
Airxcel 47000 Series Heat Pump & Ceiling Plenums User Manual
Content
Airxcel 47000 Series Heat Pump & Ceiling Plenums: Complete Product Manual
Introduction
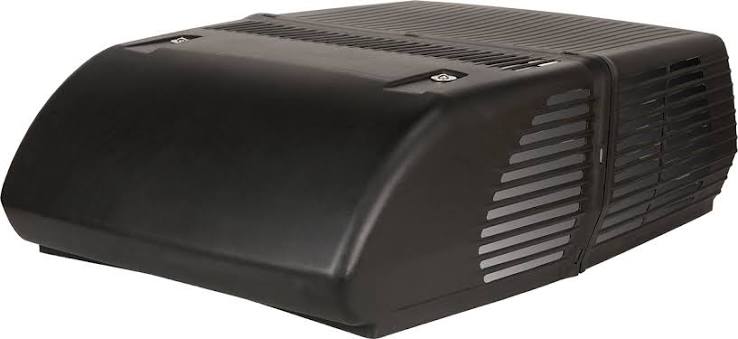
The airxcel 47000 Series Heat Pump & Ceiling Plenums are designed for RV owners who want dependable rooftop climate control with a clean interior finish and efficient air distribution. This system pairs a 47000-series rooftop heat pump with a matching ceiling plenum assembly to deliver heating and cooling through a compact, space-saving setup. It is especially popular in travel trailers, fifth wheels, and motorhomes where maximizing interior room matters as much as performance.
One of the biggest advantages of the airxcel 47000 Series Heat Pump & Ceiling Plenums is the combination of straightforward installation, strong compatibility with ducted RV systems, and flexible control options. The ceiling plenum sits directly beneath the roof opening, helping secure the rooftop unit while routing conditioned air through ceiling ducting. In practical use, the system provides even temperature distribution, quiet operation, and a finished interior appearance that blends into the living space.
This product is best suited for RV owners replacing an older rooftop unit, upgrading to a heat pump, or building out a ducted cooling and heating system. It is commonly used in seasonal camping, full-time RV living, and travel in variable climates. Estimated pricing typically ranges from about $500 to $1,500 depending on the rooftop unit, plenum kit, thermostat, and installation accessories. Availability is generally good through RV parts retailers, though exact configurations may vary by model year and supplier.
Specifications
- Product type: Rooftop RV heat pump with matching ceiling plenum assembly
- Compatible system class: 115V 47000-series rooftop units
- Installation style: Ducted ceiling plenum setup with routed supply air
- Return air design: Single centrally located return air opening
- Ceiling cavity depth: Maximum recommended depth of 6 inches
- Ducting requirement: Minimum of two supply ducts, one on each side of the plenum
- Air distribution: Balanced discharge through insulated supply ducting and registers
- Control options: Wall thermostat-based operation on supported setups
- Electrical requirement: 115 VAC service routed into the ceiling plenum area
- Typical performance: Heat pump supply air is commonly 15 to 20 degrees cooler than return air in cooling mode, with comparable comfort gains in heating mode
- Weight and size: Lightweight interior assembly designed to reduce roof load and preserve space
- Comparison: Compared with many non-ducted RV systems, this setup offers better whole-cabin air distribution and a cleaner integrated finish
The airxcel 47000 Series Heat Pump & Ceiling Plenums is well suited for owners who want a more permanent ducted solution than portable or window-style alternatives. Compared with simpler non-ducted ceiling kits, it provides stronger airflow control and a more polished interior look.
Setup Guide
Before installation, confirm that the roof opening, ceiling cavity depth, and electrical supply match the RV unit requirements. The ceiling plenum must be positioned directly below the roof opening and aligned with the rooftop unit. Start by disconnecting shore power and ensuring the RV is fully de-energized. Inspect the mounting frame, roof surface, and interior ceiling for damage or moisture before proceeding.
- Place the rooftop heat pump over the prepared roof opening.
- Install the ceiling plenum under the roof opening and align it with the upper unit.
- Compress the ceiling cavity evenly so the roof unit and plenum secure together.
- Route the 115 VAC service and low-voltage wiring into the plenum area without pinching.
- Connect the supply ducting to both sides of the plenum and verify insulation and vapor barrier protection.
- Mount the thermostat and control components according to the selected configuration.
- Restore power and test cooling, heating, fan speeds, and airflow balance.
Useful configuration options include ducted airflow, wall thermostat control, and optional heat kit support on some setups. If the system does not start, check the breaker, thermostat wiring, and control box connections. Never work on live circuits, and avoid overtightening fasteners, which can deform the plenum or roof gasket.
Troubleshooting
Most issues with the airxcel 47000 Series Heat Pump & Ceiling Plenums come from wiring, airflow restrictions, or improper installation rather than a major component failure. If the unit runs but airflow is weak, inspect the ducting for crushed sections, leaks, or missing insulation. If the system cools poorly, verify that the return air path is not blocked and that the thermostat is set correctly.
- Unit will not start: Check shore power, breaker position, thermostat settings, and control wiring.
- Weak airflow: Clean registers, inspect duct connections, and confirm the plenum is sealed properly.
- Short cycling: Look for incorrect thermostat placement, low voltage, or restricted airflow.
- Poor heating performance: Verify heat pump mode selection and check for outdoor temperature limits.
- Noise or vibration: Confirm mounting bolts are secure and the rooftop unit is seated evenly.
Common RV HVAC error codes vary by thermostat and control board, so check the control panel display if one is installed. If the code is not listed in the owner documentation, cycle power once and recheck wiring before replacing parts. Preventive care includes cleaning filters, inspecting seals, and checking the roof gasket seasonally. Warranty support is typically available through the dealer or manufacturer service network, and customers should contact the original retailer or certified RV technician for diagnosis and parts assistance.
Pros & Cons
Pros
- Space-saving integrated design that keeps the RV interior tidy
- Reliable ducted airflow for more even temperature distribution
- Compatible with 115V 47000-series rooftop heat pump systems
- Good option for full-time RV living and frequent travel
- Strong value for owners replacing older ceiling assemblies
Cons
- Installation can be more involved than a basic non-ducted setup
- Requires careful wiring and duct sealing for best results
- May need separate thermostat or control components depending on configuration
- Not ideal for buyers wanting ultra-simple plug-and-play cooling
Overall, the airxcel 47000 Series Heat Pump & Ceiling Plenums offers solid value for RV owners who want durable climate control and a finished ceiling assembly. Compared with lower-cost alternatives, it provides better system integration, but it rewards careful installation and periodic maintenance.
Customer Reviews
Customer feedback for the airxcel 47000 Series Heat Pump & Ceiling Plenums is generally positive, with many RV owners giving it 4 to 5 stars for comfort, airflow, and interior appearance. Users frequently praise the system for keeping the cabin temperature stable and for fitting neatly into existing RV layouts.
Common compliments include quieter operation than expected, reliable heating during moderate weather, and a cleaner look than exposed or portable units. Common complaints focus on installation complexity, the need for compatible controls, and occasional confusion over thermostat wiring or plenum fitment.
Typical testimonial themes include: “Works great once installed correctly,” “Airflow is much better than our old setup,” and “Wish the wiring instructions were clearer.” Buyers who want a dependable RV heat pump and ducted ceiling assembly usually recommend it, especially if professional installation is available.
Frequently Asked Questions
What is the airxcel 47000 Series Heat Pump & Ceiling Plenums used for?
It is used to provide rooftop heating and cooling in RVs with a ducted ceiling distribution system.
Is it compatible with all RVs?
No. It is designed for specific 47000-series rooftop applications and must match roof opening, ceiling depth, and electrical requirements.
Does it need a thermostat?
Yes, many setups use a wall thermostat and separate control components depending on the configuration.
How often should it be serviced?
Inspect filters, ducts, seals, and electrical connections at the start of each travel season and after extended use.
Faqs
How do I install airxcel 47000 Series Heat Pump & Ceiling Plenums correctly for a first-time RV setup?
What roof opening, ceiling depth, and support requirements are needed for airxcel 47000 Series Heat Pump & Ceiling Plenums?
Why is my airxcel 47000 Series Heat Pump & Ceiling Plenums not cooling or heating evenly?
How do I troubleshoot weak airflow from airxcel 47000 Series Heat Pump & Ceiling Plenums?
What makes airxcel 47000 Series Heat Pump & Ceiling Plenums different from a standard RV ceiling assembly?
Can airxcel 47000 Series Heat Pump & Ceiling Plenums work with ducted and non-ducted RV setups?
How often should I clean and maintain airxcel 47000 Series Heat Pump & Ceiling Plenums?
Why does airxcel 47000 Series Heat Pump & Ceiling Plenums make noise, vibrate, or rattle during operation?
More airxcel manuals
Leave a Comment