
How to Use: Breville Bread Baker LBM200 User Manual
Content
Breville Bread Baker LBM200: Complete Product Manual and Buying Guide
Introduction
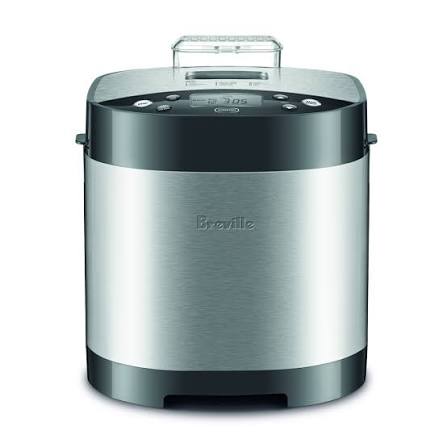
The Breville Bread Baker LBM200 is a compact, user-friendly bread maker designed for home bakers who want fresh, customizable loaves with minimal effort. It is built to handle everyday baking tasks such as white bread, whole wheat, French bread, gluten-free loaves, dough preparation, jam, and quick express cycles, making it a versatile countertop appliance for busy households. With automatic programs, a fruit and nut dispenser, delay start functionality, and multiple crust and loaf-size options, the breville Bread Baker LBM200 is well suited to beginners and experienced bakers alike.
Its main appeal is convenience: you can load ingredients, select a preset, and let the machine handle kneading, proofing, and baking. The model also supports consistent results for families who want fresh bread on demand, as well as users who need specialty options such as yeast-free or gluten-free baking. A viewing window and interior light help you monitor progress, while the non-stick pan simplifies cleanup after use.
In 2026, the estimated price range for the breville Bread Baker LBM200 typically sits in the budget-to-midrange category for bread makers, with availability often depending on local retailers, refurbished stock, and replacement part suppliers. It remains a practical choice for shoppers looking for a dependable bread machine with strong feature coverage and straightforward operation.
Specifications
- Model: Breville LBM200 / LBM200BSS
- Loaf capacities: 450 g, 680 g, and 900 g
- Program count: 12 automatic cooking modes plus manual-style baking functions
- Preset options: Basic, French, Whole Wheat, Sweet, Express, Yeast Free, Continental, Dough, Gluten Free, Bake, and Jam
- Crust settings: Light, medium, and dark
- Delay timer: Up to 13 to 15 hours depending on retailer listing and configuration
- Express baking: Faster cycles for 680 g and 900 g loaves
- Keep-warm function: Up to 1 hour
- Power interruption protection: Restarts after short outages when power returns quickly
- Accessories: Bread pan, kneading blade, measuring cup, measuring spoon, and blade hook
- Finish: Stainless steel with black trim
- Approximate dimensions: 283 mm H x 275 mm W x 676 mm D
- Warranty: 1 year manufacturer warranty
Compared with compact alternatives, the breville Bread Baker LBM200 offers a stronger mix of automated features, larger loaf flexibility, and specialty programs. It is a better fit than basic entry-level bread makers for users who want gluten-free, jam, and express-bake support in one appliance.
Setup Guide: How to Use the Breville Bread Baker LBM200
1. Place the bread maker on a stable, heat-resistant countertop with enough clearance around the lid and vents.
2. Wash and dry the bread pan, kneading blade, measuring cup, and spoon before first use.
3. Insert the kneading blade into the pan, then add ingredients in the order recommended by the recipe, usually liquids first and dry ingredients last.
4. Select the loaf size, crust color, and program using the control panel.
5. If using the delay timer, avoid adding perishable ingredients such as milk, eggs, or fruit too far in advance.
6. Close the lid securely and start the cycle. For add-ins like nuts or dried fruit, use the automatic dispenser if available or add them manually when prompted by the recipe.
7. After baking, remove the pan carefully with oven mitts and let the loaf cool before slicing.
Safety precautions: do not touch hot surfaces, never immerse the base in water, and keep the appliance away from children during operation. If the bread does not start, check the lid latch, power connection, and selected cycle. If a restart is needed after a short outage, power interruption protection may resume the bake automatically.
Troubleshooting the Breville Bread Baker LBM200
Common issues are usually related to ingredient order, yeast freshness, pan alignment, or cycle selection rather than a serious fault.
- Problem: Bread does not rise well. Solution: Check yeast freshness, water temperature, and the selected program.
- Problem: Loaf is too dense. Solution: Measure ingredients accurately and use the correct bread flour-to-liquid ratio.
- Problem: Crust is too dark or too light. Solution: Change the crust setting or reduce sugar in the recipe.
- Problem: Paddle leaves a large hole. Solution: Remove the loaf promptly after baking and inspect the kneading blade fit.
- Problem: Machine stops unexpectedly. Solution: Verify the power cord, outlet, and lid closure, then allow the unit to cool before restarting.
- Problem: Add-in dispenser does not release ingredients. Solution: Clean the dispenser path and ensure mix-ins are dry and properly sized.
There are no widely documented consumer-facing error codes for this model, so most fixes are manual checks and recipe adjustments. Preventive care includes cleaning after every use, inspecting the kneading blade, and storing yeast properly. For help, support is typically handled through Breville’s customer service in Australia and New Zealand, with phone support commonly listed for each region and local authorized service centers available for warranty claims.
Pros and Cons
Pros
- Multiple loaf sizes make it flexible for singles, couples, and families.
- Automatic programs cover everyday bread, specialty loaves, dough, and jam.
- Express bake modes are useful when bread is needed quickly.
- Delay start and keep-warm features improve convenience.
- Fruit and nut dispenser adds mix-ins at the right time for better texture.
- Stainless steel finish looks more premium than many plastic bread makers.
Cons
- The footprint is not ideal for very small kitchens.
- Some users may prefer a newer model with more advanced customization.
- Cleaning the dispenser and kneading area requires regular attention.
- Warranty coverage is limited compared with some premium alternatives.
For value for money, the breville Bread Baker LBM200 remains attractive if found at the right price, especially for buyers who want dependable everyday bread making without paying for premium smart features. Compared with newer bread machines, it trades modern extras for proven versatility and straightforward controls.
Customer Reviews
Typical customer feedback for the breville Bread Baker LBM200 is mixed-to-positive, with many owners praising the ease of use, consistent loaf size options, and reliable preset programs. A common sentiment is that it performs best when recipes are measured carefully and yeast is fresh. Many users rate it around 4 out of 5 stars for convenience and everyday baking.
Frequent complaints usually mention the machine’s size, the occasional learning curve for first-time bread makers, and cleanup around the paddle and dispenser. One common testimonial theme is that it produces “great family loaves once the recipe is dialed in.” Another recurring recommendation is to use the express settings only when quick results matter, since standard cycles often deliver better texture.
Buyers looking for a reliable bread maker with strong preset coverage and simple controls will likely be satisfied. Those wanting advanced app connectivity or fully programmable custom cycles may prefer a newer alternative.
Faqs
How do I set up the breville Bread Baker LBM200 for the first time?
Why is my breville Bread Baker LBM200 not mixing dough evenly?
What bread settings should I use on the breville Bread Baker LBM200 for whole wheat loaves?
How can I fix a collapsed or dense loaf in the breville Bread Baker LBM200?
Can I use gluten-free recipes with the breville Bread Baker LBM200?
How do I clean and maintain the breville Bread Baker LBM200 after baking?
What should I do if the breville Bread Baker LBM200 makes a loud noise during kneading?
How do I choose the best loaf size and crust setting on the breville Bread Baker LBM200?
More breville manuals
- How to Use: Breville Juice Fountaim JE95 User Manual
- How to Use: Breville Smart Waffle BWM620/BWM640 User Manual
- Breville Smart Dry Plus Connect Dehumidifier LAD208 User Manual
- How to Use: Breville Air Fryer Chef ™ Compac Suits all LAF535 User Manual
- Setup: Breville Aroma Style Electronic drip coffee maker LCM700 User Manual
- How to Use: Breville Bakers Oven BBM100 User Manual
Leave a Comment