Engindotools Automatic Washing Machine EAW-35A User Guide
Content
Introduction
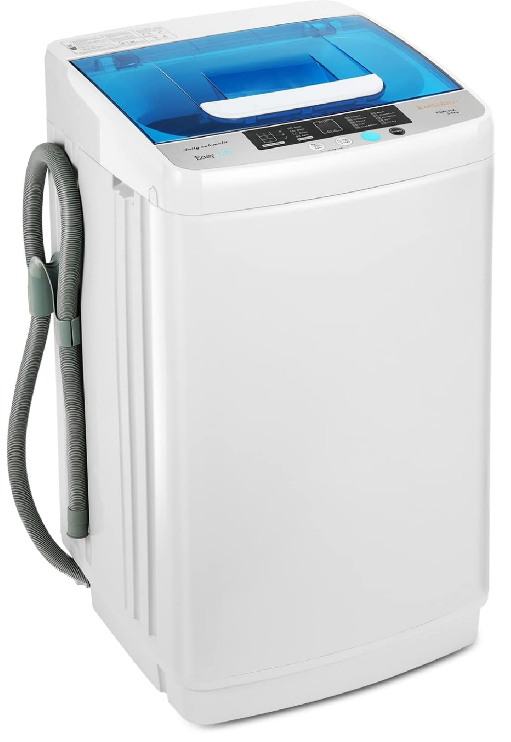
The EngindoTools Automatic Washing Machine EAW-35A is a compact and efficient appliance designed for modern households. With a capacity of 3.5 kg, it is perfect for small spaces while still delivering powerful cleaning performance. The machine features multiple wash programs and a user-friendly control panel, allowing for customized washing cycles to suit various fabric types. Its energy-efficient design helps save on utility bills. The EAW-35A is priced at approximately $249.99, making it an affordable choice for convenient laundry solutions.
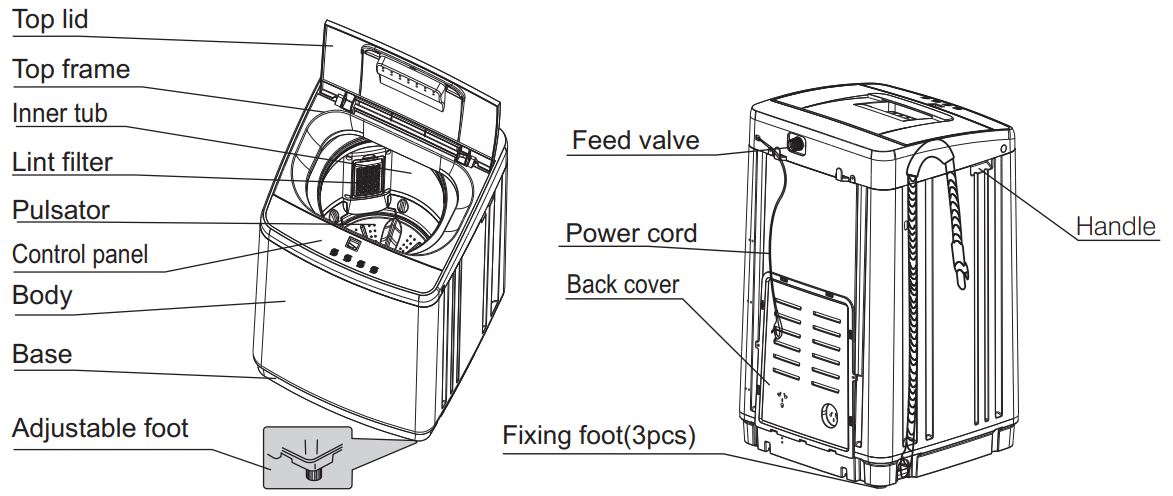
Parts name
Accessories

Use of detergent
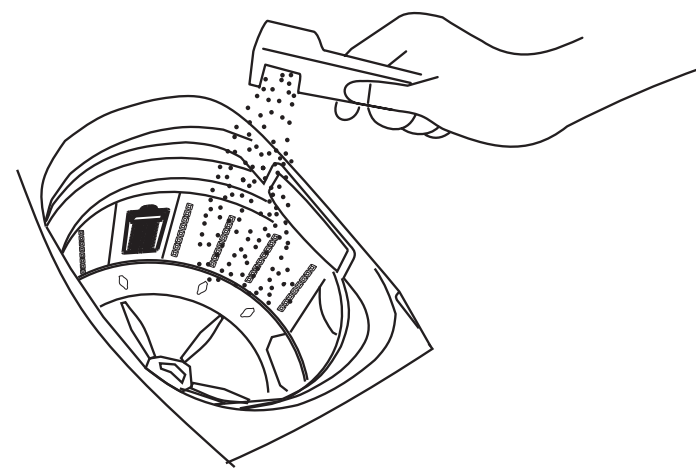
- Put the detergent powder into the tub as the right figure.
- Then colose the wash lid.
- We suggest use low sudsing detergent powder
How to use the washing powder
Dissolve in the machine directly
- Low water level.
- Add the washing powder, and run for 30 seconds to dissolve it completely.
- Put laundries in, select suitable water level.
The instant dissolving of the washing powder
- Prepare warm water of 30℃ in a container.
- Pour the powder while stirring to fully dissolve it.
The washing powder is more prone to pollute the laundries than the detergent, therefore, please use it with proper quantity. Washing powder with poor quality or not used for a long period may get blocked, please clean the detergent box in time.
How to use bleach
- Fill water to the selected level, dilute the bleach in the container, and pour it slowly into the washing tub.
- Do not use bleach for colored or figured laundries as they are prone to lose colors.
- Do not put bleach to laundries directly.
- Refer to the manual for the usage and quantity of the bleach.
- Please dissolve powder bleach before use.
- For the quantity of the concentrated washing powder, please refer to its manual。
- Remarks:avoid splashing of water and waste of washing powder, water level should not be too
Specifications
Model | EAW-35A |
Rated voltage and frequency | 110V~·60Hz |
Rated capacity of wash and spin |
3.5kg (dry laundries weight) |
Water level/water volume(about) |
1/16L 2/23L 3/30L |
Inlet pressure |
0.03MPa~0.85MPa |
Rated inputpower |
Wash:240W spin:210W |
Weight |
About 16kg |
Dimensions |
W430mm D434mm H740mm |
Other functions
Give an alarm
Display
Explanation
Settlement
E0
The top lid is opened when preset is started
Close the top lid and clear up the alarm
E1
After draining 5 minutes, it still does not reach to water level
Open top lid, according to before troubleshooting and settlement to settle it ,then close the top lid and clear up the alarm.
E2
The top lid is openwhen spinning
Close the top lid and clear up the alarm
E3
Spin does not balance
Open the top lid ,make the laundries place equally, then close it and clear up the alarm
E4
After inlet 50 minutes still not reachto setting water level
Open top lid, according to before troubleshooting and settlement to settle it. Then close the tip lid and clear up the alarm
E6
The waterlevel is morethan overflowing water level.
Drain thewater until thewater level reachthe highest water level.
E7
The inputand output of the memory is abnormal.
Close the top lid and clear up the alarm
F1
Water level sensoris wrong
Cut the power supply and call the technicians
- Imbalance adjustment
During spinning, if the laundries are not placed equally in the tub, it would cause violent vibration. This machine has an imbalance adjustment function, and the vibration testing system will supervise the running. Once the vibration is beyond a certain level, the adjustment system will start automatically to adjust the imbalance. - The power supply is cut off automatically.
If do not press START/PAUSE in 10 minutes after pressing POWER, the power supply will cut off automatically. Washing finished, the power supply will cut off automatically . - Child lock function
When the machine running, press the buttons of “water level/spin” and “program/delay” at the same time for 3 seconds to set the child lock function, and then the LED displays “CL”, press the buttons of “water level/spin” and “program/delay” at the same time above 3 seconds again to cancel the child lock. And the machine will back to display the remaining time. Once set the child lock function, all buttons are locked(including power button). If the top door is opened when the machine is running, the machine will stop to run and error alarm, the LED display “E5” and flash, if the door is closed within 5 mins after opening, the machine will stop error alarm and continue to work. If the machine door is opened more than 5 mins, and the machine will drain water until recover water level. During this time, the error alarm will sound 10 seconds every 10 mins to warn the machine have an accident, at then, close the top door is not useful. - One key spin function
When power on, and press “power on/off”, the machine will be standby(not press “start/pause”), long time press “water level/spin” above 3 seconds, the one key spin function will start, and the spin program will run as “09”, that is fast to switch for “spin” program and start to run.
Symbol definition
Warning symbols
Pay special attention to the warning symbols. There may be serious risks to personal body safety or damage to the washing machine if not followed.
Forbidden symbols
Please stop doing the contents with this symbol, otherwise it will damage the appliance or injure your personal body.
Cautions
- Please insert the plug into the power socket with a rated voltage of 110V AC.
- Always unplug the appliance and turn off the water when the power is cut, moving or cleaning the washing machine, or it is not in use. Do not insert or pull off the plug with a wet hand.
- Do not make the electric cable bended, stretched, twisted, strapped or changed, pressed or nipped. If the electric cable or plug is damaged or the socket becomes loose, they must be repaired or changed by our appointed repair stations or the professionals of our post-sale service department to avoid danger. The pin of the plug must remain clean. Please clean it carefully with dry cloth if it is dirty.
- Don t install the washing machine in bathroom or damp places, Do not wash the machine with water, do not put wet clothes on the control panel film.
- Do not use water hotter than 50 C.
- If the machine is situated on a carpeted floor, please adjust the feet in order to allow air to circulate freely.
- Do not wash raincoat, bike cover, feather dress and such waterproof laundries, which will make the washing machine abnormal vibrations during spinning.
- Do not share the same socket with other electric appliances. Do not use the damaged plug or loose socket.
Installation and adjustment
Please install and adjust the machine according to the requirements of the manual. It is very important to your safety and correct operation.
Unpacking
- Unpack the carton and take out the bottom panel.
- Open the top lid of washing machine and take out all of the accessories.
- Remove all wrappers, including the polystyrene base.
You are advised to keep all the packaging for reuse in case the machine is to be transported again.
Installing the bottom cover
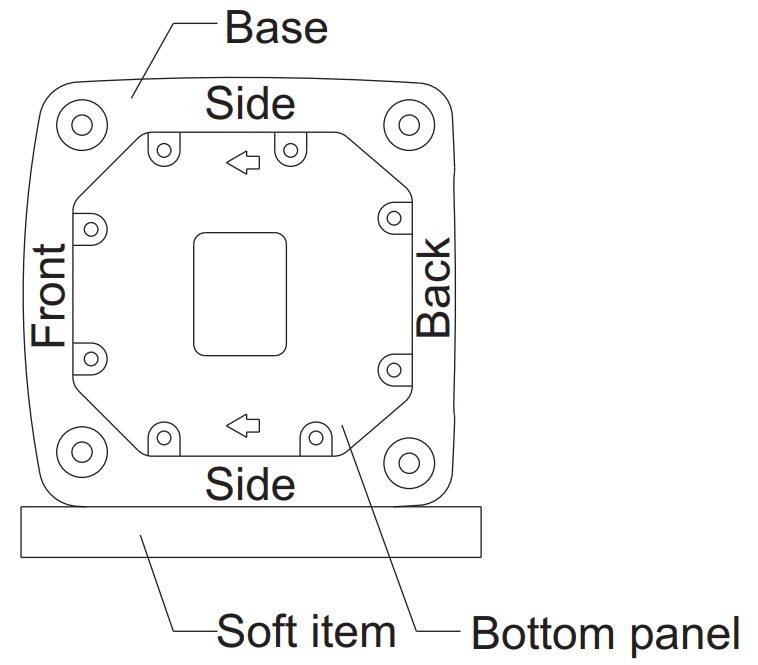
- In the right photo, put down the machine from side, put down the machine on some soft thing, please let the remarkable face outside, the arrow direction is machine front side.
- Align the screw hole between the bottom and bottom cover, use the appendix screw to fasten the bottom cover.
Positioning
The distance between the washing machine and the wall should be more than 50mm, and the maximum allowed angle of the shank base of the machine is 1. The slanting or rough ground may cause the operating stop or unstable, please adjust it with the following methods:
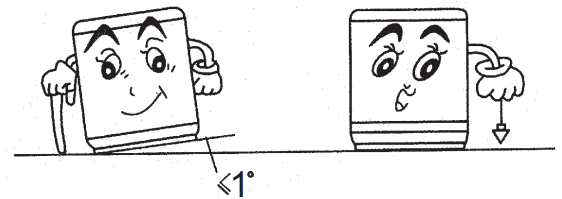
- Make it horizontal
Use a tied thread with a plumb to check if it is horizontal. - Adjust the adjustable foot
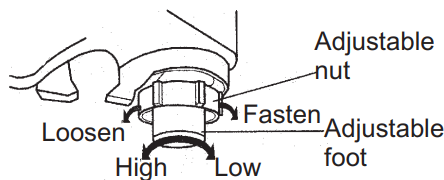
- Lift up the adjustable foot gently, lose the adjustable nut, and twist the adjustable foot.
Fasten the nut after adjustment.
How to use drainpipe
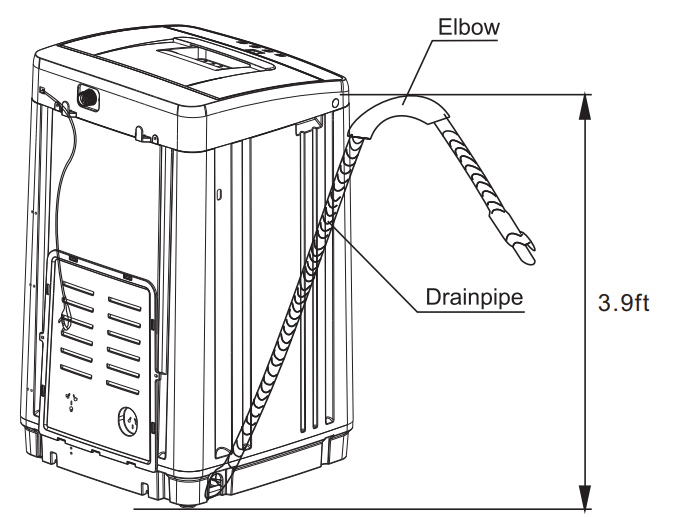
- The drainpipe must be hung during use, and the height should not be more than 3.9ft to avoid leakage or stop, if drains a long time, the machine will stop running.
- You can adjust the situation of the elbow bend pipe to change the height of the drainpipe.
- Do not extrude the drainpipe to ensure drains smoothly.
Description
The engindotools Automatic Washing Machine EAW-35A is built with durability and performance in mind. Its stainless steel drum ensures long-lasting use and reduces wear on your clothes. The machine's interior features a unique drum design that helps prevent snagging and tangling, ensuring your garments come out looking their best. The exterior is designed for ease of use with intuitive controls and a large LED display screen that makes selecting the right cycle a simple task.
The EAW-35A also includes advanced smart sensors that automatically detect the size of the load and adjust water levels and temperature accordingly, saving you both time and energy. Additionally, its advanced vibration control system minimizes noise and vibration during operation, making it suitable for use at any time of day.
Water inlet installation
Suitable Faucet(in kitchen or bathroom)
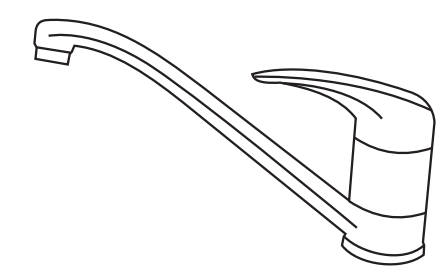
The quick adaptor is primarily for quick connection to a tap faucet, such as typical sink or kitchen or bathroom.
- Connect one side of the inlet hose to the water valve on the washing machine.
- Pull back on the white ring to free the faucet fitting from the adapter installation into the faucet.
- If the faucet has internal screw threads, unscrew the aerator if present from the tip of the faucet. Then screw the faucet fitting into the faucet. Make sure the black rubber washer is on the top of the adaptor before screwing it in.
- If the faucet has external screw threads, remove the one black washer from the top of the faucet fitting. Then screw the fitting over the external threads.
- Pull back on the white ring to connect to the two parts of the adaptor back together.
Connect the inlet hose with the washing machine
- Do not take off the water absorption cushion. Please check if the cushion is dropped or damaged before each usage. If it is, contact the seller immediately.
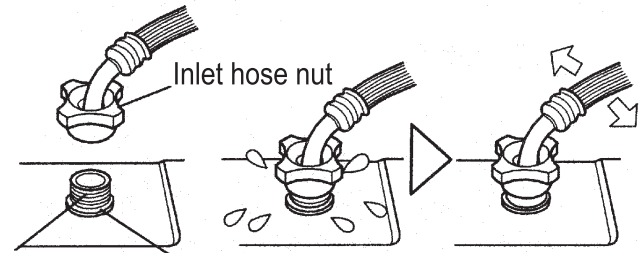
- Put the inlet hose nut on the inlet valve connector.
- Fasten the inlet hose nut and swing it gently to make sure if it is suitable.
Connect the inlet hose connector with the inlet hose
- Push down the slider, insert the inlet hose into the connector
- Hang the lock lever to the inlet hose connector and release the slider till a click sound is heard.

Check the connection between inlet hose connector and the tap
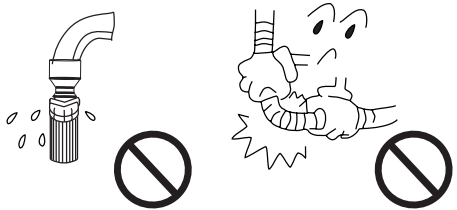
- Swing the inlet hose gently to confirm if it is fastened.
- After installation, open the tap and check if it leaks.
- Do not bend the inlet hose with overstrain.
- Before each usage, check the connection between inlet hose connector and the tap, and the installation of inlet hose. Make sure they are firmly fitted to preventdropping from improper installation position.
Dismantle the inlet hose
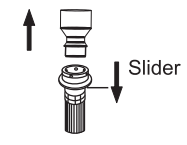
- Close the tap.
- Press the locking lever, push down the slider, and pull of the inlet hose. If the machine is used frequently, the connector of the inlet hose can be kept on the tap to prevent damaging the fixing screw.
Settlement |
Insert the plug tightly Check the socket or change to another socket Press power switch Check power supply |
Install the inlet hoseagain Tighten the connector of the machine |
The height of the drainpipe should be less than 1.2m Straighten or clean the drainpipe |
Restart when water supply is resumed Open the tap Clean the filteraccording to before“clean inlet gate” |
Themachine is adjusting automatically |
Close the top lid Close the toplid |
Normal |
Normal |
Notes: If there is still a fault after the above checks, please pull out the plug and contact the seller right away. It is dangerous to repair this product by yourself.
Load laundries
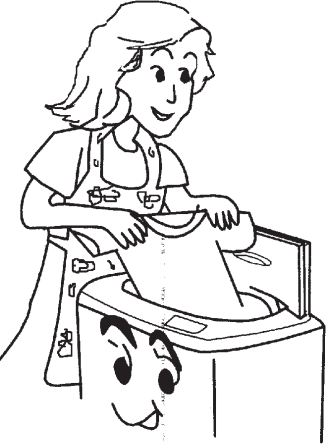
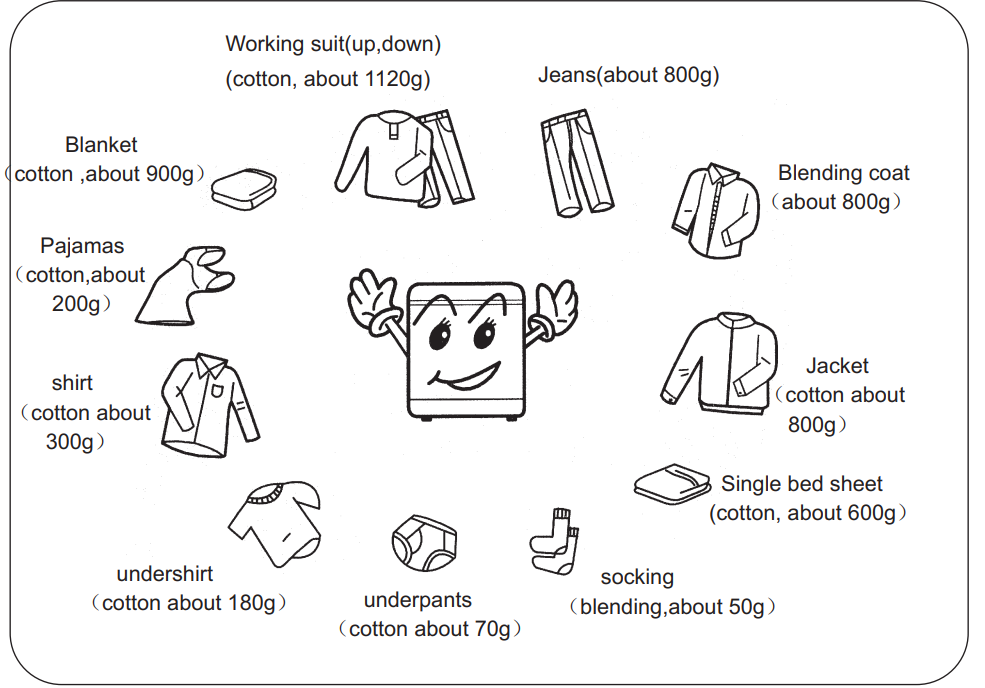
- The capacity of washing and spinning of the machine refer to the largest weight of the standard laundries under dry condition .Washing quantity shall be lower than the rated capacity.
- Different thickness, size and type of the laundries will influence the actual washing capacity. It is suitable that the laundries can be turned round normally during washing.
- Don't select high water level when laundries are less than 1.0kg to avoid water splashing.
Reference weight of the laundries
Setup Guide
Setting up the engindotools Automatic Washing Machine EAW-35A is straightforward and user-friendly:
- Unpack the washing machine carefully, ensuring all accessories are included.
- Place the machine on a level surface to prevent any imbalance or vibration issues.
- Connect the water supply lines to the rear of the machine and ensure they are securely fastened.
- Plug in the power cord and turn on the machine.
- Follow the on-screen instructions to complete the initial setup, including selecting your preferred language and setting any custom preferences.
- Load your clothes into the drum, add detergent, and select the appropriate wash cycle using the control panel.
EngindoTools Automatic Washing Machine EAW-35A Maintenance
Maintenance methods
After the end of the programme
- The machine stops automatically ,and music buzzer will remind you to take out the laundries or start again.
- Once you have finished using the machine, you are advised to unplug it and turn off the water taps to avoid unexpected leak or fire.
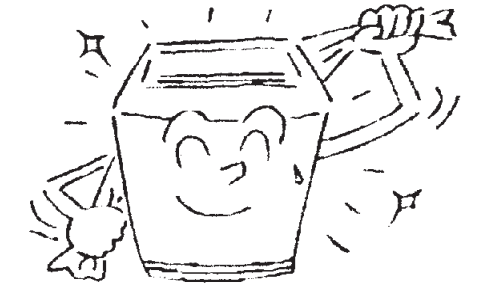
External cleaning
Clean the exterior cabinet of the appliance with soft cloth. Do not use cleanser, volatile chemical materials to clean the machine, which will damage plastic parts and the surface
Clean inlet gate
It is possible that the inlet filter net can be blocked by the dust, please clean it according to the follow steps:
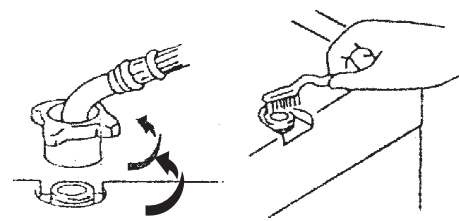
- Close the tap and turn on the power switch.
- Start the washing machine for 5 seconds(make the water in the inlet hose flows to the tub),and cut off the powersupply.
- Pull off the inlet hose, remove and clean the inlet valve and the inlet net, and install again.
Clean the lint filter
- It is necessary to use lint filter during washing.
- After washing, please clean the lint filter in time.
Clean the lint filter according to the following steps:
- Pull out the lint filter.(see llustration 1)
- Open the lint filter and wash it.(see llustration 2)
- Close the lint filter and install it to proper position.

- Once you have using the machine, you are advised to turn off the water taps.(if necessary, pull out the inlet hose)
- Do not keep water in tub for a long time. When washing is finished , drain it right away.
- Once you have finished using the machine, you are advised to unplug it.
- Put the electric cable and the drain hose in order.
- Wipe the water on the surface and in tub with soft cloth and keep the top lid opening for a while. It helps to prevent mould and stagnant smells forming inside the appliance.
Maintenance methods
If the water in the inner tub has possibility to freeze,please do like below:
- In winter, if remaining water freeze can cause the washing machine trouble, please take off the water inlet hose and drain out the water in the hose and inner tub.
- If the water freeze, please don't operate the washing machine. Put 40℃ hot water in the tub, the hot water should submerge the pulsator, after a few minutes, rotate the pulsator by hand gently, then you can operate the washing machine.
Operation steps
- Press power switch, put through power, the machine is in state of beginning:
- Press “program/Delay”button to select proper program.
- Select appropriate water level according to your laundries quantity.
- At the power on initial status, if want to choose delay wash, long press the button “program/delay” above 3 seconds to set delay wash time. Press button one time, and the flash light will flash, and the display figure is stand for program over time. If want to cancel delay wash, press “power on/off” button to back standby status.
- At the power on initial status, long press the button “water level/spin” above 3 seconds to choose spin function.
- When close the top door and press “start/pause” button to run the machine, at the same time press “water level/spin” and “program/delay” above 3 seconds to set child lock, press the buttons of “water level/spin” and “program/delay” at the same time above 3 seconds again to cancel the child lock. Once set the child lock function, if open the top door, the machine will stop run and error alarm.
- At the beginning of start, if need to select air-dry, press"Program/Delay" button to select "Air dry", When the air dry function is over, the washing machine will be in waiting state.
- Close the top lid, press Start/Pause, the washing machine is working.
- When the washing is finished, buzzer alarm, power supply cut off automatically.
Troubleshooting
Before contacting the technicians, please make the following checks:
Phenomena |
Possible reason |
Control panel has no any display |
Plug is notinserted tightly No electricity in the socket Power switch is not turned on Power supply is cut off |
Inlet hoseleaks |
Inlet hose connector(connecting with the tap)isnot fixed tightly Inlet hose and washing machine connector is loose |
It does not drain |
Water outlet of drainpipe is higher than 1.2m Drainpipe is bended or get blocked |
It does not inlet |
No water supply Tap is not open Inlet hosegets blocked |
Spin stops and begins to inlet during spin program |
Laundries is too much or too little or the Machine is not place stably |
Press the program button to select SPIN, but It does not spin | Do not close the top lid when drain is finished Open up the top lid when start drain |
The spin is intermittent when spin starts | Balance the laundries to reach to the bestspin effect |
First time to use, some water flows from the drain hose |
The remaining water when the factory make test |
Preparation before operation
Preparation before washing
- Connect the inlet hose and open the tap.
- This appliance must be earthed. Confirm the socket is earthed reliably and insert the power plug. The earth terminal should not link to gas pipeline, tap pipeline etc.
- Put down the drainpipe.
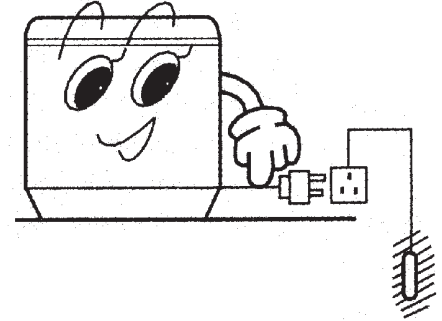
Warning: the temperature of the water should less than 50℃ !
Before washing the laundries, please pay attention to the followings:
Make sure if there is special requirements for the laundrie
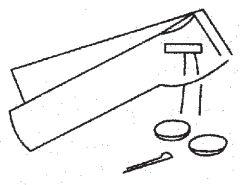
- Before washing, empty all pockets of small objects which may have been left inside (coins,keys,screws etc.)
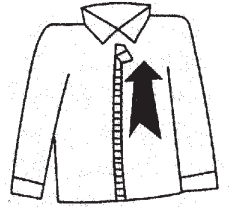
As these could damage the drain pump. Knot the long band, fasten the buttons and close the zippers
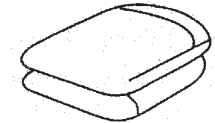
Do not overload the machine. Load the laundry loosely alternating large items with small ones
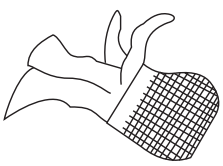
Sort the laundry according to the type of fabric, color-fastness and how dirty it is. Put thin laundries, woolens and such prone to wear and tear laundries into washing bag.
- Make sure the laundries are washable.
- It is essential to wash new colored items separately when washing for the first time. White items should not be washed with colored items.
- Please immerse the non-absorbable laundries by hand.
- Some stains such as fruit, wine, grass, rust etc. are difficult to remove and should be treated before washing with specific products, which can be found in most household shops. In some cases, it may help to soak the stain before washing with a special pre-soak product or biological detergent.
- Overturn the nap fabric and long floss laundries before putting them into the machine.
- Do not put the laundries polluted by chemicals into the machine directly.
- Very small items (handkerchiefs, ribbons, socks, etc.) should be washed in a washing bag or a pillowcase.
Pros
- Eco-Friendly Operation: Saves energy and water compared to traditional washing machines.
- Advanced Features: Smart sensors, multiple wash cycles, and vibration control for optimal performance.
- Durable Construction: Stainless steel drum ensures long-lasting use.
- User-Friendly Interface: Easy-to-read LED display and intuitive controls.
- Affordable Price Point: Competitive pricing makes it accessible to a wide range of consumers.
Cons
- Noisy During High-Speed Cycles: Some users may find it noisy during high-speed wash cycles.
- Large Footprint: Requires ample space due to its size.
- Complex Maintenance: Some users might find maintenance tasks like cleaning the drain pump filter complex.
Customer Reviews
Customer reviews have been overwhelmingly positive, with many praising its efficiency, quiet operation during normal cycles, and ease of use. Some common complaints include noise during high-speed cycles and the need for regular maintenance to keep it running optimally.
Faqs
What is the capacity of the engindotools Automatic?
Does the EAW-35A have multiple wash cycles?
Is the engindotools Washing Machine energy efficient?
What are some of the advanced features of the engindotools Automatic Washing Machine?
Is there a child safety lock on the EAW-35A?
How do I set up my new EngindoTools Machine?
Can I use this washing machine for delicate items?
What kind of drum does the EngindoTools Automatic Washing have?
When is the expected launch date for this product?
Leave a Comment
