Haier LED TV Motherboard LE55B9500U | Installation Steps
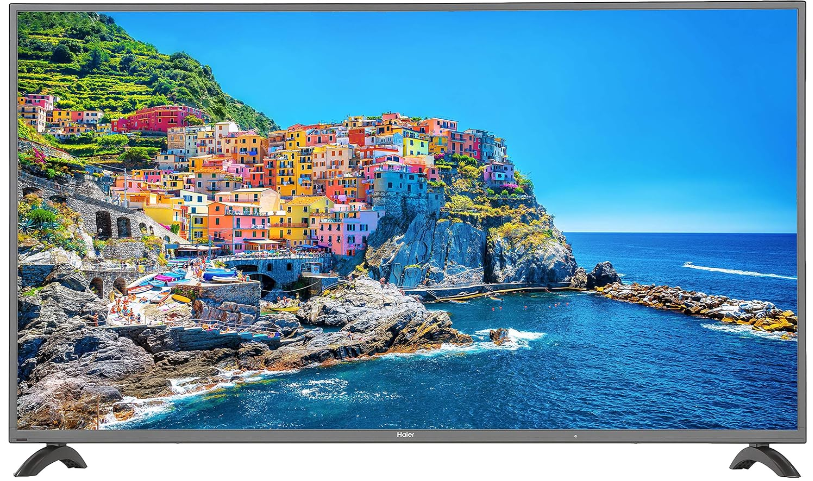
Content
Introduction of Haier LED TV Motherboard LE55B9500U
The Haier LE55B9500U LED TV Motherboard is a state-of-the-art component designed for Haier's LED TVs. This motherboard offers advanced features, ensuring an unmatched viewing experience. With an estimated price range of $200 to $300 and a launch date in mid-2021, this motherboard is a worthwhile investment for any Haier TV owner looking to upgrade their device's performance.
Accessories
- Infrared Remote Controller
- User's Manual
- Quick Set up Guide
Haier LED TV Motherboard LE55B9500U Specifications
The Haier LE55B9500U LED TV Motherboard boasts the following key features:
- Processor: Quad-core CPU
- Memory: 2GB DDR3 RAM
- Storage: 8GB eMMC flash memory
- Video Decoding: H.264, H.265, VP9
- Audio Decoding: Dolby Digital, DTS
- Connectivity: HDMI, USB, Ethernet, Wi-Fi, Bluetooth
- Smart TV Platform: Haier's proprietary Smart TV platform
- Operating System: Linux-based
Main Features
- Used as Television, display terminal:
- High luminance, wide viewing angle:
- Can store 199 TV programs:
- HDMI interface:
- Multi-Media player (USB);
Haier LED TV Motherboard LE55B9500U Main parameter
| Specification | Detail |
|---|---|
| Viewing Picture Size (Diagonal) | 139 cm |
| Resolution | 3840 x 2160 |
| Aspect Ratio | 16:9 |
| TV System | PAL: BG |
| Video Signal System | PAL/NTSC/SECAM |
| Frequency | TV 45.25 MHz – 863.25 MHz |
| Input Power Voltage | AC 100-240V 50/60Hz |
| Power Consumption | 150W |
| Audio Output Power (THD<7%) | 2 x 8W |
| Signal Input/Output | OPTICALx1, AV x 1, YCb (Pb) Cr (Pr) x 1, LINE OUT x 1, HDMI x 4, RF x 1, USB x 2 |
| Horizontal Definition (TV Line) | Composite Video Input ≥350, Y Cb(Pb) / Cr(Pr) ≥400 |
Note: This product uses a panel consisting of sub pixels which require sophisticated technology to produce. However, there may be a few bright or dark pixels on the screen. These pixels will have no impact on the performance of the product.
INSTALLATION
Stand Assemble Instruction

- Attach the stand base set to the bottom of the TV by firmly tightening the supplied 6ncs black screws.
- Finished.
INSTALLATION NOTES
- Locate the TV in a room where light does not strike the screen directly. Total darkness or a reflection on the screen can cause eyestrain. Soft and indirect lighting is recommended for comfortable viewing.
- Allow enough space between the TV and the wall to permit ventilation.
- Please do not attempt to rotate the TV on the stand.
- Avoid excessively warm locations to prevent possible damage to the cabinet or premature component failure.
Wall Mounting Installation Guidelines
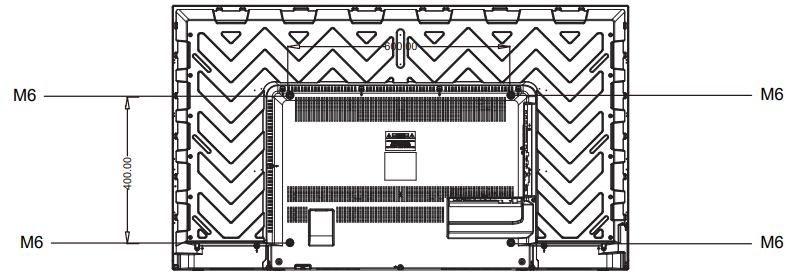
Use the four screws to fix the TV onto a wall mounting bracket (not included) via the four VESA standard holes on the back of the television.
Specification: 600mm x 400mm using 4 screws (not included) at size M6. The mounting holes are 5mm deep.
WARNING: Never place a television set in an unstable location. A television set may fall, causing serious personal injury or death. Many injuries, particularly to children, can be avoided by taking simple precautions such as:
- Using cabinets or stands recommended by the manufacturer of the television set.
- Only using furniture that can safely support the television set.
- Ensuring the television set is not overhanging the edge of the supporting furniture.
- Not placing the television set on tall furniture (for example, cupboards or bookcases) without anchoring both the furniture and the television set to a suitable support.
- Not placing the television set on cloth or other materials that may be located between the television set and supporting furniture.
- Educating children about the dangers of climbing on furniture to reach the television set or its controls.
If your existing television set is being retained and relocated, the same considerations as above should be applied.
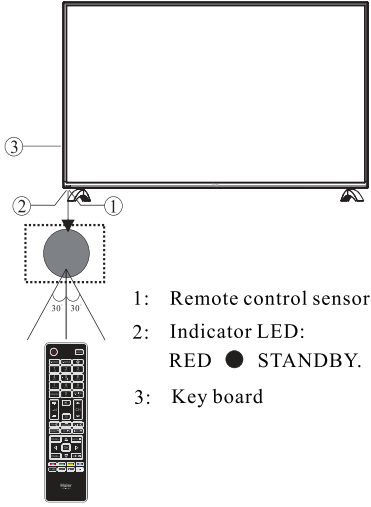
Front panel
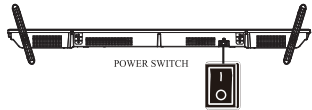
NOTE: After getting through the power supply, press the power switch on the TV (*T" means connected). the television enter into standby mode, press the standby key on the remote control, then the TV enter into normal playing status. The "O" on the power switch means shut off the power.
KEY BOARD
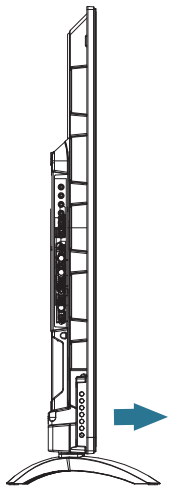
- SOURCE
Display the input source menu. - MENU
Display main MENU. - VOL+/VOL-
Adjust sound level.
In MENU mode, press "VOL+" or "VOL-" to adjust the item that you selected. - CH+/CH-
In TV mode, press "CH+" or "CH-" to change the channel up and down.
In MENU mode, press "CH+" or "CH-" to select items. - POWER
Press this button to turn the unit ON from STANDBY mode.
Press it again to turn the set back to STANDBY.
REAR AV Connections
All the terminals are(from left to right): OPTICAL,L,R, VIDEO/ YPbPr, LINE OUT, HDMI1, HDMI2.
_le55b9500u_led_tv_motherboard.png)
REAR AV Connections(SIDE)
All the terminals are (from left to right): HDMI3, HDMI4, RF, USB.

Note: VIDEO and YPbPr share one audio channel.
ANTENNA
Note: Aerial connections: RF. Input impendence: 752 unbalanced. Please don't rotate the TV.
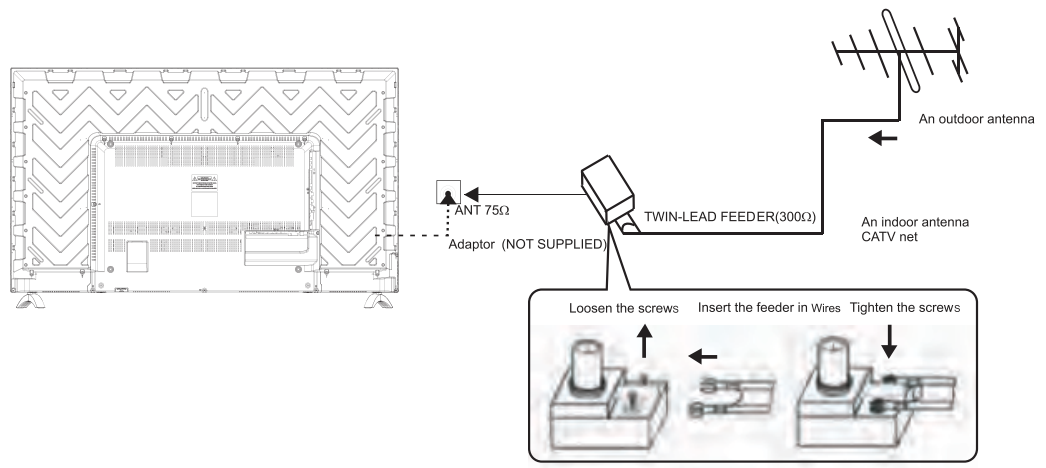
PRESET MODE (HDMI)
| RESOLUTION | V.Freq (Hz) | H.Freq (KHz) |
|---|---|---|
| 1 | 800*600 | 60 |
| 2 | 1024*768 | 60 |
| 3 | 1360*768 | 60 |
| 4 | 1920*1080 | 60 |
AV EQUIPMENT
This TV provides one group of AV one group of YPbPr for convenient connection to VCR, DVD or other video equipment. Please refer to the owner's manual of the equipment to be connected as well. You can use the input terminals on TV set rear as follows.
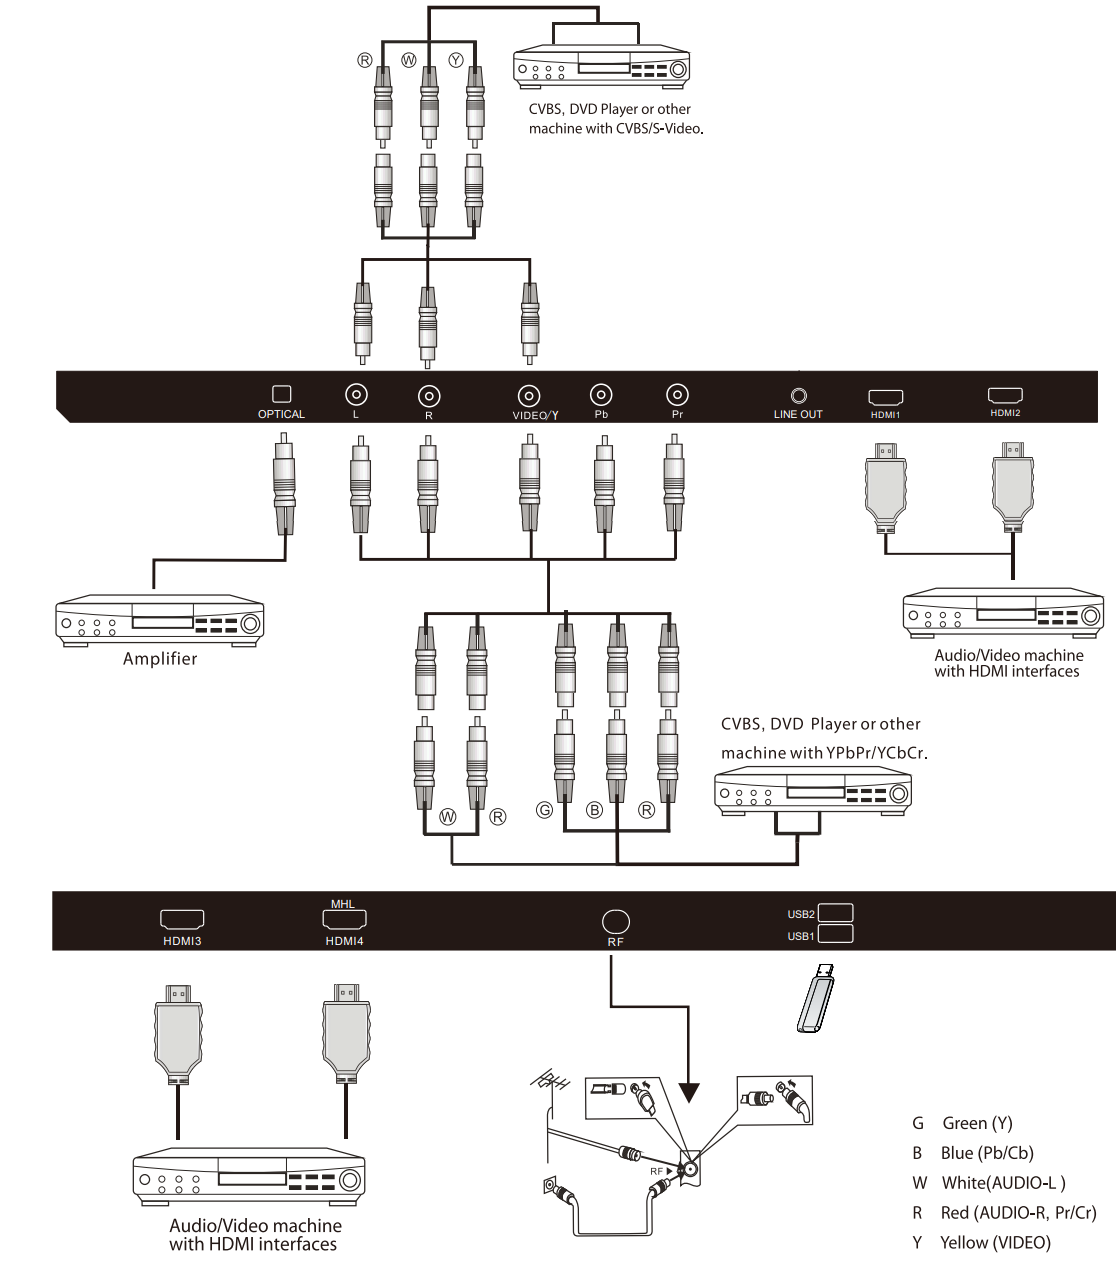
It can be connected to the following appliances: VCR, multi disc player, DVD, camcorder, video game or stereo system, etc YPbPr can support these video formats: 480,576i, 480p,576p, 720p, 1080i, 1080P.
Note
- VIDEO and YPbPr share one audio channel.
- When HDMI port get DVI signal, the "PC Audio" channel is changed to receive the audio for HDMI port.
- Sometimes it will not support in different device because the device supplys nonstandard signal.
REMOTE CONTROLLER
Using Your Remote Control
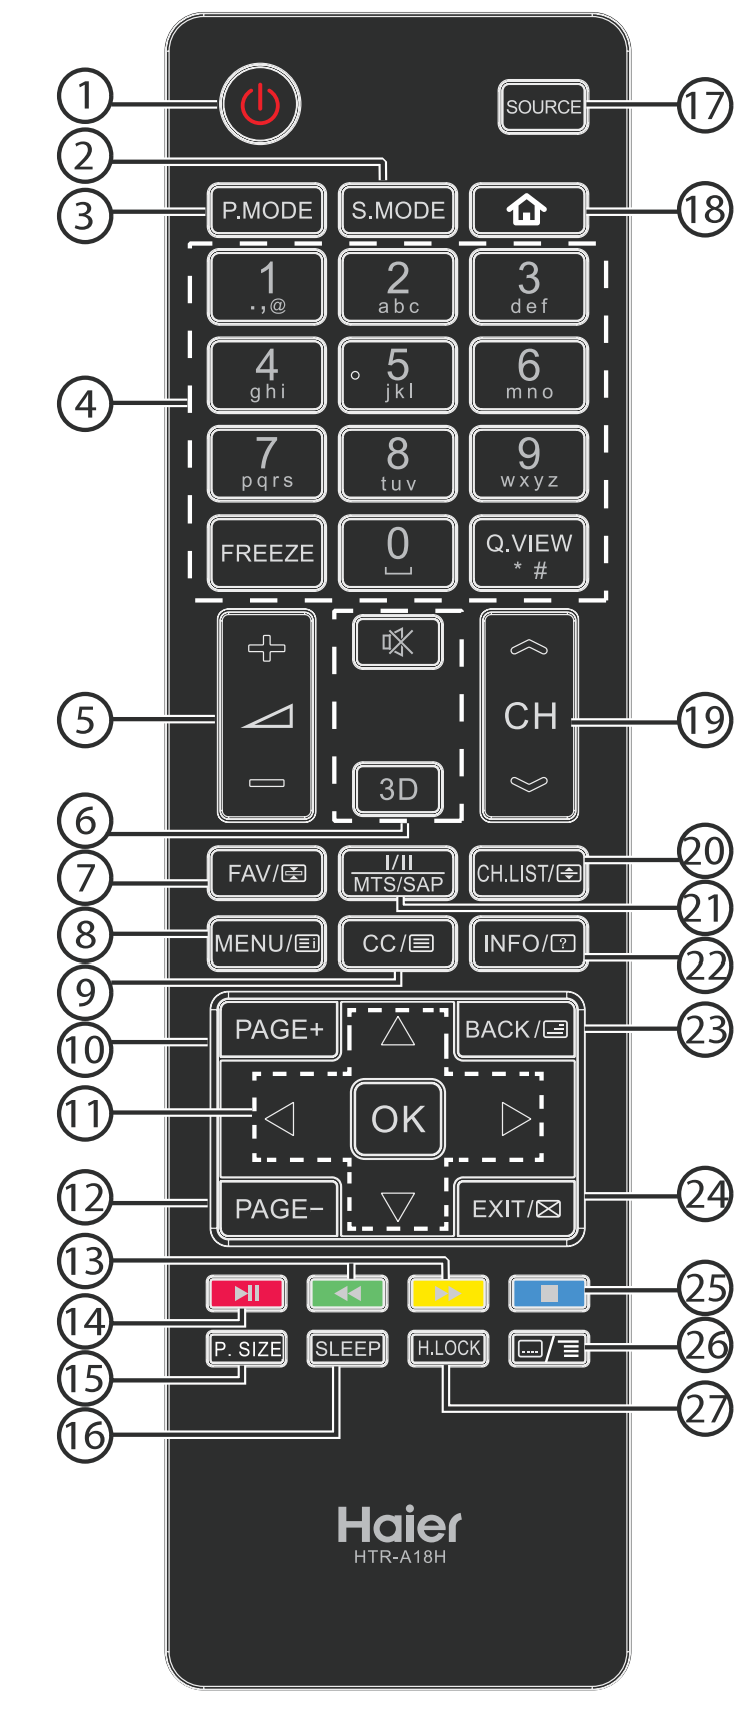
| # | Button | Descriptions |
|---|---|---|
| 1 | U (Power) | Press to turn the TV on or off. |
| 2 | S.MODE | Press to select the sound mode. |
| 3 | P.MODE | Press to select the picture mode. |
| 4 | 0-9 | Press to enter a channel number or password. |
| 5 | Q.VIEW | Press to switch to the last viewed channel. |
| 6 | FREEZE | Press to freeze the picture. |
| 7 | A+/- | Press to adjust the volume level. |
| 8 | IX (Mute) | Press to turn the sound on or off. |
| 9 | 3D | These models do not support 3D feature. |
| 10 | FAV | Press to open a favorite channel list. In teletext mode, press to hold a page. |
| 11 | MENU/ED | Press to open the on-screen menu. In teletext mode, press to open the INDEX page. |
| 12 | CC/e | Press to open the teletext. |
| 13 | PAGE + | Press to go to the next page in teletext mode and multimedia mode. |
| 14 | AVA | Press to navigate the on-screen menu. |
| 15 | OK | Press to confirm a selection. |
| 16 | PAGE - | Press to go to the previous page in teletext mode and multimedia mode. |
| 17 | << (reverse) | Press to fast forward or reverse playback in multimedia mode. |
| 18 | >> (forward) | Press to play/pause in multimedia mode. |
| 19 | (play/pause) | Press to play/pause in multimedia mode. |
| 20 | P.SIZE | Press to change the screen display mode. |
| 21 | SLEEP | Press to set the sleep timer. |
| 22 | SOURCE | Press to open the input source list. |
| 23 | CH A/S | Press to change the channel. |
| 24 | CH.LIST/E | Press to open the channel list. In teletext mode, press to switch the image to top, bottom or full. |
| 25 | /II/MTS/SAP | Press to select the audio mode (depending on broadcast signal). |
| 26 | INFO | Press to display the channel information. In teletext mode, press to reveal the hidden information. |
| 27 | BACK | In multimedia mode, press to return to the previous screen. In teletext mode, press to enter mix mode. |
| 28 | EXIT/D | Press to close the on-screen menu. In teletext mode, press to hide the text. |
| 29 | (stop) | Press to stop multimedia playback. |
| 30 | In teletext mode, press to enter a secondary page. | |
| 31 | H.LOCK | Press to open the APP menu of the MHL device. Press to open the Hotel mode menu. |
Haier LED TV Motherboard LE55B9500U Description
The Haier LE55B9500U LED TV Motherboard is a powerful and versatile component that significantly enhances Haier LED TVs' performance and functionality. With its quad-core CPU, 2GB DDR3 RAM, and 8GB eMMC flash memory, this motherboard ensures smooth and responsive performance, even when running resource-intensive applications. The motherboard's advanced video and audio decoding capabilities deliver stunning visuals and immersive audio, while its extensive connectivity options enable seamless integration with various devices and accessories.
TV OPERATION
CHANNEL MENU (for TV source only)
You can search channels and edit programs here. Press v a to move. press OK button to confirm, and press 4 > to adjust.
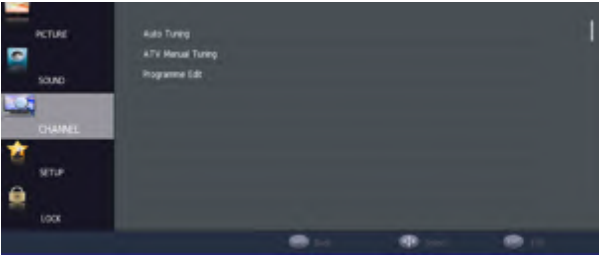
- Auto Tuning: Search all the TV channels automatically.
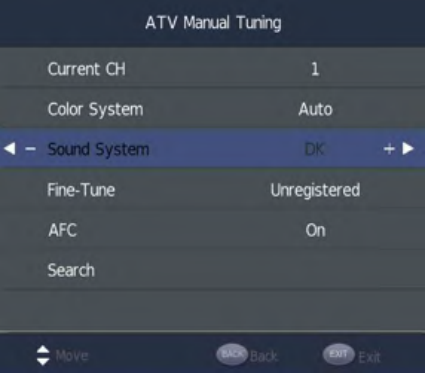
ATV Manual Tuning: You can change the sound system to search the analog TV channels and fine tune the channels, then storage the channels you selected.
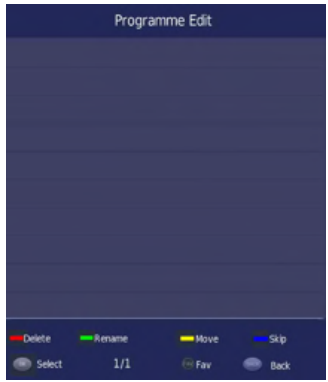
NOTE: Press teletext red button to storage to channels after manual tuning .
Program Edit: You can Delete, Rename, Move, or Skip any programs.
- Delete
Press
 to choose the program.
Press red button, the program will delete. - Rename
Move the cursor to the program, press green button to rename the program.
Press
 to choose the character. Press
 to move the cursor.
Press MENU button to exit edit, Press EXIT to exit the menu.
Note: The TV programs name only can be 5 characters. - Move
Move the cursor to the program, press yellow button, it will show yellow cursor, Press
 to move the program.
 - Skip
Press
 to choose the program, press blue button to skip this program, The icon
 will show on the right side of the program.
Choose the skipped program, press the blue button again, you can cancel the skip, Then the icon will disappear.
 - FAV
Press ^ to choose the program, press FAV button, it will show on the right side of the program. Choose the FAV program, press FAV button again, you can cancel the FAV, the
  will disappear.
Once your favorite group is created, you can press the FAV key to quickly access your favorite channel.
- Delete
PICTURE MENU
- You can adjust picture effect here, such as contrast, brightness, etc.
Press

 to move, press OK button to confirm, and press
 to adjust.
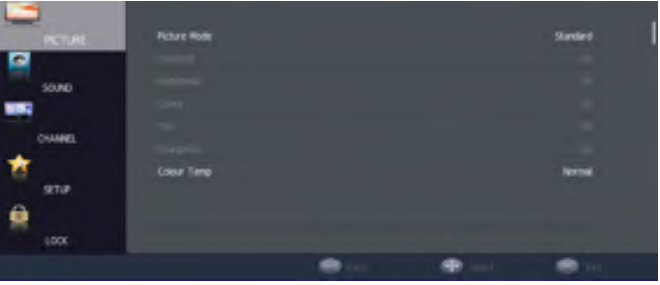
NOTE
- Tint is available in NTSC system only.
- Manually adjusting picture settings will automatically change the Picture Mode to Personal.
SOUND MENU
You can adjust the sound effect here such as treble, bass, balance etc. Press 
 to move, press OK button to confirm, and press
![]() to adjust.
to adjust.
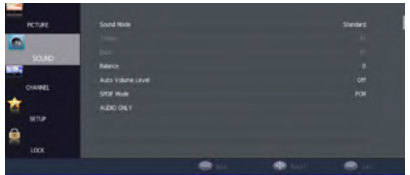
Note: Auto volume level only available when the input signal volume is too large or distortion.
SETUP MENU
You can adjust the Language, TT Language, Aspect Ratio, Blue Screen, TIME, Reset, Software Update (USB), HDMI CEC, Shop Mode, HDMI 4K.
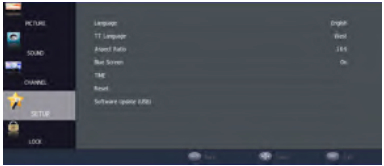
NOTE: Reset will clear all the programs and password.
LOCK MENU
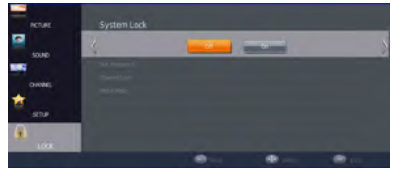
- You can adjust the clock, change the password, adjust hotel mode etc.
- Press to move, press OK button to confirm, and press

 to adjust.
- (Default password: 0000).
USB FUNCTION
You must enter the Source menu first, then choice the USB and press OK button, the USB menu will appear.
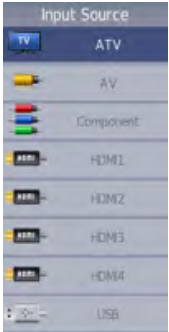
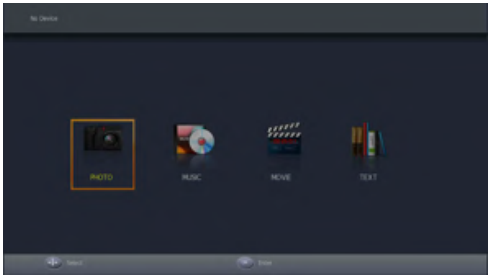
- Please make sure that the USB device have plugged in the slot. There are four type media item can be selected, such as photo, music, movie and text. Select the type media item by pressing

 , press OK button to enter the disk selection menu.
 - In the movie mode, when you use FB, FF function, The audio may be pause in several seconds to synchronize the audio signal and video signal.
In text mode, press

 to make page up and page down.
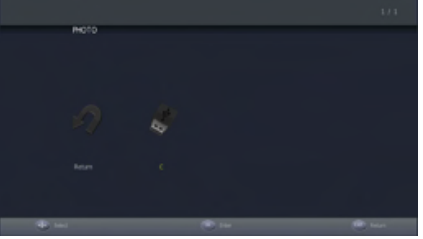
NOTE: When the USB device isn't supported, it may be that the power of the USB device isn't enough.Press the

 to select the right disk and press OK to display media files and folder list or choose Return to back to the media type selection menu.
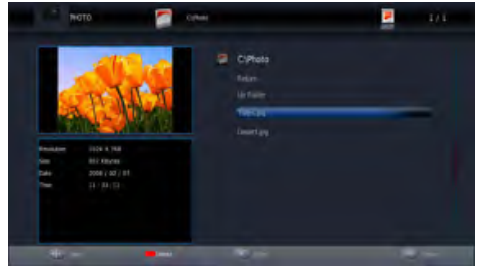
Select the media file by pressing

 or
or 
 , then the preview frame will pop up. Press the
  button to play the media file in full screen. When the media file (photo, music, movie or text type) is playing, press the OK or button can display the control bar.
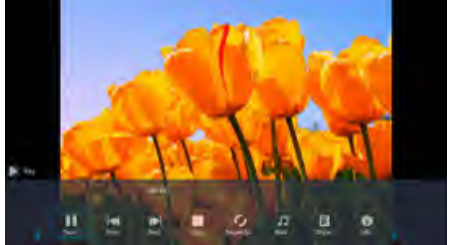
NOTE: Music function need to put music and picture in the same folder.
- Press

 select the function icon, press OK button to confirm the function.
Press or EXIT button to exit the control bar.
NOTE: You can adjust the audio track, subtitle, or program in the Info menu while playing the video file. Choose the Info icon and press OK can display the Info MENU. Hotel Mode
Press H.LOCK key then press number key “0000” to enter into Hotel Mode.
Press
 to move, press OK button to confirm, and press
 to adjust.
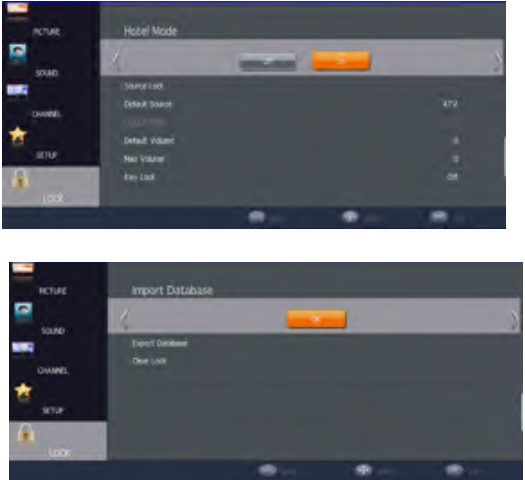
- Hotel Mode : Set Hotel mode on/off.
- Source Lock : Allows you to lock the input sources of your choice.
- Default Source : Set the default input source you want when turning ON your TV set.
- Default Prog : Set the default default program of the channel you want when turning ON your TV set.
- Default Volume : Power on default volume, press the
 or
or  Button to select the desired volume.
 - Max Volume: Set max volume limited. This option allows you to set the Max Volume Level.
- Key Lock : Keypad will be locked, when Key Lock mode is on.
- Import Date base : To copy the data from the USB key to the TV set.
- Export Date base: To export the data from the TV set, to a USB key connected in the TV set.
- Clear Lock : All user’s lock settings will be cleared and reset to default value.
Setup Guide
To operate, assemble, and configure the Haier LE55B9500U LED TV Motherboard, follow these steps:
- Power off your Haier LED TV and unplug it from the power source.
- Locate the motherboard compartment on the TV and carefully remove the existing motherboard.
- Insert the Haier LE55B9500U LED TV Motherboard into the compartment, ensuring a snug fit.
- Reconnect all cables and power on the TV.
- Follow the on-screen prompts to configure the motherboard's settings and update the TV's software.
IMPORTANT SAFETY INSTRUCTION
- Read these instructions.
- Keep these instructions.
- Read all warnings
- Follow all instructions.
- Do not use this apparatus near water.
- Clean only with dry cloth
- Do not block any ventilation openings, install in accordance with the instructions.
- Do not install near any heat sources such as radiations, heal registers, stoves, or other apparatus (including amplifiers) that produce heal.
- Do not defeat the safety purpose of the polarized plug. If the provided plug does not fit into your outlet, consult an electrician for replacement of the obsolete outlet.
- Protected the power cord from being walked on pinched particularly at plugs, convenience receptacles, and the point where they exit from the apparatus
- Only use attachments/accessories specified by the manufacturer.
- Unplug this apparatus during lighting storms or when unused for long periods of time.
- Refer all servicing to qualified service personnel. Servicing is required when the apparatus has been damaged in any way, such as power-supply cord or plug is damaged, liquid has been spilled or objects have fallen into the apparatus, the apparatus has been exposed to rain or moisture, does not opacurate normally, or has been dropped.
- Mains plug is used as the disconnect device, the disconnect device shall remain.
- The ventilation should not be impeded by covering the ventilation openings with items, such as newspapers, table-cloth, curtains, etc.
- No naked flame sources, such as lighted candles, should be placed on the apparatus.
- Attention should be drawn to the environmental aspects of battery disposal.
- The use of apparatus in moderate climate.
- The apparatus shall not he exposed to dripping or splashing and that no objects filled with liquids, such as vases, shall be placed on the apparatus.
SAFETY AND WARNINGS
- High voltages are used in the operation of this television receiver. Do not remove the cabinet back from your set. Refer servicing to qualified service personnel.
- Never stand on, lean on, or suddenly push the television or its stand. You should pay special attention to children. Serious injury may result if it falls
- To prevent fire or electrical shock hazard, do not expose the television receiver to main or moisture.
- Do not place your television on an unstable cart, stand, shelf or table. Serious injury to an individual, and damage to the television, may result if it falls
- Do not drop or push objects into the television cabinet slots or openings. Never spill any kind of liquid on the television receiver
- Avoid exposing the television receiver to direct sunlight and other sources of heat. Do not stand the television receiver directly on other products which give off heat, c.g. video cassette players and audio amplifiers. Do not place naked flame sources, such as lighted candles on the television.
- Do not trap the power supply cord under the television reporter
- If the television is to be built into a compartment or similar enclosure, the minimum distances must be maintained. Heat build-up can reduce the service life of your television, and can also be dangerous.
- Note:the use of apparatus in moderate chmates.
- If you are going to clean the product, Unplug the TV, use soft fabric, no water, never chemicals.
Haier LED TV Motherboard LE55B9500U Troubleshooting
Common issues and solutions for the Haier include:
- No picture or sound: Check all connections and ensure the TV is set to the correct input.
- Slow performance: Close unused applications and clear the cache to free up memory.
- Connectivity issues: Ensure Wi-Fi or Bluetooth is enabled and within range of the access point or device.
- No response: Restart the TV and try again.
Pros & Cons
Pros
- Advanced features and capabilities
- Smooth and responsive performance
- Stunning visuals and immersive audio
- Extensive connectivity options
Cons
- May require technical expertise to install
- Limited compatibility with non-Haier devices
Customer Reviews about Haier LED TV Motherboard LE55B9500U
Customers have praised the Haier LE55B9500U LED TV Motherboard for its responsive performance, stunning visuals, and extensive connectivity options. However, some have noted the limited compatibility with non-Haier devices as a drawback. Overall, users have expressed satisfaction with their investment, citing improved picture and sound quality and a more seamless smart TV experience.
Faqs
What is the Haier LE55B9500U LED TV Motherboard's primary function?
How does the Haier LE55B9500U LED TV Motherboard's quad-core CPU benefit the TV's performance?
What video decoding formats does the Haier LE55B9500U LED TV Motherboard support?
What smart TV platform does the Haier LE55B9500U LED TV Motherboard use?
Can I use the Haier LE55B9500U LED TV Motherboard with non-Haier LED TVs?
What connectivity options does the Haier LE55B9500U LED TV Motherboard offer?
How much RAM does the Haier LE55B9500U LED TV Motherboard have?
What type of storage does the Haier LE55B9500U LED TV Motherboard use?
What operating system does the Haier LE55B9500U LED TV Motherboard use?
Can I update the Haier LE55B9500U LED TV Motherboard's software?
Leave a Comment

