Headstorm Wall Heater Hs-1000-WX-WIFI User Manual
Content
Introduction of Headstorm Wall Heater HS-1000-WX-WIFI
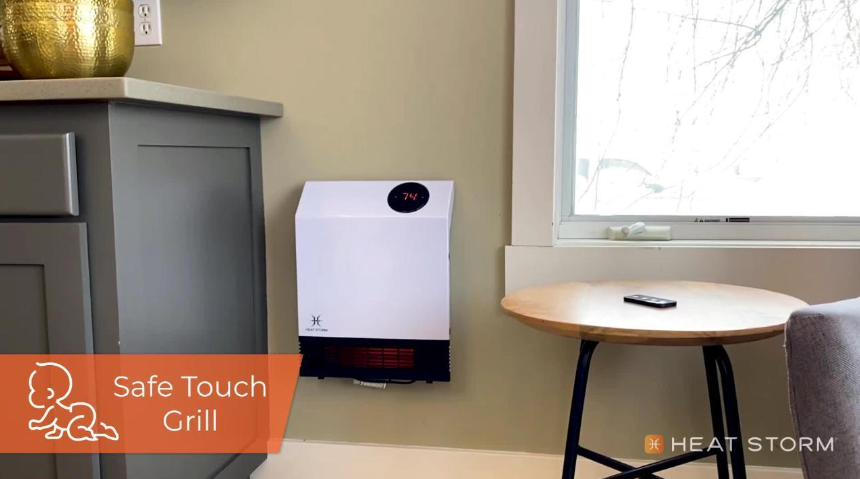
Introducing the Headstorm Wall Heater HS-1000-WX-WIFI, the perfect solution to keep your home warm and cozy during the cold winter months. This innovative wall heater is WiFi enabled, allowing you to control the temperature from anywhere using your smartphone. With a sleek and modern design, the Headstorm Wall Heater is a stylish and efficient addition to any room. The estimated price of the product is $250, and it is now available for purchase.
Detailed Specifications
The Headstorm Wall Heater HS-1000-WX-WIFI boasts several key features, including:
- 1500 watts of heating power
- WiFi enabled for remote temperature control
- Digital thermostat with LED display
- Built-in timer for automatic shut-off
- Wall-mounted design with included mounting hardware
- Energy-efficient heating elements
- Temperature range of 40-95 degrees Fahrenheit
- Built-in safety features, including tip-over protection and overheat protection
Installations & Instructions
WALL INSTALLATION
THE HEATER MUST BE PROPERLY INSTALLED BEFORE IT IS USED.
CAUTION: YOUR HEATER MUST BE INSTALLED ON A WALL. DO NOT PROP THE HEATER UP AGAINST OBJECTS OR USE THE HEATER WITH THE GRILL IS PLACED VERTICALLY.
CAUTION :High temperature, risk of fire, keep electrical cords, drapery, furnishings, and other combustibles at least 3 feet (0.9 m) from the front of the heater and away from the side and rear. To reduce the risk of fire, do not store or use gasoline or other flammable vapors and liquids in the vicinity of the heater.
Headstorm Wall Heater HS-1000-WX-WIFI Tools needed for installation: 3/16″ drill bit and a Philips screwdriver
Use the included level template to ensure you mark the guide holes correctly
Drill holes for included anchors and screws. Insert top 2 screws first
Hang the heater onto the top With 2 screws
Screw-in final 2 screws into bottom base anchors holes to secure heater onto the wall
Wa 11 mounted only
This heater is hot when in use. To avoid burns, do not let bare skin touch hot surfaces. Keep combustible materials, such as furniture, pillows, bedding, papers, clothes, etc. and curtains at least 3 feet ( 0.9 m) from the front of the heater and keep them away from the sides
The heater is not to be used in wet or moist locations


Bedrooms, family rooms, and more!

Great for the Office
CONTROL EVERYTHING FROM YOUR PHONE

Operations & Controls
Celsius & Fahrenheit
FOR INITIAL SET-UP, MAKE SURE YOUR SMART DEVICE IS CONNECTED TO YOUR 2.4 CHAWIFI BEFORE CONTINUING.
Once you have set up your heater, you will be able to go back to your 5 CHz WIFI. Video Tutorial: "Heat Storm Wifi Infrared Wall Heater
- Download the "Smart Life" App.
- Register a new account and follow the in-app prompts. Your email verification may be sent to your spam mail.
- Plug in the heater and make sure that the power is Sat Li he power symbol on the control panel will be blue. none 701220
- Open your Smart Home app and tap on "Add Device".
- Select the Home Appliance-Heater option.
- Confirm that your phone or tablet is connected to the 2.4 GHz WIFI. You will likely have to manually select the 2.4GHz WIFI, most cell phones automatically connect to the 5 GHz WIFI
- With the heater powered off, on the control panel firmly press the "up" button for 5 seconds, then the blue WIFI light will begin to blink.
Note: The "up" button will not be lit up, but you will still hear the click when you press it. - Tap "confirm indicator rapidly blink" icon at the bottom of your smart device screen
- Enter your WIFI password, tap confirm and wait for your device to link.
Note: The WIFI indicator light may stop blinking while your smart device is trying to connect. This is normal; the heater is still connecting even though the light is not flashing.
DISCONNECT THE WIFI
With the heater powered off, on the control panel firmly press the "up" button for 5 seconds, Then the blue WIFI light begin to blink. When the WIFI light is blinking, press the “up” button for 5 seconds, then close the WiFI connection.
POWER
- Once the heater is plugged into the outlet it will be in standby mode (power button will be blue).
- The On/Off button needs to be pressed in order to turn on the heater and operate the remote control.
- The power is automatically adjusted by the built-in program and works as follows:
- If the room temperature is 1 °F or 1 °C higher than the preset temperature, it switches off all heating power, but the On/Off light will remain on (red) and the leaf light will be off.
- If the room tamnerature is 2 96 or 386 lower than the pracet temperature, it will turn on all heating elements (full power), the On/Off light will be red, and the red leaf light will be on.
- If the room temperature is within a degree of your set tempera- ture, it switches on only one group of heating elements (half power) the On/Off light will be red, and the green leaf light will be on.
- For instance: Preset temperature: 72 °F
- If room temperature is 74°F, no heating (no power)
- If room temperature is 71 °F, 72 °F, or 73 °F, half heating power (green leaf)
- If room temperature is lower than 71 °F (70 °F, 69 °F-....), full power (red leaf)
CONNECTING TO WIFI
SELECTING CELSIUS AND FAHRENHEIT
By pressing the “+” and”-” icons at the same time, you can set the heater to function and display in Celsius or Fahrenheit.
NOTE: Switching between Celsius and Fahrenheit can only be performed using the touch screen on the heater or the Smart Life app on wifi models and is not available using the remote control.
SETTING THE TEMPERATURE
When pressing either the “+” or”” icons the display will enter into temperature setting mode. The heater will indicate that it is in this mode when the numbers begin to blink. Pressing the “+” or”” icons will change the thermostat by 19F or 1C.
The default set temperature of the heater is 70 °For 21 °C.
After 5 seconds without control input, the display will exit temperature setting mode and show the current ambient tempera sure.
NOTE: After the heater function or power is shut off the blower will continue to run for several minutes to cool the internal components.
CHILD LOCK FEATURE
Press the ON/OFF icon for 5 seconds to engage the child lock.
When the child lock is on, no changes can be made to the settings until the child lock is turned off.
NOTE: Setting the child lock feature can only be performed using the Control Panel on the heater or through the Smart life app on Wi-Fi models, and is not available using the remote control.
THERMOSTAT CALIBRATION
Thermostat readings can vary based on the environment. If desired, the thermostat on the heater can be manually calibrated to match the central HVAC system.
NOTE: Thermostat calibration can only be performed using the Control Panel on the heater and is not available using the remote control.
NOTE: Typically Heat Storm Infrared Heater thermostats are more accurate than home central thermostats. Changing your Heat Storm Infrared Heater to match your central system may reduce its efficiency.
NOTE: You may have to attempt thermostat calibration several times to make your heater thermostat match your HVAC system.
Press the On/Off button down for 10 seconds to begin calibration. After 5 seconds, you will hear a beep indicating that the child lock is on. Continue to hold the On/Off button down until you hear the second beep. Release the On/Off button.
Use the+ and – buttons to adjust the thermostat when the numbers begin to flash.
After 5 seconds without control input, the heater will exit the thermostat calibration.
Description of Headstorm Wall Heater HS-1000-WX-WIFI
The Headstorm Wall Heater HS-1000-WX-WIFI is a powerful and efficient heating solution for any home. With 1500 watts of heating power, this wall heater can quickly and easily heat up a room. The WiFi enabled feature allows you to control the temperature from anywhere using your smartphone, making it easy to adjust the temperature before you even get home. The digital thermostat with LED display ensures accurate temperature control, and the built-in timer allows you to set the heater to turn off automatically after a set amount of time. The wall-mounted design and included mounting hardware make it easy to install, and the energy-efficient heating elements help save you money on your heating bills. With built-in safety features, including tip-over protection and overheat protection, you can rest easy knowing that the Headstorm Wall Heater is safe to use in any room of your home.
Setup Guide
Setting up the Headstorm Wall Heater is easy. Here's how to operate, assemble, and pair the heater with your WiFi network:
- Mount the heater to the wall using the included mounting hardware.
- Plug in the heater to a power outlet.
- Download the Headstorm app on your smartphone and create an account.
- Follow the in-app instructions to connect the heater to your WiFi network.
- Use the app to adjust the temperature, set a timer, and control other settings.
Headstorm Wall Heater HS-1000-WX-WIFI Maintenance
WASHABLE LIFETIME FILTER SYSTEM
Always unplug the heater when it does not use for a long time Heat Storm™ Infrared Heaters come equipped with a washable lifetime filter that is easy to clean.
We recommend cleaning the filter regularly, about once or month or more as needed. To do this, follow these steps:
Locate the filters on your unit. The Wall unit has 2 filters, one on each side of the unit.
Press both tabs to remove the filter cover and remove the filter, noting which side of the filter receives airflow into the heater.
Run warm tap water over the filter, the opposite direction of airflow, until water runs clear. The filter might excrete some filtered residue, so be cautious not to drip on any stain-able surfaces such as carpeting. You can also soak the filter in water mixed with a small amount of mild dish soap (remember to rinse well with clean water after soaking the filter).
Shake the filter over a sink until excess water is removed and allow it to drip dry completely before reinstalling.
DO NOT force or attempt to speed the filter drying process by using any alternative methods.
ENSURE that the filter is completely dry before inserting back into the air inlet and replacing covers.
Reinstall the filter and replace the cover. OR you can clean the filters with your vacuum.
Using your vacuum wand, gently run it over the filter cover.
Do not remove the cover or the filter if you choose to clean your heater with a vacuum.
WARNING: ANY REQUIRED SERVICE OTHER THAN FILTER MAINTENANCE SHOULD ONLY BE PERFORMED BY AN AUTHO PRIZED SERVICE REPRESENTATIVE.
FACTORY RESET
Power off the heater and allow time for elements to cool. Unplug and plug in the heater. Within 3 minutes of plugging in the heater, press and hold the timer icon for 70 seconds. This will reset the heater to factory settings.
RECALIBRATING YOUR HEATER Heaters
If are your like heater other is not electronics, working like sometimes normal, they try need a resetting reboot.it. Soft onds. Reset-Release Press and and give hold the down heater a the power moment to button reset. for 30 sec.
Note: is This not can available only be using done the on the remote control control. panel on the heater
Hard Reset
Press and hold down the power button on the the unit. unit While from the continuing wall to outlet. hold down Continue the to power hold button, down the unplug power button seconds of while the holding unit down is the unplugged power for 30 button, seconds. plug the After unit 30 back You into plugged the may in. hear outlet. The the Release fan heater during the will take power the about button recalibration 15 after minutes the process. to unit is recalibrate.
Note: is This not can available only be using done the on the remote control control. panel on the heater hours. General Plug back Recalibration in -after 2 Turn hours off the and heater use as and normal. unplug it for 2 When I power the heater ON, it doesn't blow any air at first. The allows heater the is infrared functioning elements as it to get should. hot The so that first 75 when seconds the fan turns on it moves warm air into the room.
Warning
IF THE DIRE ION’SIN HIS MANUAL AF NOT FOLLOWED AN ELECTRIC SHOCK OR FIREMAN RESULT CAUSING DODFTV DAMAGE DFSONAI INUY OR OSS OF LIFF
DO NOT STORE OR USE GASOLINE OR OTHER FLAMMABLE VAPORS AND LIQUIDS IN THE VICINITY OF THIS OR ANOTHER HEA, ING AD9LANCE
ANY REQUIRED SERVICE OTHER THAN FILTER
MAINTENANCE SHOULD ONLY BE PERFORMED BY AN AUTHORIZED SERVICE REPRESENTATIVE ANY OTHER REPAIRS ATTEMPTED BY ANYONE OTHER THAN AN AUTHORIZED SERVICE REDFSENTAT IVE WILL VOID THE WARANT¥
Safety & Awareness
IMPORTANT INSTRUCTIONS
When using electrical appliances, basic precautions should always be followed to reduce the risk of fire, electric shock, and injury to persons, including the following:
Read all instructions before installing or using this heater.
This heater is hot when in use. To avoid burns, do not let bare skin touch hot surfaces. Keep combustible materials, such as furniture, pillows, bedding, papers, clothes, etc., and curtains at least 3 feet (0.9 m) from the front of the heater and keep them away from the sides.
Extreme caution is necessary when any heater is used by or near children or invalids and whenever the heater is left operating and unattended.
Do not operate any heater after it malfunctions. Disconnect power at service panel and have heater inspected by a reputable electrician before reusing.
To disconnect the heater, turn controls off, and turn off the power to the heater circuit at the main disconnect panel.
CAUTION: TO PREVENT ELECTRIC SHOCK, MATCH WIDE BLADE OF PLUG TO WIDE SLOT AND FULLY INSERTIn order to avoid overheating, do not cover the heater. It cannot be used in a wardrobe.
CAUTION: Whenever the heater is left operating and unattend ed, caution may be necessary if children or invalids are nearby.The appliance should not be used by children or persons with reduced physical, sensory or mental capabilities, or lack of expe rience and knowledge unless they have been given supervision or instruction. Contact the manufacturer by calling the customer service department at 435-752-6611. Make sure you have your sales receipt, the location of purchase, and the model of your product.
When you contact customer service, they will attempt to trou able shoot the problem with you over the phone.
If troubleshoot ing does not work, you will be asked to email proof of purchase and a picture of the manufacturer sticker to [email protected]
If you have had your unit longer than the return policy (30 days), you will be expected to pay for shipping the heater back to us.
If you would like to use our discounted shipping rates, please let your customer service representative know.
Please be advised that once we receive your unit, it may take a couple of business days for our technicians to determine if your unit can be fixed.
If your unit can be fixed, the technicians will do so. You will ONLY receive a new unit if your heater is not repairable.
Children being supervised should be instructed not to play with the appliance.
Do not operate any heater with a damaged cord or plug or after the heater malfunctions, has been dropped or damaged in any manner. Discard heater, or return to an authorized service facili ty for examination and/or repair.
If the supply cord is damaged, it must be replaced by the manu facture, its service agent, or similarly qualified persons in order to avoid a hazard.
Any repairs to this heater should be carried out by a qualified service person.
Under no circumstances should this heater be modified. Parts having to be removed for servicing must be replaced prior to operating this heater again.
Do not use outdoors.
Do not run the cord under carpeting. Do not cover the cord with throw rugs, runners, or similar coverings. Do not route the cord under furniture or appliances. Place the cord away from high traffic areas. Place cord where it will NOT cause a tripping hazard.
To disconnect the heater, turn controls to the ff position, wait for the fan to stop blowing to ensure the inside of the heater has been properly cooled, then remove the plug.
Connect to proper 2 pin polarized outlets only.
When using electrical appliances, basic precautions should always be followed to reduce the risk of fire, electrical shock, and injury to persons.
There is a thermostat limiter inside the heater. When the inner temperature over-heats or abnormal heating occurs, the thermo-stat protective device will cut off the power supply to avoid risk of fire or damage to the heater.
Do not insert or allow foreign objects to enter any ventilation or exhaust opening as this may cause an electric shock, fire, or damage the heater.
To prevent a possible fire, do not block air intakes or exhaust in any manner.
The heater has hot and arcing or sparking parts inside. Do not use it in areas where gasoline, paint or flammable liquids are used or stored.
Use this heater only as described in the manual. Any other use is not recommended by the manufacturer because it may cause fire, electric shock, or injury to persons.
Always plug heaters directly into a wall outlet/receptacle.
Never use an extension cord or relocatable power tap (outlet/power strip). This heater is for use on 720-volt standard outlets.
HEATER LOCATION
When choosing a location for your new heater, ensure that the gener al instructions are followed. For best effect, install the heater out of direct sunlight. Cold climate installation recommendation: when installing this unit against a non-insulated exterior wall or chase, it is mandatory that the outer walls be insulated to conform to applicable insulation codes. If you choose to place the unit underneath a window or on a poorly insulated exterior wall, please be advised that the heater may read a colder ambient temperature than the actual ambient temperature of the room is.
CAUTION: Do not exceed the current rating of the current tap. Always plug heaters directly into a wall outlet/receptacle. Never use with an extension cord or relocatable power tap (outlet/ power strip).
CLEARANCE TO COMBUSTIBLES
Keep electrical cords, drapery, furniture and other combustibles at least 3 feet ( 0.9M) from the front of the heater and away from the sides.
WARNING: Make sure the power is turned off before proceeding. Any electrical repairs or rewiring of this unit should be carried out by a licensed electrician in accordance with national and local codes. If repairing or replacing any electrical component or wiring, the origi nal wire routing, color coding and securing locations must be followed.
WARNING: Electrical outlet wiring must comply with local building codes and other applicable regulations to reduce the risk of fire, elec trical shock and injury to persons.
WARNING: Do not use this heater if any part of it has been underwater. Immediately call a qualified service technician to inspect the heater and replace any part of the electrical system.
Warning: Disconnect power before attempting any maintenance or cleaning to reduce the risk of fire, electrical shock or personal injury.
Warning: During any service of this appliance, the power to the unit must be turned off. First turn the main power switch to the “OFF” position, wait for the fan to stop blowing to ensure the inside of the heater has been properly cooled. Then remove the electrical plug from the wall outlet.
Voltage protection: If the heater is plugged in a 240V outlet by mistake, the PCBA will cut off the heating and fan immediately, it will show a “UH” error code, and the heater must be unplugged. The heater will function properly when plugged in the right voltage.
Troubleshooting
When I power the heater ON, it doesn’t blow any air at first.
The heater is functioning as it should. The first 75 seconds allow the infrared elements to get hot so that when the fan turns on it moves warm air into the room.
The heater’s ambient temperature reading does not match my central heating thermostat reading. Why?
All thermostats vary in temperature setting. In most cases, the central heating thermostat is not as accurate as your Heat Storm thermostat.
Also, where the temperature censor is can alter the thermostat reading.
You can calibrate your heater’s thermostat to match your central heating thermostat. Please see the calibration section of the manual.
The heater keeps blowing air when the heater is turned off. Why?
The heater is functioning as it should. This is the cool-down phase. The heater will run for several minutes (up to 12) to cool down the internal components. This increases the lifespan of the infrared elements.
The heater is not blowing warm air.
Check to see if the air inlet is blocked or the air filter is dirty.
If the filter is dirty, clean it.The ambient temperature (displayed) is higher than the ther most setting.
There is something blocking the airflow. Move the object out of the way of the heater. This is common if the heater is in a closet or under a desk.
Installing the heater near objects may cause the air in your room not to circulate and therefore have widely varying temperatures within the same room.
Disconnect the unit from the wall outlet for 2 hours. After 2 hours, plug the unit back into the wall outlet.
The fan clicks on and runs for under a minute and then turns off. Why?
The fan is turning on to attempt to create airflow within your room. The heater is trying to determine if the ambient temperature in the room has changed.
My heater smells like burning plastic.
When you first receive your heater, a light plastic odor is normal.
The heater is brand new and has never been used before.
If the smell persists for more than a couple of hours, call customer service at 435-752-6611.
My heater is not showing the temperature, just an error code.
“EE” : The temperature sensor (probe) error, when this code shows, the heating element and fan are turned off. The heater needs to unplug and check the temperature sensor which could be loose or disconnected or damaged.
“EO” : Program can not set up to run, Heater needs to be unplugged and plugged in again. If this error is still there after several tries, The PCBA needs to be replaced.
“El” This is a heater tilt-over error. When this code shows, the heater and fan are turned off. The heater can be turned back on again by touching the on/off icon after heater is standing up again.
“UH” Incorrect high voltage power supply error. The heater must be unplugged immediately.
LO-The temperature is less than l6°F (-9 °C)
HI– The temperature is greater than 99°F {37°C)
Unplug the heater for 2 hours, then plug the heater back in.
Do the factory reset. If the error persists, call customer service.
Pros & Cons about Headstorm Wall Heater HS-1000-WX-WIFI
Pros
- WiFi enabled for remote temperature control
- Digital thermostat with LED display
- Built-in timer for automatic shut-off
- Wall-mounted design with included mounting hardware
- Energy-efficient heating elements
- Built-in safety features
Cons
- May be more expensive than other wall heaters
- Requires a WiFi connection to use all features
Faqs
What are the primary features of the Headstorm HS-1000-WX-WIFI Wall Heater?
How do I install the Headstorm HS-1000-WX-WIFI Wall Heater?
What is the temperature range of the Headstorm Wall Heater HS-1000-WX-WIFI?
Can I control the Headstorm Wall Headstorm Wall Heater HS-1000-WX-WIFI remotely?
What is the wattage of the Headstorm Wall Heater HS-1000-WX-WIFI?
What is the warranty of the Headstorm Wall Heater HS-1000-WX-WIFI?
Is the Headstorm Wall Heater HS-1000-WX-WIFI energy efficient?
What safety features does the Headstorm Wall Heater HS-1000-WX-WIFI include?
How does Headstorm Wall Heater HS-1000-WX-WIFI automatic shut-off feature work?
Can I use this Headstorm Wall Heater HS-1000-WX-WIFI in the bathroom?
Leave a Comment