Rockville Car Headrest Monitors RTSVD961 User Manual | Installation
Content
Introduction of Rockville Car Headrest Monitors RTSVD961
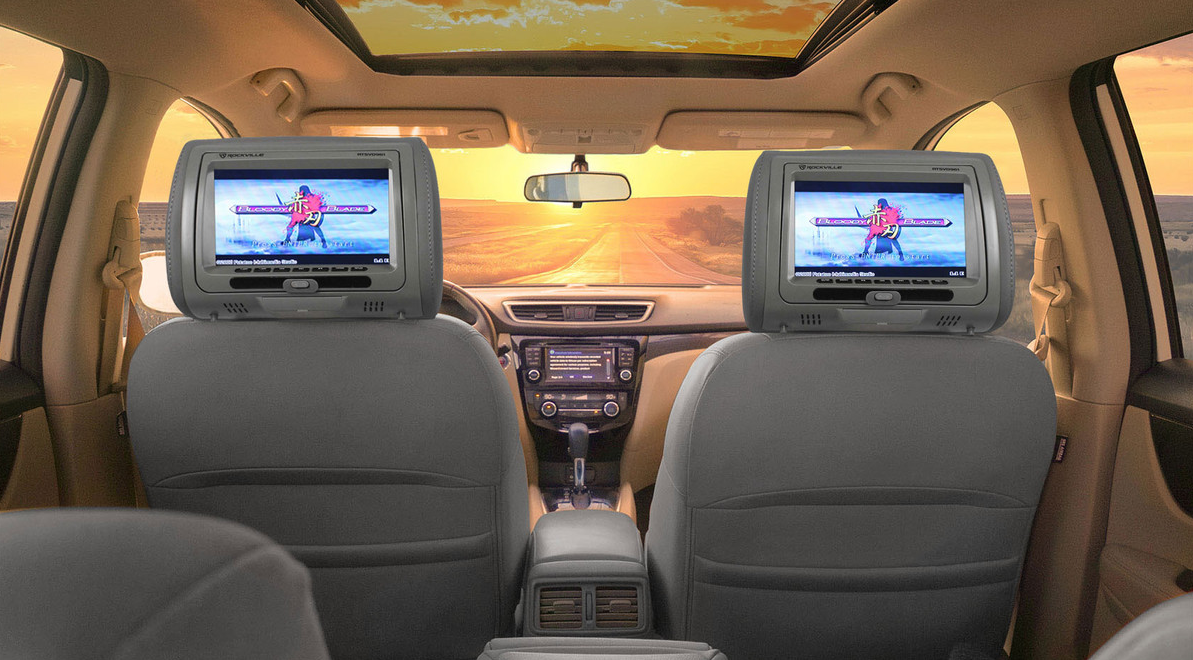
Introducing the Rockville Car Headrest Monitors RTSVD961, the ultimate entertainment solution for your vehicle. These headrest monitors are designed to keep your backseat passengers entertained, providing hours of fun on those long car rides. With a sleek and modern design, these monitors blend seamlessly into any car interior. The estimated price for the Car Headrest Monitors RTSVD961 is $200-$300, and they are now available for purchase.
Detailed Specifications
The Rockville Car Headrest Monitors come with a range of impressive features, including
- 10.1-inch HD LED screens
- Built-in DVD player
- USB and SD card ports
- Wireless FM transmitter
- Built-in games and media player
- Adjustable brackets for easy installation
- 3.5mm headphone jack
- Parental control function
- AV input and output
- Voltage: DC 12V
Description
The Rockville Car Headrest Monitors RTSVD961 are the perfect addition to any car, providing a range of entertainment options for your backseat passengers. The monitors feature a high-definition LED screen, ensuring clear and vibrant visuals. The built-in DVD player allows for easy movie playback, while the USB and SD card ports provide additional options for media playback. The wireless FM transmitter allows for easy connection to your car's sound system, ensuring high-quality audio. The monitors also come with built-in games and a media player, providing hours of entertainment. The adjustable brackets make for easy installation, and the 3.5mm headphone jack allows for private listening. The parental control function ensures that you can control what your children are watching, and the AV input and output allow for easy connection to other devices.
Powering the Unit
- Turn the engine key to the "ACC" or "ON" position
- Press and hold the power button for 3 seconds
- The unit will turn on and the main screen will be displayed.
- When the engine key is turned to the "OFF" position, the unit will turn off.
- If the unit does not turn on, check to ensure all wires are connected properly. It is strongly suggested you seek out the help of a professional when installing.
RTSVD961
| Feature | Description |
|---|---|
| Touch Screen | *Touch capabilities only available on the RTSVD961 unit. |
| Screen Size | 9" TFT-LCD |
| Aspect Ratio | 16:9 |
| Resolution | 800x480 pixels |
| DVD Player | Fully integrated with top loading DVD player |
| USB Slot | Audio, video, photo, e-book reader |
| HDMI Input | Audio and video |
| A/V Inputs | 2.4 inputs (one on the front panel) |
| Video Input Level | 1Vp-p, 75 ohm(composite) |
| Wired Headphone Input | On the front panel |
| IR Frequency (A Ch) | 2.3 MHz/2.8 MHz |
| IR Frequency (B Ch) | 3.2 MHz/3.8 MHz |
| FM Transmitter | 87.7MHz, 88.1MHz, 88.5MHz, 88.9MHz, 107.1 MHz, 107.9 MHz |
| Post Diameter | 10mm post with 12/12.5/12.7/13.8/14/16mm plastic inserts, 12mm metal inserts |
| Post Distance | Adjustable 110mm-190mm |
| 3 Different Color Choices | Black, Beige, Gray |
| Power | DC 12V(9-15V) |
Setup Guide of Rockville Car Headrest Monitors
Setting up the Rockville Car Headrest Monitors RTSVD961 is simple and straightforward. Begin by installing the adjustable brackets onto your car's headrests. Then, connect the power cable to your car's cigarette lighter socket. Next, insert a DVD into the built-in player or connect a USB or SD card to the relevant port. Finally, use the remote control to navigate the user-friendly interface and select your desired media. For wireless audio, simply tune your car's FM radio to the same frequency as the wireless FM transmitter.
Front Panel Operation

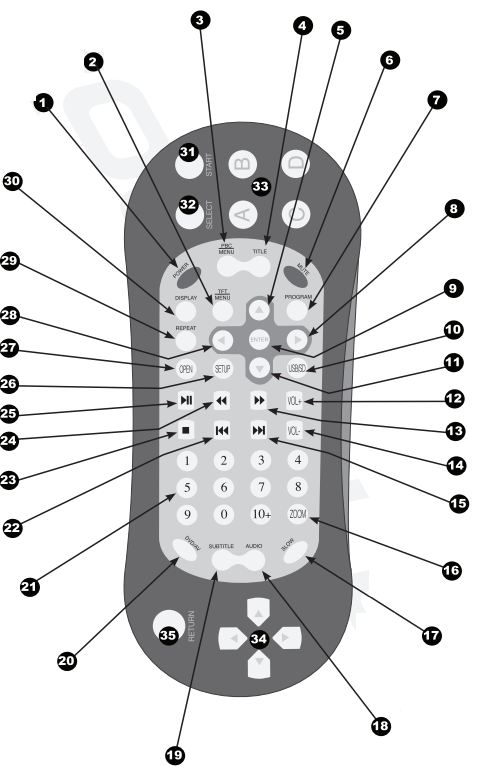
Remote
| No. | Function | Description |
|---|---|---|
| 1 | Power | Turn unit on and off |
| 2 | TFT Menu | Access unit settings menu |
| 3 | PBC Menu | Setup playback settings |
| 4 | Title | Return to the title screen |
| 5 | Up Arrow | Navigate up when available |
| 6 | Mute | Mute audio |
| 7 | Program | Adjust unit functionality |
| 8 | Right Arrow | Navigate right when available |
| 9 | Enter | Select highlighted item |
| 10 | USB/SD | Switch between USB and SD devices |
| 11 | Down Arrow | Navigate down when available |
| 12 | Volume Up | Increase volume level |
| 13 | Fast Forward | Fast forward selected music or video |
| 14 | Volume Down | Decrease volume level |
| 15 | Next | Skip to next song, photo, page, or video |
| 16 | Zoom | Zoom in on media content |
| 17 | Slow | Decrease frame rate playback of videos |
| 18 | Audio | Change the audio channel |
| 19 | Subtitle | Toggle subtitles on/off when available |
| 20 | DVD/AV | (DVD function not available) |
| 21 | Number Pad | Enter digits 1-9. Use "10+" for faster input. |
| 22 | Previous | Skip to previous song, photo, page, or video. |
| 23 | Stop | Stop media playback |
| 24 | Rewind | Rewind selected music or video |
| 25 | Play/Pause | Play and pause media content |
| 26 | Setup | System Setup |
| 27 | Open | Opens the disc tray |
| 28 | Left Arrow | Navigate left when available |
| 29 | Repeat | Repeat current song or video in playlist |
| 30 | Display | Adjust Video display size |
| 31 | Game Start | For in game use |
| 32 | Game Select | For in game use |
| 33 | Game Input | For in game use |
| 34 | Game Movement | For in game use |
| 35 | Return | Return to the main menus. |
Media Devices

| Port | Description |
|---|---|
| AV2 | Input for audio playback via a 3.5mm cable |
| HDMI | HDMI in for audio and video playback of supported devices |
| USB | USB port for media storage device (see pg.10 for information on browsing media devices) |
| Phone | Plug in headphones |
| SD | Use the provided USB adapter to access SD cards |
Supported Video Types
- AVI
- DIVX
- MPG
- DAT
- FLV
- RMVB
- VOB
- MP4.
- MOV
- OGG
- ASF
Supported Audio Types
- MP3
- WMA
Supported Game Types
- SMF
Supported E-Book Types
- • TXT
Supported Photo Types
- PNG
- BMP
DVD Operation
Popen to be aromatic
Insert disc into the slot with the label facing up To return to DVD playback press MODE on the unit front panel until
DISC is selected
Use the remote or the unit front panel to conrol playback
Supported Disc Types
- DVD
- S-VCD
- VCD
- Audio CD
- MP3 Disc
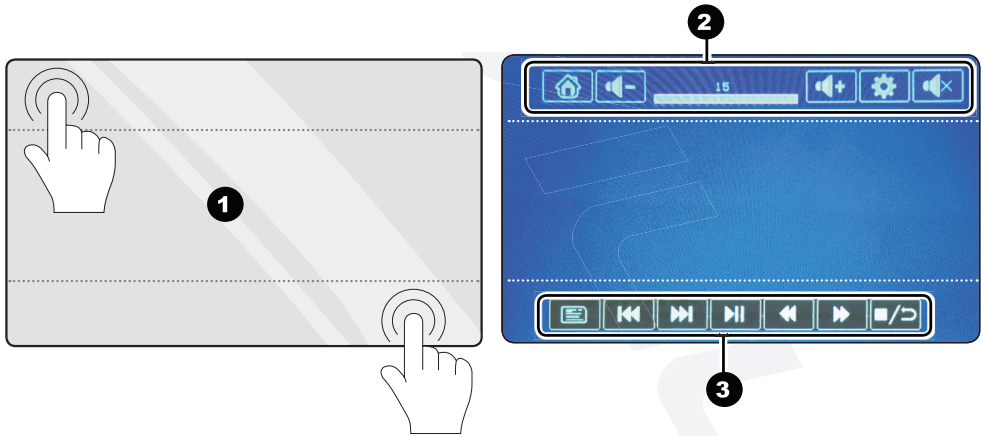
Touch DVD Controls
Touch capabilities only available on the RTSVD961 unit.
| No. | Feature | Description |
|---|---|---|
| 1 | Touch Points | While in DVD playback only the top and bottom areas are touch compatible |
| 2 | Top Menu | Return home, increase/decrease volume, access DVD settings, and mute |
| 3 | Playback Menu | The playback menu provides the basic playback options |
Browsing Files
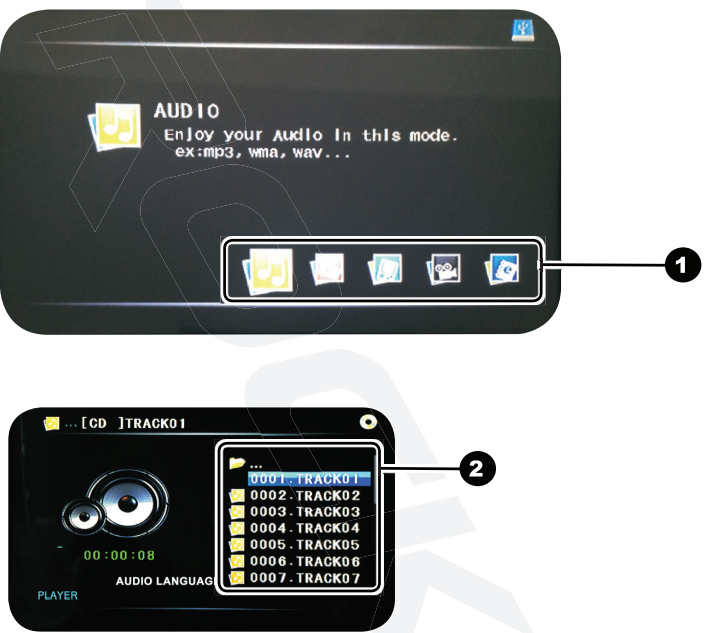
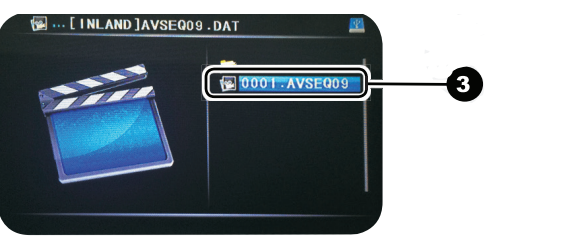
- Select the type of media you'd like to browse
- Audio/Photo/Games/Video/Books returns one retro fring them to see their contents or select
 to the previous list.
 - Select the desired file to begin playback (See pg.8s for a list of supported file types)
Settings
Picture
Fine-tune the display settings. Brightness, contrast, saturation, sharpness, hue, and orientation. Adjust manually or use one of the presets found under "Picture Mode".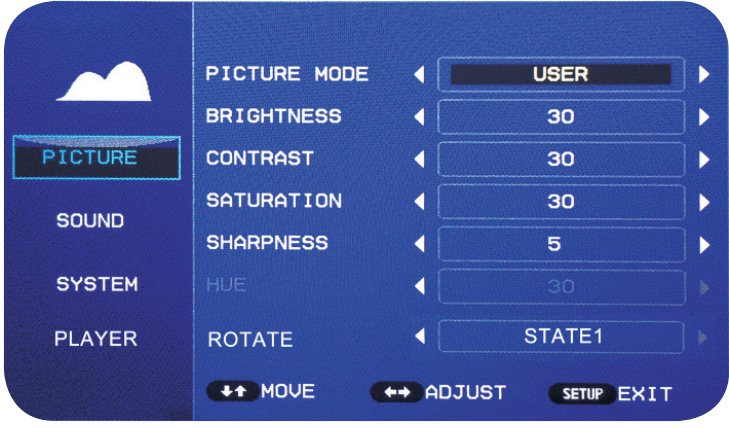
Sound
Fine-tune the sound settings. Bass, Treble, Balance, FM Radio Frequency, IR Radio Frequency, Volume. Adjust manually or use one of the presets found under "Sound Mode".
System
Change system settings. Language, OSD Duration, Video Output, Reset. OSD Duration changes the amount of time the menu will wait before disappearing from inactivity. Reset and restore the factory default settings.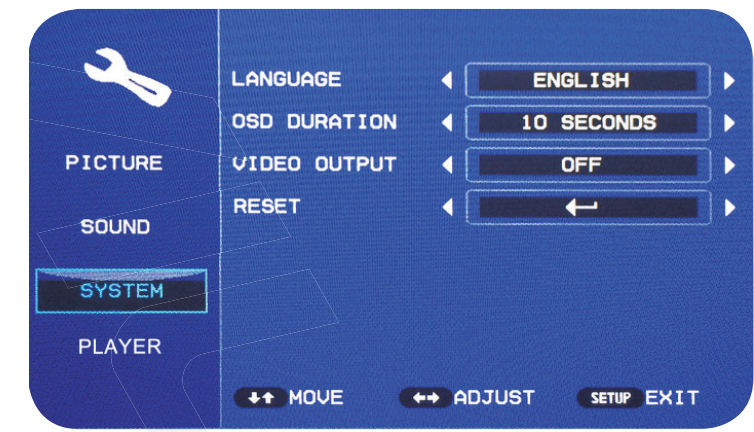
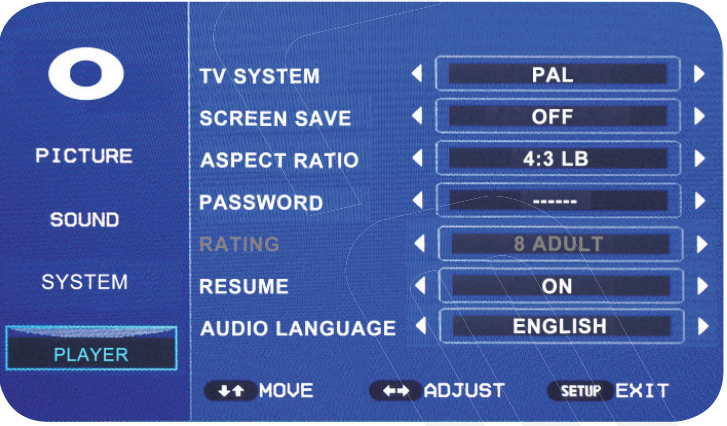
- Player
Adjust disc playback options. TV system, screen save, aspect ratio, password, rating, resume, audio language. TV system switches between PAL and NTSC mode. Use password and rating to set parental restrictions for child use.
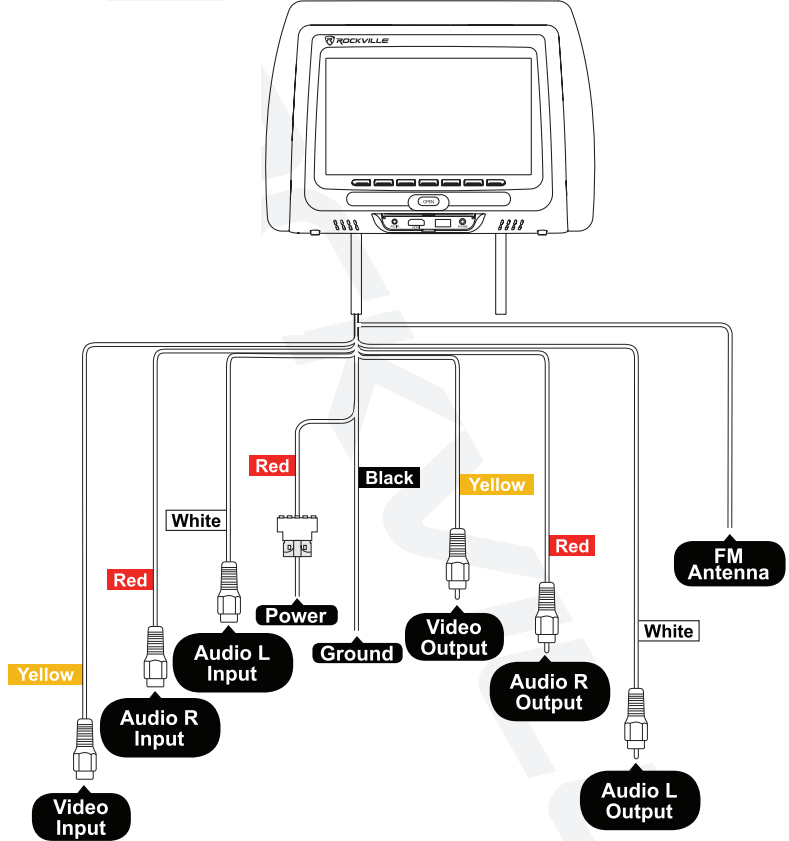
Wiring Diagram
Installation
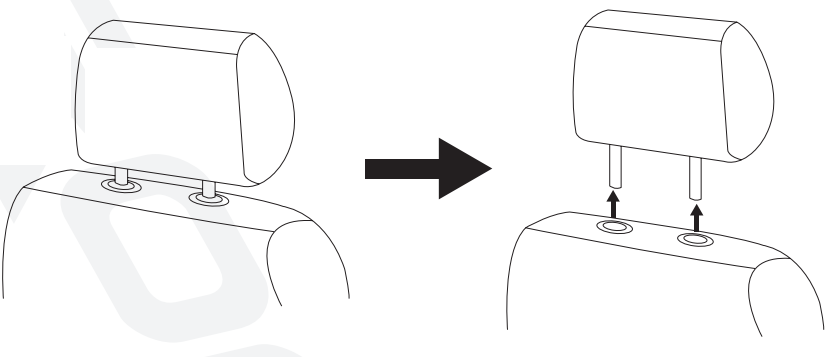
- Remove the existing headrest from the seat
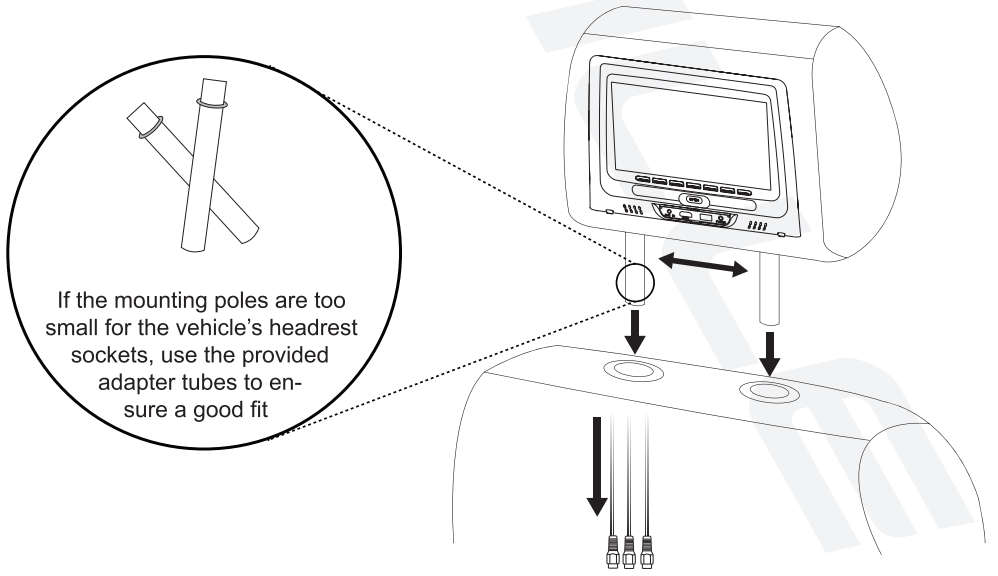
- Adjust the mountings poles of the Rockville headrest unit to fit in the vehicle's headrest sockets
- Feed the wiring through the hole, down to the bottom of the seat (make sure none of the cables are pinched)
- Once the wires are through, finish inserting the Rockville headrest unit unit it clicks into place
- You can now adjust the height of the unit as you would the vehicle's factory headrest unit
- Refer to the wiring guide for proper connection of wires
Troubleshooting
If you encounter any issues with the Car Headrest Monitors , try the following solutions
- If the screen is not turning on, check that the power cable is securely connected to the monitor and to a working cigarette lighter socket.
- If the sound is not working, check that the volume is turned up and that the 3.5mm headphone jack is not connected to the headphones. If using the wireless FM transmitter, ensure that your car's FM radio is tuned to the same frequency.
- If the DVD player is not working, check that a DVD is inserted correctly and that the disc is compatible with the player.
- If the monitors are not responding to the remote control, check that the remote is pointing directly at the monitors and that the batteries are fresh.
| ISSUE | SOLUTIONS |
|---|---|
| Unit does not start up | - Check if the power cable is connected correctly |
| - Use remote to turn on the unit, check if the battery in the remote control is installed correctly | |
| No picture | - Check power |
| - Check video connection wires | |
| - Check the vertical scanning frequency of VGA input | |
| Picture showing abnormally | - Check power |
| - Check video connection wires | |
| - Check the vertical scanning frequency of VGA input | |
| Remote control not responding | - Replace the battery in the remote control |
Pros & Cons of Car Headrest Monitors
Pros
- High-definition LED screen
- Built-in DVD player and media player
- Wireless FM transmitter
- Adjustable brackets for easy installation
- Parental control function
Cons
- May not be compatible with all car models
- Power cable may be too short for some cars
- Remote control batteries not included
Customer Reviews of Rockville Car Headrest Monitors
Customers have praised the Rockville Car Headrest Monitors for their high-quality visuals and audio, easy installation, and range of entertainment options. The wireless FM transmitter has been a particular hit, allowing for easy connection to car sound systems. The parental control function has also been appreciated by parents looking to control their children's media consumption. However, some customers have noted that the power cable may be too short for some cars, and that the remote control batteries are not included. Overall, the Car Headrest Monitors RTSVD961 have received positive reviews for their functionality and value for money.
Faqs
In the Rockville RTSVD961 Monitors, what are the different video input options that are available?
Third, is it possible to use the Rockville RTSVD961 to play audio through the speakers in my vehicle?
In the event that my Rockville RTSVD961 monitor does not turn on, what steps should I take?
What are the steps to troubleshoot problems with the remote control for the Rockville RTSVD961?
To what extent is the Rockville RTSVD961 Headrest Monitor compatible with all models of automobiles?
In the Rockville RTSVD961 Monitors, what are the steps to take in order to make use of the Dual Screen feature?
How Can I Clean My Rockville RTSVD961 Monitors' Screens?
Are the Rockville RTSVD961 Monitors Equipped with Parental Controls?
What Are the Rockville RTSVD961 Monitors' Screen Resolution and Aspect Ratio?
What is the length of time that the Rockville RTSVD961 Monitors are covered under warranty?
Leave a Comment