
Rvs Systems Rear View Camera System RVS-3CAM5077N User Manual
Content
rvs systems Rear View Camera System RVS-3CAM5077N Overview
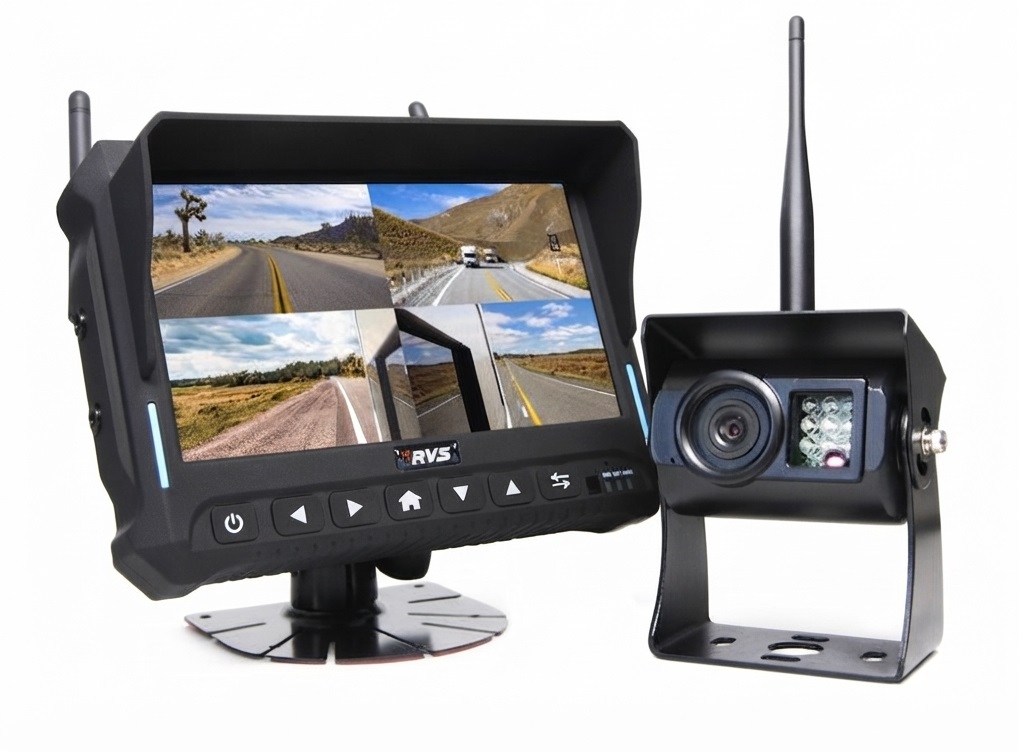
The rvs systems Rear View Camera System RVS-3CAM5077N is a 3-channel backup camera solution designed for RV owners, commercial drivers, and fleet operators who need better rearward visibility and safer maneuvering. Built for 12V-24V vehicle electrical systems, it combines a 7-inch monitor with multi-camera support to help drivers monitor blind spots, reverse with confidence, and keep an eye on trailers, cargo areas, or surrounding traffic. Its LED backlit display, 16:9 screen format, and automatic NTSC/PAL switching make it a practical fit for a wide range of vehicles and operating conditions.
This model is especially useful for motorhomes, fifth wheels, box trucks, buses, and work vehicles where visibility is limited and camera coverage matters. The monitor specification indicates an 800 x 480 RGB panel, 500:1 contrast ratio, 400 cd/m² brightness, and wide viewing angles, all of which support clear daytime image quality and usable off-angle visibility. The system is also designed to handle demanding environments, with temperature tolerance from -30°C to +80°C and shock resistance rated at 400G, making it suitable for long-distance travel and heavy-use applications.
In terms of value, the rvs systems Rear View Camera System RVS-3CAM5077N typically falls in the mid-range backup camera category, with estimated pricing commonly seen around $250 to $500 depending on seller, package contents, and installation accessories. Availability is generally strongest through RV parts suppliers, online marketplaces, and specialty surveillance or vehicle safety retailers. For buyers who want a reliable multi-camera display without moving into premium fleet-only pricing, this system offers a strong balance of features, durability, and everyday usability.
Detailed Specifications for rvs systems Rear View Camera System RVS-3CAM5077N
- Display size: 7-inch monitor with a 16:9 aspect ratio.
- Resolution: 800 x 480 RGB.
- Brightness: 400 cd/m² for improved daytime visibility.
- Contrast ratio: 500:1 for balanced image definition.
- Viewing angles: U:50°, D:60°, L/R:70°.
- Camera channels: 3-channel support for multiple camera inputs.
- Video signal: 1Vp-p, 75Ω.
- Power input: DC 12V-24V with ±10% tolerance.
- Power consumption: 5W.
- Video compatibility: Automatic NTSC/PAL switching.
- Operating temperature: -30°C to +80°C.
- Shock resistance: 400G.
- Vibration resistance: 5G.
- Physical size: 7 inches wide, 5 inches high, 1 inch deep.
- Weight: Approximately 520g.
- Panel type: Internal display design with compact mounting footprint.
Compared with many single-camera RV backup monitors, this 3-channel system provides more flexibility for front, rear, and side coverage. Compared with newer premium systems that may offer higher resolution or wireless integration, the RVS-3CAM5077N stands out for its simple design, proven ruggedness, and broad vehicle voltage support. For users who need dependable performance rather than advanced smart features, it remains a practical and efficient choice.
Pros & Cons of the rvs systems Rear View Camera System RVS-3CAM5077N
Pros
- Multi-camera flexibility: The 3-channel setup is ideal for drivers who want more than a basic backup view, such as rear plus blind-spot monitoring.
- Good visibility: The 400 cd/m² brightness and 500:1 contrast help the monitor stay readable in everyday driving conditions.
- Wide voltage support: The 12V-24V input makes it compatible with RVs, trucks, buses, and commercial vehicles.
- Durable build: Shock and vibration resistance make it better suited to road use than many consumer-grade camera displays.
- Simple installation profile: The compact 7-inch monitor design fits well in cabins where space is limited.
Cons
- No modern smart features: Buyers looking for wireless streaming, GPS overlays, or app integration may prefer newer alternatives.
- Resolution is modest: 800 x 480 is serviceable, but it is not as sharp as full HD or 1080p systems.
- Wired setup may take time: Multi-camera wiring can require more installation effort than plug-and-play wireless kits.
- Value depends on bundle: Some listings may include only the monitor or partial hardware, so buyers should verify package contents carefully.
Overall, the rvs systems Rear View Camera System RVS-3CAM5077N offers solid value for drivers who prioritize reliability, durability, and multi-angle monitoring over premium display resolution. It competes well with similarly priced RV camera systems, especially for users who need dependable performance in a tough mobile environment.
Customer Reviews and Real-World Feedback on the rvs systems Rear View Camera System RVS-3CAM5077N
Customer feedback for systems in this class is generally positive, with many users rating them around 4 out of 5 stars for practical visibility and build quality. Buyers often praise the clear daytime image, stable monitor performance, and confidence boost during reversing and lane changes. One common theme is that the 3-camera layout is especially helpful for larger RVs and tow vehicles.
Frequent compliments include easy-to-read display text, dependable switching between camera feeds, and a sturdy feel that holds up well on rough roads. Common complaints usually focus on installation time, limited image sharpness compared with high-end digital systems, and the need to confirm whether all required cables and mounting parts are included. Users also mention that performance depends heavily on proper camera placement and clean wiring.
A typical buyer recommendation is that this model is a strong choice for RV owners who want a trusted rear-view camera system with straightforward operation. For shoppers comparing similar backup camera kits, the rvs systems Rear View Camera System RVS-3CAM5077N is best suited to those who value practicality, compatibility, and rugged road use over advanced smart functionality.
Faqs
How do I set up rvs systems Rear View Camera System RVS-3CAM5077N for the first time?
What should I do if rvs systems Rear View Camera System RVS-3CAM5077N has a blank screen or no signal?
How many cameras can rvs systems Rear View Camera System RVS-3CAM5077N support, and how should I use the views?
Is rvs systems Rear View Camera System RVS-3CAM5077N compatible with RVs, trailers, and trucks?
How do I improve picture quality on rvs systems Rear View Camera System RVS-3CAM5077N at night?
Why is the image on rvs systems Rear View Camera System RVS-3CAM5077N upside down or reversed?
What wiring issues commonly affect rvs systems Rear View Camera System RVS-3CAM5077N installation?
How should I clean and maintain rvs systems Rear View Camera System RVS-3CAM5077N for long-term reliability?
Tags
Leave a Comment