Samsung SSD Data Migration v3.1 Setup Guide
Content
Introduction
The Samsung Data Migration software is designed to help users quickly, easily, and safely migrate all of their data – including their current operating system, application software, and user data – from their existing storage device (e.g. HDD) to their new Samsung SSD. Samsung Data Migration software is developed and distributed exclusively for owners of Samsung Solid State Drives (SSDs).
Instructions
To successfully migrate your data using Samsung SSD Data Migration v3.1, follow these steps:
- Connect your Samsung SSD to your computer using the provided cables.
- Download and install Samsung SSD Data Migration v3.1 from the official Samsung website.
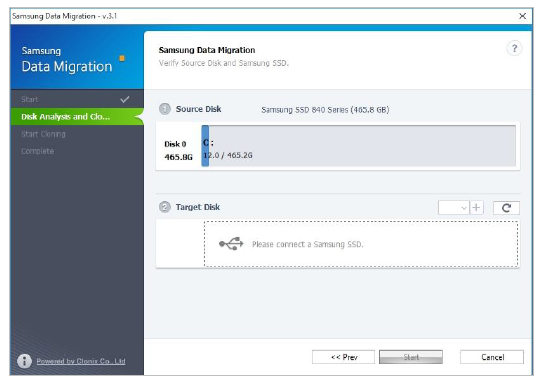
- Launch the software and select the source disk, which is the disk containing your existing data.
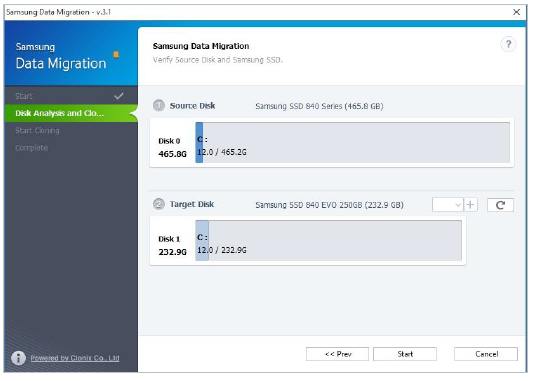
- Select the destination disk, which is your Samsung SSD where you want to migrate your data to.
- Choose the migration option that suits your needs (e.g., Clone Entire Disk, Clone Only System Disk, etc.).
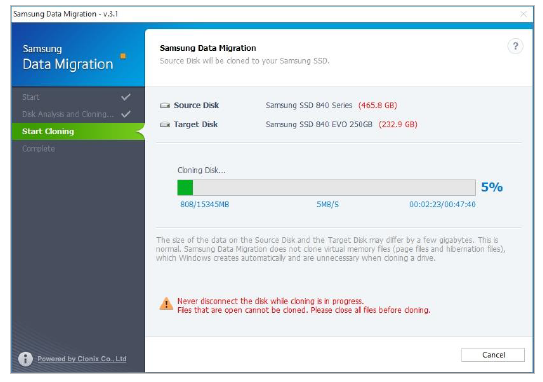
- Review the selected options and click "Start" to begin the migration process.
- Wait for the migration process to complete. This may take some time depending on the size of your data.
- Once the migration is finished, safely disconnect your Samsung SSD and restart your computer.
System Requirements
| Component | Requirement |
|---|---|
| Operating System | Windows XP SP2 (32bit) |
| Windows Vista (32/64bit) | |
| Windows 7 (32/64bit) | |
| Windows 8 (32/64bit) | |
| Windows 8.1 (32/64bit) | |
| Windows 10 (32/64bit) | |
| PC Memory (RAM) | 1 GB or more |
| Disk Space | 30 MB required for installation |
| Supported Partition Types | MBR, GPT |
| Source Disk | The Source Disk (HDD or SSD) must contain the |
| operating system installation | |
| Samsung SSD 970 PRO Series | |
| Samsung SSD 970 EVO Plus Series | |
| Samsung SSD 970 EVO Series | |
| Samsung SSD 960 PRO Series | |
| Samsung SSD 960 EVO Series | |
| Samsung SSD 950 PRO Series | |
| Samsung SSD 850 PRO Series | |
| Samsung SSD 850 EVO Series | |
| Samsung SSD 840 PRO Series | |
| Samsung SSD 840 EVO Series | |
| Samsung SSD 840 Series | |
| Samsung SSD 830 Series | |
| Samsung SSD 750 EVO Series | |
| Samsung SSD 470 Series | |
| Target Disk | Samsung SSD 970 PRO Series |
| Samsung SSD 970 EVO Plus Series | |
| Samsung SSD 970 EVO Series | |
| Samsung SSD 960 PRO Series | |
| Samsung SSD 960 EVO Series | |
| Samsung SSD 950 PRO Series | |
| Samsung SSD 850 PRO Series | |
| Samsung SSD 850 EVO Series | |
| Samsung SSD 840 PRO Series | |
| Samsung SSD 840 EVO Series | |
| Samsung SSD 840 Series | |
| Samsung SSD 830 Series | |
| Samsung SSD 750 EVO Series | |
| Samsung SSD 470 Series |
Limitations
- This software only supports the Windows operating systems listed in the User Manual.
- This software only supports the Samsung SSDs listed in the User Manual. OEM storage devices provided through a computer manufacturer or supplied through another channel are not supported.
- This software will run only if the operating system is installed on the Source Disk. function on disks that lack an operating system installation.
- On systems with two (2) drives or more (e.g. “C:”, “D:”, and “E:” drives) with the operating system installed on the “C:” drive, only the first two drives will be cloned. The “System” partition that is created during Windows installation is automatically replicated.
- The OEM Recovery partition created by the computer manufacturer as a factory setting will not be cloned. However, it will be automatically cloned if the manufacturer is Samsung and SRS
(Samsung Recovery Solution) 5, SRS 6, or SRS 7 is installed. (Versions lower than SRS 5 are not supported.) - A difference of a few GB of data capacity between the Source and Target Disks is normal after cloning. The software does not copy the files Windows automatically generates to manage virtual memory (page files and hibernation files).
- This software cannot clone encrypted disks. In order to clone an encrypted disk, you must first remove the password from the disk.
- If the mainboard chipset drivers are not up to date when cloning, this software may not function properly.
- If there are multiple operating systems installed on the PC (e.g. Windows 7 is installed on the C drive and Windows 8 is installed on the D drive), the cloned disk may not function properly.
- If the Source Disk is damaged (e.g. the disk has bad sectors), the cloned disk may not function properly.
- When attempting to clone a disk using this software, it is recommended that you close all other programs and free up sufficient memory before cloning.
- If you have instant PC recovery software installed on your system, this software may not function properly.
- If a Source Disk is converted into a dynamic disk, the software may not function properly.
- The files in the user's Library folder are listed by default on the screen for selecting files to exclude during cloning.
- To exclude files that are not in the Library folder, you can search for them by scanning folders. Program Files, Windows files, and Recycle Bin files are not scanned.
- Please note if you use a Samsung NVMe SSD as the Target Disk without installing the Samsung NVMe Driver, this software may not function properly.
- If the Target Disk is connected to a portable disk (an external hard drive via USB port) for cloning the disk, the software may not function properly due to the USB adaptor (gender).
How To Use
(Normal Mode) If the Source Disk is smaller than the Target Disk
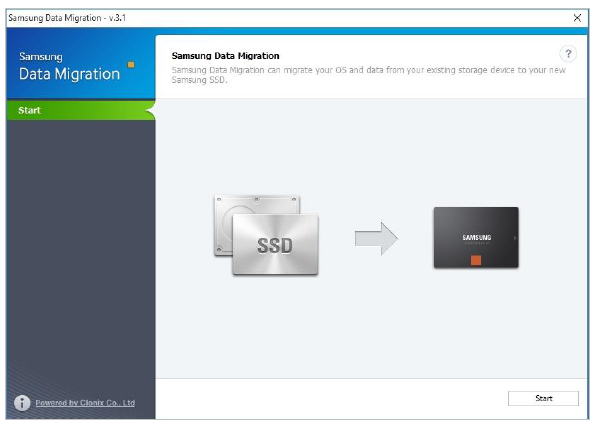
Start migration

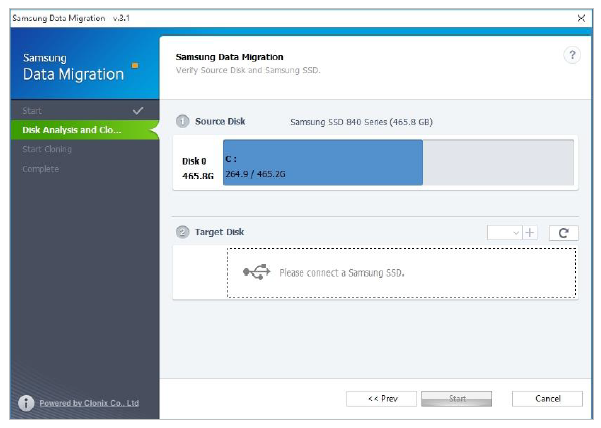
Connect Target Disk
Start cloning
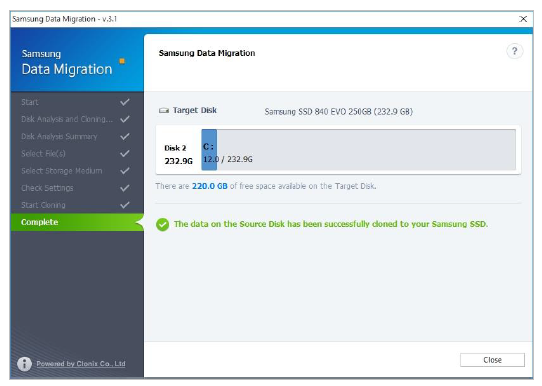
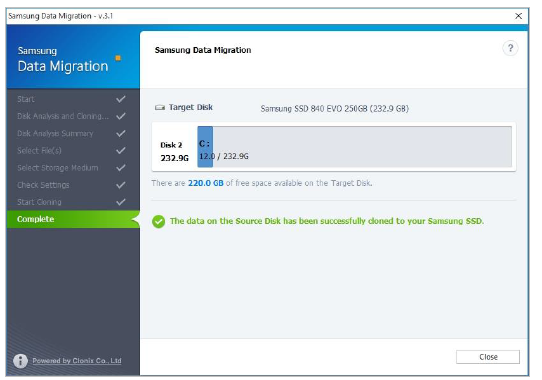
Cloning in progress
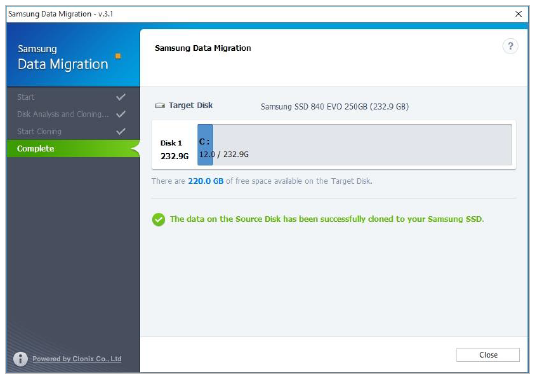
Cloning complete
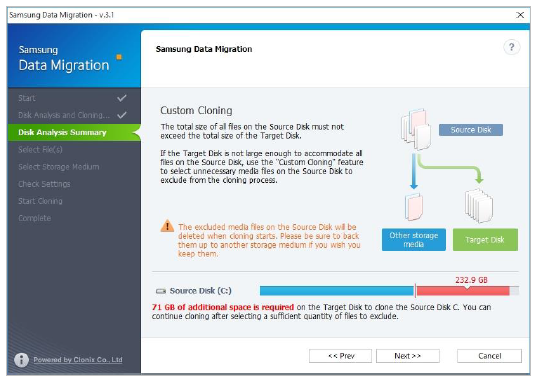
(Advanced Cloning) If the Source Disk is bigger than the Target Disk
Start migration
Connect Target Disk
On the Disk Analysis and Cloning Settings screen, click [Next>>]
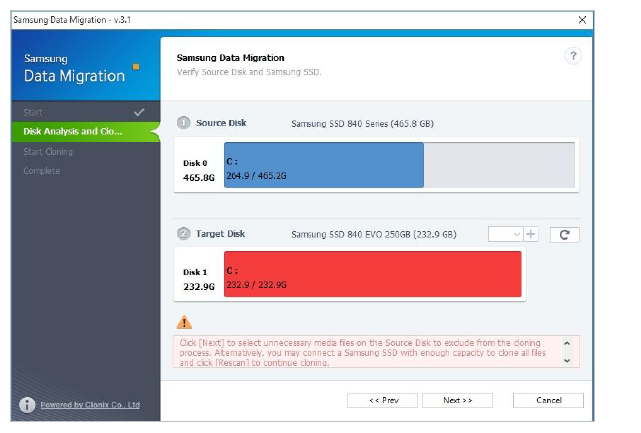
On the Disk Analysis Summary screen, click [Next>>]
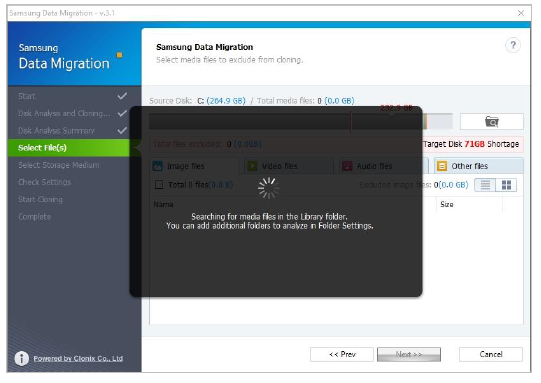
Scan for files in the Library folder to exclude from cloning.
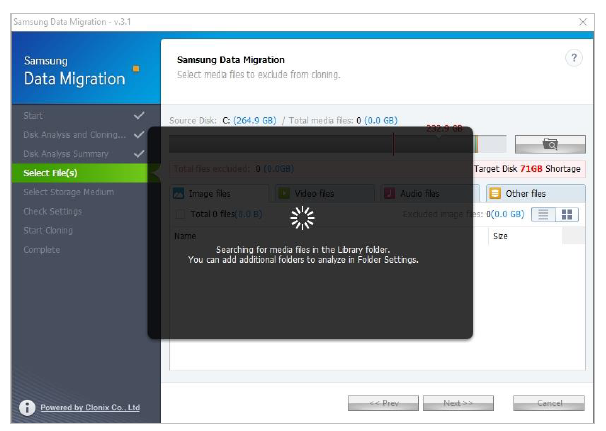
- If the list of files to be excluded is displayed, go to Step 10, If the list of files to be excluded is not displayed, go to Step 7.
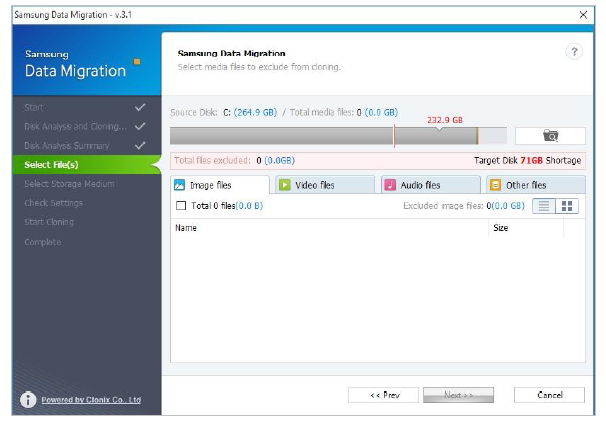
Click Browse button
Set a new folder to scan for files to exclude from cloning.
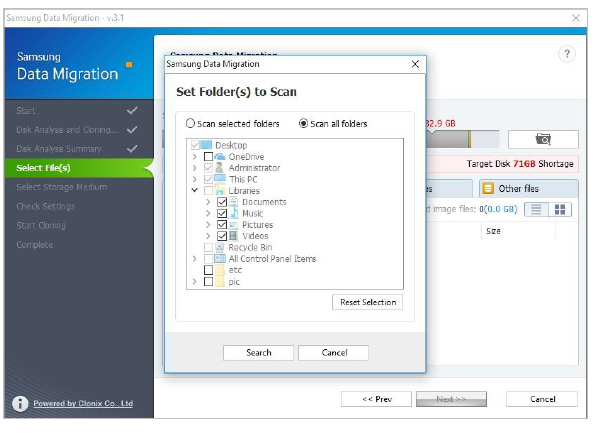
- Select “Scan selected folders” or “Scan all folders” and click [Search].
- Folder designation for scanning
- Scan selected folders: Scan only the selected folders
- Scan all folders: Scan all files on the disk
- Folder designation for scanning
- Select “Scan selected folders” or “Scan all folders” and click [Search].
Scan for files to exclude from cloning in the newly set path
Select files to exclude from cloning
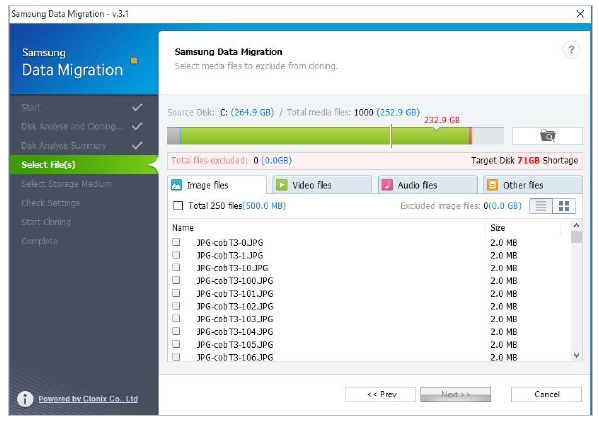
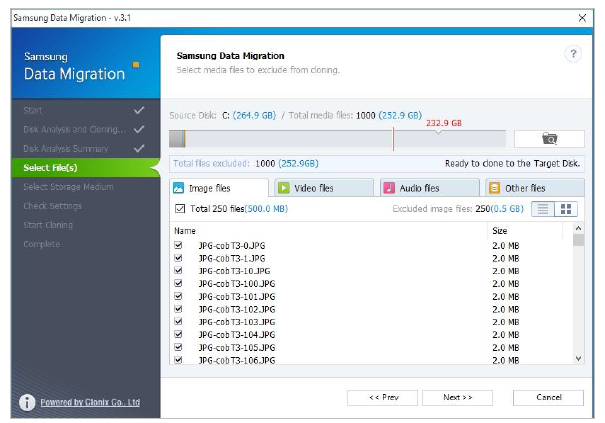
- Continue selecting files to exclude until the text below the Browse button changes to “Ready to clone to the Target Disk”.
In the screen for selecting files to exclude, click [Next>>]
- To clone everything except the selected file(s), go to Step 13.
- To delete the selected file(s) and clone everything else, go to Step 14.
- To save the selected file(s) to another storage device and continue cloning, go to Step 15.
Cloning everything except the selected files
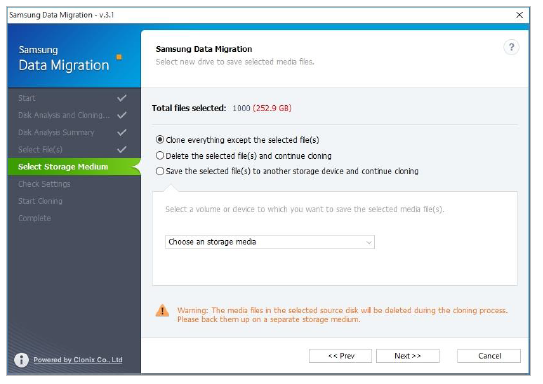
- Select the [Clone everything except the selected file(s)] option and then click the [Next>>] button.
Clone after deleting the selected files
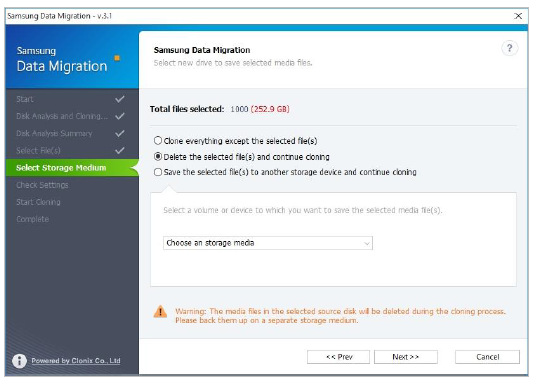
- Select the [Delete the selected file(s) and continue cloning] option and then click the [Next>>] button.
Cloning after saving the selected files on another storage device
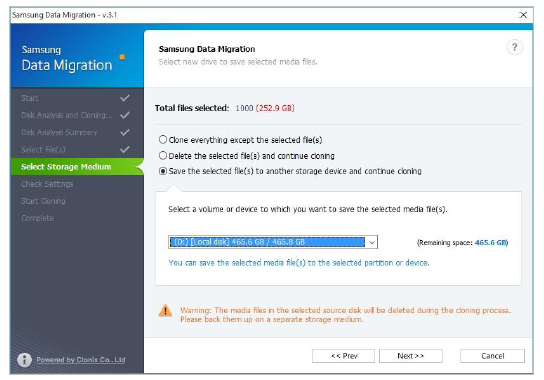
- Select the [Save the selected file(s) to another storage device and continue cloning] option.
- Select the storage device where you want to save the selected file(s).
- Click the [Next>>] button.
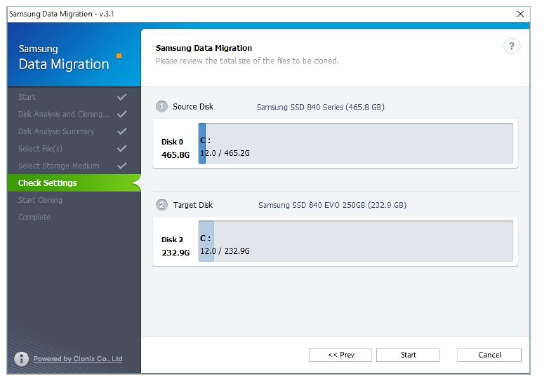
Start cloning
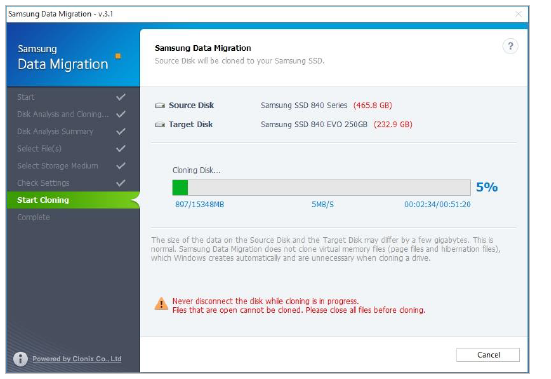
Cloning in progress
Cloning complete
Reboot from the cloned Target Disk
If Target Disk is connected to USB port
Shut down the cloned PC
Click the [Finish] button on the right bottom of the window.
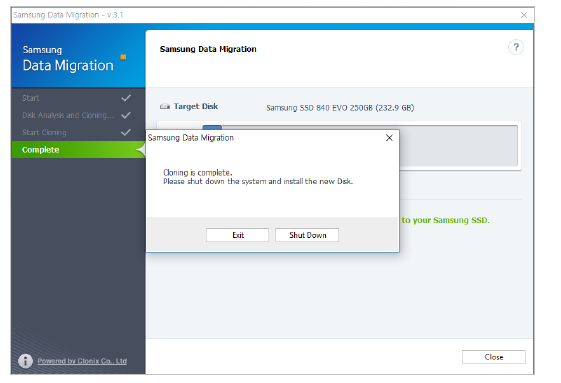
- Shut down your computer by clicking the [Shut down the system] button.
- Connect to Target Disk on PC
- Remove the USB cable that connects the Target Disk.
- Connect the cloned Target Disk. If there is only one disc in the PC that can be connected, remove the Source Disk and connect the cloned Target Disk.
Change the boot order to the cloned disk as first

- Turn on the computer power and use the BIOS entry key to enter the BIOS screen.
Enter the [Boot] menu.
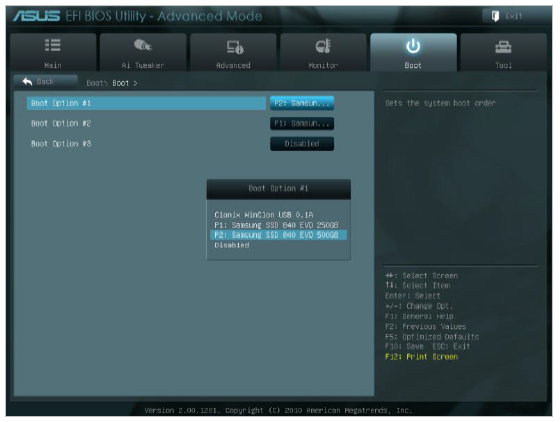
- Place the cloned Target Disk before the Source Disk in the boot order.
- Press the F10 key to save the change(s).
- Press the ESC key to exit the BIOS screen.
- Depending on the computer manufacturer or the motherboard specifications, the BIOS entry key and the boot order setting may be different.
- Boot the system from Target Disk
- Authorize the PC power and boot the system from the Target Disk.
If Target Disk is connected to SATA port
Shut down the cloned PC
Click the [Finish] button on the right bottom of the window.
- Shut down your computer by clicking the [Shut down the system] button.
Change the boot order to the cloned disk as first.
- Turn on the computer power and use the BIOS entry key to enter the BIOS screen.
Enter the [Boot] menu.
- Place the cloned Target Disk before the Source Disk in the boot order.
- Press the F10 key to save the change(s).
- Press the ESC key to exit the BIOS screen.
- Boot the system from Target Disk
- Authorize the PC power and boot the system from the Target Disk.
Depending on the computer manufacturer or the motherboard specifications, the BIOS entry key and the boot order setting may be different.
- Authorize the PC power and boot the system from the Target Disk.
Description
Samsung SSD Data Migration v3.1 is a software tool developed by Samsung to help users migrate their data from their existing disks to Samsung SSDs. It provides a simple and straightforward process for transferring data, ensuring a smooth transition to your new SSD.
Faqs
Can I use Samsung SSD Data Migration v3.1 with non-Samsung SSDs?
Is Samsung SSD Data Migration v3.1 compatible with Mac computers?
What happens to the data on my source disk during the migration process?
Can I migrate my operating system using Samsung SSD Data Migration v3.1?
Do I need to reinstall my applications after migrating my data using Samsung SSD Data Migration v3.1?
Can I use Samsung SSD Data Migration v3.1 to migrate data between two Samsung SSDs?
What happens if the destination disk is smaller than the source disk?
Can I use Samsung SSD Data Migration v3.1 to migrate data from a laptop to a desktop?
Is it possible to cancel the migration process once it has started?
Where can I find additional support for Samsung SSD Data Migration v3.1?
Leave a Comment