Samsung SyncMaster Computer 930B Instruction Manual
Content
Introduction
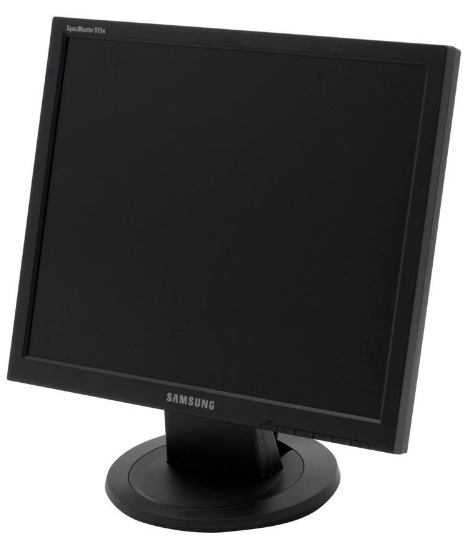
There is a 19-inch LCD monitor called the Samsung SyncMaster 930B that is ideal for users who require a display that is both clear and vivid. This monitor, which has a resolution of 1280x1024, provides crisp graphics and is ideal for use in both office work and multimedia applications. Because of its streamlined appearance and dependable performance, it is an excellent option for regular computing requirements.
Detailed Specifications
- Display: 19-inch TFT-LCD
- Resolution: 1280 x 1024
- Brightness: 300 cd/m²
- Contrast Ratio: 700:1
- Response Time: 12 ms
- Viewing Angle: 140°/120° (H/V)
- Connectivity: Analog RGB (D-Sub), Digital DVI
- Power Consumption: 34 W (typical), 0.3 W (standby)
- Dimensions: 444.7 x 344.7 x 184.5 mm (with stand)
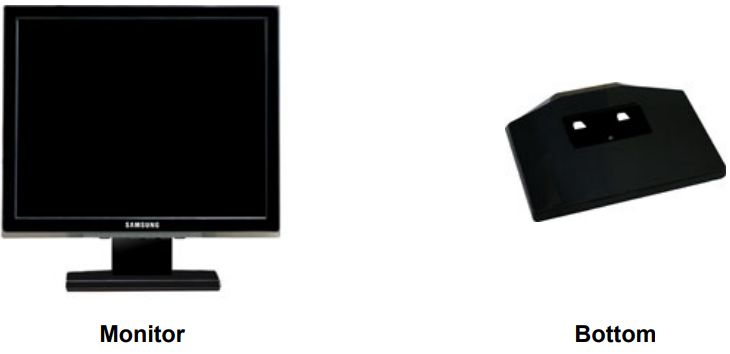
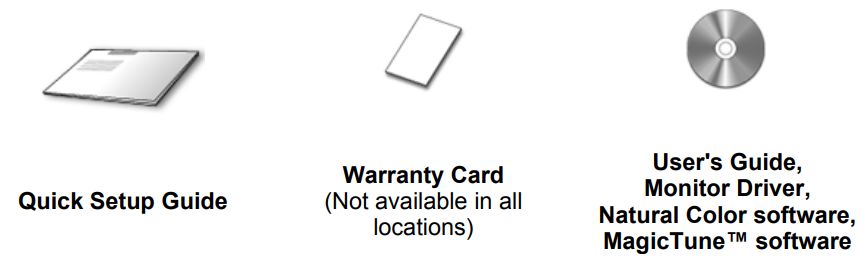
Unpacking
Manual
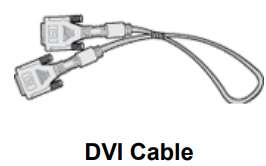
Cable

Sold separately
Front
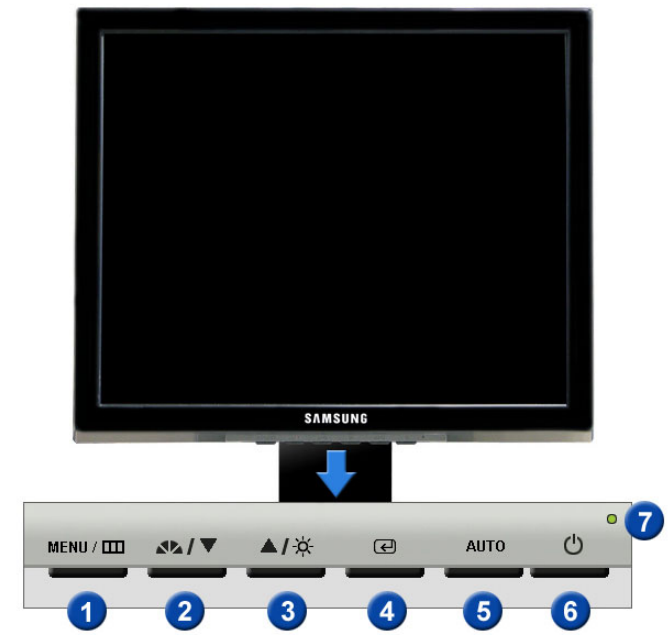
- Menu button
 : Opens the OSD menu. Also, use to exit the OSD menu or return to the previous menu.
 - MagicBright button
 : MagicBright is a new feature providing an optimum viewing environment depending on the contents of the image you are watching. Currently, six different modes are available: Custom, Text, Internet, Game, Sport, and Movie. Each mode has its own pre-configured brightness value. You can easily select one of six settings by simply pressing the MagicBright control buttons.
 - Custom
Although the values are carefully chosen by our engineers, the pre-configured values may not be comfortable to your eyes depending on your taste.
If this is the case, adjust the brightness and contrast by using the OSD menu. - Text : Normal brightness
For documentations or works involving heavy text. - Internet : Medium brightness
For working with a mixture of images such as text and graphics. - Game
For watching motion pictures such as a game. - Sport
For watching motion pictures such as a sport. - Movie : High brightness
For watching motion pictures such as a DVD or Video CD.
- Custom
- Brightness button
.png) : When OSD is not on the screen, push the button to adjust brightness.
: When OSD is not on the screen, push the button to adjust brightness.- Adjust buttons [
.png) /
/.png) ]: Adjust items in the menu.
]: Adjust items in the menu.
- Adjust buttons [
- Enter button [ ] / Source button: Activates a highlighted menu item.
Push the 'SOURCE', then selects the video signal while the OSD is off. (When the source button is pressed to change the input mode, a message appears in the center of the screen displaying the current mode -- analog or digital input signal.) Note : If you select the digital mode, you must connect your monitor to the graphic card's port using the DVI cable. - Auto button: Use this button for auto adjustment.
- Power button: Use this button for turn the monitor on and off.
- Power indicator: This light glows green during normal operation, and blinks green once as the monitor saves your adjustments.
See PowerSaver described in the manual for further information regarding power saving functions. For energy conservation, turn your monitor OFF when it is not needed, or when leaving it unattended for long periods.
Rear
(The configuration at the back of the monitor may vary from product to product.)
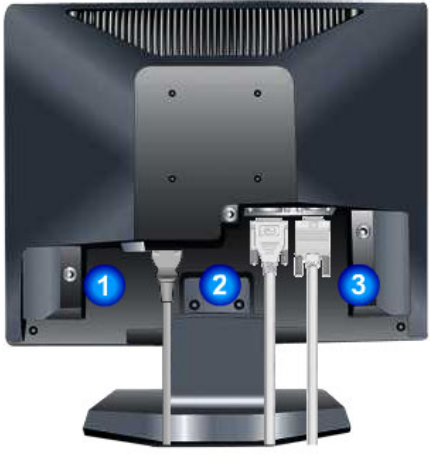
- Power port: Connect the power cord for your monitor to the power port on the back of the monitor.
- DVI port: Connect the DVI cable to the DVI port on the back of your monitor.
- D-sub 15-pin port: Connect the signal cable to the 15-pin, D-sub connector on the back of your monitor.
See Connecting the Monitor for further information regarding cable connections.
Connecting the Computer
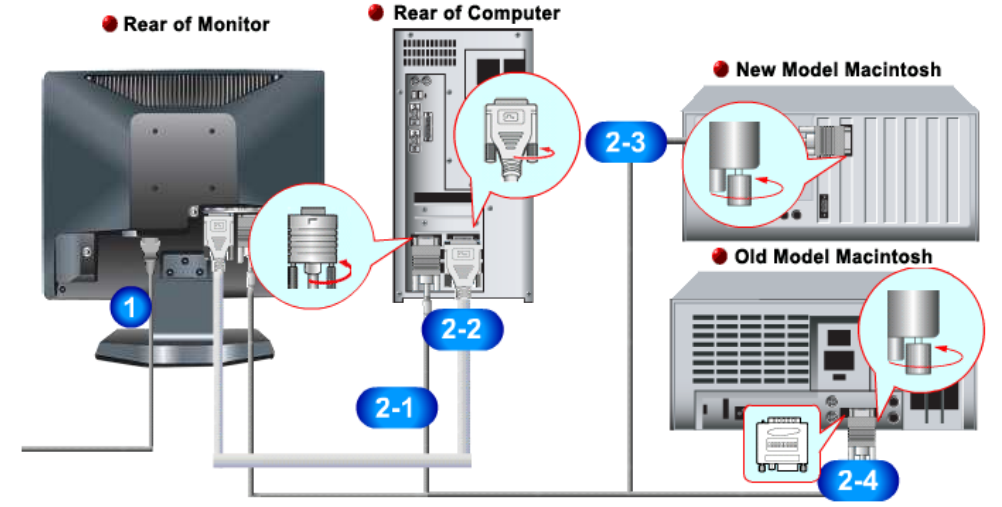
- Connect the power cord for your monitor to the power port on the back of the monitor. Plug the power cord for the monitor into a nearby outlet.
Using the D-sub (Analog) connector on the video card.
Connect the signal cable to the 15-pin, D-sub connector on the back of your monitor.
Using the DVI (Digital) connector on the video card.
Connect the DVI cable to the DVI port on the back of your monitor.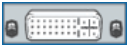
- Connected to a Macintosh.
Connect the monitor to the Macintosh computer using the D-SUB connection cable. - In the case of an old model Macintosh, you need to connect the monitor using a special Mac adapter.
- Turn on your computer and monitor. If your monitor displays an image, installation is complete.
Using the Stand
Monitor Assembly
Attaching a Base
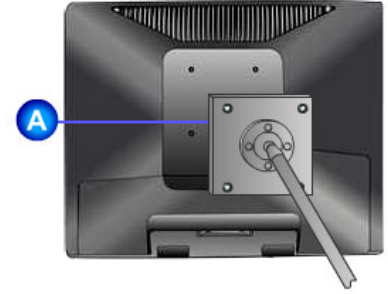
This monitor accepts a 75mm x 75mm VESA-compliant mounting interface pad.
- Monitor
- Mounting interface pad
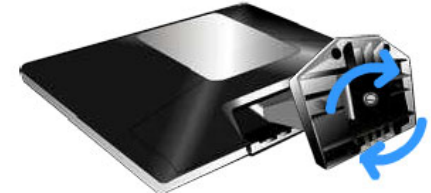
- Turn off your monitor and unplug its power cord.
- Lay the LCD monitor face-down on a flat surface with a cushion beneath it to protect the screen.
- Remove four screws and then remove the stand from the LCD monitor.
- Align the mounting interface Pad with the holes in the rear cover mounting pad and secure it with four screws that came with the arm-type base, wall mount hanger or other base.
Description
The Samsung SyncMaster Computer 930B is a reliable and versatile monitor, built for productivity and performance. The 19-inch screen provides ample space for multitasking and delivers crisp, vibrant images. The monitor features both analog and digital connectivity options, allowing users to connect to various devices easily. With a sleek design and adjustable stand, the 930B is an excellent choice for professionals seeking a high-quality monitor for their daily computing needs.
Installing the Monitor Driver (Automatic)
When prompted by the operating system for the monitor driver, insert the CD-ROM included with this monitor. Driver installation is slightly different from one operating system to another. Follow the directions appropriate for the operating system you have.
Prepare a blank disk and download the driver program file at the Internet web site shown here.
Internet web site
- http://www.samsung.com/ (Worldwide)
- http://www.samsungusa.com/monitor (USA)
- http://www.sec.co.kr/monitor (Korea)
- http://www.samsungmonitor.com.cn/ (China)
Windows ME
- Insert the CD into the CD-ROM drive.
- Click "Windows ME Driver".
Choose your monitor model in the model list, then click the "OK" button.
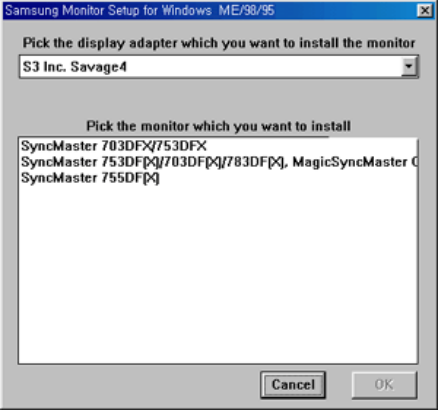
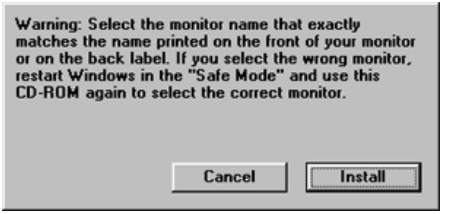
- Click the "Install" button in the "Warning" window.
Monitor driver installation is completed.
Windows XP/2000
- Insert CD into the CD-ROM drive.
- Click “Windows XP/2000 Driver”
Choose your monitor model in the model list, then click the "OK" button.
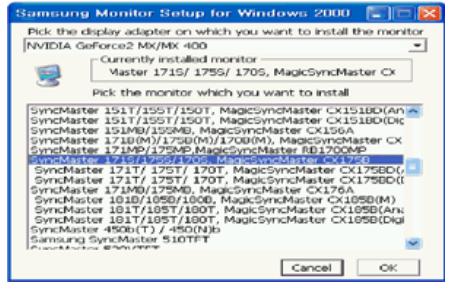
If you can see the following message window, then click the "Continue Anyway" button. Then click the "OK" button.
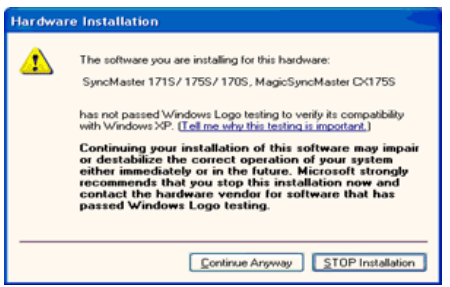
This monitor driver is under certifying MS logo,and this installation don't damage your system.The certified driver will be posted on Samsung Monitor Homepage http://www.samsung.com/.
- Monitor driver installation is completed.
Installing the Monitor Driver (Manual)
When prompted by the operating system for the monitor driver, insert the CD-ROM included with this monitor. Driver installation is slightly different from one operating system to another. Follow the directions appropriate for the operating system you have.
Prepare a blank disk and download the driver program file at the Internet website shown here.
Internet website:
- http://www.samsung.com/ (Worldwide)
- http://www.samsungusa.com/monitor (USA)
- http://www.sec.co.kr/monitor (Korea)
- http://www.samsungmonitor.com.cn/ (China)
Microsoft Windows XP Operating System
- Insert CD into the CD-ROM driver.
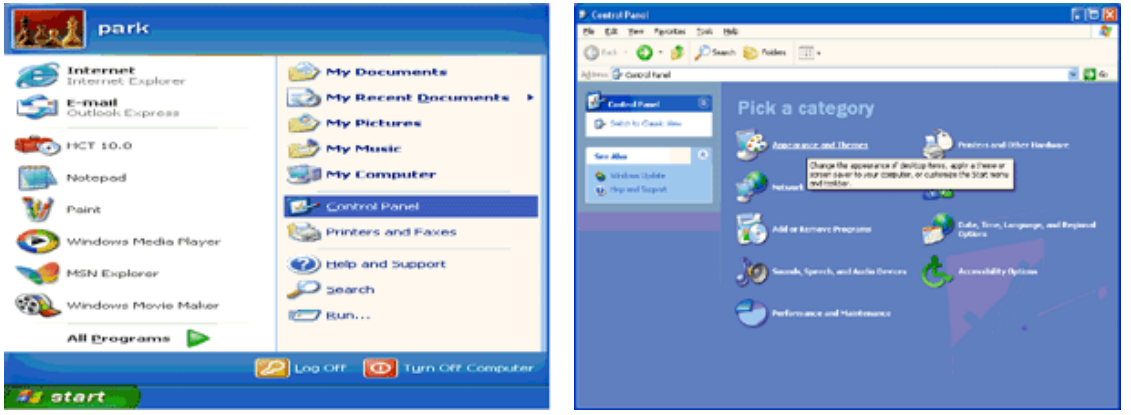
Click "Start" —> "Control Panel" then click the "Appearance and Themes" icon.
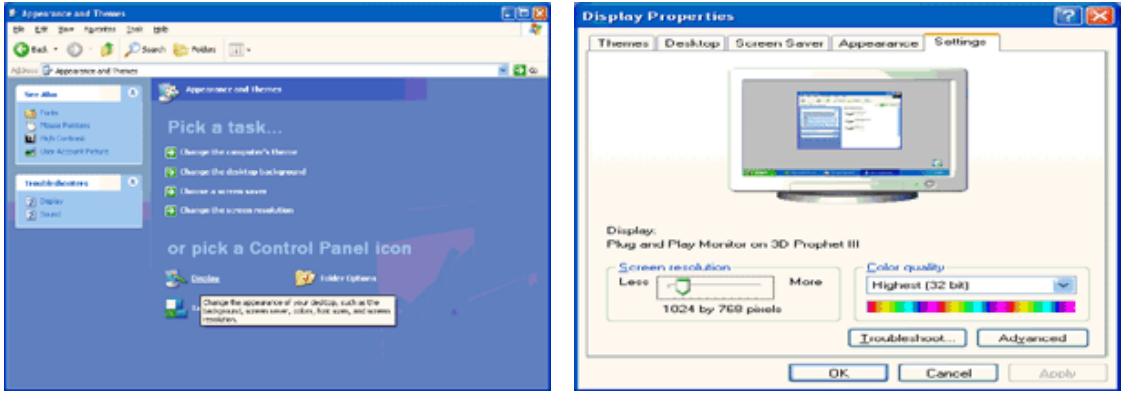
Click "Display" icon and choose the "Settings" tab then click "Advanced..".
Click the "Properties" button on the "Monitor" tab and select "Driver" tab.
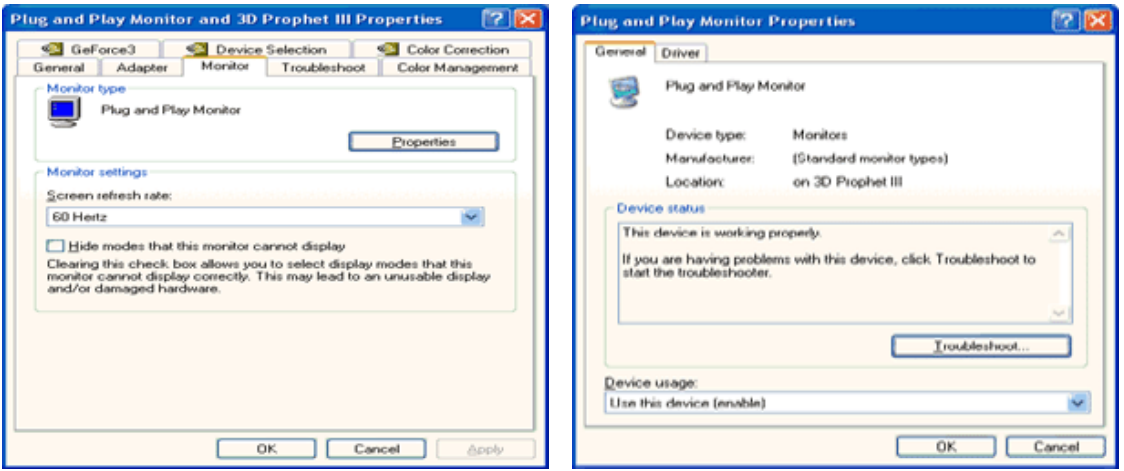
Click "Update Driver.." and select "Install from a list or.." then click "Next" button.

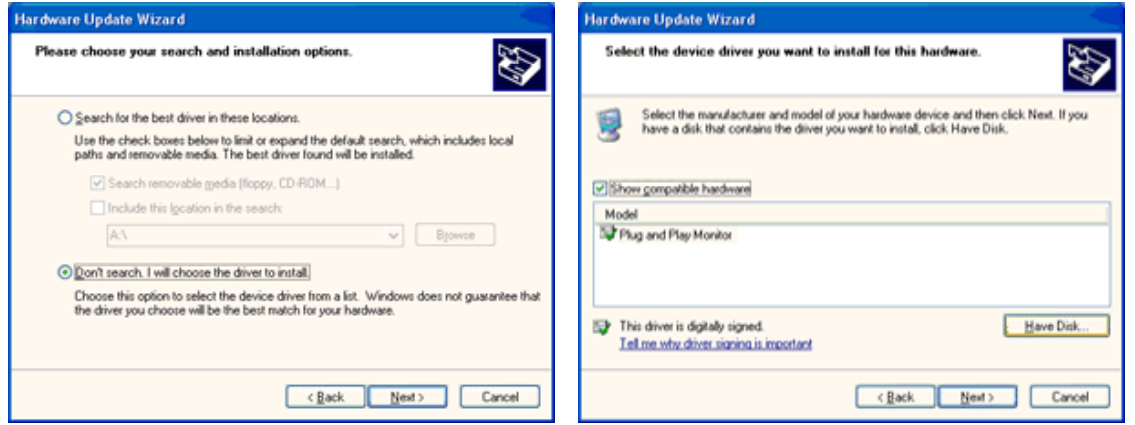
Select "Don't search ,I will.." then click "Next" and then click "Have disk".
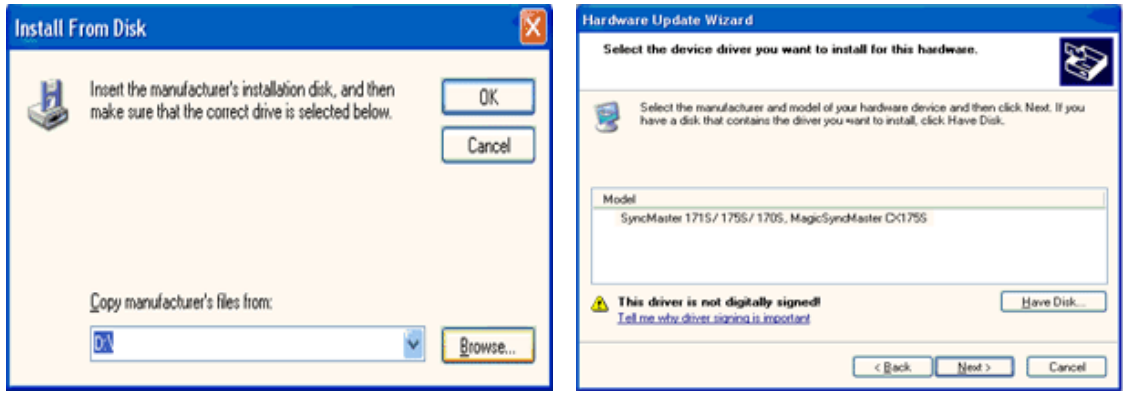
Click the "Browse" button then choose A:(D:\Driver) and choose your monitor model in the model list and click the "Next" button.
If you can see following "Message" window, then click the "Continue Anyway" button. Then click "OK" button.
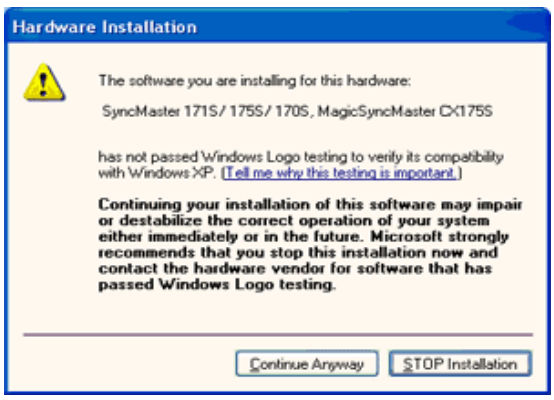
- This monitor driver is under certified MS logo,and this installation doesn't damage your system.The certified driver will be posted on Samsung Monitor homepage. http://www.samsung.com/
Click the "Close" button then click "OK" button continually.
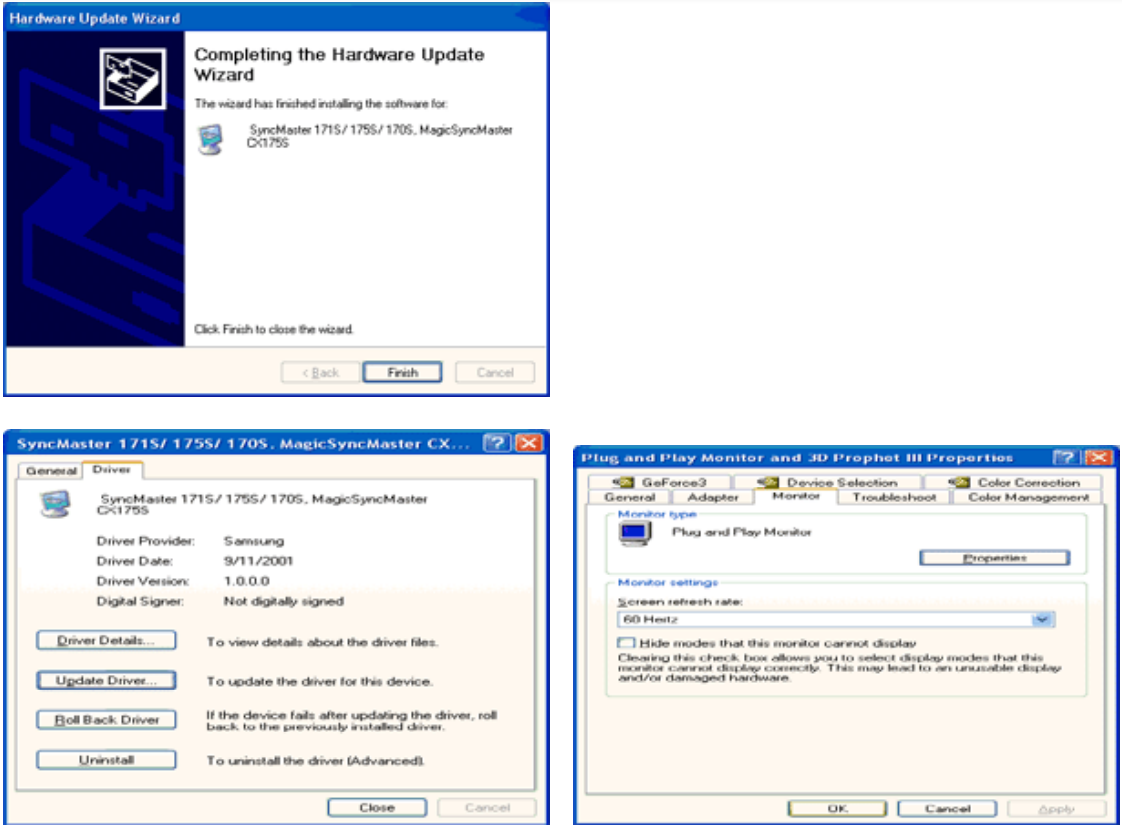
- Monitor driver installation is completed.
Microsoft Windows 2000 Operating System
When you can see "Digital Signature Not Found" on your monitor, follow these steps.
- Choose "OK" button on the "Insert disk" window.
- Click the "Browse" button on the "File Needed" window.
- Choose A: (D:\Driver) then click the "Open" button and then click "OK" button.
How to install
- Click "Start" , "Setting" , "Control Panel".
- Double click the "Display" Icon.
- Choose the "Settings" tab and then click "Advanced..".
- Choose "Monitor".
- Case 1: If the "Properties" button is inactive, it means your monitor is properly configured. Please stop installation
- Case2: If the "Properties" button is active, click the "Properties" button then follow next steps continually.
- Click "Driver" and then click on "Update Driver.." then click on the "Next" button.
- Choose "Display a list of the known drivers for this device so that I can choose a specific driver" then click "Next" and then click "Have disk".
- Click the "Browse" button then choose A:(D:\Driver).
- Click the "Open" button, then click "OK" button.
- Choose your monitor model and click the "Next" button then click "Next" button.
- Click the "Finish" button then the "Close" button.
If you can see the "Digital Signature Not Found" window then click the "Yes"button. And click the "Finish" button then the "Close" button.
Microsoft Windows Millennium Operating System
- Click "Start" , "Setting" , "Control Panel".
- Double-click "Display" icon.
- Select the "Settings" tab and click "Advanced Properties" button.
- Select the "Monitor" tab.
- Click the "Change" button in the "Monitor Type" area.
- Choose "Specify the location of the driver".
- Choose "Display a list of all the driver in a specific location.." then click "Next" button.
- Click the "Have Disk" button
- Specify A:\(D:\driver) then click "OK" button.
- Select "Show all devices" and choose the monitor that corresponds to the one you connected to your computer and click "OK".
- Continue choosing "Close" button and "OK" button until you close the Display Properties dialogue box.
Microsoft Windows NT Operating System
- Click Start, Settings, Control Panel, and then double-click Display icon.
- In Display Registration Information window, click Settings Tab and then click All Display Modes.
- Select a mode that you wish to use (Resolution, Number of colors and Vertical frequency) and then click OK.
- Click Apply button if you see the screen working normally after clicking Test. If the screen is not normal, change to a different mode (lower mode of resolution, colors or frequency).
If there is no Mode at All Display Modes, select the level of resolution and vertical frequency by referring to the Preset Timing Modes in the user guide.
Linux Operating System
To execute X-Window, you need to make the X86Config file, which is a type of system setting file.
- Press Enter at the first and the second screen after executing the X86Config file.
- The third screen is for setting your mouse.
- Set a mouse for your computer.
- The next screen is for selecting a keyboard.
- Set a keyboard for your computer.
- The next screen is for setting your monitor.
- First of all, set a horizontal frequency for your monitor. (You can enter the frequency directly.)
- Set a vertical frequency for your monitor. (You can enter the frequency directly.)
- Enter the model name of your monitor. This information will not affect the actual execution of X-Window.
- You have finished setting up your monitor.
Execute X-Window after setting other requested hardware.
Setup Guide
- Remove the monitor from its packaging and attach the base to the stand.
- Connect the monitor to your computer using the appropriate cable (analog RGB or digital DVI).
- Plug the power cord into the monitor and an electrical outlet.
- Turn on the monitor and adjust settings as necessary (brightness, contrast, etc.).
- Adjust the height, tilt, and swivel of the monitor to your desired position.
Natural Color
Natural Color Software Program

One of the recent problems in using a computer is that the color of the images printed out by a printer or other images scanned by a scanner or a digital camera are not the same as those shown on the monitor. The Natural Color S/W is the very solution for this problem. It is a color administration system developed by Samsung Electronics in association with Korea Electronics & Telecommunications Research Institute (ETRI). This system is available only for Samsung monitors and makes the color of the images on the monitor the same as the printed or scanned images. For more information, refer to Help (F1) in the software program.
How to install the Natural Color software
- Insert the CD included with the Samsung monitor into the CD-ROM Drive. Then, the initial screen of the program Natural Color will be executed. Click Natural Color on the initial screen to install the Natural Color software.
- To install the program manually, insert the CD included with the Samsung monitor into the CD-ROM Drive, click the [Start] button of Windows and then select [Execute].
- Enter D:\color\eng\setup.exe and then press the <Enter> key.
(If the drive where the CD is inserted is not D:\, enter the applicable drive.)
How to delete the Natural Color software program
- Select "Setting/Control Panel" on the "Start" menu and then double-click "Add/Delete a program".
- Select Natural Color from the list and then click the "Add/Delete" button.
Troubleshooting
- Problem: No display.
Solution: Ensure that the monitor is properly connected to the computer and the power cord is plugged in. - Problem: Flickering screen.
Solution: Adjust the refresh rate in your graphics card settings or replace the video cable. - Problem: Distorted image.
Solution: Make sure the monitor is set to the correct input (analog or digital). If the issue persists, try adjusting the resolution or contacting Samsung for support.
Pros & Cons
Pros
- High-resolution display
- Both analog and digital connectivity
- Sleek, space-saving design
- Adjustable stand
Cons
- Limited to 19-inch screen size
- 12 ms response time may be slow for gaming
Customer Reviews
Users have praised the Samsung SyncMaster Computer 930B for its excellent image quality, sleek design, and versatile connectivity options. The adjustable stand is also a popular feature, allowing users to easily find their most comfortable viewing position. However, some users have expressed concerns about the relatively high price point compared to other 19-inch monitors on the market.
Faqs
What is the Samsung SyncMaster 930B's screen size?
What are the dimensions of the Samsung SyncMaster 930B?
Is the Samsung SyncMaster 930B height-adjustable?
What is the Samsung SyncMaster 930B's viewing angle?
Is the Samsung SyncMaster 930B suitable for gaming?
Leave a Comment