
Siglent Technologies SDS1000CML+ Digital Oscilloscope User Manual
Content
Introduction: Siglent Technologies SDS1000CML+ Digital Oscilloscope Overview
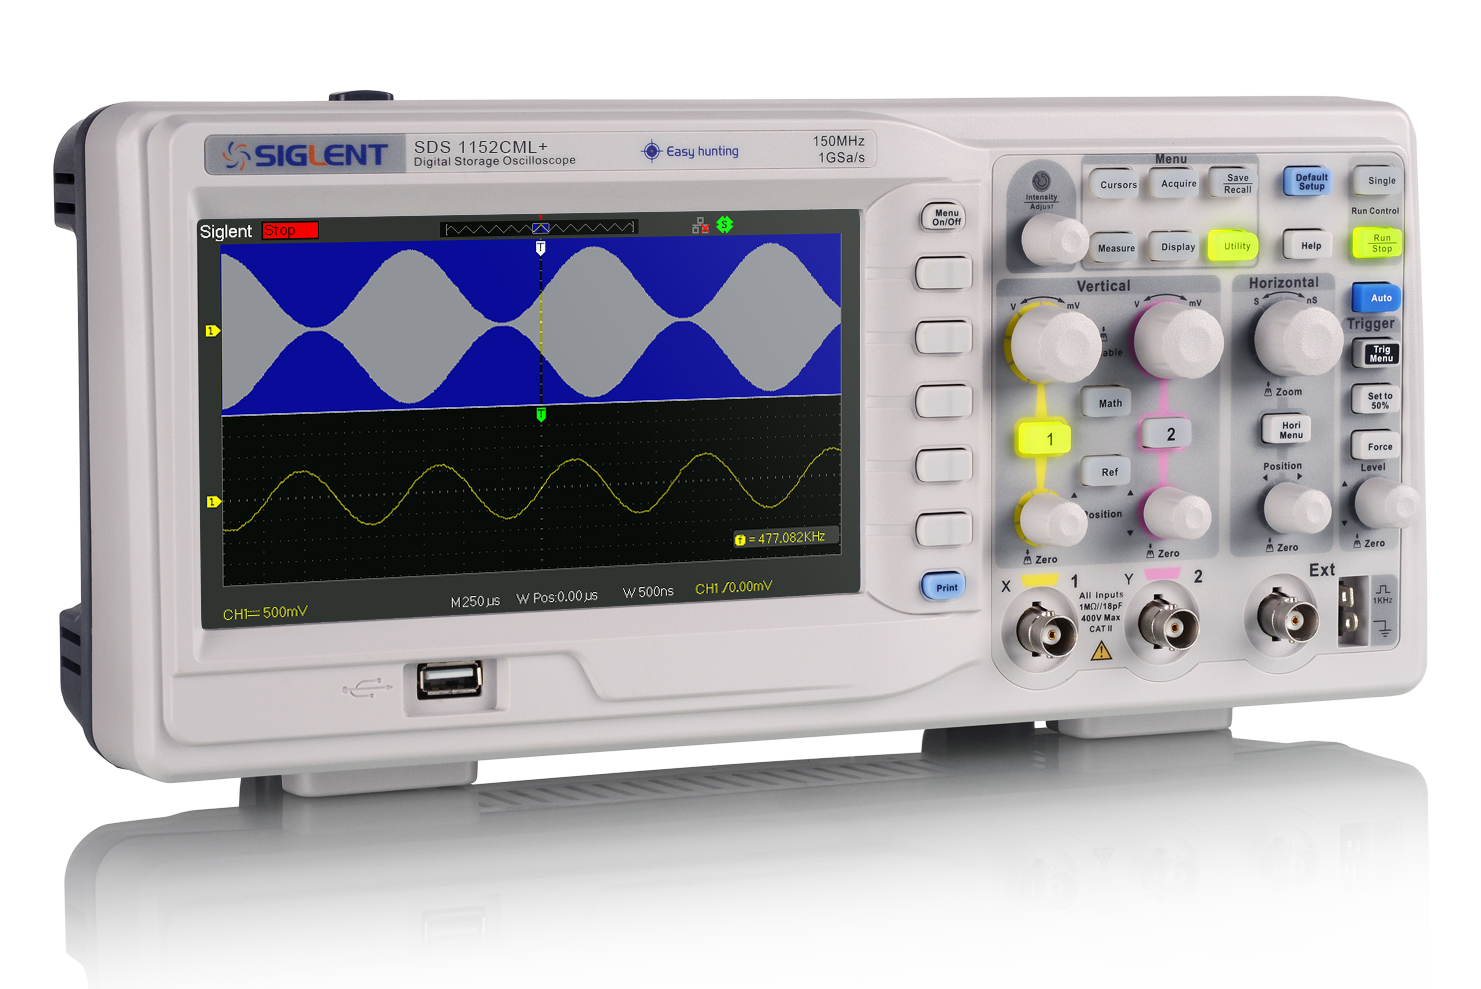
The Siglent Technologies SDS1000CML+ Digital Oscilloscope is an entry-level bench oscilloscope designed for students, hobbyists, technicians, and engineers who need dependable signal analysis without paying for a higher-end lab instrument. It combines a 7-inch color TFT LCD, dual-channel input, and a 1 GSa/s real-time sampling rate to deliver clear waveform capture for everyday electronics work. The series is especially attractive for users who want a practical digital storage oscilloscope with LAN and USB connectivity, pass/fail testing, built-in measurements, and waveform recording in one compact unit.
One of its biggest strengths is value. The SDS1000CML+ series offers bandwidth options around 70 MHz, 100 MHz, and 150 MHz, making it suitable for general troubleshooting, education, embedded development, and routine service work. Its 2 Mpts memory depth helps preserve waveform detail during longer captures, while the built-in measurement suite and FFT analysis make it useful for both time-domain and frequency-domain tasks. The oscilloscope also supports SCPI control over USB-TMC and LAN with VXI-11, which is a major advantage for automated test setups.
Estimated pricing typically falls in the budget-to-midrange category, with availability depending on region and distributor. In many markets, the 100 MHz model is sold at a price that is competitive with other entry-level digital storage oscilloscopes from Rigol, OWON, and Hantek, making it a strong choice for users who want a feature-rich instrument at a sensible cost.
Specifications: Siglent SDS1000CML+ Series Digital Storage Oscilloscope Specs
- Bandwidth options: 70 MHz, 100 MHz, and 150 MHz depending on model.
- Channels: 2 analog channels plus external trigger input.
- Maximum real-time sampling rate: 1 GSa/s.
- Equivalent sampling rate: up to 50 GSa/s for repetitive signals.
- Memory depth: 2 Mpts for longer waveform capture and better detail retention.
- Display: 7-inch color TFT LCD with 800 × 480 resolution.
- Measurements: 32 automatic measurement parameters with multiple on-screen readouts.
- Analysis tools: FFT with multiple window functions, cursors, math functions, digital filter, and waveform recorder.
- Connectivity: USB Host, USB Device, LAN, USB-TMC, and VXI-11 support.
- Special functions: pass/fail testing with TTL output, hardware frequency counter, and SCPI remote control.
- Power input: universal AC support in the 100–240 V range.
Compared with similar entry-level oscilloscopes, the SDS1000CML+ stands out for its strong memory depth, network control options, and feature-rich measurement suite. It is more capable than many basic scope models that lack LAN connectivity or advanced capture tools, while remaining easier to use than more complex midrange instruments.
Detailed Description: How the Siglent SDS1000CML+ Works
The Siglent Technologies SDS1000CML+ Digital Oscilloscope converts incoming electrical signals into a visual waveform so users can observe amplitude, frequency, timing, and signal shape. Each channel samples the input signal at high speed, stores the captured data in memory, and displays it on the LCD for real-time analysis. The 2 Mpts record length helps preserve more of the signal, which is especially useful when looking for glitches, intermittent faults, or long periodic events.
This model is well suited for electronic repairs, classroom labs, power supply testing, microcontroller debugging, audio work, and basic RF signal inspection within its bandwidth limits. The included pass/fail test function is especially valuable in production or service environments where repeated waveform checks are needed. Its compact cabinet-style design and portable bench format make it easy to place on a small workbench or move between stations.
The build quality is practical and functional, with a straightforward front panel and a clear menu system designed for quick operation. Users generally benefit from its intuitive controls, readable screen, and useful shortcut features. For technicians who want a reliable digital storage oscilloscope for routine diagnostics, it offers a balanced mix of usability and capability.
Setup Guide: How to Set Up the SDS1000CML+ Oscilloscope
Start by placing the oscilloscope on a stable, dry surface with adequate ventilation. Connect the power cord to an appropriate AC outlet and confirm that the input voltage matches the instrument’s supported range. Before connecting any signal, inspect probes, cables, and leads for damage.
- Connect the probe to Channel 1 or Channel 2 and attach the ground clip to a proper reference point.
- Set the probe attenuation to match the probe, such as 1X or 10X, and confirm the oscilloscope channel setting.
- Use the AutoSet function or manually adjust timebase, volts/div, and trigger level for the signal under test.
- Choose the proper input coupling, such as DC, AC, or ground, based on the measurement goal.
- Enable FFT, cursors, or automatic measurements when frequency, timing, or amplitude data is needed.
- For remote control, connect USB or LAN and configure SCPI-compatible software if automation is required.
If the waveform appears unstable, check trigger source, trigger mode, and probe grounding first. Keep safety in mind when measuring mains voltage or high-energy circuits, and never connect the probe ground clip to a live line conductor.
Troubleshooting: Common SDS1000CML+ Problems and Fixes
Most issues with the SDS1000CML+ are simple to diagnose. If no waveform appears, verify the probe connection, channel enable status, input coupling, and trigger settings. If the display is frozen or the trace is missing, reset the timebase and trigger level or load default settings.
- Weak or noisy signal: check probe compensation, ground lead length, and proper probe attenuation.
- Wrong amplitude reading: confirm whether the probe is set to 1X or 10X in both the probe and channel menu.
- Unstable waveform: adjust trigger slope, trigger source, and trigger level.
- Unexpected FFT result: reduce noise, narrow the frequency span, or confirm signal periodicity.
- Remote connection failure: verify LAN settings, USB drivers, and SCPI software configuration.
No widely publicized error code system is commonly used for everyday operation on this series, so most problems are handled through menu settings and signal checks rather than code-based fixes. Preventive care includes using proper probes, avoiding excessive input voltage, and keeping the instrument clean and ventilated. For support, users should contact the authorized Siglent distributor in their region or the brand’s official technical support channel and retain proof of purchase for warranty service.
Pros & Cons: Siglent SDS1000CML+ Review
Pros
- Excellent value for an entry-level digital oscilloscope with professional features.
- 2 Mpts memory depth helps capture longer events and preserve signal detail.
- LAN and USB connectivity make it suitable for automated test workflows.
- 32 automatic measurements and FFT analysis improve productivity.
- Pass/fail output is useful for lab, QA, and production checks.
- 7-inch display offers a comfortable viewing area for everyday use.
Cons
- Only two channels, which may limit advanced multi-signal debugging.
- Bandwidth ceiling is lower than midrange and advanced lab oscilloscopes.
- Display resolution is adequate but not as sharp as newer higher-end models.
- Better suited to general-purpose electronics than demanding high-frequency work.
Overall, the Siglent Technologies SDS1000CML+ Digital Oscilloscope delivers strong value for money. It compares favorably with other budget oscilloscopes by combining useful automation, storage, and connectivity features in a simple package, though users needing more channels or higher bandwidth may want a more advanced alternative.
Customer Reviews: What Users Say About the SDS1000CML+
Typical user feedback highlights ease of use, solid performance, and a helpful feature set for the price. Many buyers rate it around 4 to 5 stars for hobby electronics, repair work, and educational labs. Users often praise the clear menu layout, responsive controls, and dependable waveform capture.
Common complaints usually focus on the two-channel limit and the fact that it is not intended for high-end mixed-signal or very high-frequency applications. Some users also note that the screen resolution is functional rather than premium. A frequent testimonial theme is that it “does more than expected for the price,” especially when used for general troubleshooting and bench measurements.
For shoppers seeking an affordable digital storage oscilloscope with remote control, measurement automation, and practical everyday capability, this model is often recommended as a smart purchase. It is especially appealing to students, makers, and technicians who want a reliable first lab scope.
Faqs
How do I set up the siglent technologies SDS1000CML+ Digital Oscilloscope for the first time?
Why is the waveform on my siglent technologies SDS1000CML+ Digital Oscilloscope unstable or hard to read?
What are the most useful features of the siglent technologies SDS1000CML+ Digital Oscilloscope for everyday lab work?
Can the siglent technologies SDS1000CML+ Digital Oscilloscope connect to a PC for remote control or data capture?
How do I use the math and FFT functions on the siglent technologies SDS1000CML+ Digital Oscilloscope effectively?
What should I do if the siglent technologies SDS1000CML+ Digital Oscilloscope does not trigger correctly?
What probes and signal limits should I check before using the siglent technologies SDS1000CML+ Digital Oscilloscope?
How should I maintain and care for the siglent technologies SDS1000CML+ Digital Oscilloscope to keep it accurate?
More siglent technologies manuals
Leave a Comment