Startech DisplayPort KVM Switch & Cables SV231DPU2 User Guide

Content
Introduction
The StarTech DisplayPort KVM Switch & Cables SV231DPU2 is a versatile device that allows users to control two computer systems from a single workstation. Manufactured by StarTech.com, this KVM switch supports high-resolution video output up to 4K at 30Hz and features a built-in USB 2.0 hub for additional peripherals. Launched in 2014, it is priced at approximately $99. This product is ideal for environments requiring efficient management of multiple systems, such as graphic design and healthcare.
Packaging Contents
- 1 x 2-Port DisplayPort KVM Switch
- 2 x 4ft (1.2m) DisplayPort KVM Cables
- 1 x Instruction Manual
System Requirements
- DisplayPort display device (for example, monitor, projector, TV, etc.)
- A DisplayPort output and available USB port per computer
- USB keyboard and mouse
- A video source and display that support up to 4K at 30Hz
Note: The SV231DPU2 KVM switch supports DisplayPort 1.1
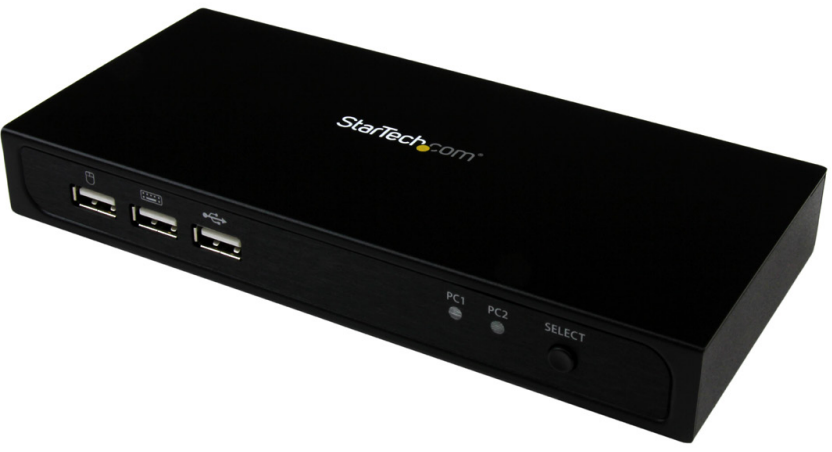
StarTech Diagram
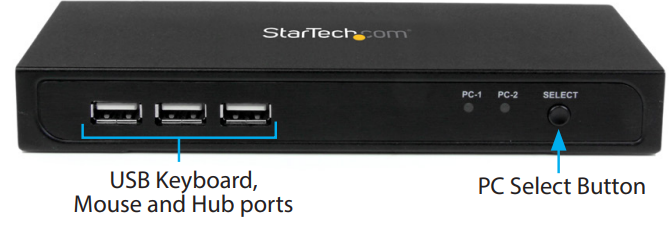
Front View

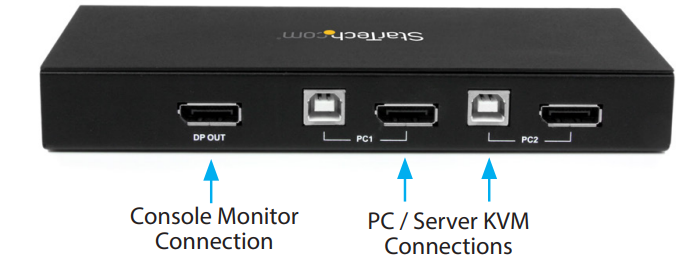
Rear View

Specifications
- Supports up to two DisplayPort computers and one console
- DisplayPort 1.2 technology with 4K resolution at 60Hz
- Hotkey switching and push-button control
- USB 3.0 hub with two ports for peripheral devices
- Audible and visual indicators for switching confirmation
- Compact design with a durable metal enclosure
- Includes two DisplayPort cables and one USB cable
Description
The StarTech DisplayPort KVM Switch & Cables SV231DPU2 is built with robust construction and features a sleek, compact design that fits easily on any desktop. The device includes two DisplayPort input ports and one DisplayPort output port, allowing seamless integration with high-resolution monitors. Additionally, it has a built-in USB 3.0 hub, providing two USB ports for connecting peripheral devices such as flash drives, printers, or external hard drives.
The switch supports hotkey switching and push-button control, making it easy to switch between the connected computers. It also includes audible and visual indicators to confirm the switch, ensuring minimal disruption to your workflow.
Installation
Hardware Installation
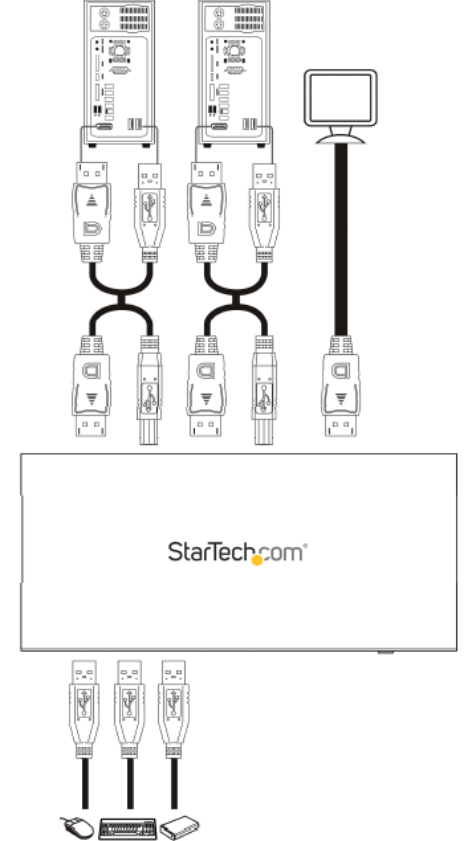
- Connect a DisplayPort monitor into the DP OUT connector on the back of the KVM switch.
- Connect a USB keyboard and mouse into the front USB ports on the KVM switch.
Connect the included DisplayPort USB KVM cables to each PC, then to the PC1 & PC2 ports on the back of the KVM switch.

- OPTIONAL: Connect any other USB peripheral you wish to share between the connected computers to the USB Hub port on the front.
- Power up the first computer/device and wait for it to fully boot and test keyboard/mouse functionality.
- Once operation has been successfully confirmed, switch to the next port and power up that computer/device and confirm.
- Once completed for both computers/devices connected to the KVM switch, you should be able to switch between ports freely.
Notes: This DP KVM Switch does not detect the power status of the connected systems, so switching to a computer that is turned off will result in no display on the monitor. It is recommended to use the same resolution for both connected systems where possible, to avoid the screen resolution change when switching between ports.
Switch Between Computers
To switch between computers, do any of the following:
- Press the PC Select button on the KVM switch.
- Download the switching software and use it on your computer to switch between the connected computers.
- Use hotkey switch commands.
Note:
Hotkey switch commands are only supported on computers running Windows.
Software Installation
The KVM switch offers optional switching software to switch between the connected PCs with a single click.
Supported operating systems
Windows 8 / 8.1 (32/64-bit), 7 (32/64), Vista (32/64), XP (32/64), Mac OS 10.3 and up (Tested up to 10.10)
Note:
The KVM also supports switching through the physical select button on the front of the unit and through hotkeys on any platform.
- Open a web browser and navigate to startech.com/Downloads
- Enter the SKU “SV231DPU2” and download the software.
- Browse to the location that you saved the file and run the Setup.exe (Windows) / USB KVM.dmg (Mac OS) application.
- Follow the on-screen instructions to complete the installation.
Switch & Cables SV231DPU2 Operation
Switching Between Systems
Switching between your connected systems can be done by:
- Pressing the SELECT button on the front of the KVM
- Pressing the Scroll Lock hotkey twice (ScrLk + ScrLk)
- Clicking the green taskbar icon (if software is installed)
Setup Guide
- Connect the DisplayPort cables from the KVM switch to the respective computers.
- Connect the keyboard, mouse, and monitor to the console ports on the KVM switch.
- Plug in any peripheral devices to the USB 3.0 hub on the KVM switch.
- Power on the computers and the KVM switch.
- Use the hotkeys or push-button to switch between the connected computers.
Troubleshooting
If you encounter issues with video resolution or switching between computers, ensure that all cables are securely connected and that the DisplayPort version is compatible with your hardware.
If there are issues with keyboard or mouse functionality, try disconnecting and reconnecting these devices to the KVM switch. Also, check for any firmware updates for the KVM switch.
Always refer to the user manual for specific troubleshooting steps and instructions.
Pros & Cons
Pros
- High-resolution video support up to 4K at 60Hz
- Hotkey and push-button switching for easy control
- Compact and durable design
- Built-in USB 3.0 hub for additional connectivity
- Audible and visual indicators for smooth switching
Cons
- Slightly higher price point compared to some other KVM switches
- Limited to two computer inputs
- No support for older DisplayPort versions
Customer Reviews
Customers have generally praised the StarTech DisplayPort KVM Switch & Cables SV231DPU2 for its reliability and ease of use. Many have appreciated the high-resolution video output and the convenience of hotkey switching. However, some users have noted that the device can be a bit pricey and that it is limited to only two computer inputs.
Common complaints include occasional lag during switching and the need for precise cable management due to the compact design.
Warranty Information
This product is backed by a two year warranty.
In addition, StarTech.com warrants its products against defects in materials and workmanship for the periods noted, following the initial date of purchase. During this period, the products may be returned for repair, or replacement with equivalent products at our discretion. The warranty covers parts and labor costs only https://StarTech.com does not warrant its products from defects or damages arising from misuse, abuse, alteration, or normal wear and tear.
Faqs
What is the maximum video resolution supported by the StarTech DisplayPort?
How do I switch between the connected computers using the KVM switch?
What type of cables are included with the StarTech?
Can I connect peripheral devices to the KVM switch?
How do I troubleshoot issues with video resolution on the StarTech DisplayPort KVM Switch & Cables?
Can I update the firmware of the Cables SV231DPU2?
What are some common issues faced by users of the StarTech KVM Switch & Cables?
Leave a Comment
