
How to Use: Waterpik Water Flosser User Manual
Content
Waterpik Water Flosser: Complete Product Manual and Buyer Guide
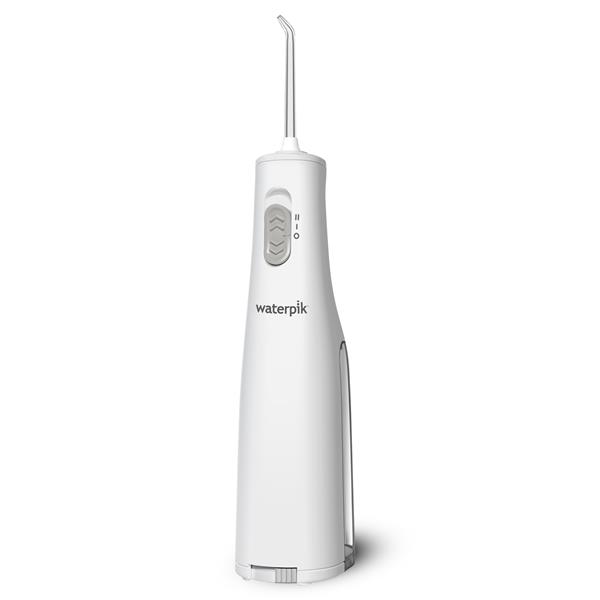
The Waterpik Water Flosser is one of the most popular oral care devices for users who want a faster, easier, and more effective alternative to traditional string floss. Designed to remove plaque and food debris with a targeted stream of pulsating water, the Waterpik Water Flosser is especially useful for people with braces, implants, crowns, bridges, deep pockets, or sensitive gums. It is also a strong choice for anyone who struggles with flossing consistency and wants a more comfortable daily routine.
One of the biggest advantages of the Waterpik Water Flosser is its range of models, from compact cordless units to feature-rich countertop systems. Countertop models typically offer larger reservoirs, more pressure settings, and longer flossing sessions, while cordless versions are better for travel, small bathrooms, and quick cleanups. Depending on the model, users can expect 2 to 10 pressure settings, multiple specialized tips, and reservoir capacity that supports roughly 30 to 90+ seconds of use per fill.
In 2026, the estimated price range for a Waterpik Water Flosser generally starts around $40 for basic cordless options and can reach about $150 or more for premium countertop or rechargeable models. Availability is broad through major online retailers, dental supply stores, and the Waterpik product lineup itself. For shoppers comparing electric oral care tools, the Waterpik Water Flosser stands out for ease of use, model variety, and strong everyday performance.
Waterpik Water Flosser specifications and key features
- Product type: Cordless and countertop water flossers for daily oral hygiene
- Pressure settings: Typically 2 or 3 on cordless models; 3, 6, or 10 on countertop models
- Pulse rate: Commonly around 1,400 to 1,450 pulses per minute depending on model
- Reservoir capacity: About 5 to 22 ounces, with flossing time ranging from 30 seconds to 90+ seconds
- Power options: Corded electric, rechargeable lithium-ion, or AA battery-powered depending on model
- Included tips: Standard, orthodontic, plaque seeker, and specialized tips vary by bundle
- Special features: On/off handle control, rotating tips, massage mode, LED indicators, timer/pacer on select models
- Warranty: Commonly 1, 2, or 3 years depending on the model
- Connectivity: Most Waterpik Water Flosser models do not require app pairing or wireless connectivity
Compared with other leading oral irrigators, Waterpik countertop models usually deliver more pressure options and larger reservoirs than many cordless competitors. Cordless models are more portable, but countertop versions are generally the better pick for performance-focused users who want longer sessions and more control.
How to set up a Waterpik Water Flosser
Setting up a Waterpik Water Flosser is simple and usually takes only a few minutes. First, place the unit on a flat, stable surface near a sink or outlet if you are using a countertop model. Fill the reservoir with lukewarm water, since warm water is often more comfortable for new users and people with sensitive gums. Next, select and insert the desired tip until it clicks into place.
For cordless models, charge the battery fully before first use if the unit includes a rechargeable pack. If the model uses AA batteries, install fresh batteries according to the compartment markings. Choose a low pressure setting for the first session, then increase gradually once your gums adapt. For countertop units, start with the lowest pressure and keep your mouth slightly closed to reduce splashing while allowing water to flow into the sink.
Safety matters during setup. Never use the device with damaged cords, cracked reservoirs, or loose tips. Do not immerse the base in water unless the model is specifically rated for that. If the unit seems weak at startup, check for air in the line, ensure the reservoir is seated properly, and confirm that the tip is fully locked in.
Waterpik Water Flosser troubleshooting guide
If your Waterpik Water Flosser is not turning on, check the power source first. For corded models, verify that the outlet works and the plug is firmly connected. For rechargeable cordless units, recharge the battery and confirm that charging contacts are clean. If the pressure feels too low, the reservoir may be empty, the tip may be partially blocked, or the selected setting may be too low.
- Problem: Weak water stream — Fix: Refill reservoir, clean the tip, and increase pressure gradually.
- Problem: Leaking water — Fix: Reseat the reservoir, inspect seals, and make sure the tip is fully inserted.
- Problem: Unit stops mid-use — Fix: Recharge, replace batteries, or check for overheating and debris buildup.
- Problem: Loud vibration or unusual noise — Fix: Look for trapped air, mineral buildup, or a loosely attached tip.
Most Waterpik units do not display complex error codes, so troubleshooting is usually based on symptoms rather than on-screen alerts. Preventive maintenance includes regular reservoir cleaning, tip replacement when worn, and periodic descaling if you use hard water. Warranty coverage commonly ranges from one to three years depending on the model, and support is typically handled through Waterpik’s customer service channels and product documentation.
Pros and cons of the Waterpik Water Flosser
Pros
- Excellent for braces, implants, crowns, and bridges
- Easy to use for people who dislike traditional floss
- Multiple pressure settings improve comfort and control
- Countertop models offer strong performance and large reservoirs
- Specialized tips make it more versatile than many basic flossing tools
- Good value for users who want consistent daily oral hygiene
Cons
- Countertop models take up more space
- Cordless models usually have smaller reservoirs and shorter run times
- Some users need a short adjustment period to avoid splashing
- Replacement tips and maintenance add to long-term cost
- Not as compact as a simple travel floss pick
For most households, the Waterpik Water Flosser offers strong value for money because it combines ease of use, reliable performance, and a wide selection of models. Compared with cheaper alternatives, it generally feels more durable and more refined. Compared with premium competitors, it remains competitive because of its pressure range, tip variety, and overall brand reputation.
Customer reviews of the Waterpik Water Flosser
Customer feedback is generally very positive, with many users giving the Waterpik Water Flosser around 4 to 5 stars for convenience and cleaning power. Common praise includes cleaner-feeling teeth, improved gum comfort, and better results for orthodontic care. Many reviewers say it becomes part of their routine within days.
Typical complaints focus on noise, splashing during the learning phase, and reservoir size on smaller cordless models. Some users also mention that the countertop version is bulky for compact bathrooms. A frequent testimonial style is: “I should have bought one sooner,” especially from users with braces or sensitive gums.
For buyers deciding whether to purchase, the best recommendation is to choose a countertop Waterpik Water Flosser for maximum performance or a cordless model for portability and simple daily use.
Frequently asked questions about Waterpik Water Flosser use
How often should you use a Waterpik Water Flosser? Most users benefit from once-daily use as part of a complete oral care routine.
Can it replace string floss? It can be an excellent alternative for many people, especially those with braces or dental work, but some users still combine it with brushing and occasional string flossing based on dentist advice.
Which model is best for home use? Countertop models are usually best for larger reservoirs and stronger performance, while cordless models are better for travel and smaller spaces.
Faqs
How do I set up a waterpik Water Flosser for the first time?
Why is my waterpik Water Flosser leaking from the tank or handle?
What pressure setting should I use on a waterpik Water Flosser if my gums are sensitive?
Can I use mouthwash or warm water in a waterpik Water Flosser?
Why does my waterpik Water Flosser have weak water pressure?
How often should I clean and descale a waterpik Water Flosser?
Which Waterpik tips are best for braces, implants, or deep cleaning?
How can I make my waterpik Water Flosser last longer and perform better?
More waterpik manuals
- How to Use: Waterpik Whitening WF-05 User Manual
- How to Use: Waterpik Water Flosser Tip User Manual
- How to Use: Waterpik Sidekick WF-04 Water Flosser User Manual
- How to Use: Waterpik Water Flosser WF-05 User Manual
- Waterpik Complete Care WP-800 Series User Manual
- How to Use: Waterpik Water Flosser WF-16 WF-17 User Manual
Leave a Comment