Settings: Yaber Official Smart Projector T2 User Manual
Content
Introduction
The Yaber Official Smart Projector T2 is a versatile and portable projector designed for both home entertainment and professional presentations. It features a stunning 1080p resolution with 450 ANSI lumens brightness, ensuring vibrant and clear images in various lighting conditions. With seamless connectivity options, including HDMI, USB, Bluetooth 5.0, and WiFi 6, users can easily connect their devices for effortless streaming. The built-in battery allows for up to 2.5 hours of video playback, making it ideal for on-the-go use. Priced at $299, the T2 combines convenience and quality for an exceptional viewing experience.
Important Precautions
Please use the device correctly:
- Do not face the lens into eyes because the strong projector light may cause injury to the eyes.
- Do not block the air inlet/outlet of the device in order to avoid damage to internal electronic devices arising from normal heat dissipation failure.
- Do not wipe the lens directly with cleaning tools including paper and cloth to avoid damage to the lens, Please clean up the dust on the lens through clean air blowing.
- Do not wash the device with chemicals, detergents, or any liquid to prevent the circuit board from being corroded by rainwater, or moisture mineral-containing liquids.
- Keep the device and its components and accessories out of reach of children.
- Make sure that the device is used in a dry and ventilated environment.
- Do not store the device in excessively hot or cold places, because extreme temperatures will shorten the life of electronic devices. Place and use the device in an environment of 0°C-40°C
- Do not put the device into any heating equipment (such as a dryer and microwave oven) for drying.
- Do not firmly extrude the device or place barriers on it or its back to avoid damage to the device.
- Do not throw, strike, or sharply vibrate the device to avoid damage to the internal circuit board
- Do not try to disassemble and assemble the device yourself. If any issue occurs, please contact the after-sales service of Yaber.
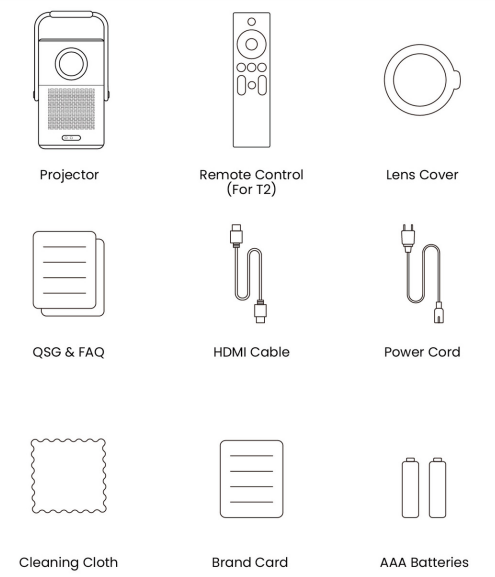
What's included
Projector Interface
⚠️Notice: Press power button 2s-5s to boot the projector
⚠️Notice: Please ensure that the area in front of the [Focus receiver] is not blocked, otherwise the focus function will be affected.
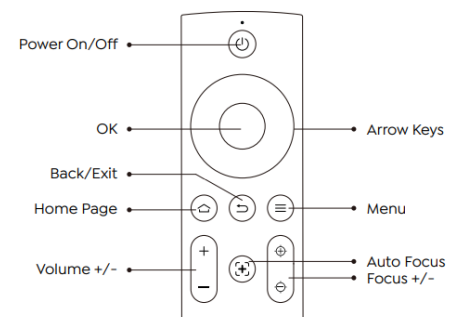
Remote Contol
Yaber Smart Projector T2 Specification
Model No.T2 | |||
Native Resolution | 1920*1080 | Light Source | LED |
Battery Lifespan | Video Playtime 2.5h Music Playtime 18h |
Aspect Ratio |
16:9/4:3 |
Focus | Auto/Eletric | Keystone Correction | Auto/Eletric |
Screen Alignment | Auto | Obstacle Avoidance | Auto |
Interface | USB 2.0*1 HDMI 1.4*1 Audio Out*1 Lan*1 |
Unit Dimension |
165*140*290 mm 6.4*5.5*11.4 inches |
Projection Ratio |
1.25:1 |
Projection Distance | Min1.1m~ Max3.3 m Min43.3~Max129.9 inches |
Power Voltage | 100-240V~/50-60Hz | Power Consumption | 110W |
Projector Weight | 2.5 kg 5.5 lbs |
Projection Method | Front/Rear on Desk Front/Rear on Celling |
Picture Format | JPG、PNG、BMP、JPEG | ||
Audio Format | MP3, AAC,LPCM, APE, FLAC,OGG, AMR | ||
Video Format | MP4、MKV、WMV、3GP 、MPG、VOB、TP、TS、DAT、MOV、FLV | ||
USB Format | FAT 32, NTFS ⚠Unsupported format: Exfat ⚠Attention:If the projector cannot recognize the contents of the USB flash drive, please check whether your USB flash drive is formatted correctly. | ||
WPS Documents | txt, pdf, docx, xlsx. pptx | ||
About Battery
The Yaber T2 is equipped with a battery that will give you 2.5 hours of use in battery mode(Brightness in 60). In battery mode, the brightness of the screen will be reduced, thus extending a longer battery life.
You can also adjust the settings to increase the brightness of the screen, but the duration will be shortened.
🔔 Tips: (As the number of times the machine is used increases, the battery life may be affected.)
Charging Time
🔔 Tips: For the health of the battery and your experience, we recommend that you charge your machine while it is turned off.
🔔 Tips: For first-time use, we recommend you fully charge your projector using the provided power cord.
- When the machine is turned off, the charging time from 0 to 100 is 3.5 hours.
When the machine is turned on, the charging time from 0 to 100 is 5.5 hours.

Condition Charging Time From 0% ~ 100% Projector turned off 3.5 Hours Projector turned on 5.5 Hours - When the Power light is Blue, it means the battery is completely charged.
- When the Power light is Red, the battery is charging.
Low Power Notification
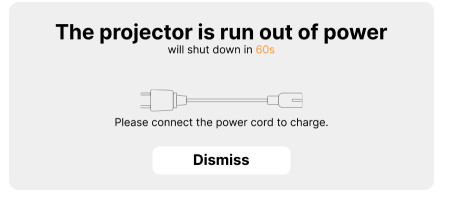
When the battery power is lower than 20%, the system will pop up a window to prompt you to charge the Projector. The battery icon on the projector screen will change to: ![]()
If the battery is about to run out, the system will push a shutdown countdown pop-up.
Installation
Handle to Stand
For a better image, please try to place the projector on a stable, flat surface.
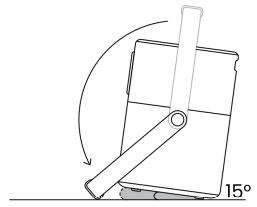
If you need to adjust the screen at a larger angle, you can rotate the carrying handle to the bottom and it will provide you with support at certain angles (15%).
⚠ Notice: Please ensure that the area in front of the focus receiver is not blocked, otherwise the focus function will be affected.
Ceiling Mounting
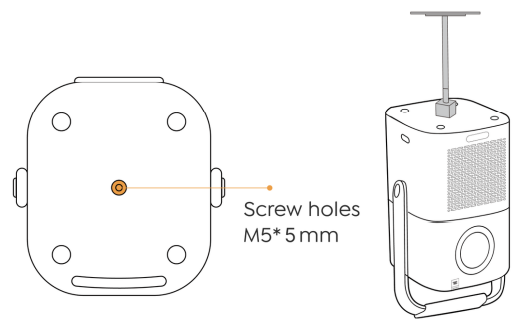
⚠ Note: T2 does not support four-corner mount installation.
- Step 1: Make sure you have a universal mounting bracket that can fit the projector.
Step 2: Use the stand with M5*5mm screw to fix the projector on the bracket to complete the installation.
Stand Mounting
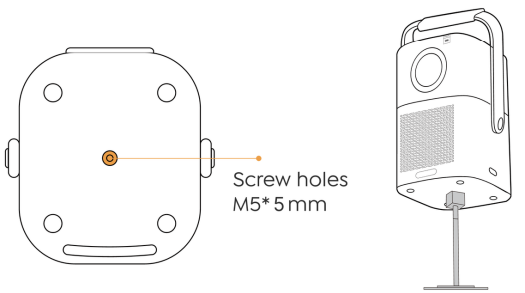
Note: T2 does not support four-corner mount installation.
- Step 1: Make sure you have a universal mounting bracket that can fit the projector.
Step 2: Use the stand with M5*5mm screw to fix the projector on the bracket to complete the installation.
Projection Settings
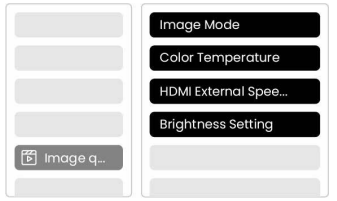
You can select [Settings]- [Image Settings] or [Projection Settings] in to adjust the projector image.
Projection Distance
Tips: Actual projection size and distance may deviate slightly from laboratory data.

Auto Focus
Auto focus will be activated after each shift.
You can also turn off the auto focus function through [Settings]-[Projection Settings]-[Auto Focus].
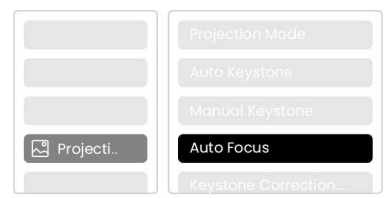
⚠️Attention:If you have already determined the location of the projector, it is recommended that you turn off autofocus in the settings to get a better viewing experience.
Auto Keystone Correction
As you move the machine, the T2 automatically performs trapezoidal correction, depending on the target wall.
⚠️Attention: The angle of the auto keystone cannot exceed 15 degrees up, down, left, and right.
Auto Screen Alignment and Auto Obstacle Avoidance
⚠️ Note: When using the Auto Screen Alignment and or Auto Obstacle Avoidance functions, make sure the Auto Keystone and Auto Focus functions are turned on.
- Obstacle avoidance may not work when there are white or other light-colored objects in the target screen.
- The backdrop should have a distinct black or other colored border, except for anti-light screens which do not require a border.
Before using the auto screen alignment function:
Please ensure the projection screen is larger than the screen area, and do not block the area within the central square frame of the screen.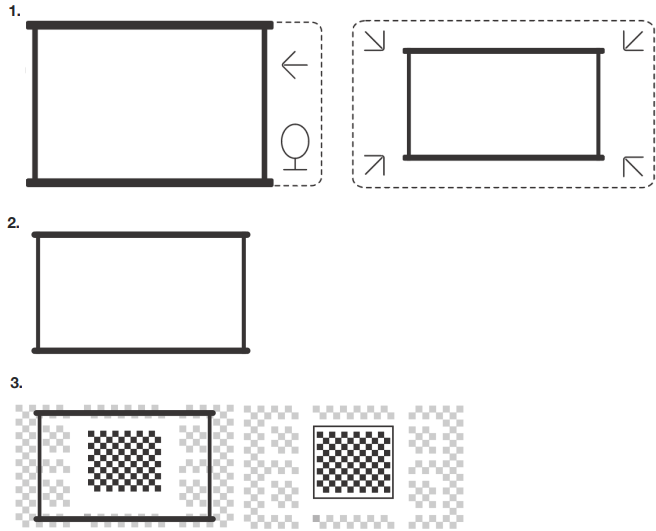
Electric Focus
You can also adjust the focus by clicking on the buttons on the remote control to get your desired picture.
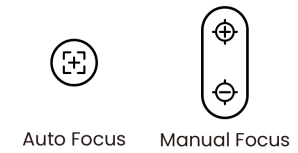
Manual Keystone Correction
If you need to adjust the screen further, you can adjust the screen by dragging the arrows by selecting "Manual Keystone"in the settings.

Projection Zoom
After auto-focusing, the zoom effect will be reset. If you want to save the zoom, please try to turn off the auto focus when the picture is clear.
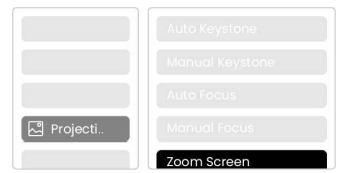
Picture Settings
You can select [Image Settings] or [Projection Settings] in [Settings] to adjust the projector image.

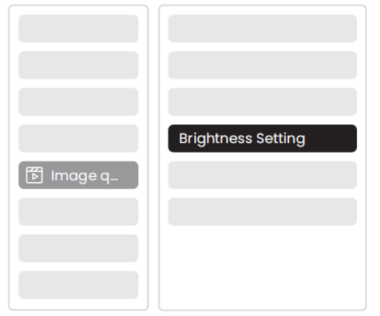
Brightness Settings
You can also adjust the brightness by adjusting the settings; However, battery life time will change as well.
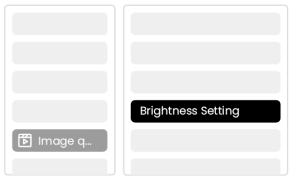
Image Color Settings
Ajust the image color through [Home] - [Settings] - [Image Quality] -[Picture Mode]. You can set the [Brightness], [Contract], [Sharpness], [Color] of the screen in this [User Mode].
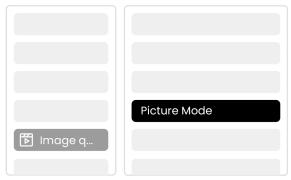
⚠️Attention: The Image color setting will only take effect when playing pictures or videos.
Description
The Yaber Smart Projector T2 boasts a sleek and modern design, making it a stylish addition to any room. Its high-resolution display ensures crisp and vivid images, while the advanced LED light source provides long-lasting performance. The projector is also equipped with integrated Dolby Audio speakers, offering a comprehensive audio-visual experience without the need for external speakers.
The user interface is intuitive and easy to navigate, with support for popular streaming services and apps. This makes it simple to access your favorite content directly from the projector, enhancing your viewing experience.
Connectivity
HDMI, USB, Lan Port
The T2 has an HDMI 1.4 port and a USB 2.0 port. Before using these ports, make sure your external devices are compatible with this format.
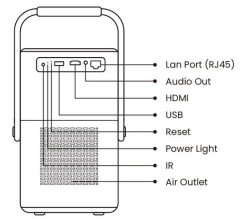
USB
⚠️Notice: T2 currently only supports reading FAT32 and NTFS USB flash drives, and currently does not support reading exFAT formatted USB flash drives.
HDMI
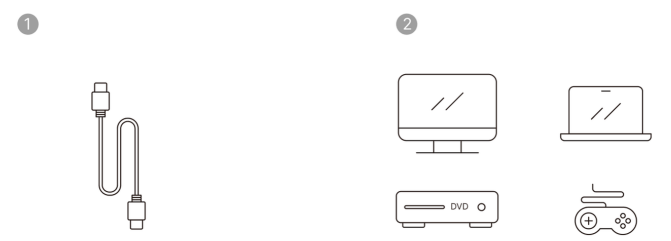
If you're meet some troubles while using HDMI, please try these solutions below:
- Method 1. Switch HDMI EDID version to 1.4 in your external device settings.
- Method 2. Try changing the HDMI cable.
Method 3. Try to replace other external devices with HDMI function and check whether the HDMI interface of external device is working.
Lan
The Lan interface of T2 is an RJ45 interface. If you encounter lag when using the same screen with your phone, you can try to use this interface to connect to the network and use the same screen.
Wireless Connections
Wi-Fi Screen Mirroring
⚠️Notice: If you need to mirror Netflix, Prime Video, etc. to the projector, please connect a TV Dongle/Stick or other products with these streaming media via HDMI.
Yaber App

You can download the Yaber App from the Google Play Store or Apple App store for better screen casting!
⚠️Notice: Scan the QR code below to download the Yaber App.
Screen Share
Tip: To enhance your experience during screen sharing, download the [Yaber] app from the Apple App Store or Google Play Store.
- Ensure your phone and the projector are connected to the same Wi-Fi network.
- In the Yaber app, tap [Connect Device] and select the device named [Yaber_T2_xxxx] to connect.
- Once connected, select the screen mirroring option in the Yaber app to share your phone screen with the projector.
- To end the screen share, go to your phone's control center, select the device, and stop sharing.
⚠️Attention: If you need to share the screen from streaming apps like Netflix, Disney, or Prime Video, enter the Dongle system to share.
🔔Tip: If you prefer not to use the Yaber APP, please follow these steps: (Only the step 2 is different)
- Ensure your phone and the projector are connected to the same Wi-Fi network.
- In the screen mirroring settings on your smartphone, select the device named [Yaber_T2_xxxx] to connect.
- To end the screen share, go to your phone's control center, select the device, and stop sharing.
Phone Control
⚠️Attention: Yaber App cannot control TV Dongle.
⚠️Attention: The phone and projector need to be connected in the same Wi-Fi environment.
The [remote control] function of Yaber App can help you control the projector without a physical remote control.
NFC Settings
Tip: If you need to use NFC for screen mirroring, download the [Yaber] app from the Apple App Store or Google Play Store to synchronize your screen.
- When using NFC, ensure your phone and the projector are connected to the same Wi-Fi network.
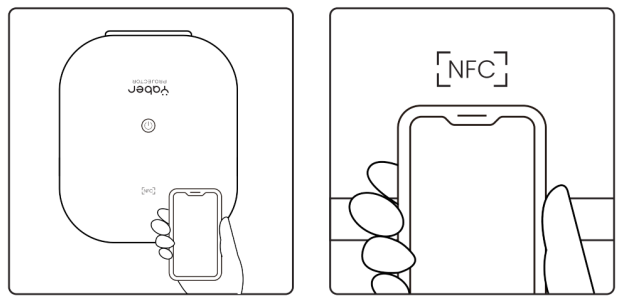
- Use an NFC-enabled phone and lightly tap the NFC area on top of the device to use this feature.
⚠️Attention: Ensure NFC is turned on in your phone's settings.
T2 Dongle
(Special for T2 Plus or Purchase separately Online)
Dongle Overview

Remote Contol
⚠️Attention: When using Google TV for the first time, follow the screen prompts for remote control pairing and other settings.
To pair, hold down the pairing button and ![]()
![remote_contolof_the].png](https://manualsfact.com/media/posts/6738a322940c0e81e548c221/remote_contolof_the].png)
Dongle Installation
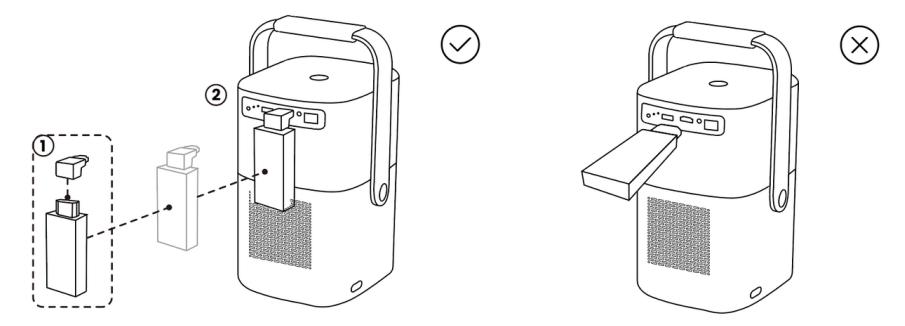
⚠️ Notice: When using Dongle on the T2/T2 Plus, it must be connected via the Yaber Adapter. The Yaber adapter combines power and video source function.
- Step1: Connect the dongle with the adapter
Step2: Connect the adapter with the HDMI port of the projector
How to Use TV Dongle
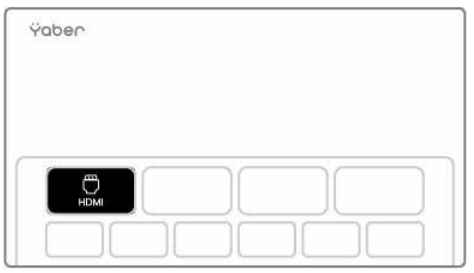
After connect TV Dongle to the HDMI Port on T2, Click [HDMI] on the Homepage to Entry TV
⚠️ Notice: When you turn on the device, it will take about 30s to wait before the Dongle screen appears.
Setup Guide
To set up the Yaber Smart Projector T2,
- Start by connecting it to a power source. Use the included remote control or the projector's onboard controls to turn it on.
- For wireless connectivity, select the Wi-Fi or Bluetooth option and follow the on-screen instructions to pair with your device.
- Place the projector at the desired distance from the screen and use the auto-focus and auto-keystone features to adjust the image.
- Connect your media devices via HDMI or USB ports, and navigate through the menu to select your input source.
Bluetooth Settings
You can connect your phone to the projector via Bluetooth and enter Bluetooth speaker mode anytime after confirmation. Please pair the device named [Yaber_T2series_xxxx].
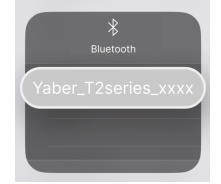
In Bluetooth Speaker mode, you can also turn off the screen and use the T2 as an outdoor stereo.

System Upgrade
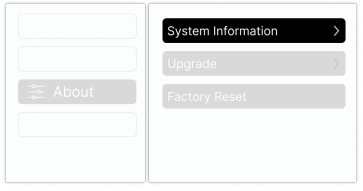
🔔Tips: You can check the system status of your device in [Settings]-[About]-[Upgrade]
If you need to upgrade the software, please go to [Settings]-[About]-[System information] and select the corresponding [MAC address]
Quiet Mode
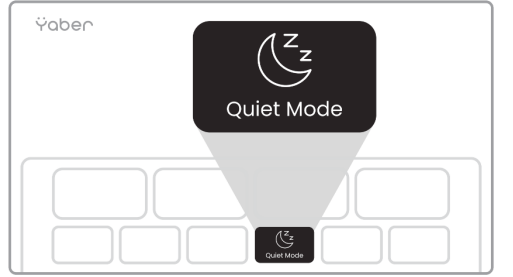
⚠️Notice: After turning on Quiet Mode, the noise of the machine will slowly decrease within 5 minutes.
Troubleshooting
If the image appears blurry,
- Ensure that the auto-focus feature is enabled and the projector is at an appropriate distance from the screen.
- For connectivity issues, check that your Wi-Fi or Bluetooth is enabled on both the projector and your device.
If the sound is not working,
- Verify that the volume is turned up and that the correct audio input is selected.
WARRANTY
Yaber Smart Projector T2 Have 3-year warranty for Yaber T2 projector.
Yaber Smart Projector T2 Pros & Cons
Pros:
- High brightness and resolution for clear images
- Auto-focus and auto-keystone for easy setup
- Integrated Dolby Audio speakers for enhanced sound quality
- Wireless connectivity options (Wi-Fi, Bluetooth)
- Compact and lightweight design for portability
- Supports 4K input and various media formats
Cons:
- Limited battery life in portable mode
- No built-in streaming services on some models (requires separate devices)
- Some users report minor issues with wireless connectivity stability
Customer Reviews
Customers have praised the Yaber Smart Projector T2 for its exceptional image quality, ease of use, and robust feature set. Many users appreciate the auto-focus and auto-keystone features, which simplify the setup process significantly. However, some reviewers have noted occasional connectivity issues and limited battery life in portable mode.
Common complaints include minor delays in auto-focus adjustment and the need for occasional software updates to maintain optimal performance.
Faqs
What is the maximum throw distance of the Yaber?
Does the Yaber support 4K resolution?
How do I connect my smartphone to the Smart T2 wirelessly?
What are the dimensions and weight of the Yaber?
Can I use the Yaber Smart Projector T2 outdoors?
How long does it take to fully charge the battery of the Yaber?
Does the Yaber come with built-in streaming services?
What type of speakers are integrated into the Yaber Smart Projector T2?
How do I update the software of the Yaber?
Is there a warranty offered with the purchase of the Smart Projector?
Leave a Comment
