Acer ODK390 USB C Docking Station User Manual | Specifications
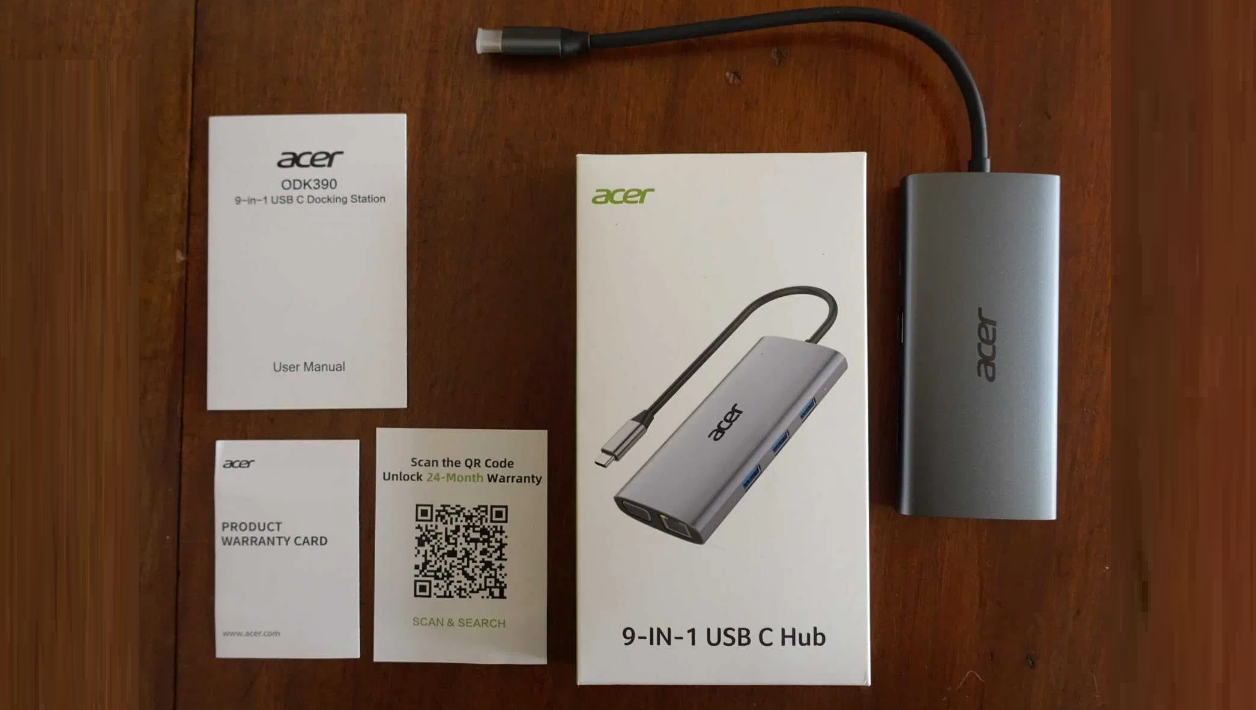
Content

Introduction Of Acer ODK390 USB C Docking Station
The ODK390 USB C Docking Station is a versatile and powerful docking station designed to expand the connectivity options of your USB-C-compatible laptop or desktop. With a sleek and compact design, this docking station offers a multitude of ports, allowing you to connect various peripherals, displays, and other devices with ease. Estimated to be priced around $150, the Acer USB C Docking Station is expected to launch in the second quarter of 2023.
Detailed Specifications of ODK390 USB C Docking Station
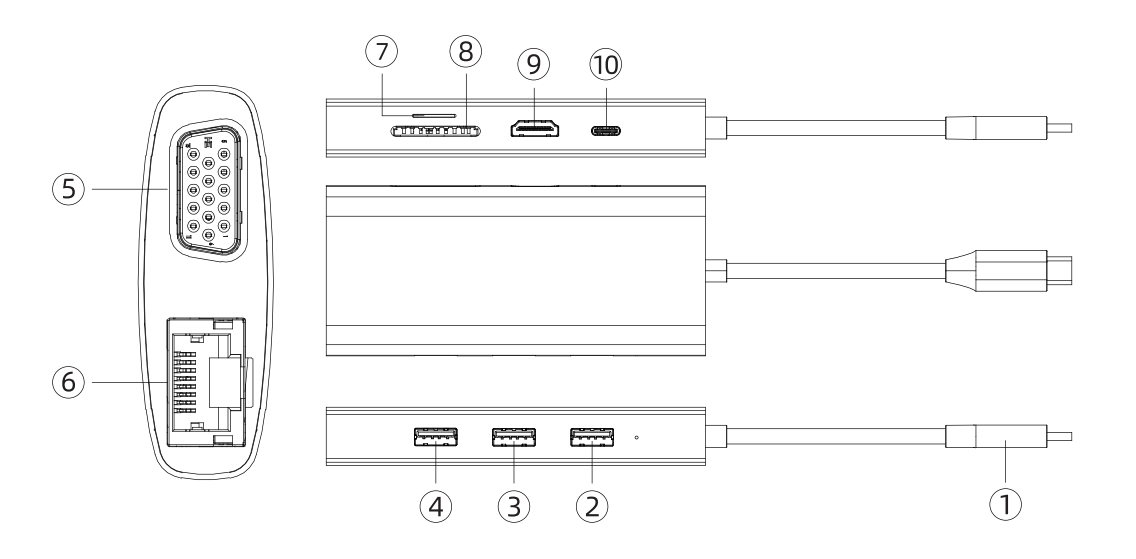
The Acer USB C Docking Station boasts the following key features
- USB-C 3.2 Gen 2 port with 100W power delivery
- 4x USB-A 3.2 Gen 1 ports
- 2x HDMI 2.0 ports, supporting 4K resolution at 60Hz
- 1x DisplayPort 1.4, supporting 4K resolution at 60Hz
- 1x Gigabit Ethernet port
- 3.5mm audio in/out jack
- SD card reader (SD 4.0 UHS-I)
- Compact and lightweight design
- Material: Aluminum
- Product weight: 83g / 0.1 Slb
- Product size: l l 2mm*S0mm*l 7mm / 4.4*1.97*0.67 inches
- Cable length: 170mm I 0. S6ft
- Operating temperature: 0°C-40°C
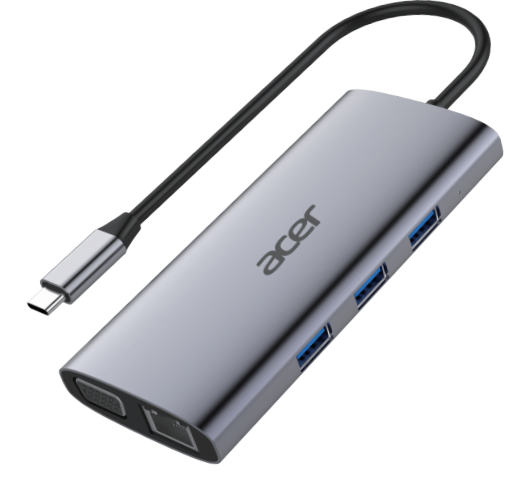
| Serial Number | Name | Function Description |
|---|---|---|
| 1 | USB-C male | Connecting the type-c interface |
| 2, 3, 4 | USB-A 3.1 GEN1 female | Support USB devices: mouse, keyboard, USB flash disk, mobile hard disk and other data transmission. |
| 5Gbps Transmission speed and downward compatible with USB 3.0 / USB 2.0 / USB 1.1 | ||
| 5 | VGA female | Support 1080P high-definition video output |
| 6 | RJ45 female | Gigabit Ethernet port supporting 1000Mbps network connection. |
| 7 | Micro SD | Support TF / micro SD and other memory cards |
| 8 | SD | Support SD / SDHC / SDXC and other memory cards |
| 9 | HDMI female | Support high-definition HDMI 4K@30Hz video output, |
| downward compatible with 2K, and support HDCP 1.4/2.2 | ||
| 10 | USB-C female | Input: support 100W fast charging |
Description of Acer ODK390
The ODK390 USB-C Docking Station is a high-performance docking station perfect for professionals, creators, and power users who require expanded connectivity options for their USB-C-compatible devices. The docking station supports a wide range of peripherals, including monitors, keyboards, mice, hard drives, and more. Its robust design ensures stable and reliable connections, allowing you to maximize your productivity and creativity.
- Model: ODK390
- Item Name: 9-in-l USB C Docking Station
- Product List
- 1 x 9-in-l USB C Docking Station
- 1 x User Manual
- 1 x Warranty Card
- Compatibility
The 9-in-l Intelligent Type-C Hub Docking Station is a high-performance USB 3.1 hub that offers a range of expansion options for your computer. Featuring a total of 9 ports, including 3 USB A 3.1 ports, SD and TF card ports, a Gigabit RJ45 port, a VGA port, a
4K/30Hz HDMI 2.0 port, and a powerful PD lO0WType C charging port. Our USB-C Docking Station is compatible with operating systems such as Windows, Linux, and Mac, providing greater flexibility and convenience to enhance your computing experience.
Setup Guide of ODK390 USB C Docking Station
To set up the Acer USB C Docking Station, follow these steps:
- Connect the docking station to a power source using the provided power adapter.
- Connect the docking station to your USB-C-compatible device using the included USB-C cable.
- Connect your desired peripherals and displays to the available ports on the docking station.
- Your device should automatically recognize the docking station and its connected devices. If not, please ensure that your device supports USB-C docking functionality and that the necessary drivers are installed.
Product precautions of Acer ODK390
- he PD power supply function requires a standard PD power adapter to power the product and the computer.
- The charging is intermittent , Please check and confirm that the interface of the type-c motherboard of the computer and the plug of the power adapter are in go.
- When the TF / SD memory card needs to be removed after the installation, please remove it safely on the computer before pulling it out . Do not pull it out by force to avoid data loss , disk error , damage ,etc.
- When using a large mobile hard disk or solid state hard disk , please connect the external power adapter of the hard disk or connect the external power supply of the computer to charge the computer.
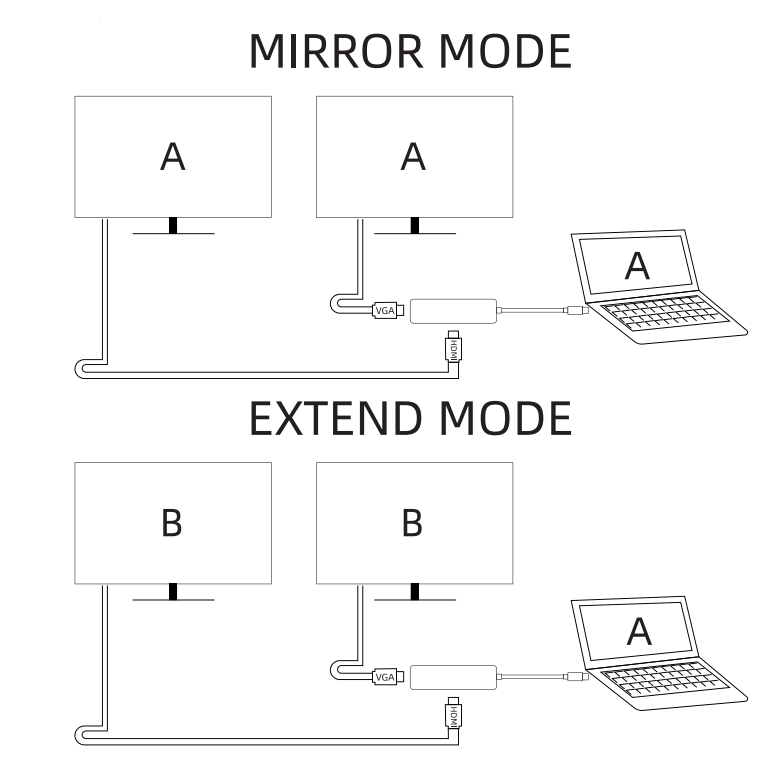
- When using the HDMI and VGA connector , make sure your computer has the video output function.
Note: When VGA and HDMI are connected simultaneously, only identical displays are supported on two screens.
- The Gigabit network card of this product is plug and play on Apple Mac OS and Winl 0 systems When it is accessed for the first time on Win7 , Win8, and Win8.1 systems , you may be prompted to install the driver automatically . ( Please refer to page 6 for installation instructions for the drivers.)
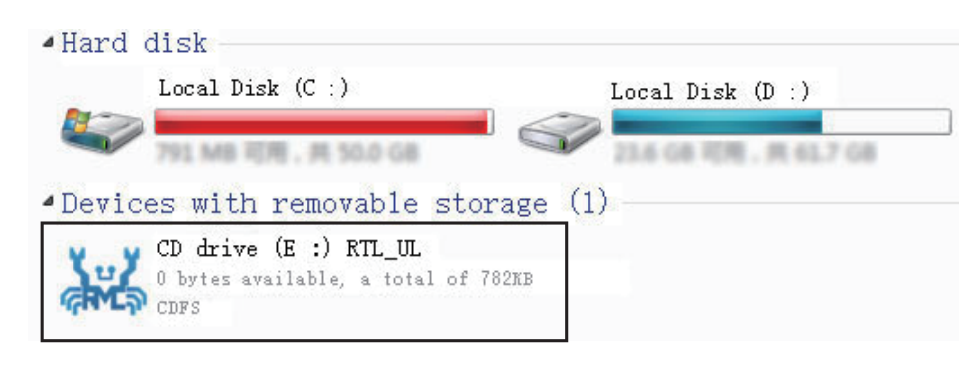
If you are using Microsoft's Windows 7 or Windows XP operating systems and need to open a drive to install drivers, follow these steps
- Insert the Drive: First, insert the CD, DVD, or USB drive containing the drivers into your computer.
- AutoRun: Typically, Windows will automatically detect the newly inserted drive and initiate the AutoRun program. If an Auto Run dialog box appears, you can directly choose to install the driver from there.
- Manually Open the Drive: In Windows 7/XP, open "Computer' (or "My Computer") and then double-click on the drive icon.
- Locate Installation File: Find the installation file in the drive, usually named "setup.exe" or "install.exe.'
- Run the Installer: Double-click the installation file and follow the instructions to complete the driver installation.
- Restart the Computer: After installation, restarting the computer for the drivers to take effect.
Please note that the Windows XP system may not support the latest hardware and drivers. You can upgrade to Windows 10 or Windows 11 for better compatibility and security.
The following is an operational demonstration
Product Pictures
Troubleshooting of Acer ODK390 USB C Docking Station
If you encounter any issues with the USB C Docking Station, consider the following troubleshooting steps:
- Ensure that the docking station is properly connected to a power source and your device.
- Make sure that the USB-C cable is securely connected to both the docking station and your device.
- Check that your device supports USB-C docking functionality and that the necessary drivers are installed.
- If your device does not recognize the docking station, try restarting both your device and the docking station.
Pros & Cons of Acer USB C Docking Station
Pros
- Wide range of ports for expanded connectivity
- Supports 4K resolution at 60Hz for high-quality displays
- 100W power delivery for charging your devices
- Compact and lightweight design
Cons
- May be pricier than some alternative docking stations
- Not compatible with devices that do not support USB-C docking functionality
Customer Reviews about Acer ODK390 USB
Customers have praised the Acer USB C Docking Station for its wide array of ports, excellent build quality, and reliable performance. Some have mentioned that the docking station can sometimes become warm during extended use, but this has not been reported to cause any issues.
Faqs
What kinds of electronic gadgets are compatible with the Acer ODK390 USB-C Docking Station model?
When I first use my Acer ODK390 Docking Station, what are the steps that I need to do to set it up?
If I use the Acer ODK390 Docking Station, will it be possible for me to charge my laptop?
If my monitor is not identified when it is attached to the docking station, what steps should I take to resolve the issue?
How can I get the devices connected to the Acer ODK390 Docking Station to function better?
What is the maximum number of monitors that may be connected to the Acer ODK390 Docking Station?
Where can I get the most recent drivers for my docking station, Acer ODK390?
What is the process for connecting a device without a USB-C port?
What should I do if my peripherals that are attached to the docking station aren't connecting?
I have an Acer ODK390 Docking Station. What is the procedure for submitting a warranty claim?
Leave a Comment
