Bissell Pet Hair Eraser HAND VACUUM 33A1 User Manual
Content

Introduction of Bissell Pet Hair Eraser Hand Vacuum 33A1
The Pet Hair Eraser Hand Vacuum 33A1 is a compact and lightweight handheld vacuum designed specifically to tackle pet hair and other messes on various surfaces. Launched in 2020, this corded vacuum retails for approximately $39.99, making it an affordable option for pet owners.
Detailed Specifications of Bissell Pet Hair Eraser Hand Vacuum
- Powerful 4 amp motor
- Corded with 16-foot power cord
- Lightweight design, weighing only 3.1 lbs
- Specialized rubber nozzle for pet hair pick-up
- Two-stage filtration system
- Easy-empty dirt cup
- HEPA media filter
- Measures 10.6 x 5.2 x 7.1 inches
Description of Pet Hair Eraser Hand Vacuum
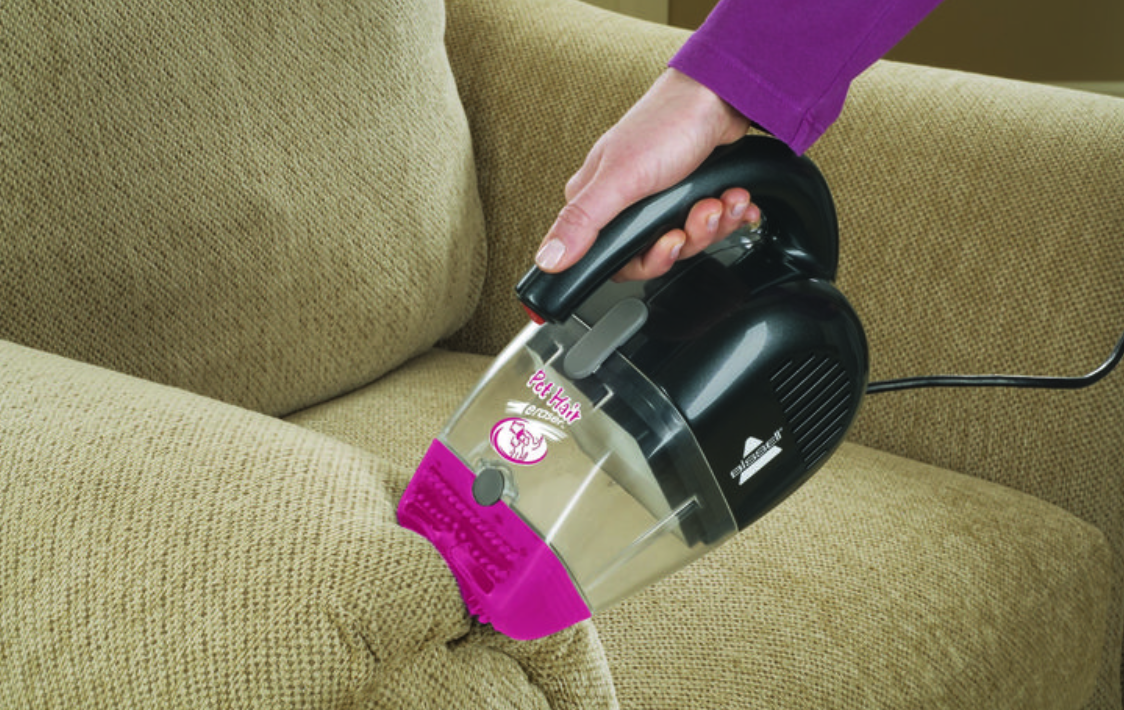
The Pet Hair Eraser Hand Vacuum is a powerful and convenient solution for pet hair and messes on upholstery, car interiors, stairs, and other tight spaces. The vacuum features a specialized rubber nozzle that attracts pet hair, while the cyclonic cleaning system ensures strong suction power for efficient cleaning. The vacuum's lightweight and corded design provides ease of use and maneuverability, making it an ideal tool for quick cleanups. The vacuum also includes a hard nozzle for cleaning dry messes and a HEPA filter that captures allergens for healthier air.
Product view of Bissell Pet Hair Eraser
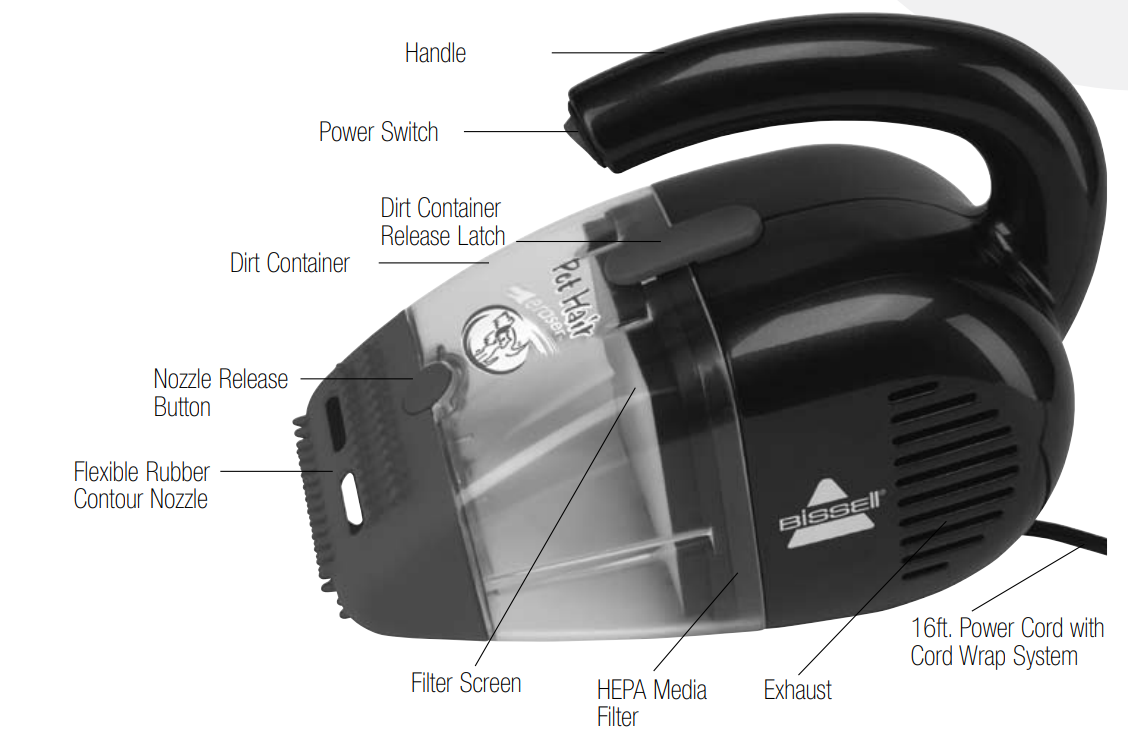
Assembly of Pet Hair Eraser Hand Vacuum
Your unit will come assembled and will require no tools to put together.
Operations
Power switch
The power switch is located on the end of the curved handle.
- To turn the hand vacuum ON ( I ), press up.
- To turn the hand vacuum OFF ( 0 ), press down.
Cleaning with hard nozzle
- Turn hand vacuum OFF.
Remove flexible rubber nozzle by pressing down on round nozzle release button.
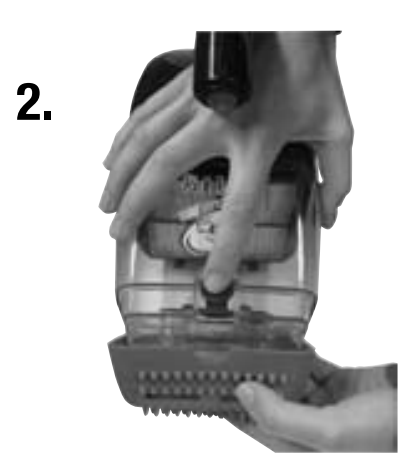
Replace with hard nozzle by lining up the bottom of nozzle to the bottom of the dirt container. Pivot upwards to snap into place.
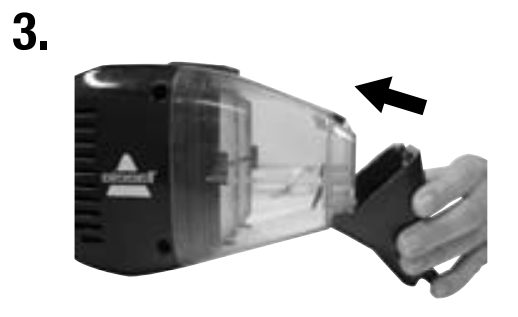
- Make sure the nozzle has snapped securely into place before using.
Cleaning with flexible rubber contour nozzle
- Turn hand vacuum OFF.
- Remove hard nozzle by pressing down on round nozzle release button.
Replace with flexible rubber contour nozzle by lining up the bottom of nozzle to the bottom of the dirt container. Pivot upwards until it snaps into place.
- Make sure the nozzle has snapped securely into place before using
Emptying the dirt container
Empty the dirt container after each use. A full dirt container may reduce suction or performance of vacuum.
- Turn hand vacuum OFF.
- Unplug hand vacuum from electrical outlet.
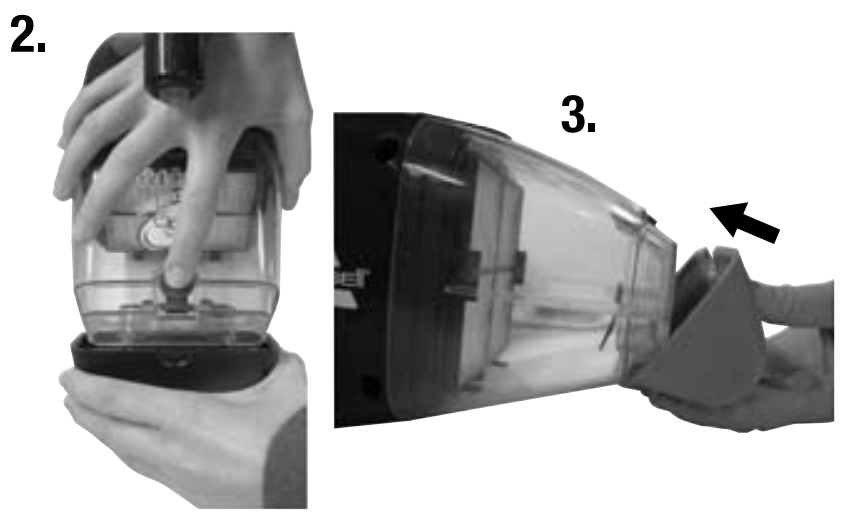
- Press dirt container release latch down to disconnect dirt container and filter assembly from the unit.
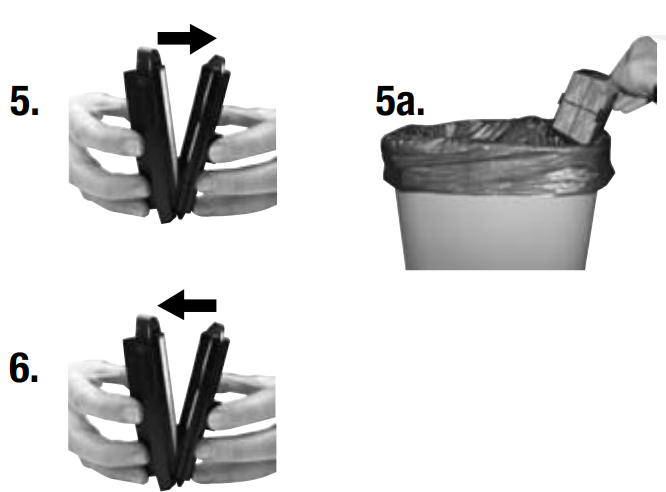
- Remove filter by grasping tabs on both sides of filter frame and pulling away from the dirt container. For best results, periodically tap filter assembly against trash can to remove dirt that has collected on the screen and filter.
- Empty dirt into trash can.
Replace filter assembly by aligning side labeled “TOP” into top of dirt container. Grasp filter tabs and press firmly to ensure filter assembly is secure in dirt container.
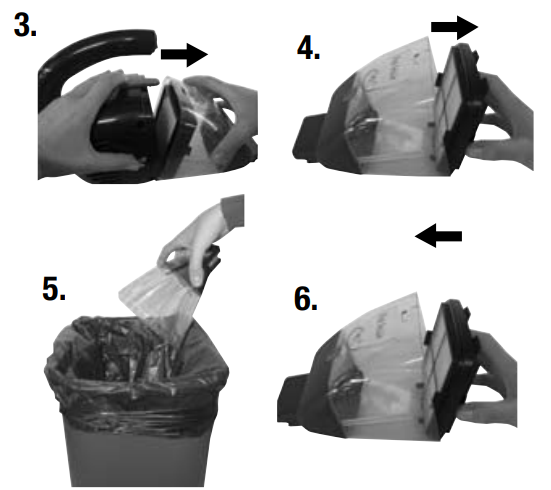
NOTE: Make sure side of filter assembly labeled "TOP" faces outward when inserting filter assembly into dirt container.
Reattach dirt container to unit by aligning bottom of dirt container to bottom of unit. Pivot upwards and snap into place. Use one hand to hold the unit and use the other hand to clip the dirt container securely in place.
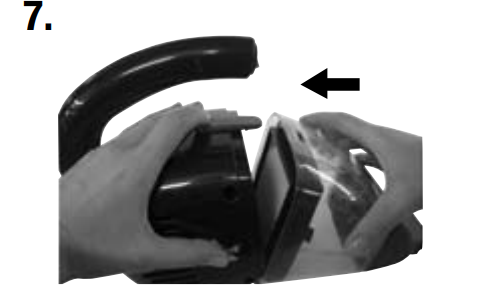
ATTENTION: For best performance, dirt container and filter assembly should be cleaned after every use.
Maintenance and care
Cleaning the filter and screen
- Turn hand vacuum OFF.
- Unplug hand vacuum from electrical outlet.
- Disconnect dirt container and filter assembly from the unit.
Remove filter by grasping tabs on both sides of filter frame and pulling away from the dirt container.
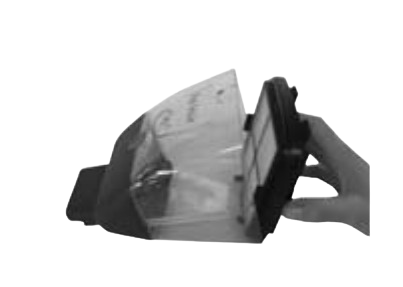
- Separate filter assembly by grasping tabs on both sides of assembly and pull. For best results, periodically tap filter and screen against trash can to remove dirt that has collected.
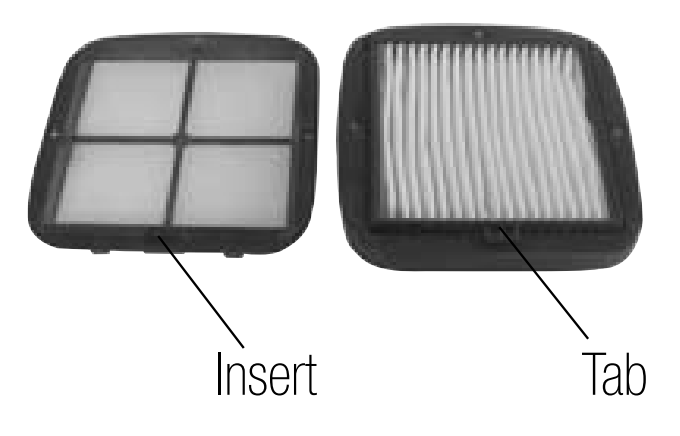
Reconnect filter and screen by aligning rectangular tab on filter with insert on screen. Press together to ensure assembly is secure.
- See page 5 to reattach dirt container.
NOTE: Dirt container and screen may be rinsed with cold water. Ensure both are dry before reinserting. Do not rinse the pleated filter.
Storage/Cord wrap system
- To store the unit, turn hand vacuum OFF.
- Unplug hand vacuum from the electrical outlet.
- Bundle cord, using wrap that is located on cord, to store.
Nozzle Maintenance
- Keep nozzles clean and free of debris.
- Wipe nozzles clean with damp cloth.
Replacement parts - BISSELL vacuum
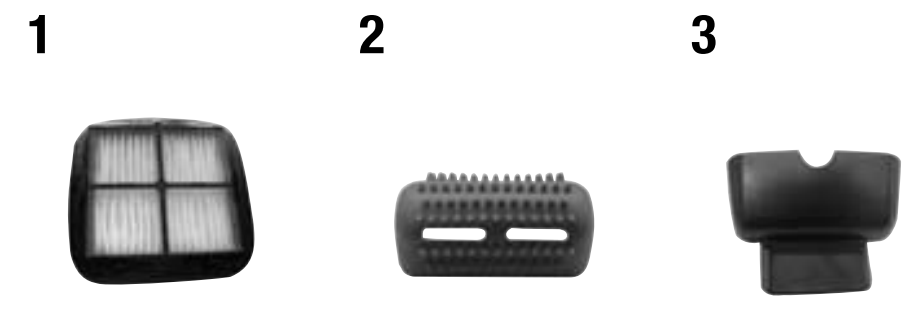
| Item | Part No. | Part Name |
|---|---|---|
| 1 | 97D5 | HEPA Media Filter Assembly |
| 2 | 203-1408 | Flexible Rubber Contour Nozzle |
| 3 | 203-1409 | Hard Nozzle |
Troubleshooting of Hand Vacum 33A1
- Hand vacuum won’t run Possible causes
- Power cord not plugged in
- Blown fuse/tripped breaker in home
- Thermal protector is activated
- Remedies
- Check electrical plug
- Check/replace fuse or reset breaker
- Turn OFF and unplug the unit. Empty dirt container, clean filter and screen, and clear any clogs. Wait 30 minutes before turning the unit back ON.
- Hand Vacuum won’t pick up or low suction Possible causes
- Dirt container not installed properly
- Dirt container is full
- Filter or screen is dirty
- Nozzles are clogged with debris
- Remedies
- Check assembly of dirt container making sure it is snapped in
- Empty dirt container and reattach
- See instructions above. Replace filter if needed
- Wipe tools clean with damp cloth
Warranty of BISSELL Pet Hair EraserCorded Hand Vacuum
One Year Warranty
Subject to the *EXCEPTIONS AND EXCLUSIONS identified below, upon receipt of the product BISSELL Homecare, Inc. will repair or replace (with new or remanufactured components or products), at BISSELL’s option, free of charge from the date of purchase by the original purchaser, for one year any defective or malfunctioning part.
See the information below on "If your BISSELL product should require service". This warranty applies to product used for personal, and not commercial or rental service. This warranty does not apply to fans or routine maintenance components such as filters, belts, or brushes. Damage or malfunction caused by negligence, abuse, neglect, unauthorized repair, or any other use not in accordance with the User's Guide is not covered.
Pros & Cons of Pet Hair Eraser Hand Vacuum 33A1
Pros
- Specialized rubber nozzle for pet hair pick-up
- Powerful suction for efficient cleaning
- Lightweight and easy to maneuver
- Long power cord for extended reach
- Affordable price point
Cons
- Limited to small cleanups due to the small dirt cup
- Not suitable for wet messes
- No attachments included for versatility
- The corded design may limit mobility in some situations
Customer Reviews about Bissell Pet Hair Eraser Hand Vacuum 33A1
Customers have praised the Pet Hair Eraser Hand Vacuum for its powerful suction, specialized rubber nozzle for pet hair, and lightweight design. However, some users have expressed disappointment with the small dirt cup size and the limited attachments included. The most common complaints include the corded design and the lack of versatility for cleaning larger messes or wet spills.
Faqs
What is the Bissell 33A1 Hand Vacuum Pet Hair Eraser?
What is the purpose of the accessories that come with my Bissell Pet Hair Eraser? Does it come with any?
When not in use, how should I store and care for my Bissell Pet Hair Eraser Hand Vacuum?
How should my Bissell Pet Hair Eraser Hand Vacuum be cleaned?
What is the recommended frequency for replacing the filter in my Bissell Hand Vacuum system?
Is it possible to acquire replacement parts for the Bissell Pet Hair Eraser 33A1 for my pet?
If the suction on my Bissell Pet Hair Eraser stops working, what should I do differently?
For the best possible pet hair removal, how should I use the Bissell Pet Hair Eraser Hand Vacuum?
Highlights of Features: What sets the Bissell Pet Hair Eraser 33A1 apart from other portable vacuums in terms of functionality and design?
How long is the Bissell Pet Hair Eraser Hand Vacuum 33A1 warranty?
Leave a Comment
