How to Use: Black Decker 1800W Heat Gun KX1800 Guide
Content
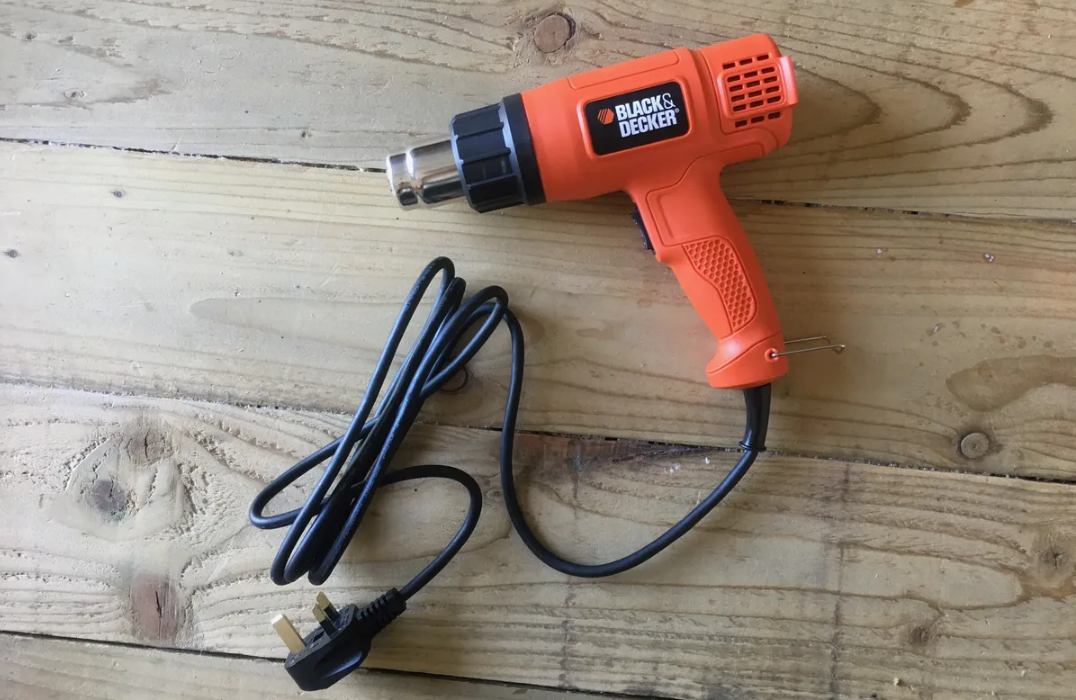
Introduction Of Black+Decker 1800W Heat Gun KX1800
The 1800W Heat Gun KX1800 is a versatile and powerful tool that can be used for a variety of tasks around the home or workplace. With its high wattage and adjustable temperature control, this heat gun is perfect for shrink wrapping, loosening rusted parts, bending plastic pipes, and much more. The Black+Decker 1800W Heat Gun KX1800 is also lightweight and easy to handle, making it a great choice for both professionals and DIY enthusiasts. The estimated price of this product is around $30 to $40, and it was launched in 2021.
Detailed Specifications
The Black+Decker 1800W Heat Gun has the following key features
- 1800 watt motor for powerful performance
- Adjustable temperature control from 250 to 1000 degrees Fahrenheit
- Cool-touch handle for safe and comfortable use
- Built-in stand for hands-free operation
- Lightweight and easy to handle
- Includes concentrator nozzle for focused heat application
Description of Black+Decker Heat Gun KX1800
The Black+Decker Heat Gun is a versatile and powerful tool that can be used for a variety of tasks around the home or workplace. With its high wattage and adjustable temperature control, this heat gun is perfect for shrink wrapping, loosening rusted parts, bending plastic pipes, and much more. The KX1800 is also lightweight and easy to handle, making it a great choice for both professionals and DIY enthusiasts. The cool-touch handle and built-in stand make it safe and easy to use, while the concentrator nozzle allows for focused heat application. Whether you're a contractor, a DIYer, or just someone who needs a reliable heat gun for various tasks, the Black+Decker Heat Gun KX1800 is an excellent choice.
Features

- Two-speed switch
- Support Stand/Hanging Hook
- Ventilation slots
- Nozzle
Setup Guide
- To operate the Black+Decker 1800W Heat Gun KX1800, first make sure it is unplugged and the cool-touch handle is cool to the touch.
- Plug in the heat gun and select the desired temperature setting using the adjustable control dial.
- Press the trigger to begin heating and direct the nozzle at the desired area.
- To use the concentrator nozzle, simply attach it to the end of the nozzle for more focused heat application.
- When finished, release the trigger and unplug the heat gun. Allow it to cool before storing.
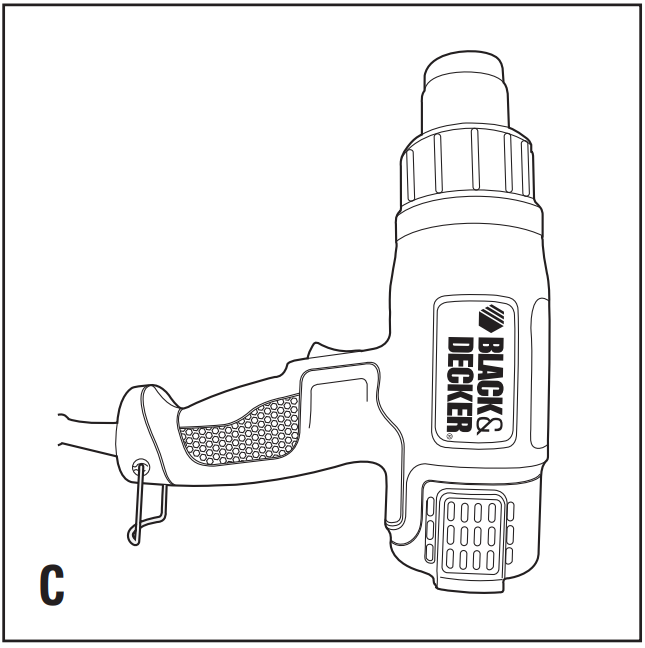
Handling Your Heat Gun
Do not place your hand over the ventilation slots (3) or block these vents in any way. This restricts the airflow through the element and causes over heating.
Operating Your Heat Gun
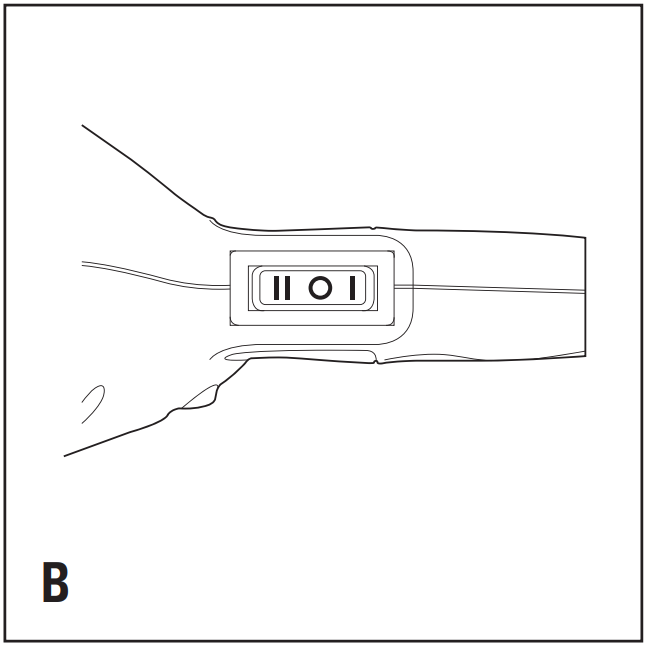
- To switch your heat gun on at the low temperature setting, press the switch (1) to depress to position “I”.
- To switch the tool on at the high temperature setting, set the switch (1) to position “II”.
- To switch the tool off, set the on/off switch (1) to position “0”.
Note: Allow the element to heat up for a few seconds before use. Initially, some smoke may emit from your heat gun. This is normal and will soon cease.The position of the switch controls both the fan speed and temperature of the product.
Cooling Down
In use, the nozzle (4) of your heat gun becomes extremely hot. Great care is necessary when cooling your heat gun after use.
Hands Free Use
This tool can also be used in stationary mode.
- Place the tool onto a firm and stable surface as shown.
- Always point your heat gun away from you.
- Secure the cable to prevent pulling your heat gun off the stand.
Do not touch the nozzle (4) and ensure that nothing is dropped into the nozzle. Carefully switch off your heat gun and then allow it to cool
Paint Stripping
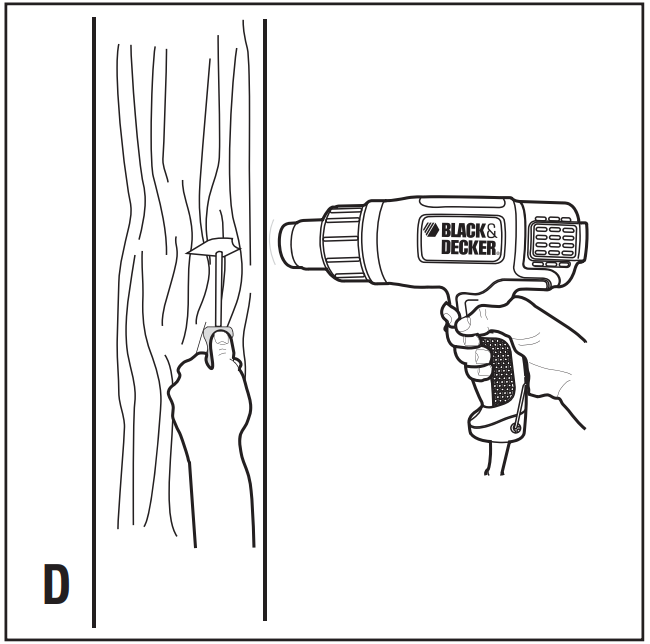
Your heat gun is designed to soften paint and lacquer enabling it to be removed using a good quality hand scraper.
Proceed as follows: Direct the hot air onto the area to be removed. When the paint softens, scrape firmly. Experiment to establish the length of time necessary to apply the heat to obtain optimum results. Scrape the softened paint immediately or it will harden again.
Your heat gun is not suitable for stripping metal-framed windows. This is because the heat from the heat gun is conducted through the metal and can crack the glass. Scrape with the grain of the wood wherever possible. Do not linger on one spot for too long as the surface may char or ignite.
Accessories
The performance of your tool depends on the accessory used. Black & Decker and Piranha accessories are engineered to high quality standards and designed to enhance the performance of your tool. By using these accessories you will get the very best from your tool.
Maintenance
Your tool has been designed to operate over a long period of time with a minimum of maintenance. Continuous satisfactory operation depends upon proper tool care and regular cleaning.
Warning: Before performing any maintenance, switch off and unplug the tool.
- Regularly clean the ventilation slots in your tool using a soft brush or dry cloth.
- Regularly clean the motor housing using a damp cloth. Do not use any abrasive or solvent-based cleaner.
Troubleshooting of 1800W Heat Gun KX1800
- If the heat gun is not heating up, make sure it is plugged in and the cool-touch handle is cool to the touch before attempting to use it.
- If the heat gun is still not heating up, check the fuse or circuit breaker to ensure they have not tripped.
- Always use the heat gun in a well-ventilated area and avoid using it for extended periods of time.
- Do not use the heat gun on flammable materials.
- Always wear protective clothing and eyewear when using the heat gun.
Intended Use
Your Black & Decker heat gun has been designed for various heating applications (eg. Paint stripping)
General safety rules
Warning! Read all instructions. Failure to follow all instructions listed below may result in electric shock, fire and/or serious injury. The term “power tool” in all of the warnings listed below refers to your mains operated (corded) power tool or battery operated (cordless) power tool. SAVE THESE INSTRUCTIONS.
- Work area
- Keep work area clean and well-lit. Cluttered and dark areas invite accidents.
- Do not operate power tools in explosive atmospheres, such as in the presence of flammable liquids, gases or dust. Power tools create sparks which may ignite the dust or fumes.
- Keep children and bystanders away while operating a power tool. Distractions can cause you to lose control.
- Electrical safety
- Power tool plugs must match the outlet. Never modify the plug in any way. Do not use any adapter plugs with earthed (grounded) power tools. Unmodified plugs and matching outlets will reduce risk of electric shock.
- Avoid body contact with earthed or grounded surfaces such as pipes, radiators, ranges and refrigerators. There is an increased risk of electric shock if your body is earthed or grounded.
- Do not expose power tools to rain or wet conditions. Water entering a power tool will increase the risk of electric shock.
- Do not abuse the cord. Never use the cord for carrying, pulling or unplugging the power tool. Keep cord away from heat, oil, sharp edges or moving parts. Damaged or entangled cords increase the risk of electric shock.
- When operating a power tool outdoors, use an extension cord suitable for outdoor use. Use of a cord suitable for outdoor use reduces the risk of electric shock.
- Personal safety
- Stay alert, watch what you are doing and use common sense when operating a power tool. Do not use a power tool while you are tired or under the influence of drugs, alcohol or medication. A moment of inattention while operating power tools may result in serious personal injury.
- Use safety equipment. Always wear eye protection. Safety equipment such as dust mask, non-skid safety shoes, hard hat, or hearing protection used for appropriate conditions will reduce personal injuries.
- Avoid accidental starting. Ensure the switch is in the off position before plugging in. Carrying power tools with your finger on the switch or plugging in power tools that have the switch on invites accidents.
- Remove any adjusting key or wrench before turning the power tool on. A wrench or a key left attached to a rotating part of the power tool may result in personal injury.
- Do not overreach. Keep proper footing and balance at all times. This enables better control of the power toolin unexpected situations.
- Dress properly. Do not wear loose clothing or jewellery. Keep your hair, clothing and gloves away from moving parts. Loose clothes, jewellery or long hair can be caught in moving parts.
- If devices are provided for the connection of dust extraction and collection facilities, ensure these are connected and properly used. Use of these devices can reduce dust related hazards.
- Use clamps or another practical way to secure and support the workpiece to a stable platform. Holding the work by hand or against your body leaves it unstable and may lead to loss of control.
Before drilling into walls, floors or ceilings check for the location of wiring and pipes. Avoid touching the tip of a drill bit just after drilling, as it may be hot.
- Power tool use and care
- Do not force the power tool. Use the correct power tool for your application. The correct power tool will do the job better and safer at the rate for which it was designed.
- Do not use the power tool if the switch does not turn it on and off. Any power tool that cannot be controlled with the switch is dangerous and must be repaired.
- Disconnect the plug from the power source before making any adjustments, changing accessories, or storing power tools. Such preventive safety measures reduce the risk of starting the power tool accidentally.
- Store idle power tools out of the reach of children and do not allow persons unfamiliar with the power tool or these instructions to operate the power tool. Power tools are dangerous in the hands of untrained users.
- Maintain power tools. Check for misalignment or binding of moving parts, breakage of parts and any other condition that may affect the power tools operation. If damaged, have the power tool repaired before use. Many accidents are caused by poorly maintained power tools.
- Keep cutting tools sharp and clean. Properly maintained cutting tools with sharp cutting edges are less likely to bind and are easier to control.
- Use the power tool, accessories and tool bits etc., in accordance with these instructions and in the manner intended for the particular type of power tool, taking into account the working conditions and the work to be performed. Use of the power tool for operations different from those intended could result in a hazardous situation.
- Service
- Have your power tool serviced by a qualified repair person using only identical replacement parts. This will ensure that the safety of the power tool is maintained.
Additional Safety Instructions for Heat Guns
- Always switch off before putting tool down.
- Extreme care should be taken when stripping paint, the peelings, residue and vapors of paint may contain lead, which is poisonous. Once deposited on surfaces, hand to mouth contact can result in the ingestion of lead. Exposures to even low levels of lead can caused irreversible brain and nervous system damage; young and unborn children are particularly vulnerable. Do not smoke, eat or drink in a work area that could or may be contaminated by lead. Lead based paints should only be removed by a professional and should not be removed using a heat gun.
- When removing paints you should ensure that your work area is enclosed. It is advisable to wear a dust mask.
Do not burn the paint. Keep the nozzle at least 25mm (1”) from the surface as this keeps the temperature below the required 450°C. If you are scraping from a vertical position then you should scrape downwards to prevent the paint from falling back into the heat gun and burning. Dispose of all paint debris safely and ensure that the work area is thoroughly cleaned after completing the job. - Do not use in a damp atmosphere or where flammable gases may be present or use near combustible materials. Spaces behind boards, ceilings and floors and wall cavities in timber frame constructed houses can contain flammable materials. Check before using the heat gun.
- Allow the tool to cool fully before storing.
- Ensure adequate ventilation when using heat guns as toxic fumes may be produced.
- Do not use as a hairdryer! The air temperature is far higher than a hairdryer.
- Do not obstruct either the air intake or nozzle outlet as this may cause excessive heat build up resulting in damage to the tool.
- Do not direct the hot air blast at other people
- Do not touch the metal nozzle as it becomes very hot during use and remains hot for up to 30 minutes after use. Do not look down the nozzle while the unit is working because of the high temperatures being produced.
- Do not allow paint to adhere to the nozzle or scraper as it could ignite after a time.
- Do not operate your heat gun whilst it is hanging by the hanging hook.
- A fire may arise if the appliance is not used with care.
- Do not place the nozzle against anything while using or immediately after use
- Do not poke anything down the nozzle as it could give you an electric shock.
- Do not use to cook or warm food.
- Caution must be exercised around gasoline, automotive fluids, tires, gaskets, upholstery and hoses, etc. to prevent damage or fires. Be constantly aware that this tool can ignite flammable materials and soften or melt others. Avoid overheating adjacent flammable materials such as wood, insulation, electrical wiring jackets or plastic. Thaw only those metal pipe sections that are fully exposed. Do not attempt to thaw pipes that are inside walls, floors, ceilings, or otherwise enclosed. Do not attempt to thaw pipes that are wrapped in insulation.
Technical data
| SPECIFICATION | KX1800 |
|---|---|
| POWER | 1800 W |
| SWITCH CONTROL | 2 Stage (I / II) |
| TEMPERATURE | 400/550 °C |
| AIRFLOW | 550/ 750 l/min |
| CABLE LENGTH | 2 m |
Pros & Cons of Black+Decker Heat Gun
Pros
- Powerful 1800 watt motor
- Adjustable temperature control
- Cool-touch handle for safe use
- Built-in stand for hands-free operation
- Includes concentrator nozzle for focused heat application
Cons
- May get hot with extended use
- Not suitable for use on flammable materials
Customer Reviews of 1800W Heat Gun
Customers have given the Black+Decker Heat Gun KX1800 high marks for its power, versatility, and ease of use. Many have praised its adjustable temperature control and cool-touch handle, while others have appreciated its lightweight and compact design. Some common complaints include that it may get hot with extended use and that it is not suitable for use on flammable materials.
Faqs
How Can I Use My Black+Decker Heat Gun KX1800 Safely?
If the Black+Decker KX1800 isn't heating up, what should I do?
Is it Possible to Bend Pipes with the Black+Decker KX1800 Heat Gun?
How Can I Replace My Black+Decker KX1800's Nozzles?
When drying wet surfaces, is the Black+Decker KX1800 Heat Gun appropriate?
How Can I Adjust the KX1800 Heat Gun's Temperatures?
How Should the Black+Decker KX1800 Heat Gun Be Maintained and Stored?
What Safety Measures Must I Follow When Using the KX1800 to Remove Paint?
Where Can I Purchase KX1800 Heat Gun Replacement Parts?
How long is the Black+Decker KX1800 Heat Gun warranty valid?
Leave a Comment