Step-by-Step Guide: Vacuum Cleaner Maintenance | Tips, Products, and Techniques
Content
In the realm of household gadgets, few are as essential to maintaining cleanliness as the vacuum cleaner. Just like any tool that helps keep our homes neat and tidy, the vacuum cleaner itself requires regular cleaning and upkeep to ensure it continues to perform at its best. A clean vacuum not only enhances suction power but also contributes to a healthier indoor environment by efficiently capturing dust, allergens, and debris. In this comprehensive guide, we'll take you through the step-by-step process of cleaning your vacuum cleaner thoroughly. Starting from gathering the necessary supplies to testing its performance afterward, each step is designed to help you maintain peak efficiency and extend the lifespan of this indispensable gadget. Let's get into the details of how to care for your vacuum cleaner, ensuring it stays in top-notch condition for years to come. Why is it important to clean your vacuum cleaner regularly? Cleaning your vacuum cleaner regularly isn't just about neatness—it's about maintaining optimal performance and hygiene in your home. Did you know that a dirty vacuum can lose up to 50% of its suction power? Regular maintenance, like emptying the dustbin or changing the bag, ensures that airflow remains unobstructed, allowing your vacuum to suck up dirt and debris effectively. Moreover, clean filters trap allergens and dust particles, preventing them from being redistributed back into the air you breathe. This is especially crucial for people with allergies or respiratory issues. Keeping the brush roll free of tangled hair and checking hoses for blockages ensures that every corner of your home gets a thorough clean. Think of your vacuum as a high-performance machine—it needs regular care to keep delivering top-notch results. So, by giving your vacuum a little TLC on a regular basis, you're not just keeping your floors clean; you're also promoting a healthier indoor environment for you and your family.
Step 1: Gather Your Supplies
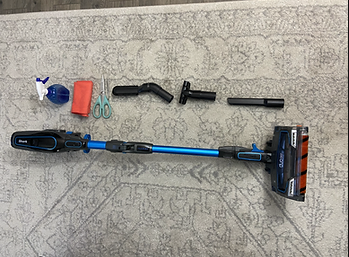
Before you start cleaning your vacuum cleaner, it's important to gather all the necessary supplies. This step ensures that you won't have to stop mid-cleaning to find a tool or product, making the process smoother and more efficient. Here are the supplies you'll need:
A pair of gloves: Protects your hands from dirt and any sharp objects.
A clean, dry cloth: Used for wiping down the exterior and other components.
A damp cloth: Helps to remove stuck-on grime and dirt.
A pair of scissors: Essential for cutting away hair and string from the brush roll.
A small brush (like an old toothbrush): Perfect for scrubbing small parts and crevices.
A can of compressed air: Useful for blowing out dust from hard-to-reach areas.
Replacement filters (if needed): Ensure you have the correct filters for your vacuum model.
Having these items on hand will make the cleaning process quicker and more efficient. Using the right tools can significantly improve the cleaning results, ensuring that every part of your vacuum is thoroughly cleaned.
Step 2: Unplug the Vacuum
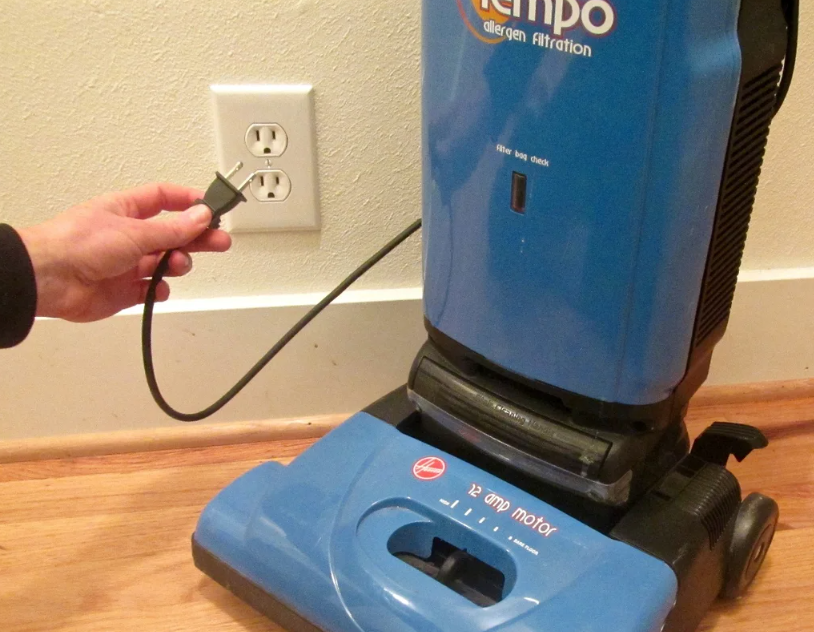
Safety should always be a priority when dealing with electrical appliances. Before you begin cleaning your vacuum cleaner, make sure it is unplugged from the power source. This step is crucial to prevent any accidental electrocution or injury while you're working. According to the National Fire Protection Association (NFPA), electrical appliances should always be unplugged before any maintenance or cleaning to avoid potential hazards. Additionally, unplugging the vacuum prevents the accidental activation of the vacuum while you’re working on it, which could lead to injury or damage to the vacuum cleaner itself.
Step 3: Empty the Dustbin or Replace the Bag
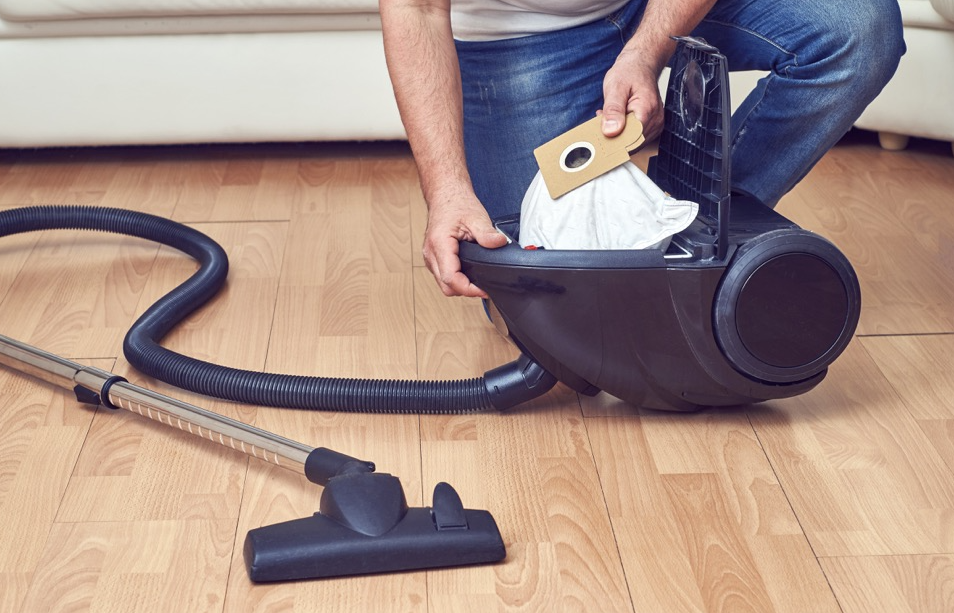
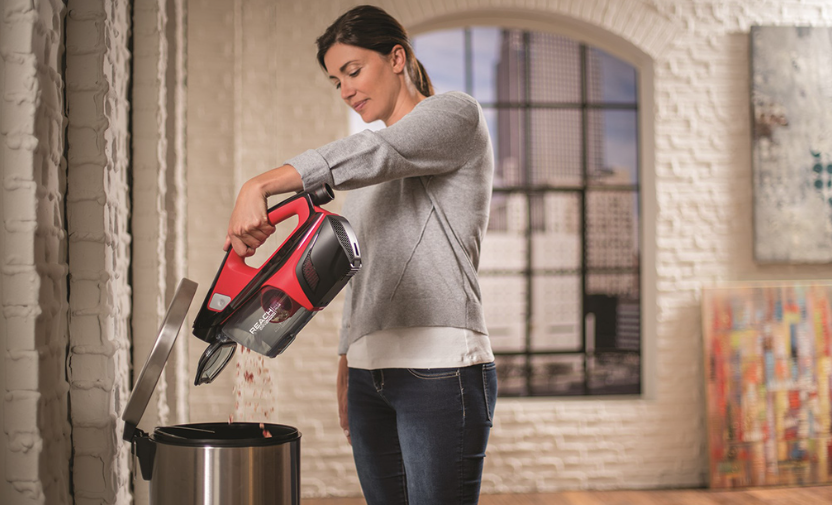
This step varies depending on whether you have a bagless vacuum or one that uses bags. For bagless vacuums, start by removing the dust bin. Empty its contents into a trash bag, making sure to tap out any stubborn debris. It's recommended to rinse the dust bin with warm, soapy water to remove any dust particles and grime that may have accumulated. Allow the dustbin to dry completely before reattaching it to avoid any moisture-related issues. According to a study by the American Cleaning Institute, regularly emptying and cleaning the dust bin can improve the vacuum’s efficiency by up to 50%.For bagged vacuums, the process involves opening the vacuum and carefully removing the old bag. Dispose of the bag properly, adhering to any local recycling or waste disposal guidelines. Insert a new bag according to the manufacturer’s instructions, ensuring it’s securely in place. A full bag can significantly reduce the suction power of your vacuum, so replacing it regularly is essential for maintaining optimal performance.
Step 4: Clean or Replace Filters

Filters are a critical component of your vacuum cleaner, trapping dust and allergens and preventing them from being recirculated into the air. Over time, filters can become clogged with dirt and debris, reducing the vacuum’s efficiency. Depending on the type of filter your vacuum uses, you will either need to clean or replace it. For washable filters, remove the filter from the vacuum and rinse it under warm water until the water runs clear. Avoid using soap unless the manufacturer specifies it, as some soaps can leave a residue that might damage the filter. Allow the filter to air dry completely before reinserting it into the vacuum. This drying process can take up to 24 hours, so plan accordingly. According to the Environmental Protection Agency (EPA), a clean filter can improve indoor air quality by reducing airborne particles. For non-washable filters, tap the filter gently to remove excess dust. If the filter is extremely dirty or damaged, replace it with a new one. Filters should typically be replaced every three to six months, depending on usage and the manufacturer's recommendations. Using a vacuum with a clean filter can improve suction power and overall performance, ensuring your home stays cleaner and healthier.
Step 5: Check the Brush Roll

The brush roll, also known as the beater bar, is an essential part of the vacuum cleaner, responsible for agitating carpet fibers and loosening dirt and debris. However, it can quickly become entangled with hair, string, and other debris, which can impede its function. Start by flipping the vacuum over to access the brush roll. Use a pair of scissors to carefully cut away any hair or string wrapped around the brush. Be cautious not to damage the bristles while doing this. Once the visible debris is removed, check for any additional dirt stuck in the bristles. If the brush roll is very dirty, you may need to remove it from the vacuum (refer to the manual for instructions) and wash it with warm, soapy water. Allow it to dry completely before reinserting it. Regularly cleaning the brush roll can prevent clogs and maintain the vacuum’s effectiveness. According to a report by Consumer Reports, a clean brush roll can enhance a vacuum's deep-cleaning capabilities, especially on carpets.
Step 6: Inspect the Hose and Attachments
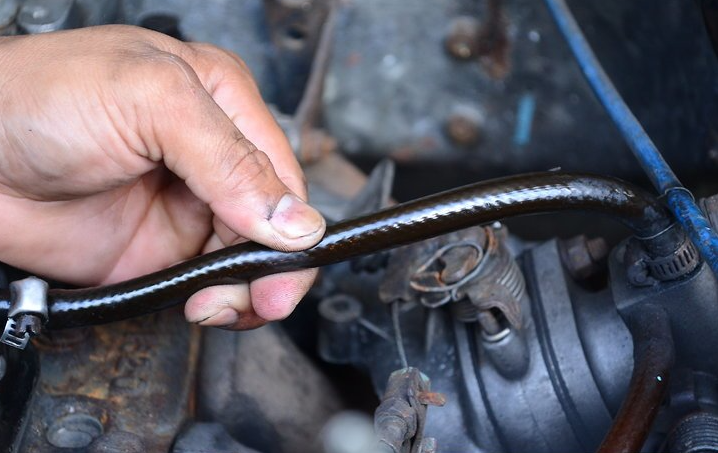
The hose and attachments of your vacuum cleaner are prone to blockages, which can reduce suction power. Detach the hose and any attachments from the vacuum. Check for blockages by looking through the hose or using a long, flexible brush to push out any debris. Rinse the hose with water to remove any remaining dust and let it dry thoroughly before reattaching. This prevents mold or mildew from developing inside the hose. For attachments, use a damp cloth to wipe them down, ensuring all dirt and dust are removed. Some attachments, like brush tools, may require a more thorough cleaning with soapy water and a small brush. Make sure they are completely dry before reattaching them to the vacuum. Regularly inspecting and cleaning the hose and attachments ensures your vacuum operates at peak efficiency. According to the American Cleaning Institute, maintaining these components can improve vacuum performance by up to 30%.
Step 7: Wipe Down the Vacuum
The exterior of your vacuum cleaner can accumulate dust and grime over time. Use a damp cloth to wipe down the entire surface of the vacuum, paying special attention to buttons, handles, and any crevices where dust might accumulate. For stubborn dirt, a mild detergent can be used, but make sure to rinse with a damp cloth afterward to remove any soap residue. Compressed air can be used to blow out dust from hard-to-reach areas, such as vents and small crevices. Wiping down the vacuum not only keeps it looking clean but also prevents the buildup of dust and dirt that can affect its operation. Keeping the exterior clean can also help identify any potential issues, such as cracks or worn parts, before they become major problems. According to a study by the University of California, regular cleaning of household appliances, including vacuum cleaners, can extend their lifespan by up to 20%.
Step 8: Reassemble the Vacuum
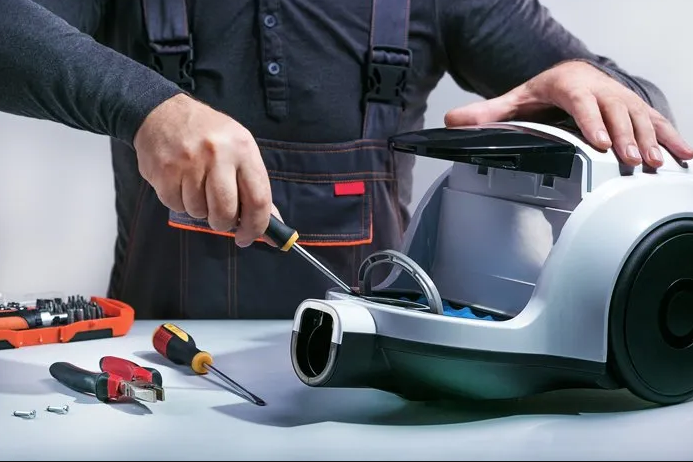
After all parts are cleaned and dried, it's time to reassemble the vacuum cleaner. Ensure that all components, including the dust bin or bag, filters, brush roll, hose, and attachments, are securely in place. Follow the manufacturer’s instructions to make sure everything is correctly reassembled. A well-assembled vacuum ensures that all parts work together efficiently, providing optimal performance. Reassembling the vacuum correctly is crucial for maintaining suction power and preventing any damage to the internal components. If any parts are not securely in place, it can lead to reduced efficiency or even cause the vacuum to malfunction. Regular maintenance and proper assembly can significantly enhance the longevity and performance of your vacuum cleaner, according to a report by Consumer Reports.
Step 9: Test the Vacuum

Finally, plug the vacuum back in and turn it on. Check that it is operating smoothly and that the suction is strong. Listen for any unusual noises that might indicate a problem, and make sure all attachments are working correctly. If everything appears to be functioning well, your vacuum is ready for use. Testing the vacuum after cleaning ensures that it’s performing at its best. Regular testing can help identify any issues early, allowing for timely repairs and maintenance. According to the Home Appliance Manufacturers Association, regular testing and maintenance of household appliances can prevent costly repairs and extend the life of the appliance.
Step 10: Establish a Regular Cleaning Schedule

To keep your vacuum cleaner in top condition, establish a regular cleaning schedule. Depending on how often you use your vacuum and the type of environment you live in, you may need to clean it more or less frequently. For instance, if you have pets or live in a dusty area, you should clean your vacuum more often. Aim to perform a basic clean after every use, including emptying the dustbin or replacing the bag and checking the brush roll for debris. Perform a more thorough cleaning, as detailed in the steps above, every 1-3 months. A regular cleaning schedule ensures that your vacuum cleaner remains efficient and effective. It can also help you spot potential issues before they become serious problems. According to a study by the National Sanitation Foundation (NSF), regular maintenance of household appliances can reduce the need for repairs and replacements, saving you time and money in the long run. Keeping a schedule will ensure you don’t overlook essential maintenance tasks, helping your vacuum cleaner perform at its best for years to come.
Maintenance Tips

To keep your vacuum cleaner in excellent working condition, follow these maintenance tips:
Clean the Dust Bin or Replace the Bag
Frequency: After every use or at least once a week.
Importance: Prevents dust and debris buildup, maintaining suction power.
Steps: Empty the dust bin into a trash bin for bagless models. Replace bags for bagged vacuums when full.
Check and Clean Filters
Frequency: Monthly.
Importance: Ensures optimal air quality and suction efficiency.
Steps: Rinse or replace filters as per manufacturer instructions to remove dust and allergens.
Inspect the Brush Roll
Frequency: Regularly, especially if you have pets.
Importance: Removes hair and debris, preventing clogs and maintaining effective cleaning.
Steps: Use scissors or a cleaning tool to cut and remove tangled hair and debris from the brush roll.
Clear Hose and Attachments
Frequency: Monthly or as needed.
Importance: Prevents blockages that reduce suction power.
Steps: Use a broomstick or long tool to clear any debris from hoses and attachments.
Wipe Down Exterior Surfaces
Frequency: After each use or as needed.
Importance: Prevents dust and dirt from entering internal components.
Steps: Use a soft, damp cloth to wipe down the vacuum’s exterior. Avoid harsh cleaners.
Inspect and Replace Belts (if applicable)
Frequency: Annually or if the vacuum brush roll stops rotating properly.
Importance: Ensures effective brush roll operation for thorough cleaning.
Steps: Refer to the manual to replace worn-out or broken belts.
Check and Straighten Vacuum Hose
Frequency: Monthly
Importance: Prevents kinks that can obstruct airflow and reduce suction.
Steps: Inspect the hose for kinks or bends, straightening them gently to maintain smooth airflow.
Clean Vacuum Wheels and Bearings
Frequency: Every 3-6 months.
Importance: Ensures smooth movement and prevents damage to vacuum components.
Steps: Remove any hair or debris stuck in the wheels or bearings. Use a damp cloth to wipe clean.
Inspect and Tighten Connections
Frequency: Every 6 months.
Importance: Prevents air leaks and ensures all parts are securely attached.
-Steps: Check and tighten hose, wand, and brush roll connections to maintain suction efficiency.
Store Vacuum Properly
Importance: Prevents damage and prolongs lifespan.
Steps: Store in a clean, dry place away from direct sunlight. Wrap cords neatly to prevent tangling.
Following these 10 maintenance tips will help keep your vacuum cleaner in optimal condition, ensuring efficient cleaning and extending its lifespan. Regular care and attention to these details will save you time and money in the long run by reducing the need for repairs and replacements.
Closing Remarks
By investing time in cleaning and maintaining your vacuum cleaner, you're not just extending its lifespan but also ensuring it operates at peak efficiency to keep your floors spotless and your indoor air quality high. Consistency is key: establish a routine for emptying the dustbin or replacing bags, cleaning filters, and checking the brush roll. These simple steps can significantly enhance the performance and longevity of your vacuum cleaner, making it a reliable tool in your cleaning arsenal. Maintaining your vacuum cleaner isn't just about functionality; it's about creating a healthier environment for you and your family. A well-maintained vacuum effectively captures allergens and dust, reducing potential respiratory irritants in your home. So, embrace these maintenance practices as part of your household cleaning routine. With regular care and attention, your vacuum cleaner will continue to deliver exceptional results, ensuring your floors remain pristine and your living space stays fresh and inviting.
Faqs
How often to clean vacuum cleaner?
How to fix vacuum cleaner lost suction?
Which brands are known for high-quality vacuum bags?
Where can I find reliable HEPA filters for vacuum cleaners?
What are some recommended brands for brush roll cleaner tools?
Which brands offer reliable compressed air canisters for vacuum maintenance?
Where can I purchase high-quality gloves and cleaning cloths for vacuum maintenance?
What brands offer comprehensive maintenance kits for vacuum cleaners?
Can I wash vacuum filters?
How to clean vacuum brush roll?
Leave a Comment
