Bosch Dishwasher Machine SGE53B55UC User Manual | Specs
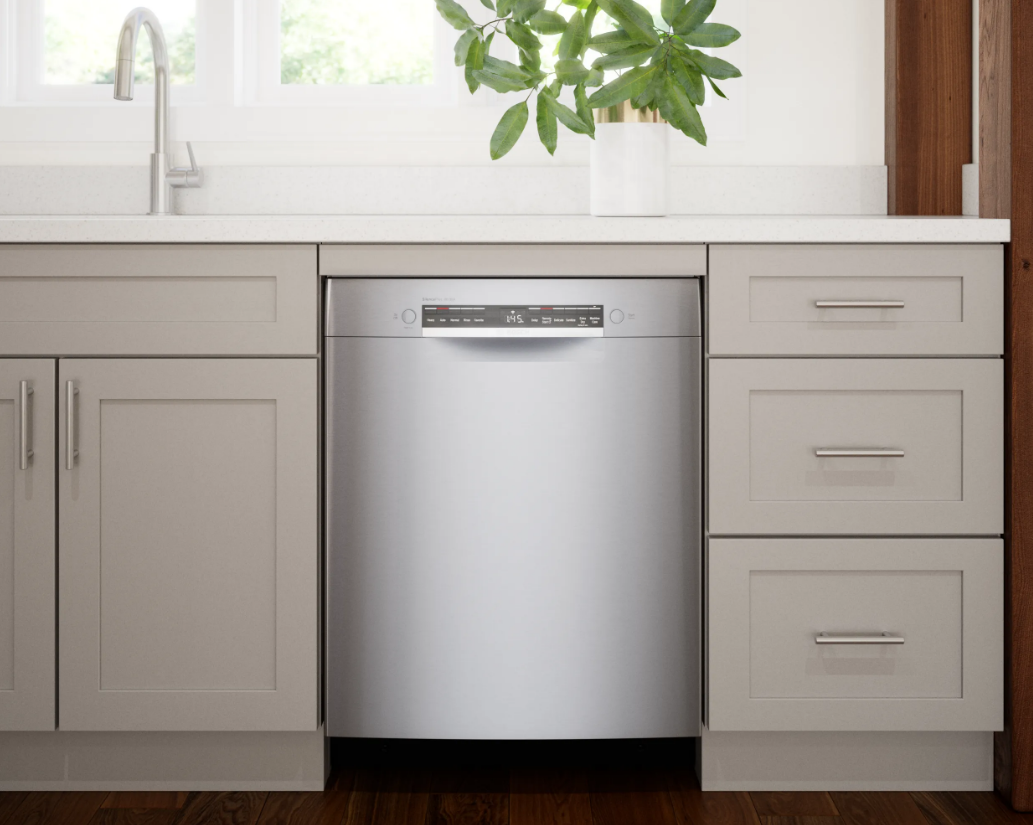
Content
Bosch Dishwasher Machine SGE53B55UC Introduction
The Bosch is a high-efficiency appliance designed to provide exceptional cleaning performance while remaining energy-efficient. With a spacious interior that holds up to 16 place settings, it features a flexible 3-rack system for optimal loading versatility. Operating at a quiet 44 dBA, this dishwasher ensures minimal noise during cycles. It offers multiple wash programs, including a sanitize option, making it suitable for various dish types and ensuring thorough cleanliness.The cost of the Bosch SGE53B55UC typically ranges around $949.00, reflecting its advanced features and reliable performance.
Technical specifications
Facts and figures for your appliance can be found here.
Weight
Max.: 45 kg
Voltage
120 V, 50 Hz or 60 Hz
Power rating
1440 W
Fuse
12 A
Water pressure
- Min. 7.25 psi (50 kPa)
- Max. 145 psi (1000 kPa)
Inlet rate
Min. 2.6 gal/min
Water temperature
- Cold water
- Hot water max.: 140 °F (60 °C)
Load Capacity
10 place settings
Features
You can find an overview of the possible features of your appli-ance and how to use them here. These features depend on your appliance model.
Upper rack
Arrange cups and glasses in the upper rack.
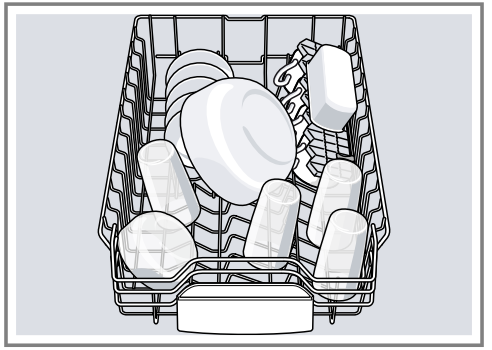
- You can adjust the height of the upper rack to make room for larger items.
Adjusting upper rack with the side levers
To wash large items in the racks, adjust the shelf height of the up-per rack.
- Pull out the upper rack.
- To prevent the rack from sud- denly dropping down, hold the side of the rack by the top edge.
Press in the right- and left-hand levers on the outside of the rack.
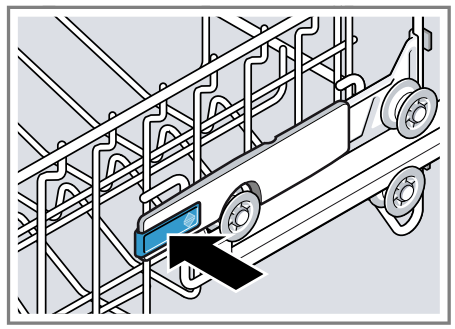
The rack can then slip down slightly.
Raise or lower the rack evenly to the right level.
Check that the rack is level on both sides.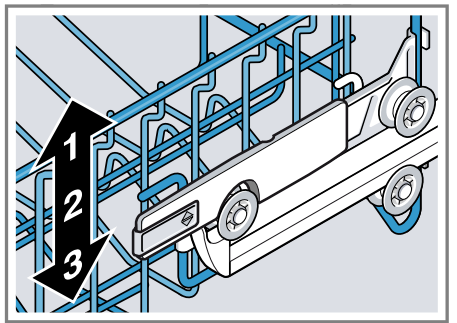
- Slide the rack in.
Dishwasher Machine Lower rack
Arrange pans and plates in the lower rack.
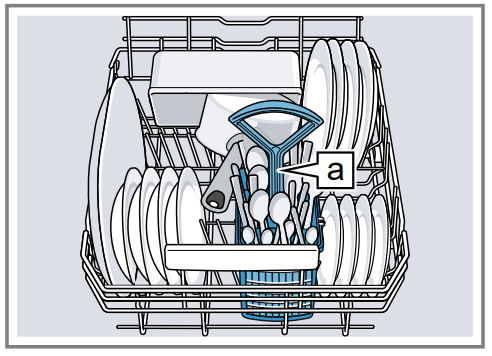
Silverware basket
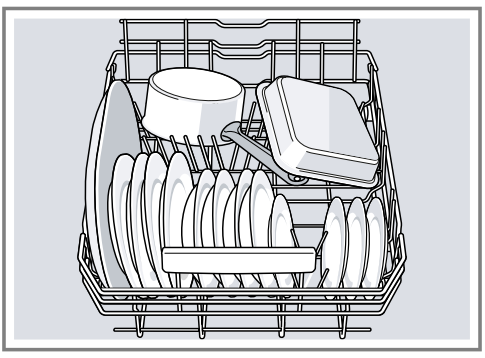
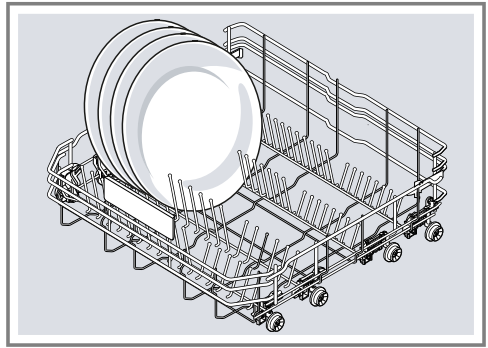
Large plates up to a diameter of 12 inches can be arranged in the lower rack as shown.
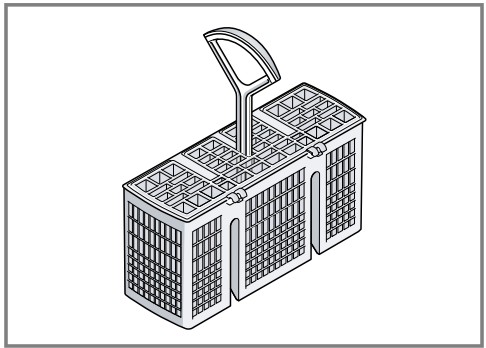
Silverware Basket
Arrange the silverware in the sil-verware basket, ensuring that the items are not nestled together and with the sharp points down.
WARNING
The sharp points and edges of knives and other sharp utensils can cause serious injury.
- Load knives and other sharp utensils with edges down. Do not allow children to handle or play near knives and sharp utensils
Silverware drawer
Arrange silverware in the silver-ware drawer.

- Arrange silverware with the points and sharp edges down.
Cup shelf
Use the cup shelf and the space underneath for small cups and glasses or for large items of silver-ware, e.g. cooking spoons or serving cutlery.

- If you do not need the cup shelf, you can fold it up.
Flip tines
Use the flip tines to position dish-ware securely, e.g. plates.

- You can fold the tines down to ar-range pans, bowls and glasses better.
Rack heights
Set the racks at the right height.
Appliance height 32 inches with silverware drawer
Level | Upper rack | Lower rack |
1 max. ø | 8.5" | 12" |
2 max. ø | 9.5" | 11" |
3 max. ø | 10.5" | 10" |
Appliance height 32 inches with silverware drawer
Level | Upper rack | Lower rack |
1 max. ø | 6" | 12" |
2 max. ø | 7" | 11" |
3 max. ø | 8" | 10" |
Folding down the tines
If you do not need the tines, fold them down.
Push the lever forward and fold down the tines .
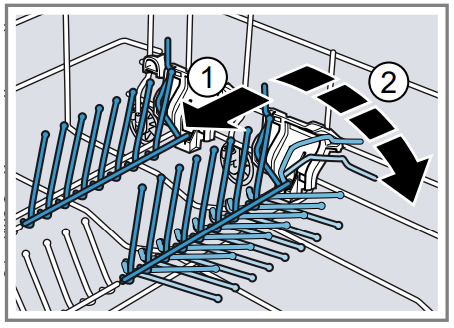
- To use the tines again, fold them back up.
The tines click into position.
Familiarizing yourself with your appliance
Appliance
Here you can find an overview of the parts of your appliance.
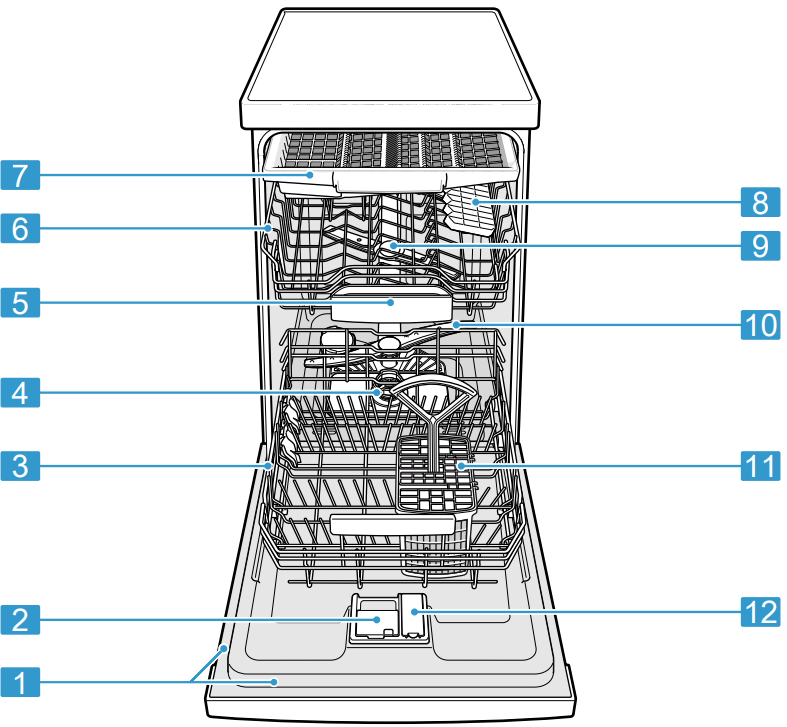
1 | Rating plate | Rating plate with E number and FD number → Page 48. You will need this data to contact Cus- tomer service → Page 47. |
2 | Detergent dispenser | Detergent is added to the detergent dispenser. |
3 | Lower rack | |
4 | Filter system | |
1 Depending on the appliance specifications | ||
5 | Detergent tab collecting tray | During the wash cycle, detergent tabs automatically drop out of the detergent dispenser into the tab collecting tray, where they can dissolve fully. |
6 | Upper rack | Upper rack |
7 | Silverware drawer | |
8 | Cup shelf1 | |
9 | Upper spray arms | The upper spray arms wash the dish- ware in the upper rack. If the dishware has not been washed properly, clean the spray arms. |
10 | Lower spray arm | The lower spray arm washes the dish- ware in the lower rack. If the dishware has not been washed properly, clean the spray arms. |
11 | Silverware basket | Silverware basket |
12 | Dispenser for rinse aid | Rinse aid is added to the dispenser for rinse aid. |
1 Depending on the appliance specifications | ||
Controls
You can use the control panel to configure all functions of your appliance and to obtain information about the operating status.
With some buttons, you can perform different functions.
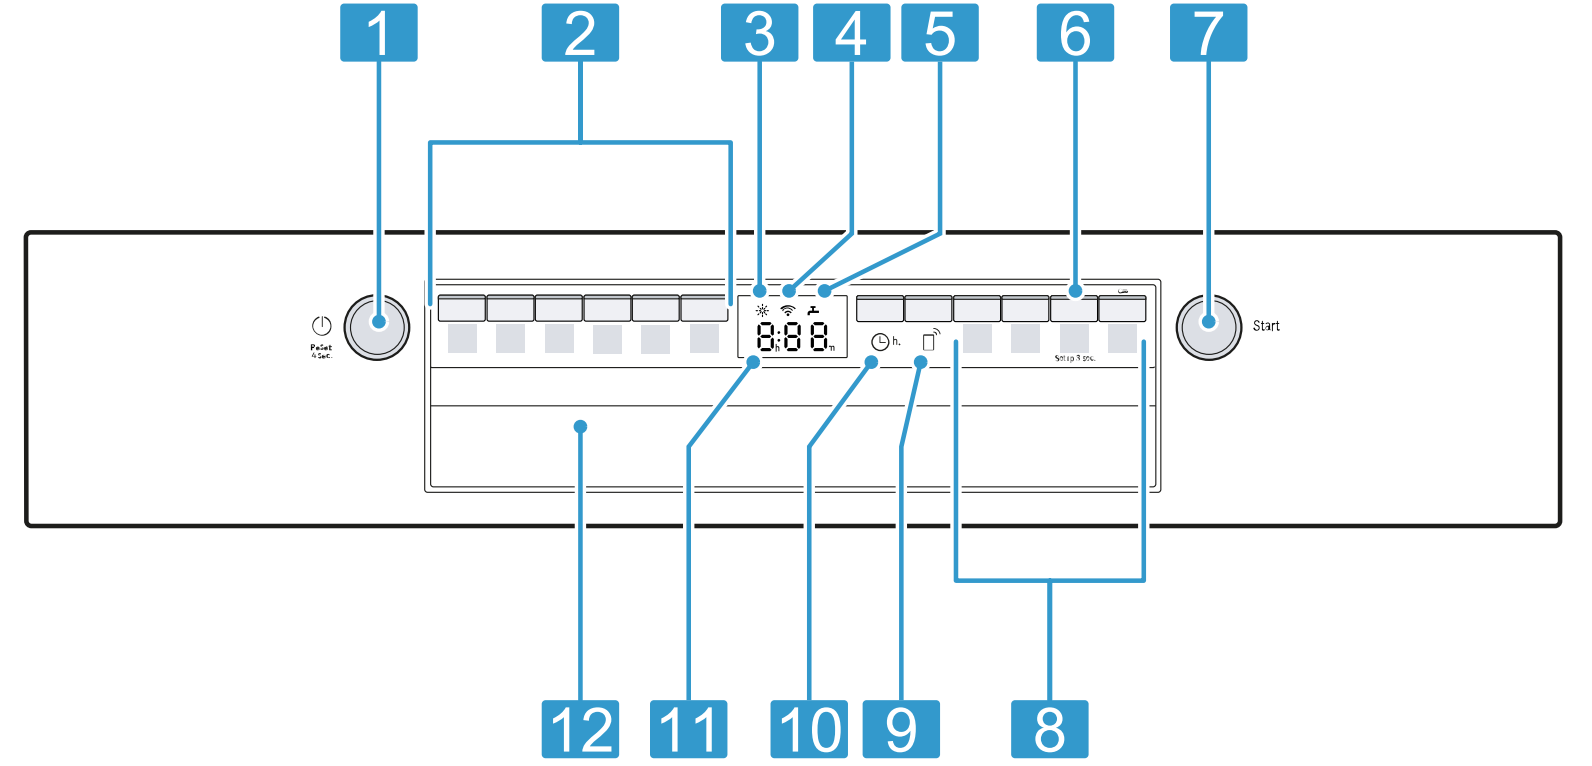
1 | ON/OFF button and reset button
| Switching off the appliance Terminating the wash cycle |
2 | Cycle buttons | Cycles |
3 | Rinse aid refill indicator | |
4 | WLAN display | |
5 | Water supply display | Display for water supply |
6 | button | If you press for approx. 3 seconds, you can open the basic settings. |
7 | Start button | |
8 | Cycle buttons and options | Cycles Options |
9 | Remote Start | |
10 | Electronic delay time | |
11 | Display | The display shows information about the remaining run time or ba- sic settings. You can change the basic settings via the display and the setting buttons. |
12 | Door opener1 | Open the appliance door. |
1 Depending on the appliance specifications | ||
Description
This Bosch dishwasher is designed with both functionality and aesthetics in mind. The sleek and modern design fits seamlessly into any kitchen decor while offering a spacious interior to accommodate a variety of dish sizes. The control panel is intuitive and easy to use, allowing you to select the perfect cycle for your dishes. The dishwasher also includes Bosch's patented 800 Series technology, which ensures optimal cleaning performance and energy efficiency.
Dishwasher Cycles
You can find an overview of the cycles that can be selected here. Different cycles, which can be found on the control panel of your appliance, are available depending on the appliance configuration.
The running time may vary depending on the cycle selected. The running time depends on the water temperature, the quantity of dishware, the level of soiling, and the option selected. The running time will change if the rinse aid system is switched off or rinse aid needs to be added. The consumption values relate to normal conditions and a water hardness of 16 - 20 °E. Different influencing factors such as water temperature or pipe pressure may result in deviations.
Cycle | Purpose | Cycle sequence | Usage
|
Heavy | Dishware:
Level of soiling:
| Intensive
|
2:05
0.830
|
Auto | Dishware:
Level of soiling:
| Sensor controlled:
|
2:15
0.660
Note: The dis- played cycle time indicates an average value. |
Cycle | Purpose | Cycle sequence | Usage
|
Normal | Dishware:
Level of soiling:
| Most economical cycle:
|
2:15
0.660
|
Rinse | Dishware:
Level of Soiling:
| Cold rinsing:
|
|
Machine Care | Only when using unloaded appli- ance. | Machine Care 162 °F |
|
Favorite | - | - |
|
Options
You can find an overview of the options that can be selected here. Different options, which can be found on the control panel of your appliance, are available depend- ing on the appliance configuration
Option | Use |
Delicate | For lightly soiled items with easy to remove foods for better care of the loaded glasses. Gentle drying, uses less energy and shortens the cycle. |
Option | Use |
Extra Dry |
tended. |
Sanitize |
|
Energy Guide
The Energy Guide label was based on the Normal soil sensing cycle.
The unit was tested without any rinse aid (liquid) in the rinse aid dispenser. A single dose of detergent was inserted into the detergent dispenser, with no detergent being used in the prewash. The unit was not subjected to truncated testing per the definitions in the test procedure. We recom-mend that dish loads such as the one in the energy certification test have the rack position set in the highest position. Recommended for daily, regular, or typical use to completely wash a full load of normally soiled dishes.
Favorite
With this function, you can save a combination of a Cycle and an Option.
You can save the selected Cycle and Option combination via the Home Connect app or on the ap-pliance. When programs have been downloaded to the appliance, the name of the program will be displayed in the app. The display alternately shows "APP" and the remaining running time.
Tip: You can use the Home Connect app to download additional Cycles and Options and save them. 1
Save Favorite on the appliance.
Save Favorite on the appliance.
- Press .
- Press the right cycle button.
- Press the button for the relevant options.
- Press the Favorite button for 3 seconds.
- The selected cycle and option will flash.
- The Favorite button flashes.
- The program combination is saved.
Tip: To reset the cycle, either use the Home Connect app or reset your appliance back to the factory settings.
Detergent
Find out which detergents are suitable for your appliance.
The correct detergents
Only use detergents that are made for dishwashers, either ba-sic or combination detergents. For the best washing and drying results, use a separate detergent, then add a Rinse aid → Page 19 separately.
Modern, powerful detergents mainly use a low-alkaline formulation with enzymes. Enzymes break down starch and remove protein. Oxygen-based bleaching agents are generally used to remove colored stains, e.g. tea or ketchup.
Note: Follow the manufacturer's instructions for each detergent. | |
Detergent | Description |
Tabs | Tabs are perfect for all cleaning functions and do not need to be measured out. However, with shorter Cycles → Page 13 some- times tabs do not dissolve entirely and leave residues of de- tergent. This may re- duce its effective- ness. |
Powder detergent | Powder detergent is recommended for shorter cycles. The dosage can be ad- justed to the level of soiling. |
Liquid de- tergent | Liquid detergent works faster and is recommended for shorter cycles with- out a pre-rinse. Sometimes liquid detergent may leak out despite the de- tergent dispenser being closed. This is not a problem, just remember the fol- lowing:
The dosage can be adjusted to the level ofsoiling. |
Incompatible detergents
Do not use a detergent that is not designated for dishwasher use or contains chlorine.
Detergent | Description |
Liquid hand soap | Liquid hand soap can cause increased froth- ing and dam- age the appli- ance. |
Detergent con- taining chlorine | This may leave chlorine residue on dishware. |
Information on Detergent
- Detergents marked as "ecological" (environmentally friendly)generally contain lower levels of active agents or none at all. The cleaning effect may be reduced.
- Adjust the rinse aid and the water softening system settings with the detergent combination detergent in use.
- Any rinse aid component of a combination detergent has limited effectiveness. You will have better results using a separate rinse aid.
- To prevent sticking, only touch detergents in a water-soluble pouch with dry hands and only ever place them in a dry detergent dispenser.
- Even if the rinse aid and special salt refill indicators light up, the wash cycles will run properly with combination deter-gents.
- Use tablets with enhanced drying results.
Adding Detergent
- To open the detergent dispenser, press the locking latch
- Add the detergent to the dry detergent dispenser
If you are using tablets, one is enough. Insert the tablets in a horizontal position.
If you are using powder or liquid detergent, follow the manufacturer's instructions and quantities for dosage in the detergent dispenser.
1.5 to 1.75 Tbsp (20 ml – 25 ml) detergent is sufficient for normal soiling. If dishware is only lightly soiled, slightly less than the amount of detergent specified is usually sufficient. - Close the lid of the detergent dispenser.
- The lid clicks into position.
- The detergent dispenser will open automatically at the optimum time during the cycle. Powder or liquid detergent will spread around the washing tank and dissolve there. Tablets will fall into the tablet collecting tray and dissolve in the right dosage. To ensure that tablets can dissolve evenly, do not place any other objects in the tablet collecting tray.
Tip: If you use powder detergent and select a cycle with pre-rinse, you can also add a little detergent to the interior door of the appliance.
Detergent table
Detergent amount guidelines
- Auto 1.75 Tbsp (25 ml) or 1 tab
- Normal 1.75 Tbsp (25 ml) or 1 tab
- Heavy 3 Tbsp (45 ml) or 1 tab
Setup Guide
To operate the Bosch SGE53B55UC effectively, start by ensuring it is properly installed according to the manufacturer's instructions.
- Once installed, load your dishes onto the racks carefully, making sure large items are placed at the bottom and utensils are secured in their designated holders.
- Select your preferred wash cycle using the control panel and press start. For assembly, follow the provided manual for correct rack configuration.
- Pairing with smart home devices is optional but can be done through Bosch's Home Connect app.
Basic settings
You can configure your appliance to meet your needs.
Overview of the basic settings
The basic settings depend on the features of your appliance.
Basic setting | Display text | Selection | Description |
Rinse aid disp. | r04 1 | r00 - r06 | Set the amount of rinse aid. → "Setting the amount of rinse aid", Page 19 Switch the rinse aid sys- tem off with level r00. |
Intensive drying | d00 1 | d00 - d01 | The temperature is in- creased during the final rinse, which improves the drying result. This may in- crease the run time slightly. Note: Not suitable for del- icate items of dishware. Switch Intensive drying on "d01" or off "d00". |
Wi-Fi | Cn0 1 | Cn0 - Cn1 | Switch the wireless net- work connection on or off. Level "Cn0" switches the wireless network connec- tion off. |
Remote Start | rc11 | rc0 - rc2 | Activate or deactivate . The following settings are possible:
|
1 Factory setting (may vary according to model) | |||
Factory setting | rE | Starting with
YES Confirming with | Restore changed settings to the factory settings. The settings for initial use must be configured. |
1 Factory setting (may vary according to model) | |||
Changing the basic settings
- Press power button for 3 seconds.
- To open the basic settings, press for 3 seconds.
- The display shows .
- Press repeatedly until the display shows the required setting.
- Press repeatedly until the display shows the right value.
You can change one or more settings. - To save the settings, press for 3 seconds.
Troubleshooting
If your Bosch dishwasher door isn't opening properly, it might be due to a few common issues:
Child Lock: This feature prevents unintended use. If activated, it can make the door and controls unresponsive. Refer to your manual for instructions on deactivating the child lock.
Damaged Door Latch: The latch keeps the door closed during cycles. If it's broken, the dishwasher won't start, and you'll need a professional to replace it for safety reasons.
Faulty Door Lock: If the door doesn't shut correctly or the latch doesn't engage the micro switch, you might have a faulty door lock. This situation also calls for a professional repair.
Door Hinges Problem: Check the hinges for any damage or if the door isn't moving freely. Damaged hinges can affect the door's operation and require professional repair.
Pros & Cons
Pros
- High Efficiency: Energy Star certified and uses less water.
- Quiet Operation: Runs at a quiet 40 dBA.
- Advanced Features: Includes CrystalDry and PrecisionWash technology.
- Large Capacity: Accommodates up to 16 place settings.
- Modern Design: Sleek design fits well in any kitchen.
Cons
- Cost: Pricier compared to some other models in the market.
- Installation Challenges: Requires professional installation for optimal performance.
- Complex Interface: Some users may find the control panel complex to navigate.
Customer Reviews
Customers have praised the Bosch SGE53B55UC for its excellent cleaning performance, quiet operation, and modern design. However, some have noted that it can be quite expensive and may require professional installation. Common complaints include issues with drying performance in certain cycles and occasional noise during operation.
Bosch Dishwasher Machine SGE53B55UC Warranty
How Long warranty Lasts
BSH warrants that the Product is free from defects in materials and workmanship for a period of three hundred sixty-five (365) days fromthe date of the original purchase.
5-year limited warranty on electronics: BSH will repair or replace any BSH microprocessor or printed circuit board if it proves to be defective in materials or workmanship (excludes labor charges).
5 year limited warranty on dishracks: BSH will replace the upper or lower dish rack (excluding rack components) if the rack proves defective in materials or workmanship (excludes labor charges).
Faqs
Does the Bosch have a silent operation?
What special features does the Bosch offer?
How many place settings can the Bosch Machine accommodate?
Is professional installation required for the SGE53B55UC?
Does the Bosch come with smart home integration?
What are some common issues users face with the Machine?
How do I troubleshoot error codes on the Dishwasher Machine?
Is the Bosch energy-efficient?
Can I customize wash cycles on the Bosch SGE53B55UC?
Where can I find detailed instructions for assembling and configuring the Bosch?
Leave a Comment
