Dymo Printer LabelWriter 5XL User Guide | Installation
Content
DYMO Printer LabelWriter 5XL Introduction
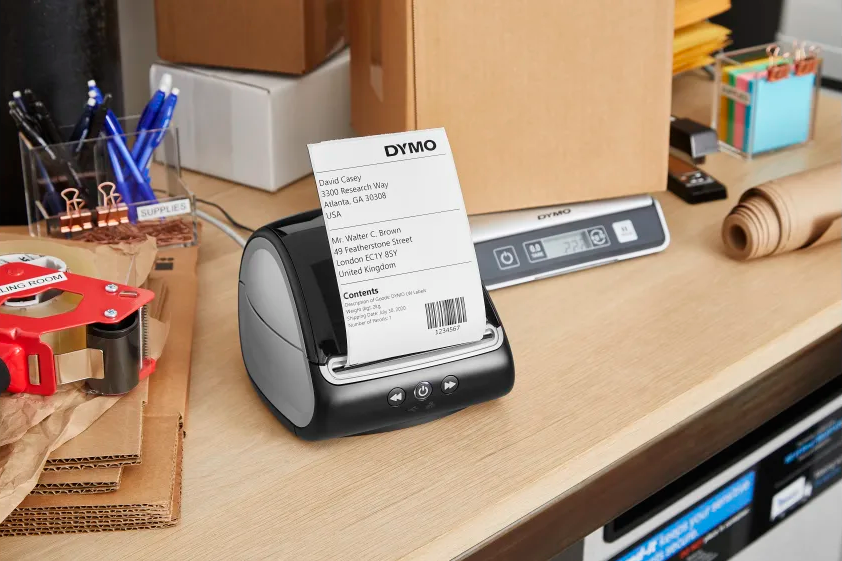
The DYMO Printer LabelWriter 5XL is an advanced label printer designed for businesses and eCommerce sellers, capable of printing extra-large labels up to four inches wide. Utilizing direct thermal printing technology, it eliminates the need for costly ink or toner while providing high-quality, crystal-clear labels for shipping, asset tracking, and organization. The printer features Automatic Label Recognition, ensuring users can easily identify label sizes and quantities remaining. The DYMO LabelWriter 5XL is priced at approximately $300.
Specifications
The DYMO LabelWriter 5XL boasts several key features that make it a top choice in its category:
- Prints up to 4.1 inches wide labels
- High-speed printing at up to 60 labels per minute
- Automatic label detection and adjustment
- USB connectivity for easy integration with computers
- Supports DYMO Stamps and other label types
- Energy-efficient design with auto-shutoff feature
Description
The DYMO LabelWriter 5XL is designed to streamline your labeling tasks with its advanced features and user-friendly interface. Its robust build ensures durability and reliability over extended periods of use. The printer is compact yet powerful, making it suitable for both home offices and large corporate environments. It comes with a comprehensive software package that allows for easy label design and printing, ensuring that you can create professional-looking labels quickly and efficiently.
The printer also supports thermal transfer printing, which eliminates the need for ink or toner cartridges, reducing maintenance costs and environmental impact. With its capability to print a variety of label sizes, including postage stamps, address labels, and shipping labels, the DYMO LabelWriter 5XL is an all-in-one solution for your labeling needs.
Quick Start Guide
This Quick Start Guide provides information for the LabelWriter 550, 550 Turbo, and the 5XL label printers.
For complete information on using your printer, download the LabelWriter 550 User Guide from one of the following locations:
From the Help menu within the software
By using the QR code to download to your mobile device
Installation of DYMO LabelWriter 5XL
Step 1. Installing the Desktop Software
Stop: Do not connect the printer to your computer until after the software installation is complete.
Download and install the latest version of DYMO Connect for Desktop labeling software from support.dymo.com.
From the Help menu, you can view the following:- Online Help
- Software user guide
- LabelWriter 550 Series printer user guide
Step 2. Connecting the Power
Use only the DYMO power adapter included with the printer.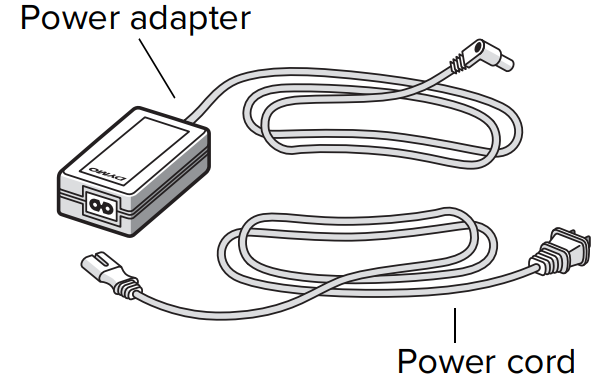
To connect the power
- Plug the power cord into the power adapter.
- Plug the power adapter into the power connector on the back of the printer.
- Plug the other end of the power cord into a power outlet.
Step 3. Connecting to your Computer
Do not connect the printer to your computer until after the software installation is complete.
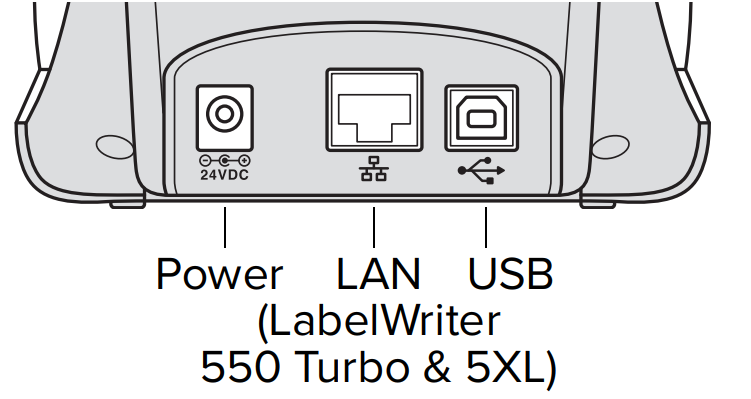
To connect using USB- Plug the USB cable into the USB port.
- Press
 to turn on the power.
 After the software is completely installed, connect the other end of the USB cable into an available USB port on your computer.
macOS
If the printer is not in the printer list when the installation is complete, refer to the macOS instructions on how to add it.
To connect using a wired LAN (LabelWriter 550 Turbo and 5XL models)
- Plug the LAN cable into the LAN port on the back of the printer.
- Plug the other end of the cable into an active LAN port on your network.
- Press
 to turn on the power.
The printer’s LAN communications settings can be changed on the Printer Status page in DYMO Connect for Desktop.
- Step 4. Loading Labels
The printer works only with authentic DYMO LW labels. Authentic DYMO LW labels support Label Recognition, which allows DYMO software to receive information about the labels, such as which size label is in your printer and how many labels remain on the roll.
To load a label roll- Lift to open the top cover.
Place the label roll on the spindle so that the labels feed from underneath and the left edge of the label roll is firmly against the side of the spool (A).
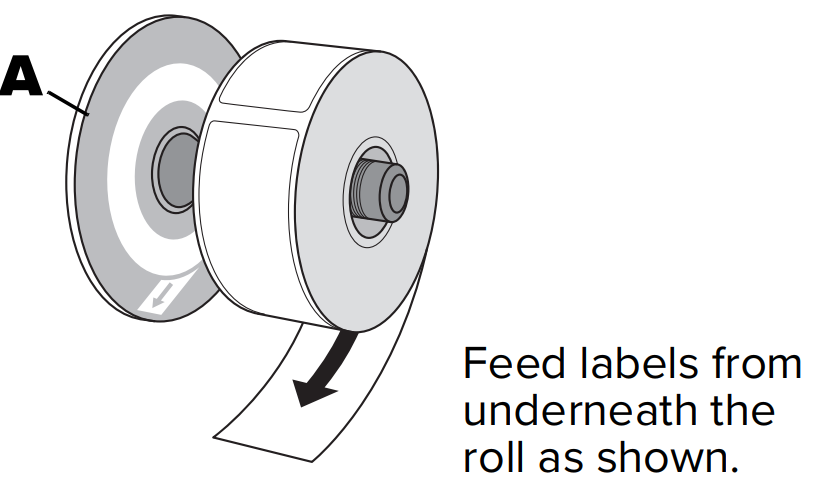
Press the spool guide (B) tightly against the side of the label roll, leaving no gap between the roll and the spool.
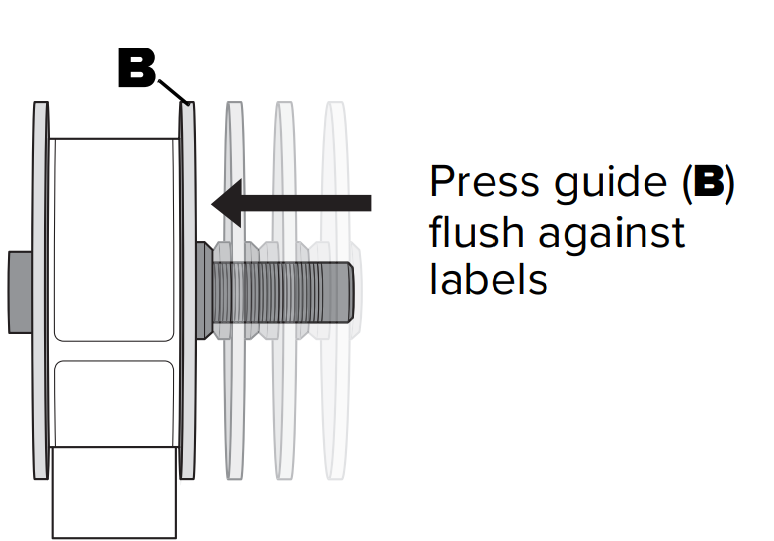
- Insert the label spool into the slots (C) in the base of the printer with the labels extending from underneath the roll.
Align the left edge of the label with the left edge of the label feed slot (D) and insert the label into the slot.
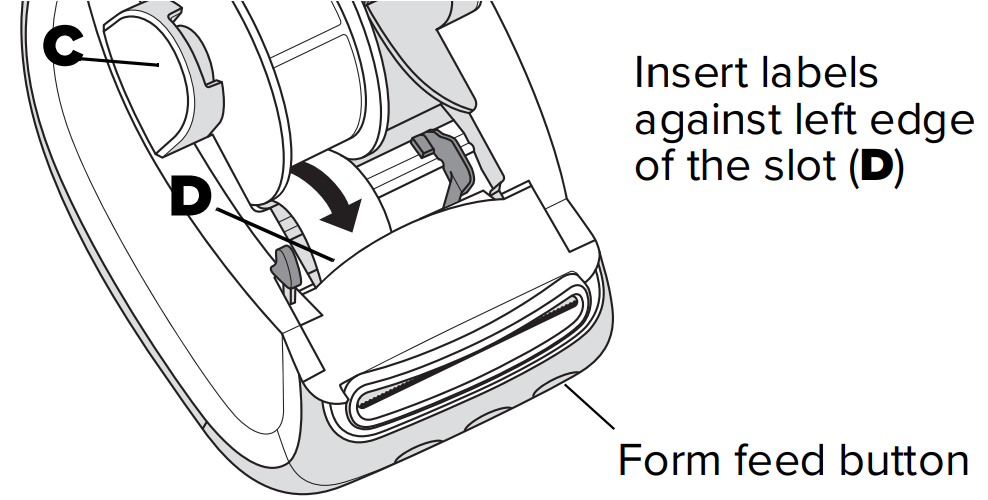
- Press the form feed button to advance the label into position.
Slide the label guide (E) against the right edge of the labels.
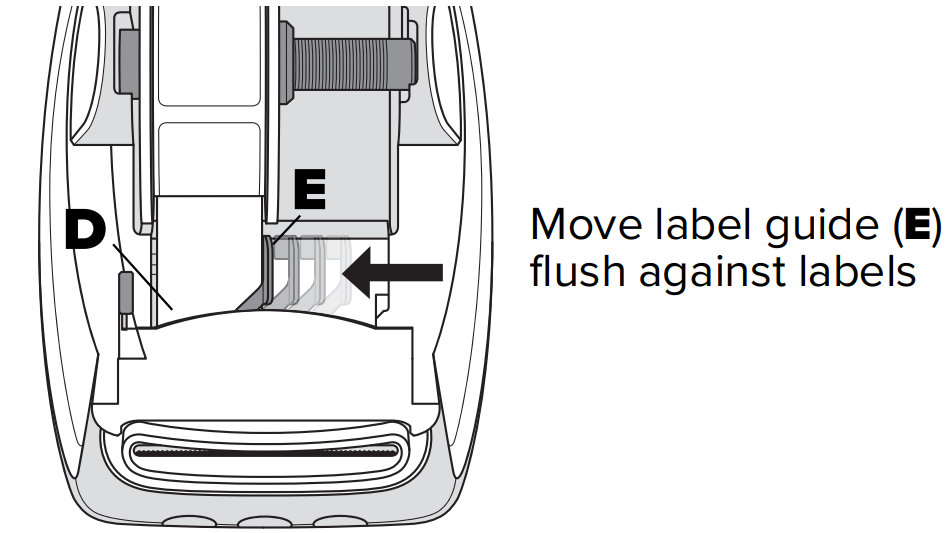
IMPORTANT! In order for the labels to feed properly during printing:- Make sure the power is turned on.
- Insert the label with the left edge against the left edge of the label feed slot.
- Press the label spool guide flush against the label roll, leaving no gap.
Setup Guide
To set up your DYMO LabelWriter 5XL, follow these steps:
- Unpack the printer and ensure all components are included.
- Connect the printer to your computer via USB.
- Install the DYMO software from the provided CD or download it from the official website.
- Load the labels into the printer according to the user manual instructions.
- Configure the printer settings using the software to start printing labels.
The setup process is straightforward and typically takes less than 10 minutes to complete.
Troubleshooting
If you encounter any issues with your DYMO LabelWriter 5XL, here are some common problems and solutions:
- Labels not feeding properly: Check if the labels are loaded correctly and ensure there are no jams.
- No printing: Verify that the printer is properly connected to your computer and that the software is installed correctly.
- Incorrect label size: Adjust the label settings in the software to match the size of the labels you are using.
Always refer to the user manual or contact customer support if you encounter any persistent issues.
2-Year Warranty for Your DYMO Product
Your electronic DYMO product is sold with a 2 year warranty from the date of purchase against defects in material and workmanship.
DYMO label printers are designed for use only with DYMO-branded labels. This warranty does not cover any malfunction or damage caused by the use of third-party labels.
Register Information
Register at https://www.dymo.com/register
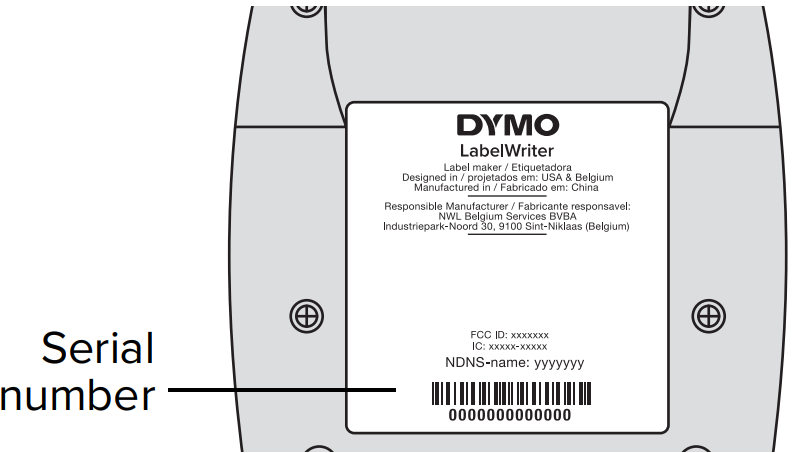
The first time you open the software, you will be asked to register your product. Registering ensures that you will receive any news and updates. During the registration process, you will be asked to enter the serial number for your label printer. The serial number is located on the bottom of the printer.
Pros & Cons
Pros
- High-speed printing capability
- Supports a wide range of label sizes
- Compact and energy-efficient design
- Ease of setup and operation
- No need for ink or toner cartridges
Cons
- Higher initial cost compared to smaller models
- Dependence on DYMO labels for optimal performance
- Limited wireless connectivity options
Customer Reviews
Customers have generally praised the DYMO LabelWriter 5XL for its speed, reliability, and ease of use. Many have noted that it significantly improves their labeling efficiency, especially in high-volume applications. However, some users have mentioned that the initial cost is higher than expected and that there are limited options for wireless connectivity.
A common complaint is the exclusivity to DYMO labels, which can be more expensive than generic alternatives. Despite these minor drawbacks, the majority of users recommend the DYMO LabelWriter 5XL for its overall performance and value.
Faqs
What is the maximum label width supported by the DYMO?
How fast can the DYMO print labels?
How do I set up my LabelWriter 5XL?
What are some common issues with the 5XL and how can I troubleshoot them?
Can I use generic labels with the LabelWriter?
Is the DYMO LabelWriter 5XL energy-efficient?
Does the 5XL support wireless connectivity?
What types of labels can I print with the 5XL?
Leave a Comment
