Netgear Nighthawk AX8 WiFi Mesh 6 Extender EAX80 User Manual
Content
Introduction
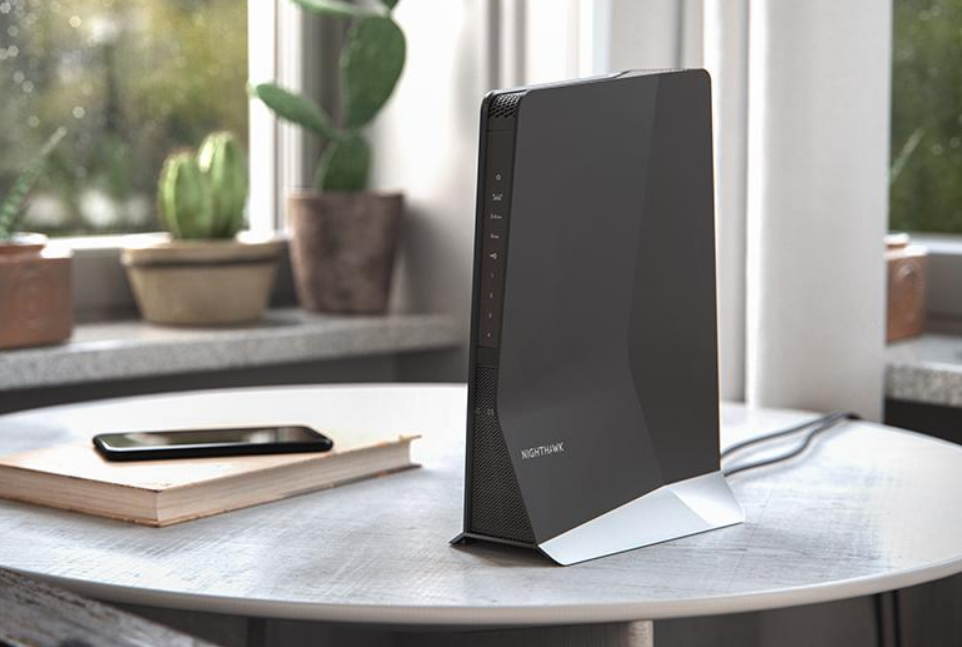
The NETGEAR Nighthawk AX8 WiFi Mesh 6 Extender EAX80 is a high-performance device designed to enhance your home WiFi network with the latest WiFi 6 technology. It supports dual-band operation, delivering combined speeds of up to 6Gbps, making it ideal for streaming, gaming, and connecting multiple devices simultaneously. With its eight-stream capability, it significantly reduces congestion and improves bandwidth availability. The extender features four Gigabit Ethernet ports for wired connections and is compactly designed at 10 x 7.75 x 4.2 inches, weighing just 1.9 pounds. The price for the NETGEAR Nighthawk AX8 EAX80 is approximately $199.99. This powerful extender is perfect for large homes, extending coverage up to 2,500 square feet.
Technical and Environmental Specifications
Network Protocols and Data Routing Protocols: Supports TCP/IP, DHCP server and client, and DNS relay.
Standards Compatibility: Compatible with 802.11ax/ac/n/a/g/b and 802.11k.
Physical Specifications:
Dimensions: 10 x 7.75 x 4.2 inches (279 x 197 x 106 mm).
Weight: 1.9 lb (0.86 kg).
Environmental Specifications:
Operating Temperature: 32° to 104°F (0° to 40°C).
Operating Humidity: Maximum of 90% relative humidity, non-condensing.
Local Interface: Four 10/100/1000 Mbps Ethernet ports for connectivity.
Unpack Your Extender
Your package contains an extender and power adapter.

Figure 1. Extender package contents
Mesh 6 Extender EAX80 LEDs
The following table describes the LEDs.
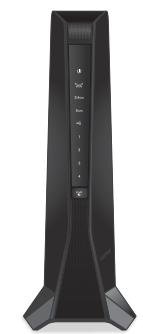
Figure 2. Front panel
Table 1. LED descriptions
| LED Indicator | Description |
|---|---|
| Power LED | Slow blinking white: The extender is booting or resetting to factory defaults. |
 | Solid white: The extender is powered on. |
| Fast blinking white: The firmware is corrupted. | |
| Off: The extender is powered off. | |
| Router Link LED | Solid white: Best connection to the router. |
 | Solid amber: Good connection to the router. |
| Solid red: Poor connection to the router. | |
| Off: No connection to the router. | |
| 2.4 GHz LED | Solid white: The extender’s 2.4 GHz WiFi radio is operating. |
| Off: The extender’s 2.4 GHz WiFi radio is off. | |
| 5 GHz LED | Solid white: The extender’s 5 GHz WiFi radio is operating. |
| Off: The extender’s 5 GHz WiFi radio is off. | |
| USB LED | Solid white: A USB device is connected to the USB port. |
 | Off: No USB device is connected to the USB port. |
| Ethernet 1–4 LEDs | Solid white: An Ethernet device is connected to an Ethernet port. |
| 1 2 3 4 | Off: An Ethernet device is not connected to the extender. |
| WPS LED | Blinking white: A WPS connection is being established. |
 | Solid white: The extended network is enabled with WiFi security (WPA or WPA2). |
| Off: The extended network is enabled without WiFi security. |
Back Panel
The back panel of the extender provides ports, buttons, and a DC power connector.
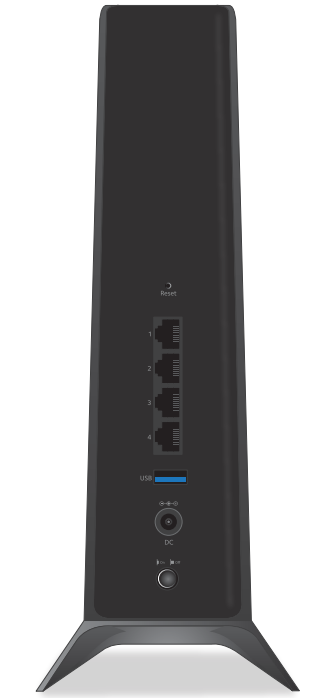
Figure 3. Back panel
The back panel contains the following components:
- Reset button. Pressing this button resets the extender. If the Reset button is pressed for at least seven seconds, the Power LED blinks amber, and the extender returns to its factory settings.
- Ethernet ports. Use the four Gigabit Ethernet RJ-45 LAN ports to connect the extender to LAN devices.
- USB 3.0 port. Use this port to connect USB storage devices to the extender.
- DC power connector. Connect the power adapter that came in the product package to the DC power connector.
- Power On/Off button. Press the Power On/Off button to provide power to the extender.
System Requirements
You need the following to install your extender:
- 2.4 GHz or 5 GHz 802.11 a/b/g/n/ac/ax wireless router or gateway
- Compatible web browser:
- Microsoft Internet Explorer 8.0 or higher
- Firefox 2.0 or higher
- Safari 5.1 or higher
- Google Chrome 25.0 or higher
How the Extender Works
The extender works like a bridge between a WiFi router (or a WiFi access point) and a WiFi device outside the range of the WiFi router. The extender performs two main jobs:
- The extender connects to a working WiFi network.
When the extender connects over WiFi to an existing network, it functions as a network client, similar to how a WiFi device connects to a network. - The extender acts as an access point for WiFi devices.
The extender broadcasts its own WiFi network that WiFi devices can join. In its role as an access point, the extender performs tasks that WiFi routers do, such as broadcasting its network name (SSID).
The extender must do each of these jobs so that both ends of the bridge are in place.
Description
The Netgear Nighthawk AX8 WiFi Mesh 6 Extender EAX80 is engineered to provide robust and reliable WiFi coverage. Its sleek design includes four external antennas that help in maximizing the signal strength and stability. The device supports the latest WiFi 6 standard, ensuring that it can handle a large number of devices without compromising on speed or performance.
It also features a Gigabit Ethernet port, allowing you to connect wired devices directly to the extender for even faster speeds. The EAX80 is compatible with any WiFi router and can be easily integrated into existing home networks.
Get Started
Install the WiFi Extender
Place the extender, apply power, and connect the extender to your existing WiFi network.
Place the Extender and Apply Power
To place the extender and apply power:
- Place your extender in the same room as your WiFi router.
Proximity to the WiFi router is required only during the initial setup process. - Plug the extender into an electrical outlet.
- Wait for the Power LED to light solid white.
If the Power LED does not light, press the Power On/Off button on the extender.
Connect to an Existing WiFi Network
To extend the range of your WiFi network, you must connect the extender to your existing router's WiFi network.
Note: If your router’s WiFi security is set to WPA enterprise or WPA2 enterprise, your extender can’t connect to your router. You must change your router’s WiFi security setting.
You can connect your extender to your router's WiFi netowrk using one of these methods:
- Connect with the Nighthawk app. The Nighthawk app guides you through the connection process.
- Connect with WPS. If your router supports Wi-Fi Protected Setup (WPS), use WPS to connect your extender to your router's WiFi network.
Note: WPS does not support WEP network security or a hidden SSID network. If your router WiFi network uses WEP security or its SSID is hidden, follow the instructions in Connect With the NETGEAR Installation Assistant.. - Connect with the web browser setup. You can use the extender's web browser setup, called the NETGEAR installation assistant.
Connect with the Nighthawk app
To connect with the Nighthawk app:
Download the Nighthawk app on your mobile device.

- On your mobile device, open the WiFi connection manager, then locate and connect to the extender network called NETGEAR_EXT.
- Launch the Nighthawk app.
- Follow the prompts to connect your extender to your existing router WiFi network.
Unplug your extender and move it to a new location.
We recommend that the new location be about halfway between your router and the area with a poor WiFi signal.
The extender must be within the range of your router WiFi network.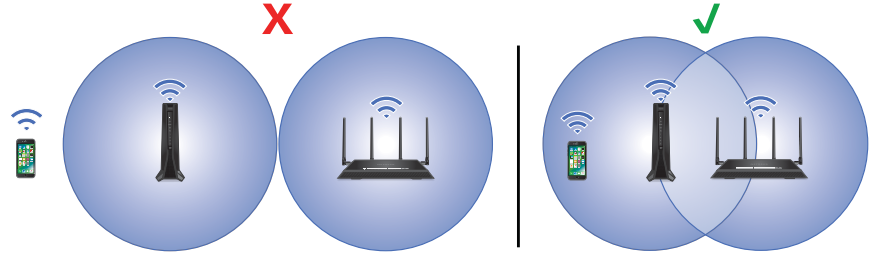
- Power on your extender.
- Use the Router Link LED to help you choose a spot where the extender-to-router connection is optimal.
- If the Router Link LED doesn’t light white, plug the extender into an outlet closer to the router and try again.
Keep moving the extender to outlets closer to the router until the Router Link LED lights white. - Reconnect your computer or mobile device to the new extended WiFi network.
The following are examples of what your 2.4 and 5 GHz extended WiFi names might look like. Examples of your existing dual-band router's WiFi names:- 2.4 GHz WiFi name. MyWiFiExample
- 5 GHz WiFi name. MyWiFiExample-5G
Examples of your new extended WiFi names:- New extended 2.4 GHz WiFi name. MyWiFiExample
- New extended 5 GHz WiFi name. MyWiFiExample-5G
Connect With WPS
- Wi-Fi Protected Setup (WPS) lets you join a secure WiFi network without typing the network name and password. For help with the WPS button on your
- The WPS-enabled device, check the instructions or online help that came with that device. Some older equipment cannot use WPS.
Note: WPS does not support WEP network security or a hidden SSID network. If your existing WiFi network uses WEP security or its SSID is hidden,
To use WPS to connect the extender to your WiFi router:
- Press the WPS button on the extender until the WPS LED blinks.
- Within two minutes, press the WPS button on your router.
- When the extender connects to your existing WiFi network, the WPS LED on the extender lights.
- If the Router Link LED lights white, the connection between the router and extender is good. If the Router Link LED lights amber or red, move the extender closer to the router and try again.
- If the Router Link LED lights white, the connection between your router and extender is good. If the Router Link LED lights amber or red, move the extender closer to the router and try again.
Note: If your router supports the 5 GHz band and your extender didn’t connect to that band, repeat the WPS process.
- Unplug your extender and move it to a new location.
We recommend that the new location be about halfway between your router and the area with a poor WiFi signal.
The extender must be within the range of your router WiFi network. - Power on your extender.
- Use the Router Link LED to help you choose a spot where the extender-to-router connection is optimal.
Keep moving the extender to outlets closer to the router until the Router Link LED lights white. - If the Router Link LED doesn’t light white, plug the extender into an outlet closer to the router and try again.
Keep moving the extender to outlets closer to the router until the Router Link LED lights white. - Reconnect your computer or mobile device to the new extender WiFi network. After the setup, the One WiFi Name feature is enabled, which allows your extender to use the same WiFi network settings as your router.
Connect your WiFi-enabled computer or mobile device to the extended network. Your extender uses the same WiFi network settings as your router for its 2.4 GHz and 5 GHz extended networks.
For example, if your extender connects to the router’s 2.4 GHz WiFi band, your extender uses your router’s 2.4 GHz WiFi settings for both its networks:- Existing router 2.4 GHz WiFi network name. MyWiFiExample
- Existing router 5 GHz WiFi network name. MyWiFiExample-5G
- New extended 2.4 GHz WiFi network name. MyWiFiExample
- New extended 5 GHz WiFi network name. MyWiFiExample
If your extender connects to the router’s 5 GHz WiFi band, your extender uses your router’s 5 GHz WiFi settings for both its networks:
- Existing router 2.4 GHz WiFi network name. MyWiFiExample
- Existing router 5 GHz WiFi network name. MyWiFiExample-5G
- New extended 2.4 GHz WiFi network name. MyWiFiExample-5G
- New extended 5 GHz WiFi network name. MyWiFiExample-5G
Note: Since your router and extended networks share the same WiFi network name, only one WiFi network name is broadcast.
Connect With the NETGEAR Installation Assistant
You can use the NETGEAR installation assistant to connect your extender to your existing WiFi router network. To use the NETGEAR installation assistant, you must launch a web browser on your computer or mobile device.
To use the NETGEAR installation assistant to connect the extender to your WiFi router:
- On your WiFi-enabled computer or mobile device, open the WiFi connection manager and locate and connect to the extender network called NETGEAR_EXT.
- Launch web browser.
- Enter NETGEAR installation assistant displays.
- Follow the prompts to connect your extender to your existing router WiFi network.
- Unplug your extender and move it to a new location.
We recommend that the new location be about halfway between your router and the area with a poor WiFi signal. - Power on your extender.
- Use the Router Link LED to help you choose a spot where the extender-to-router connection is optimal.
- If the Router Link LED doesn’t light white, plug the extender into an outlet closer to the router and try again.
Keep moving the extender to outlets closer to the router until the Router Link LED lights white. - Reconnect your computer or mobile device to the new extended WiFi network.
Use the Extender in Access Point Mode
You can use the extender as a WiFi access point, which creates a new WiFi hotspot by using a wired Ethernet connection.

To use the extender in access point mode:
- Plug the extender into an electrical outlet.
- Wait for the Power LED to light amber and then turn white.
If the Power LED does not light, press the Power On/Off button on the side of the extender. - Connect a computer or mobile device to the extender using a WiFi or Ethernet connection:
- WiFi. On your WiFi-enabled computer or mobile device, open the WiFi connection manager and connect to the extender network called NETGEAR_EXT.
When your WiFi-enabled computer or mobile device is connected to the extender, the Client LED lights solid white. - Ethernet. Connect the Ethernet cable to the Ethernet port on your computer and extender.
Note: If you want to use an Ethernet connection, you must do this before you connect your extender to your modem router or router.
- WiFi. On your WiFi-enabled computer or mobile device, open the WiFi connection manager and connect to the extender network called NETGEAR_EXT.
- Launch a web browser and visit www.mywifiext.net.
The NETGEAR installation assistant displays. - Use an Ethernet cable to connect your router to an Ethernet port on the extender. Note: Do not connect your extender directly to your DSL or cable modem. The extender does not function as a router. If your network includes a DHCP server, you can connect the extender to a switch or hub that is connected to the DHCP server.
- Return to the NETGEAR installation assistant and follow the prompts to finish setting up your extender as an access point.
Connect a Device to the Extender Network
After you complete the setup process, you can connect all your devices to the new extender network using a WiFi or WPS connection.
Connect a Device to the Extender Network Using WiFi
If you enabled the One WiFi Name feature, your extender uses the the same WiFi network name and password as your router.
To connect to the extender WiFi network:
- On your WiFi-enabled computer or mobile device, open the WiFi connection manager that manages your WiFi connections.
The WiFi connection manager scans for WiFi networks in your area. - Find and select your extender’s WiFi network name (SSID) and enter your extender’s WiFi password.
This is the SSID and password that you set up during the installation process. If you enabled the One WiFi Name feature, use your router’s SSID and password.
Connect a Device to the Extender Network Using WPS
For help with the WPS button on your WPS-enabled device, check the instructions or online help that came with that device. Some older equipment cannot use WPS.
To connect to the extender using a WPS connection:
- Press the WPS button on the extender until the WPS LED blinks white.
- Within two minutes, press the WPS button on your WPS-enabled device.
When the extender connects to your WPS-enabled device, the WPS LED lights solid white.
Log In to the Extender After Installation
After installation, you can log in to the extender to view or change the extender’s settings. To log in to the extender:
- Launch a web browser from a computer or mobile device that is connected to your extender network.
- Log in to your extender:
- If you did not enable the One WiFi Name feature in the address field of the browser.
- If you enabled the One WiFi Name feature, enter one of the following URLs.
- Windows-based computers.
- Mac computers and iOS devices.
- Android devices. IP address> (for example, http://192.168.1.3)
Run Smart Setup Installation
You can use Smart Setup to change the extender settings. This is an easy way to connect the extender to a different router or to change the extender WiFi network name (SSID) or WiFi password.
To run Smart Setup:
- Launch a web browser from a computer or mobile device that is connected to your extender network.
- Log in to your extender:
- If you did not enable the One WiFi Name feature, enter www.mywifiext.net in the address field of the browser.
- If you enabled the One WiFi Name feature, enter one of the following URLs:
- Windows-based computers.
- Mac computers and iOS devices.
- Android devices. IP address> (for example, http://192.168.1.3)
A login page displays.
- Enter your admin user name and password and click the LOG IN button. The Status page displays.
- Click the SMART SETUP button.
- Follow the prompts.
Setup Guide
To set up the Netgear Nighthawk AX8 WiFi Mesh 6 Extender EAX80, follow these steps:
- Unbox the extender and place it in a central location within your home.
- Plug in the extender and power it on.
- Use the Netgear Nighthawk app or web browser to connect to the extender’s default network.
- Follow the in-app instructions to configure the extender with your existing WiFi network.
- Once configured, move the extender to its final location and test the WiFi coverage.
Factory Default Settings
| Feature | Default Settings |
|---|---|
| Smart Setup | Enabled |
| WiFi Communication | Enabled |
| WiFi Network Name (SSID) | NETGEAR_EXT |
| Security | Disabled |
| Transmission Speed | Auto1 |
| Country/Region | Varies by region |
| Operating Mode | 802.11a/b/g/n/ac/ax |
| Data Rate in the 2.4 GHz Band | Max 1200 Mbps (Disabled by default; Max 4800 Mbps when enabled) |
| Data Rate in the 5 GHz Band | Max 4800 Mbps |
| DHCP Server and Client | Enabled |
- Maximum WiFi signal rate (IEEE Standard 802.11). Actual throughput can vary. Network conditions and environmental factors, including volume of network traffic, building materials and construction, and network overhead lower actual data throughput rate.
Nighthawk AX8Troubleshooting
Find the Extender’s IP address
If your extender and router use the same WiFi network name (SSID) and you want to log in to your extender using an Android device, you must use the extender’s IP address. You can log in to your router to find your extender’s IP address. If you own a NETGEAR router, use the following procedure to find the extender’s IP address. If you do not own a NETGEAR router, see your router's documentation.
Note: The following instructions might not apply to your NETGEAR router. For more information, see your NETGEAR router’s user manual.
To log in to your router and find your extender’s IP address:
- Launch a web browser from a computer or mobile device that is connected to the router network.
- Enter http://www.routerlogin.net/
A login window opens. - Enter the router admin user name and password.
The user name is admin. The password is the one that you specified the first time that you logged in. The user name and password are case-sensitive.
The BASIC Home page displays. - Select Attached Devices.
A list of devices connected to your router displays. - Find your extender in the list and note your extender’s IP address.
Cannot Connect to the Extender
If you cannot connect to the extender, determine what prevents you from connecting:
- If you cannot access it.
- If you forgot your user name or password, click the Username & Password Help link.
- If your browser displays an error page, include http:// in the address field of your browser by typing.
- If you already set up the extender but can no longer connect to it over WiFi, check to see if the Client Link LED is off.
- If you cannot get a WiFi connection working, you can use an Ethernet cable to connect your computer to the extender.
Cannot Join a WiFi Network and Receive an Error Message
To join a WiFi network, you must know its WiFi network name (also called the SSID) so that you can select it. If the network is secure, you must know the WiFi password (also called the passphrase or key). If the extender does not connect to the network that you select, the cause might be one of the following:
- It is possible that you typed the WiFi network name or WiFi passowrd incorrectly. Use Smart Setup (see Run Smart Setup Installation on page 20) to select a WiFi network and retype the WiFi password. The WiFi password is case-sensitive. For example, PASSWORD25 is not the same as Password25 or password25.
- If the extender cannot detect your WiFi network, check to see if your WiFi network is still working. Make sure that the WiFi router is turned on. If possible, move the extender closer to the WiFi router.
- If the extender Router Link LED is red, the WiFi connection between the WiFi router and the extender is poor. You can establish the best connection with a clear line of sight between the extender and the WiFi router. Make sure that no physical obstacles exist between the extender and the WiFi router, and try to move the extender closer to the WiFi router.
If you use Smart Setup, and the extender does not connect to the WiFi router, does not connect to the Internet, or cannot get an IP address from the WiFi router, Smart Setup displays a message to notify you that the extender is not configured.
To run Smart Setup again, click the YES button. To manually configure the extender, click the NO, CONFIGURE MANUALLY button.
Cannot Access mywifiext.net
When you try to set up your extender, you might receive an error message that says you are not connected to the extender's WiFi network. This website is not a regular Internet website. It is a local web address used to log in to the extender web interface and view the extender’s settings.
Try these troubleshooting tips to connect:
- If you’re trying to access www.mywifiext.net for the first time to set up your extender, see Connect With the NETGEAR Installation Assistant on page 16 and follow the instructions.
- After you connect your computer or mobile device to the extender network, make sure that the extender’s Client Link LED is solid white.
If the Client Link LED is not lit, open your computer’s or mobile device’s WiFi connection manager and make sure that your device is still connected to the extender network. - Launch a web browser and enter the extender’s default IP address, which is 192.168.1.250.
If this IP address does not work, it is possible that your extender’s IP address might have changed. You can log in to your router to view your extender’s IP address. - If your extender and router use the same WiFi network name
- Clear your web browser’s cache and browsing history and try again.
- Try using another web browser.
- Assign a static IP address to your computer.
Pros & Cons
Pros
- High-speed WiFi 6 technology for better performance
- Quad-core processor for handling multiple devices simultaneously
- OFDMA technology for efficient data transmission
- Gigabit Ethernet port for wired connections
- Easily integrates with any WiFi router
Cons
- Slightly higher price compared to some other extenders
- Large size due to external antennas
- May require some technical knowledge for setup
Customer Reviews
Customers have generally praised the Netgear Nighthawk AX8 WiFi Mesh 6 Extender EAX80 for its robust performance and ease of setup. Many have noted significant improvements in their home network coverage and speed. However, some users have mentioned that the device is slightly larger than expected due to its external antennas.
Common complaints include occasional drops in signal strength if not placed optimally and the need for some technical expertise during the initial setup process.
Faqs
How do I set up the Extender?
What is the coverage area of the WiFi Mesh 6?
Does the Netgear support wired connections?
Is the WiFi Mesh 6 Extender compatible with any WiFi router?
What technology does the Nighthawk Extender EAX80 use?
How many devices can the Netgear Nighthawk AX8 support?
Why is my WiFi signal weak after setting up the extender?
How do I troubleshoot if my device is not connecting to the Extender EAX80?
Leave a Comment