
Setup: Ecozy Ice Maker IM-NB661A User Manual
Content
ecozy Ice Maker IM-NB661A: Comprehensive Product Manual and Review
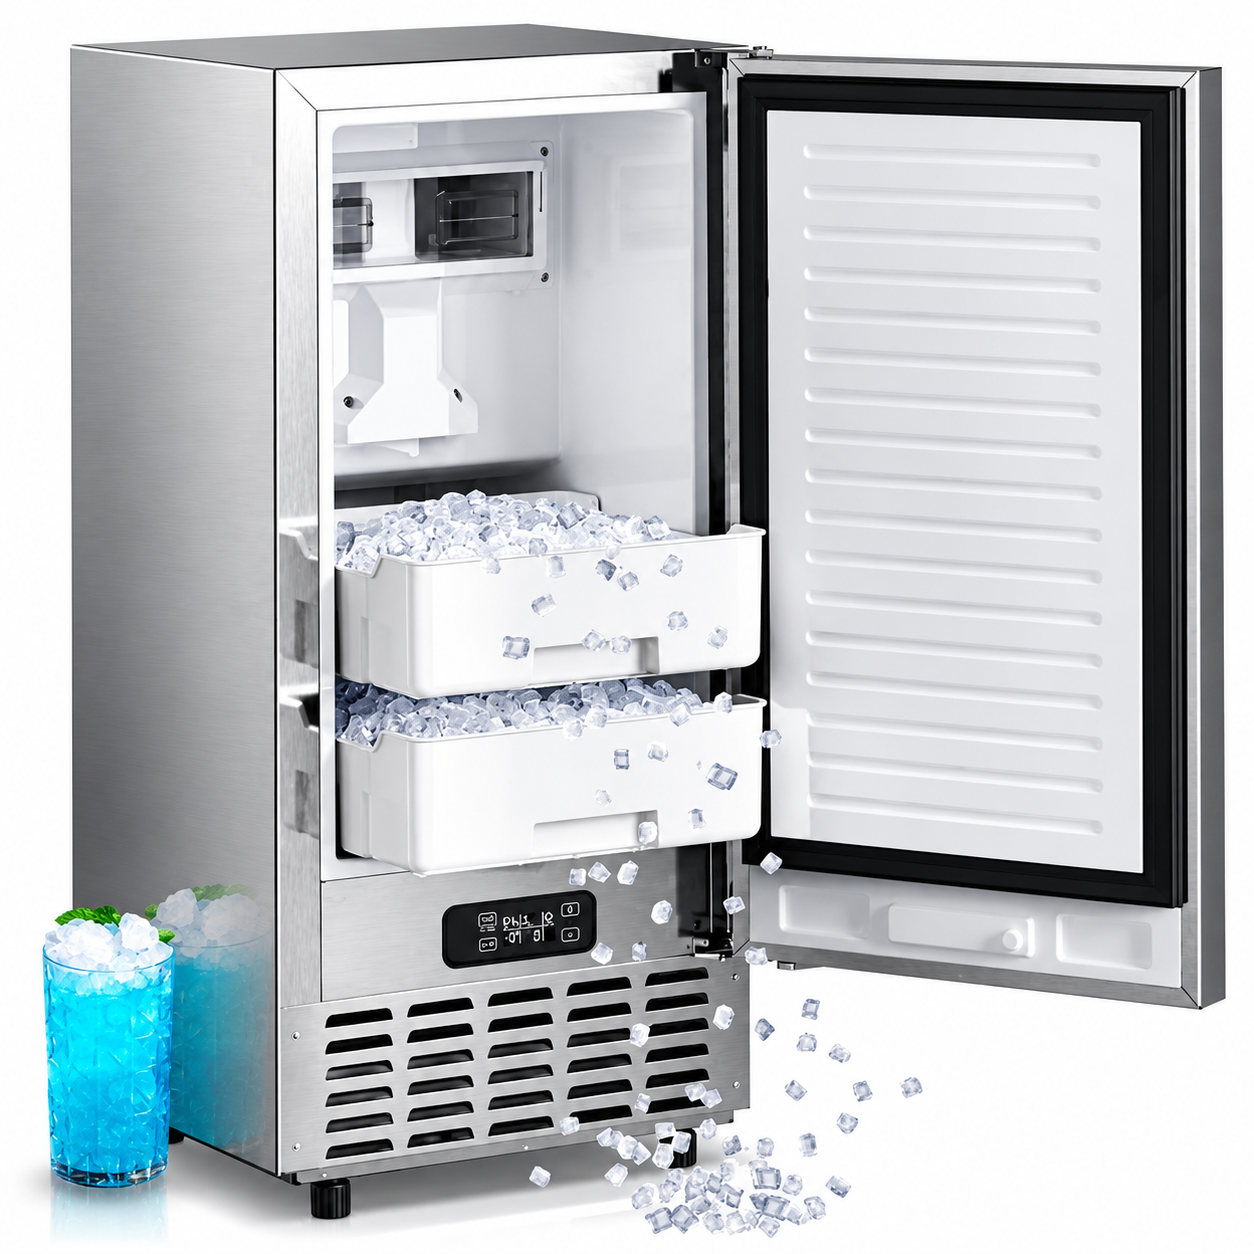
Introduction to ecozy Ice Maker IM-NB661A
The ecozy Ice Maker IM-NB661A is a premium under-counter nugget ice maker designed for seamless integration into modern kitchens, bars, and home entertainment spaces. This built-in or freestanding machine produces up to 66 lbs of chewable nugget ice per day, with a generous 26 lbs ice storage capacity, making it ideal for parties, daily cocktails, or keeping beverages chilled without constant refills. Its standout features include triple-layer insulation that keeps ice frozen for up to 8 hours, preventing melting and ensuring fresh, crunchy pebble ice on demand.
Targeted at homeowners, cocktail enthusiasts, and small business owners seeking a reliable nugget ice maker machine, the ecozy IM-NB661A excels in high-volume scenarios like family gatherings or office break rooms. Unique selling points include smart app control via EcozyHome for remote start/stop and scheduling, voice compatibility with Alexa and Google Assistant, and an advanced IceLumix full-color panel displaying real-time TDS (Total Dissolved Solids) and temperature for optimal ice quality. Low TDS water (under 200) ensures clearer, better-tasting ice and reduces descaling needs.
Versatile installation options—under-counter or freestanding—fit diverse setups, while the included 6.56ft water supply hose with 1/4" connector simplifies plumbing.[8] Priced around $759.99 to $959.99, it's available directly from ecozy.com and retailers like Best Buy, offering excellent value for a high-capacity under-counter ice maker. Whether upgrading your home bar or stocking a party, this ecozy nugget ice maker delivers convenience, efficiency, and restaurant-quality ice.
Package Contents
- Ice Maker
- Glass Pane
- Ice Scoop
- Door Handle
- Water Supply
- Hose
- Water Drain Hose
- Hose Connector
- Screws
- User Manual
- Installation Guide
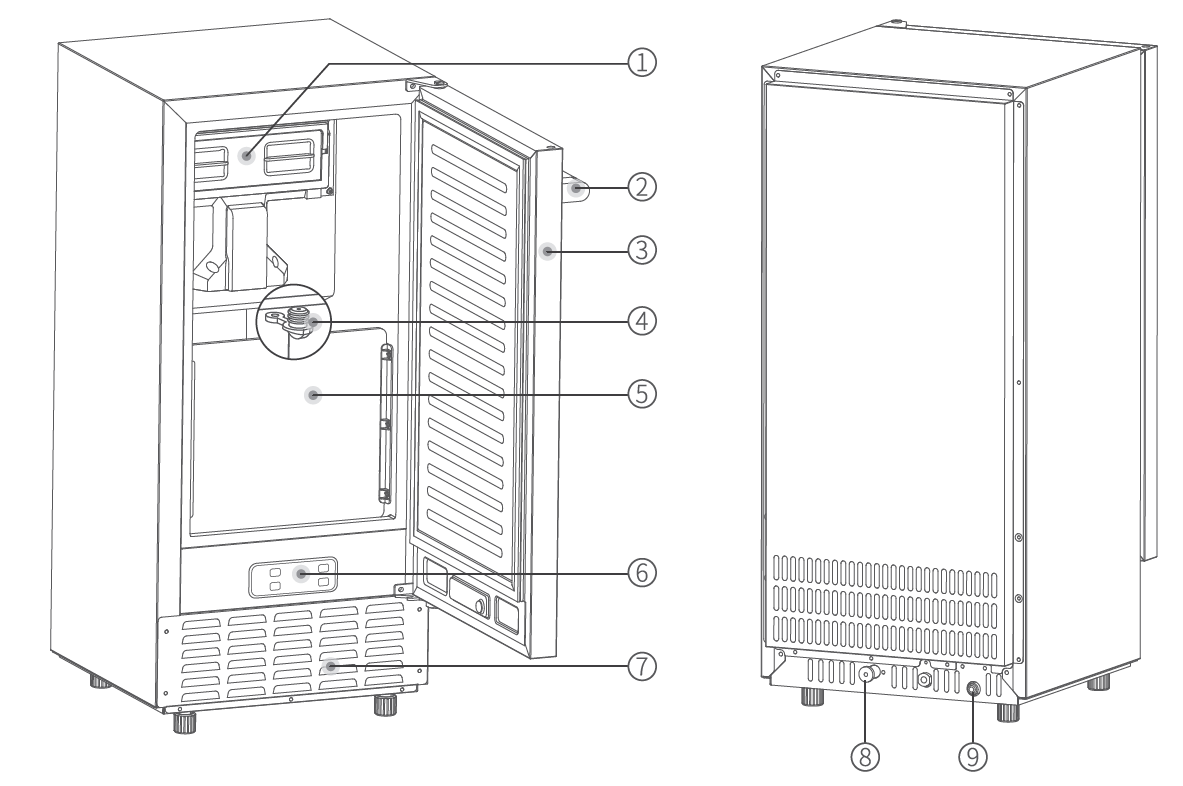
Product Description
- Water Tank
- Door Handle
- Door
- Drain Plug
- Glass Pane (Not Pre-installed)
- Control Panel
- Air Outlet (Do not block)
- Water Drain Port (Plugged with Cap)
- Water Inlet Port
Control Panel & LCD Display
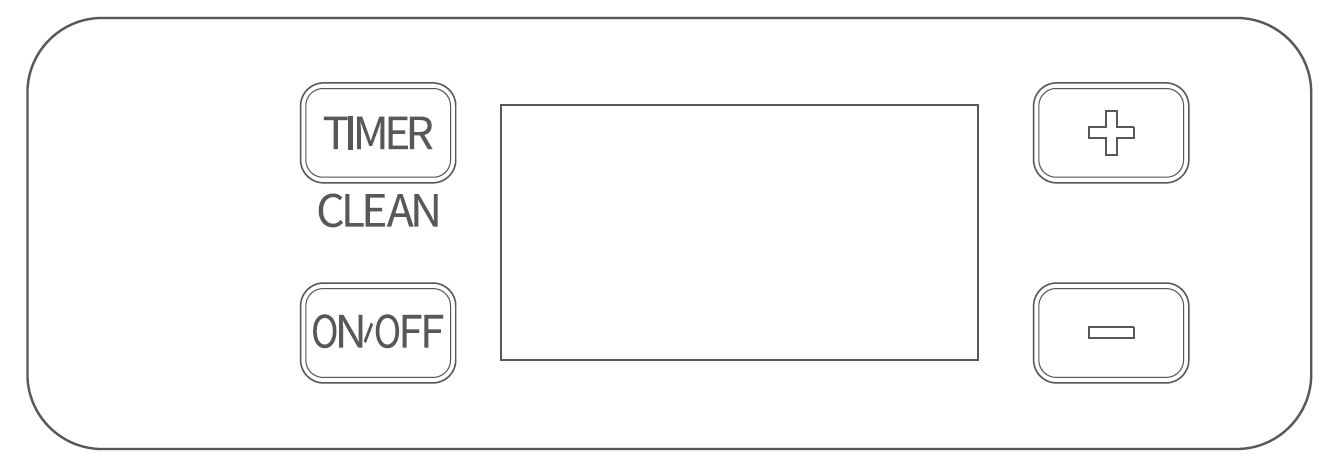
- TIMER/CLEAN button:
Set a timer to automatically start or stop making ice. Press and hold this button for over 5 seconds to enter self-cleaning mode. - ON/OFF button:
Start/stop making ice. - +/- button:
Adjust the timer time.
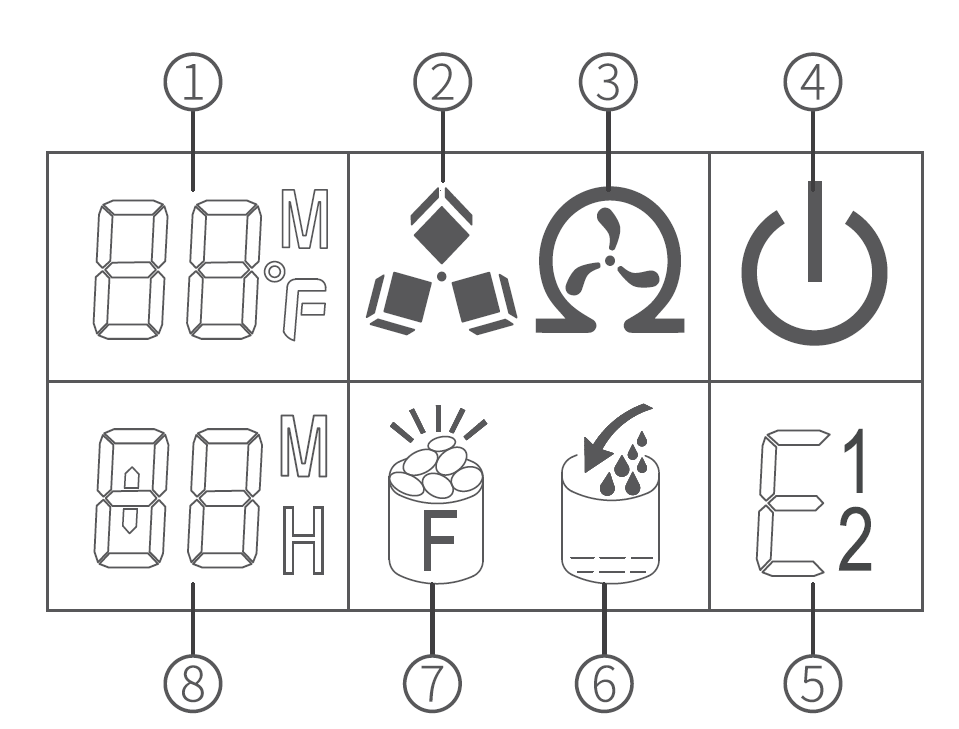
- Ambient Temperature
- Ice Making Status (Rotating: Normal; Flashing: Abnormal)
- Self-Cleaning Mode Indicator
- On/Off Status
- Error Code
- Water Status
- Ice Full Reminder
- Timer Setting & Ice Making/Cleaning Remaining Time
Before First Use
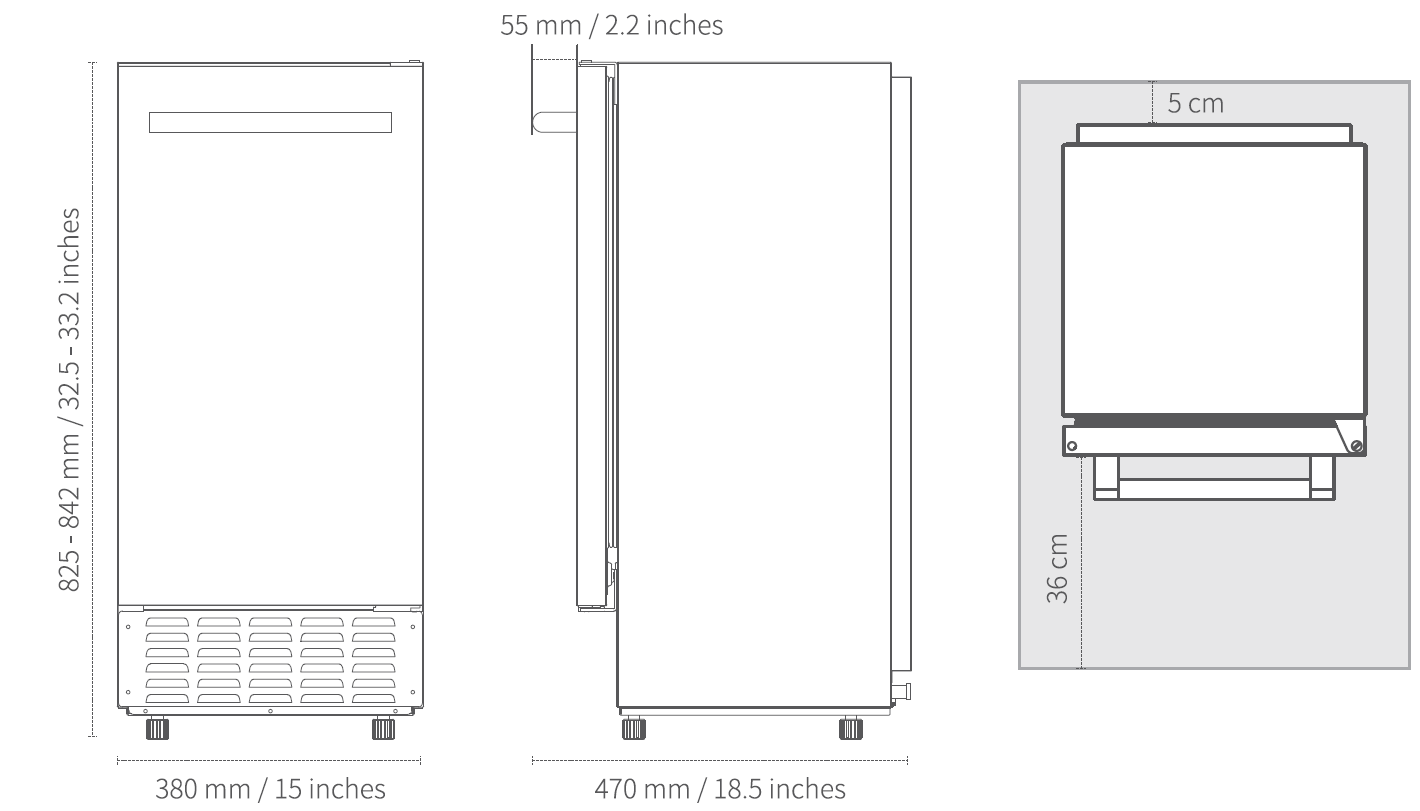
- Before installing the ice maker, make sure you have enough space. Leave a minimum clearance of 14.2 inches (36 cm) in front of the ice maker for door opening and 2 inches (5 cm) at the back.
- Unpack the ice maker, then remove all the packaging materials.
- Clean the interior of the ice maker, glass pane, and ice scoop with warm water and a soft cloth 3–5 times to remove any possible odor or residue caused by manufacturing or transportation. For thorough cleaning before use, refer to the Cleaning & Maintenance section.
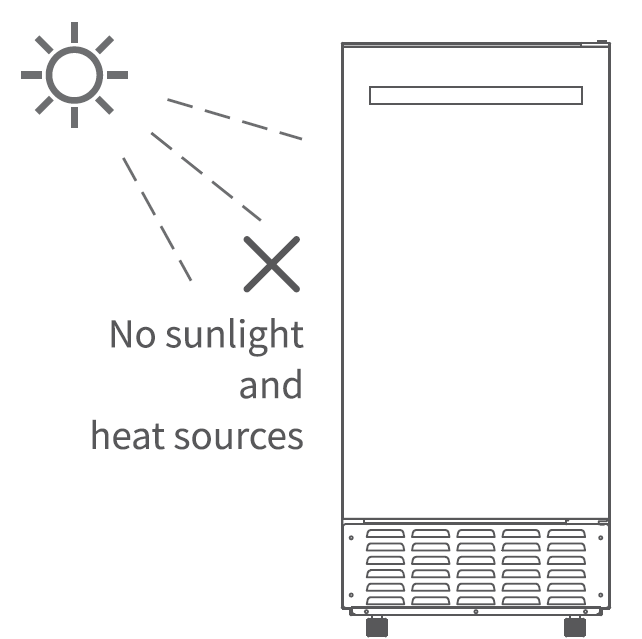
- Place the ice maker on a flat, level surface in a location protected from direct sunlight and other heat sources, such as a stove, furnace, or radiator. The recommended ambient temperature is between 50°F and 90°F.
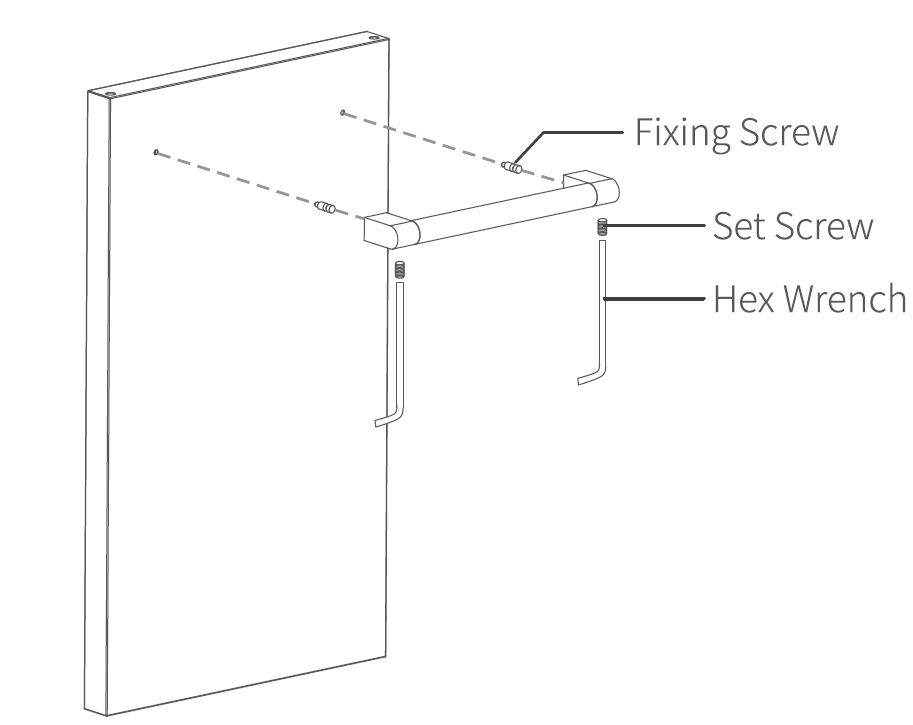
- Install the handle on the ice maker door.
- Install the provided fixing screws into the door using a screwdriver.
- Align the handle with the fixing screws and lock it into place.
- Adjust the set screws in the handle's bottom holes to secure the fixing screws, then tighten the set screws using a hex wrench.
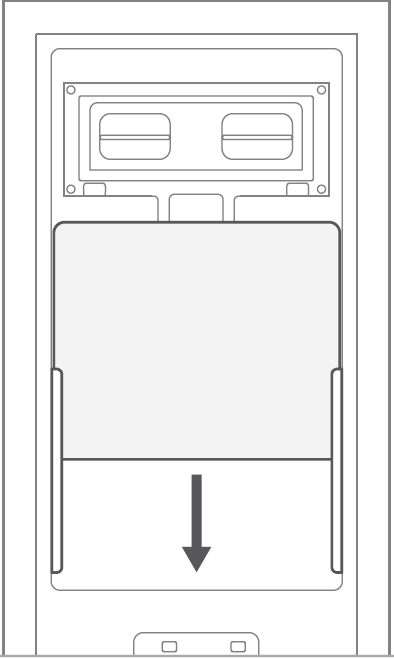
- Insert the glass pane into the ice maker and ensure it is securely in place.
- Connect the water supply hose and drain hose. Refer to the Water Hose Connection section.
- Before plugging in, please let the ice maker stand upright for 4 hours to allow the refrigerant to settle.
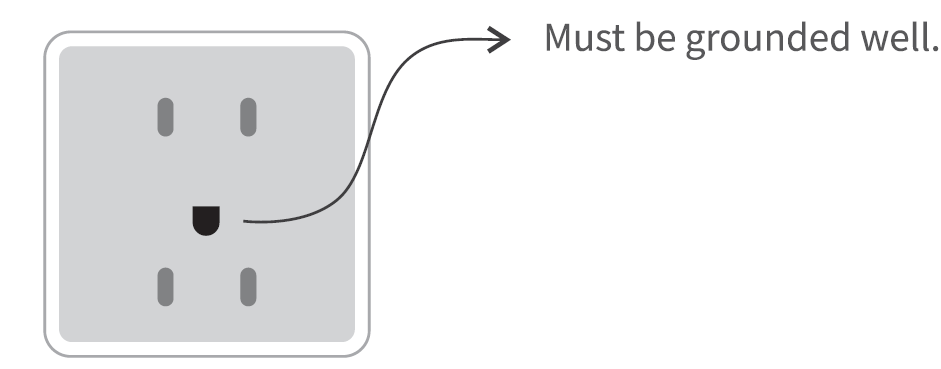
- Plug the ice maker into a well-grounded outlet.
Door Reversal Installation
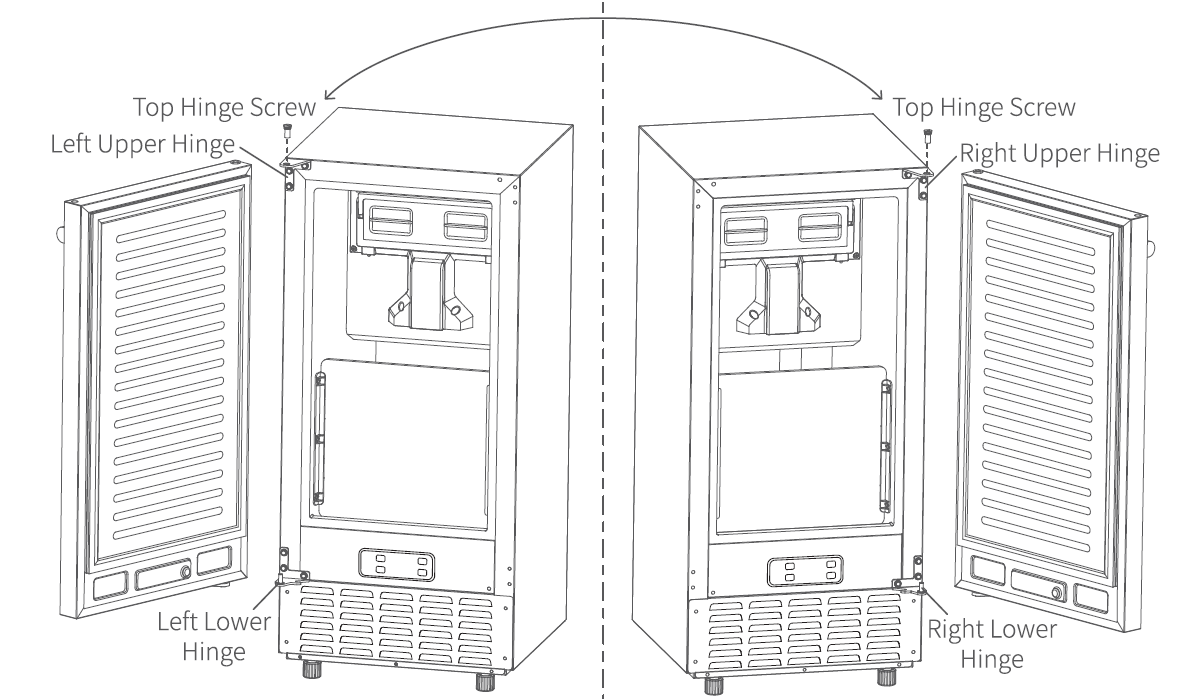
- Make sure the ice maker is unplugged.
- Loosen the top hinge screw that secures the door's right upper hinge using a screwdriver, then remove the door.
- Loosen the remaining screws on the right upper and lower hinges using a screwdriver, then remove both hinges.
- Reinstall the screws into the ice maker to prevent loss.
- Loosen the preinstalled screws on the left side and use them to install the left upper and lower hinges found in the accessory bag.
- Align the door's bottom hole with the left lower hinge's pin and mount the door onto it, ensuring the door's orientation is correct.
- Install the top hinge screw on the left upper hinge to secure the door.
- Check the door's stability after installation.
- Before plugging in, let the ice maker stand upright for 4 hours to allow the refrigerant to settle.
- Plug the ice maker into a properly grounded electrical outlet.
Water Hose Connection
Connect the Water Supply Hose to the Ice Maker
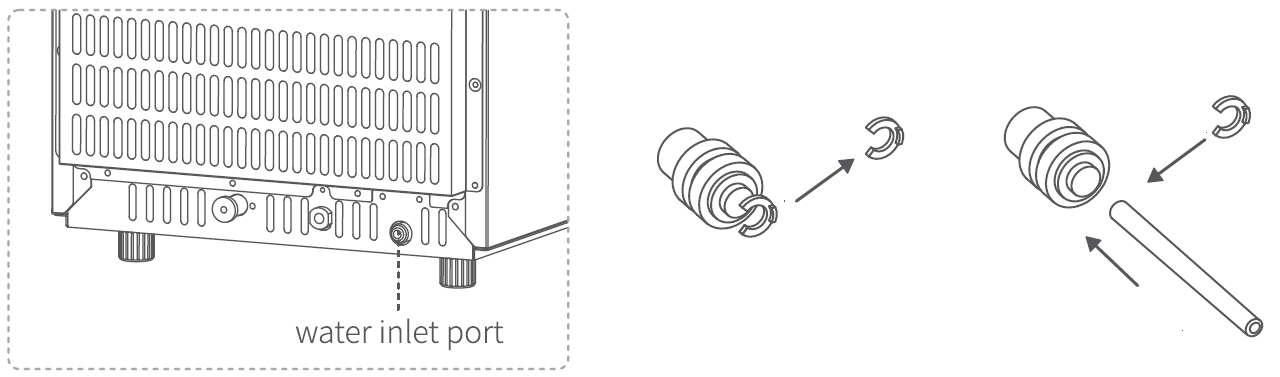
- Remove the tape from the water inlet port at the back of the ice maker, then remove the clip from the inlet port.
- Press the outer ring of the water inlet port, insert one end of the water supply hose fully into the port, and then reattach the clip.
Connect the Water Drain Hose
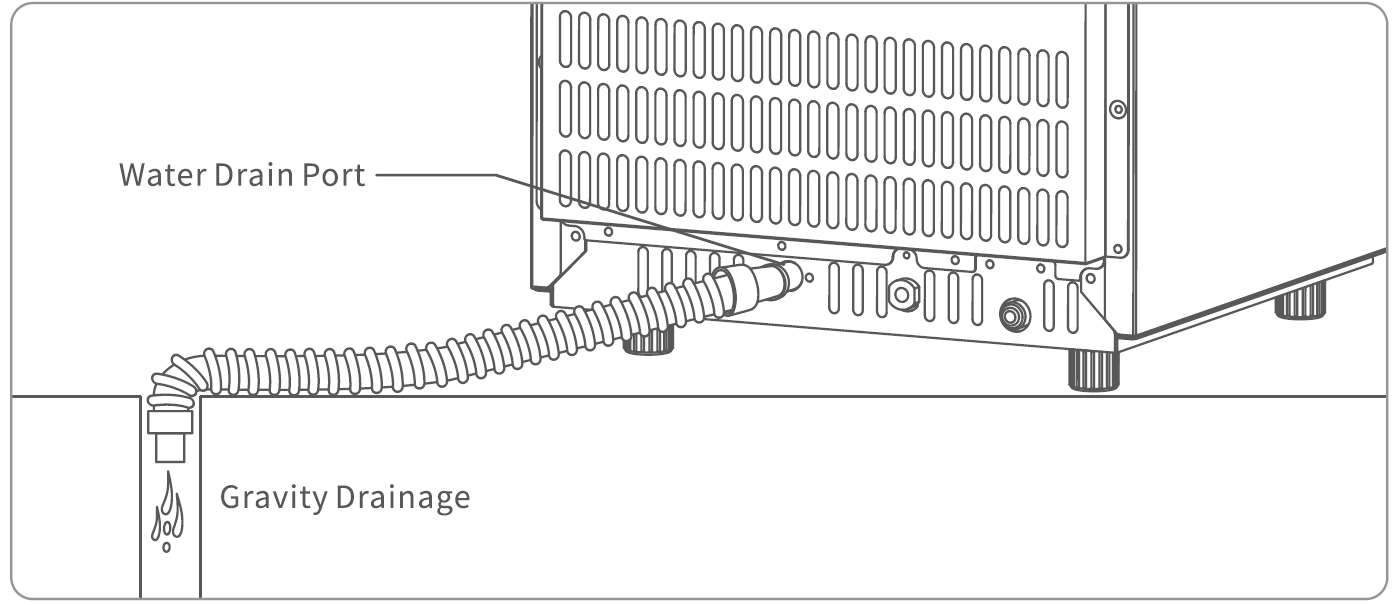
- Remove the cap from the water drain port and connect the water drain hose to the port.
- Connect the other end of the water drain hose to the water drain pipeline.
Connect the Water Supply Hose to the Water Supply System
- Install the provided hose connector onto the water faucet of the main water supply system and remove the clip from the connector.
- Insert the other end of the water supply hose fully into the connector port, then reattach the clip.

Cleaning & Maintenance
- Press and hold the Timer/Clean button for more than 5 seconds to start the self-cleaning program, which takes approximately 15 minutes.
- Remove the drain plug to drain the water from the water tank.
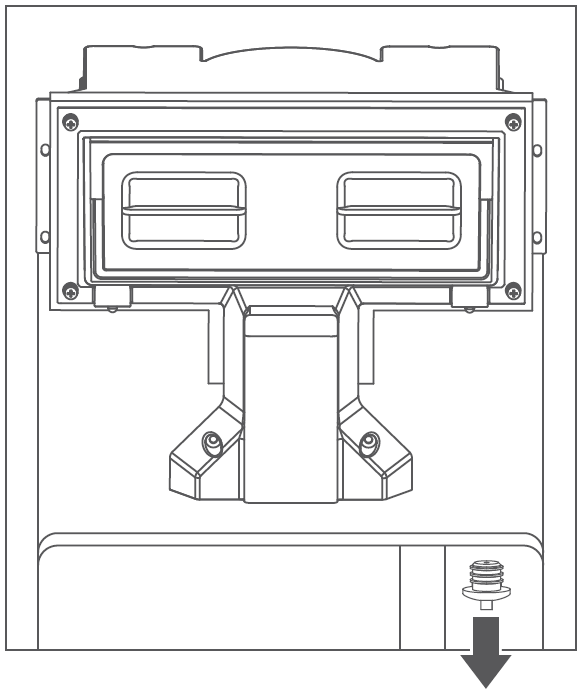
- Reinstall the drain plug and repeat the self-cleaning program.
- After cleaning is complete, press the On/Off button to start making ice. Discard the first batch of ice produced within 15 minutes.
- Clean the exterior of the ice maker with a mild detergent solution and warm water.
- Dry the interior and exterior with a clean, soft cloth.
Pros and Cons of ecozy Ice Maker IM-NB661A
Pros
- High Output and Storage: Produces 66 lbs of nugget ice daily with 26 lbs capacity, perfect for large events—far surpassing basic countertop models like ecozy IM-BS260C (lower capacity).
- Smart Features: EcozyHome app for remote control, scheduling, and monitoring; voice activation via Alexa/Google; IceLumix panel shows TDS/temperature for superior ice clarity.
- Durability and Convenience: Triple-layer insulation holds ice 8 hours; self-cleaning cycles (10 minutes total) with water flush; touchless dispensing options.
- Installation Flexibility: Built-in or freestanding with easy water line hookup—great value at $759+ compared to pricier competitors.
Cons
- Water Quality Sensitivity: Requires low TDS water (<200) for best results; higher TDS may need frequent descaling.
- Initial Cost: Higher price point than portable ice makers, though justified by capacity and features.
- Space Needs: Under-counter design demands clearance (adjustable for taller bins), not as compact as countertop alternatives.
Overall, the ecozy Ice Maker IM-NB661A offers exceptional value for money, outperforming budget options in production and smart tech while matching premium brands in reliability.
Customer Reviews and Feedback on ecozy Ice Maker IM-NB661A
The ecozy Ice Maker IM-NB661A boasts strong user approval, with 40 reviews on ecozy.com averaging high ratings for its performance. Customers rave about the crunchy nugget ice quality and rapid production: "The ice is outstanding—perfect for cocktails, and it keeps going all night!" (5 stars). Smart features shine in testimonials: "App scheduling is a game-changer; start it from my phone before guests arrive" (4.8 stars).
Common praises include the insulated bin holding ice overnight and easy self-cleaning, with one user noting, “TDS monitor ensures clear ice—tastes cleaner than fridge makers.”Complaints are minor: some mention setup plumbing tweaks and sensitivity to hard water, addressed by using filtered sources. Frequent issues like initial Wi-Fi pairing resolve quickly per support.
Recommended for frequent entertainers (90% repurchase intent), it's hailed as "the best nugget ice maker so far" for home use. Ideal buy for under-counter pebble ice machine seekers.
Faqs
How do I set up the ecozy Ice Maker IM-NB661A under the counter for the first time?
What should I do if the ecozy Ice Maker IM-NB661A is not producing ice?
How does the smart app control work on the ecozy Ice Maker IM-NB661A?
Does the ecozy Ice Maker IM-NB661A require a drain for installation?
How can I optimize nugget ice production on ecozy Ice Maker IM-NB661A?
What is the self-cleaning process for ecozy Ice Maker IM-NB661A?
How do I maintain the ice bin and insulation on ecozy Ice Maker IM-NB661A?
What water quality is best for ecozy Ice Maker IM-NB661A performance?
More ecozy manuals
- Setup: Ecozy Brezzano DuoSet Coffee Maker CM9102TE-UL User Manual
- Setup: Ecozy Brezzano Elite Espresso & Americano & Cold Brew Machine CM-PM020A User Manual
- Setup: Ecozy Sphere Ice Maker IM-BM401A User Manual
- Setup: Ecozy Sphere Ice Maker IM-BM401C User Manual
- Setup: Ecozy Ice Maker IM-ND481B User Manual
- Setup: Ecozy ICE MAKER IM-SS440A User Manual
Leave a Comment