Epson All-in-One Printer WF-7720 User Guide | Specifications

Content
Introduction
The Epson All-in-One Printer WF-7720 is a versatile and high-performance printer designed for small businesses and heavy home use. This printer offers a wide range of features, including automatic document feeder, fax capability, and large paper capacity. The estimated price of the Epson WF-7720 is around $299.99, and it was launched in October 2016.
Technical Specifications
These sections list the technical specifications for your product.
Note: Epson offers a recycling program for end of life Epson products. Please go to this site (U.S) or this site (Canada) for information on how to return your Epson products for proper disposal.
Windows System Requirements
To use your product and its software, your computer should use one of these Microsoft operating systems:
- Windows 10
- Windows 8.x
- Windows 7
- Windows Vista
- Windows Server 2016
- Windows Server 2012 R2
- Windows Server 2012
- Windows Server 2008 R2
- Windows Server 2008
- Windows Server 2003 R2
- Windows Server 2003
- Windows Server 2003 SP2 or later
Mac System Requirements
To use your product and its software, your Mac should use one of these operating systems:
- macOS 10.12.x
- OS X 10.11.x
- OS X 10.10.x
- OS X 10.9.x
- OS X 10.8.x
- OS X 10.7.x
- OS X 10.6.8
Paper Specifications
Note: Since the quality of any particular brand or type of paper may be changed by the manufacturer at any time, Epson cannot guarantee the quality of any non-Epson brand or type of paper. Always test a sample of paper stock before purchasing large quantities or printing large jobs.
Single-sheets
- Size
- A3 (11.7 × 16.5 inches [297 × 420 mm])
- A4 (8.3 × 11.7 inches [210 × 297 mm])
- A5 (5.8 × 8.2 inches [148 × 210 mm])
- A6 (4.1 × 5.8 inches [105 × 148 mm])
- B4 (13.9 × 9.84 inches [353 × 250 mm])
- B5 (7.2 × 10.1 inches [182 × 257 mm])
- B6 (5 × 7.2 inches [128 × 182 mm])
- Half Letter (5.5 × 8.5 inches [140 × 216 mm])
- Letter (8.5 × 11 inches [216 × 279 mm])
- Legal (8.5 × 14 inches [216 × 356 mm])
- 11 × 14 inches (279 × 356 mm)
- 11 × 17 inches (279 × 432 mm)
- 13 × 19 inches (330 × 483 mm)
- 4 × 6 inches (102 × 152 mm)
- 5 × 7 inches (127 × 178 mm)
- 8 × 10 inches (203 × 254 mm)
- 3.5 × 5 inches (89 × 127 mm)
- 16:9 wide (4 × 7.1 inches [102 × 181 mm])
- Paper types
- Plain paper and paper distributed by Epson
- Weight
Plain paper: 17 lb (64 g/m2) to 24 lb (90 g/m2)
Thick paper: 25 lb (91 g/m2) to 68 lb (256 g/m2) - Envelopes
Size No: 10 (4.1 × 9.5 inches [105 × 241 mm])
Paper types: Plain paper
Weight :20 lb (75 g/m2) to 24 lb (90 g/m2)
Printable Area Specifications
Note: When printing borderless, quality may decline in the expanded printable area.
Single sheets (with borders)
- Top/bottom/left/right margins: 0.12 inch (3 mm)
- Reduced print quality area/top: 1.85 inches (47 mm)
- Reduced print quality area/bottom: 1.77 inches (45 mm)
Borderless
- Reduced print quality area/top: 1.97 inches (50 mm)
- Reduced print quality area/bottom: 1.89 inches (48 mm)
Envelopes
- Left/right margins: 0.12 inch (3 mm)
- Top/bottom: 0.20 inch (5 mm)
- Reduced print quality area/right: 1.85 inches (47 mm)
- Reduced print quality area/left: 0.71 inch (18 mm)
Automatic Document Feeder (ADF) Specifications
- Paper input
Faceup loading - Paper output
Facedown ejection - Paper size
US letter, legal, A3, A4, A5, B4, or B5 size - Paper type
Plain paper - Paperweight
17 lb (64 g/m2) to 24 lb (95 g/m2) - Sheet feeding capacity
Total thickness: 0.14 inch (3.5 mm) Approximately 35 sheets at 20 lb (75 g/m2)
Scanning Specifications
- Scanner type
Flatbed, color - Photoelectric device
CIS - Effective pixels
14040 × 20400 pixels at 1200 dpi - Document size
Maximum: 11.7 × 17 inches (297 × 431.8 mm)
Scanner glass: A3 (11.7 × 16.5 inches [297 × 420 mm]), 11 × 17 inches (279 × 432 mm) - Scanning resolution
1200 dpi (main scan)
2400 dpi (sub-scan) - Output resolution
50 to 9600 dpi (in 1 dpi increments) - Image data Color
48 bits per pixel (16 bits per pixel per color) internal
24 bits per pixel (8 bits per pixel per color) external - Grayscale
16 bits per pixel internal
8 bits per pixel external - Black and white
16 bits per pixel internal
1 bit per pixel external
Fax Specifications
Fax type: Walk-up black-and-white and color fax capability (ITU-T Super Group 3)
Support line: Standard analog phone lines, PBX (Private Branch Exchange) telephone systems
Speed: Up to 33.6 kbps
Resolution:
- Monochrome:
- Standard: 203 pixels per inch × 98 lines per inch (8 pixels per mm × 3.85 lines per mm)
- Fine: 203 pixels per inch × 196 lines per inch (8 pixels per mm × 7.7 lines per mm)
- Super Fine: 203 pixels per inch × 392 lines per inch (8 pixels per mm × 15.4 lines per mm)
- Ultra Fine: 406 pixels per inch × 392 lines per inch (16 pixels per mm × 15.4 lines per mm)
- Color: 200 × 200 dpi
Page memory: Up to 550 pages (ITU-T No. 1 chart in monochrome draft mode)
Redial: 2 times (with 1-minute interval)
Interface: RJ-11 Phone Line, RJ-11 Telephone set connection
Ink Cartridge Specifications
Note: This product uses only genuine Epson-brand cartridges. Other brands of ink cartridges and ink supplies are not compatible and, even if described as compatible, may not function properly. The cartridges included with the printer are designed for printer setup and not for resale. After some ink is used for charging, the rest is available for printing. Yields vary considerably based on images printed, print settings, paper type, frequency of use, and temperature. For print quality, a variable amount of ink remains in the cartridge after the "replace cartridge" indicator comes on.
Color: Black, Cyan, Magenta, Yellow
Cartridge life
- Opened package: 6 months
- Unopened package: do not use if the date on the package has expired Temperature:
- Storage: –22 to 104 °F (–30 to 40 °C)
- 1 month at 104 °F (40 °C)
- Ink freezes at 3.2 °F (–16 °C)
- Ink thaws and is usable after 3 hours at 77 °F (25 °C)
Note: For best printing results, use up a cartridge within 6 months of opening the package.
Dimension Specifications
Height:
- WF-7710: 13.4 inches (340 mm)
- WF-7720: 16.5 inches (418 mm)
Width: 22.3 inches (567 mm)
Depth:
- Stored: 17.8 inches (452 mm)
- Printing: 32.2 inches (817 mm)
Weight (without ink cartridges or power cord):
- WF-7710: 41.2 lb (18.7 kg)
- WF-7720: 48.9 lb (22.2 kg)
Electrical Specifications
- Input voltage range: 100 to 240 V
- Rated frequency range: 50 to 60 Hz
- Rated current: 0.5 to 0.3 A
- Power consumption:
- Standalone copying: Approximately 18 W (ISO/IEC24712)
- Ready mode: Approximately 8.5 W
- Sleep mode: Approximately 1.0 W
- Power off mode: Approximately 0.2 W
Environmental Specifications
Temperature
- Operating: 50 to 95 °F (10 to 35 °C)
- Storage: –4 to 104 °F (–20 to 40 °C)
- 1 month at 104 °F (40 °C)
Humidity (without condensation)
- Operating: 20 to 80% RH
- Storage: 5 to 85% RH
Interface Specifications
Interface type: Hi-Speed USB (Device Class for computers), Hi-Speed USB (for Mass storage class for external storage)
Note: Epson cannot guarantee the operation of externally connected devices.
External USB Device Specifications
Do not use devices with the following requirements:
- Dedicated driver
- Security settings, such as password or encryption, etc.
- Built-in USB hub
Note: Use only external storage devices with independent AC power sources. External storage devices that are powered via USB are not recommended. Epson cannot guarantee the operation of externally connected devices.
Hard disk and USB flash drives: 2TB, Formatted in FAT, FAT32, or exFAT
Network Interface Specifications
Note: Wireless LAN standard complies with either IEEE 802.11 b/g or IEEE 802.11 b/g/n, depending on purchase location.
Wi-Fi
- Standard: IEEE 802.11 b/g/n; complied with either IEEE 802.11 b/g or IEEE 802.11 b/g/n, depending on purchase location
- Security: WPA2-PSK (AES); complies with WPA2 standards with support for WPA/WPA2 Personal, WEP (64/128 bit)
- Frequency band: 2.4 GHz
- Maximum radio-frequency power transmitted: 19.8 dBm (EIRP)
- Coordination modes: Infrastructure mode, Wi-Fi Direct (Simple AP); not supported for IEEE 802.11b
Ethernet
- Standard: IEEE802.3i (10BASE-T); use a category 5e or higher STP (Shielded twisted pair) cable to prevent risk of radio interference, IEEE802.3u (100BASE-TX), IEEE802.3az (Energy Efficient Ethernet); the connected device should be IEEE802.3az compliant
- Communication mode: Auto, 10Mbps Full duplex, 10Mbps Half duplex, 100Mbps Full duplex, 100Mbps Half duplex
- Connector: RJ-45
- Security: SSL/TLS: HTTPS Server/Client, IPPS, SMTPS (STARTTLS, SSL/TLS)
Safety and Approval Specifications
United States:
- Safety: UL60950-1
- EMC: FCC part 15 Subpart B class B
Canada:
- Safety: CAN/CSA C22.2 No. 60950-1
- EMC: CAN/CSA-CEI/IEC CISPR 22 Class B
This equipment contains the following wireless modules:
- Manufacturer: Askey Computer Corporation
- Type: WLU6320-D69 (RoHS)
This product conforms to Part 15 of FCC Rules and RSS-210 of the IC Rules. Epson cannot accept responsibility for any failure to satisfy the protection requirements resulting from a non-recommended modification of the product. Operation is subject to the following two conditions: (1) this device may not cause harmful interference, and (2) this device must accept any interference received, including interference that may cause undesired operation of the device.
To prevent radio interference to the licensed service, this device is intended to be operated indoors and away from windows to provide maximum shielding. Equipment (or its transmit antenna) that is installed outdoors is subject to licensing.
This equipment complies with FCC/IC radiation exposure limits set forth for an uncontrolled environment and meets the FCC radio frequency (RF) Exposure Guidelines in Supplement C to OET65 and RSS-102 of the IC radio frequency (RF) Exposure rules. This equipment should be installed and operated so that the radiator is kept at least 7.9 inches (20 cm) or more away from a person's body (excluding extremities: hands, wrists, feet, and ankles).
Product Parts
Top and Front
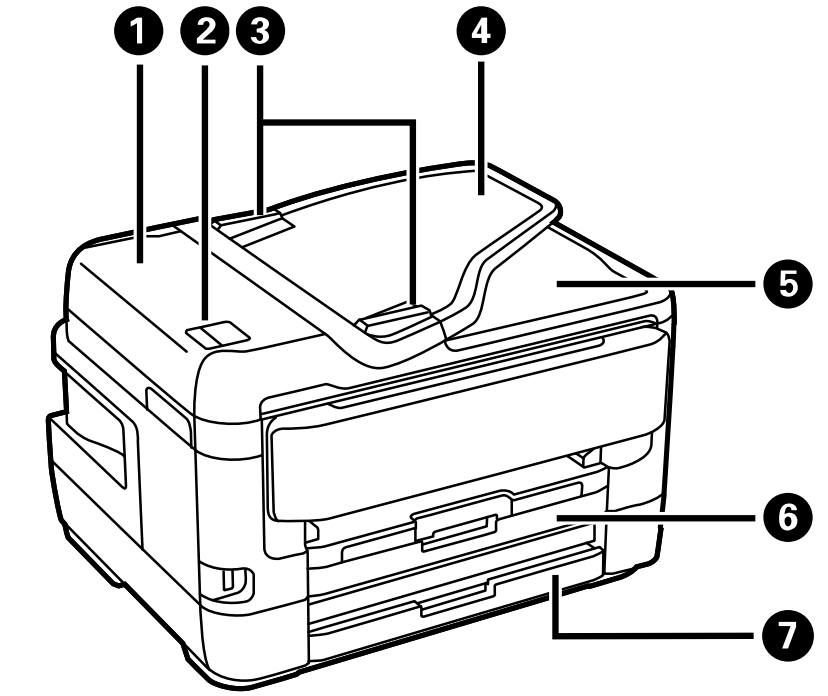
- Automatic Document Feeder (ADF)
- ADF lever
- ADF edge guides
- ADF input tray
- ADF output tray
- Paper cassette 1
Paper cassette 2 (WF-7720)
_epson_all-in-one_printer_wf-7720.png)
- Document cover
- Scanner glass
- Control panel
- USB Type-A port for external devices
Paper Path
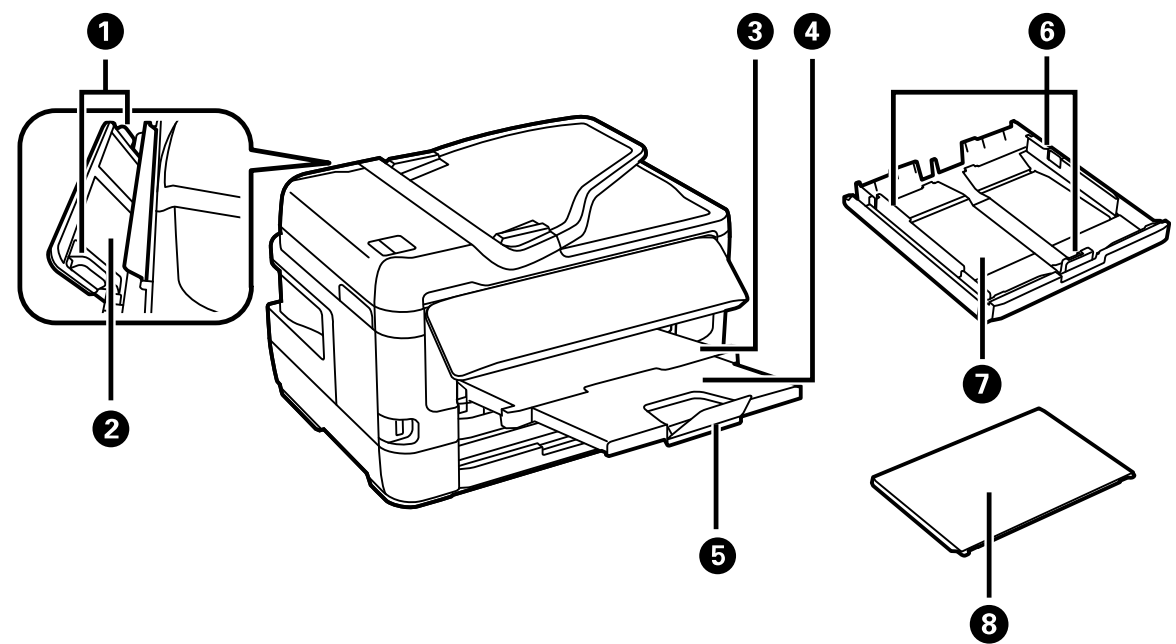
- Rear paper feed edge guides
- Rear paper feed slot
- Output tray
- Output tray extension
- Paper stopper
- Paper cassette edge guides
- Paper cassette
- Paper cassette cover
Inside
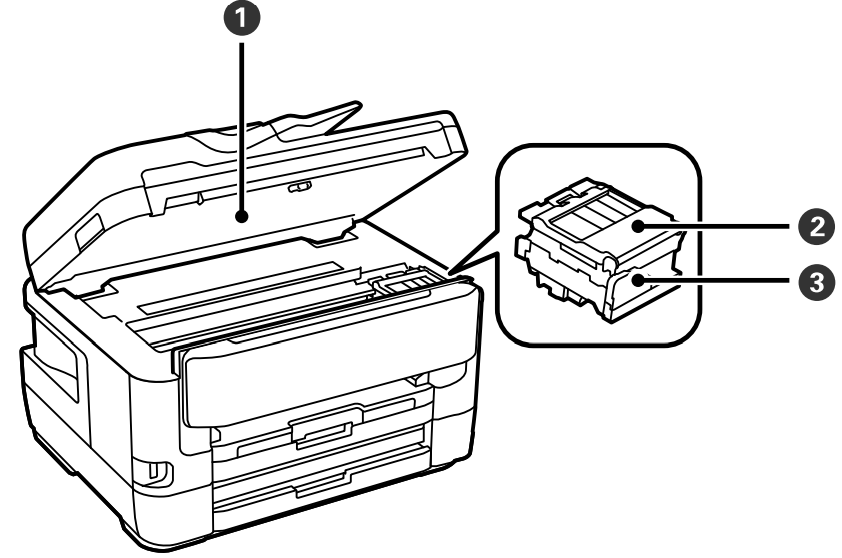
- Scanner unit
- Ink cartridge cover
- Ink cartridge holder
Back
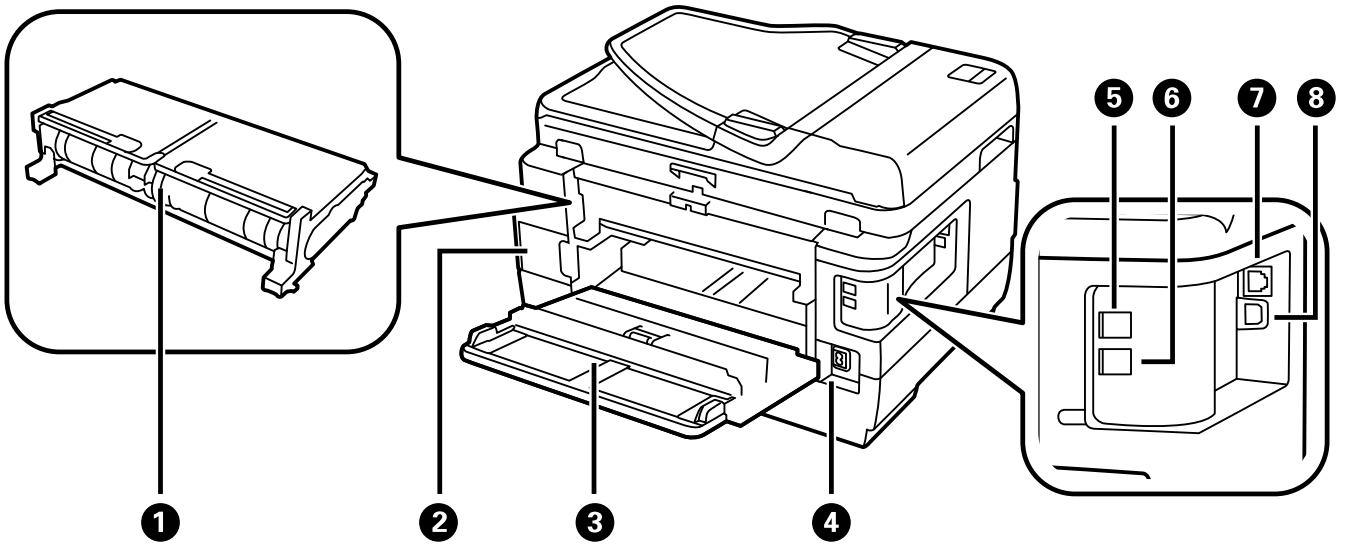
- Rear cover (duplexer)
- Maintenance box
- Rear cover
- AC inlet
- LINE port
- EXT port
- Ethernet LAN port
- USB port
Description
High-volume printing jobs are well-suited for the dependable and efficient Epson All-in-One Printer WF-7720. With its many capabilities, this printer is perfect for small companies and frequent home usage. The 500-sheet paper capacity of the printer minimizes the need for regular paper refills. Moreover, it features an automatic document feeder that holds 30 pages, making it simple to scan, copy, and fax multi-page documents.
With a maximum print resolution of 5760 x 1440 dpi, the Epson WF-7720 guarantees sharp and clear text and images. Additionally, the printer can scan documents and photographs at high qualities thanks to its 1200 x 2400 dpi scanner quality. The printer's Ethernet, USB, and Wi-Fi networking options make it simple to link it to a computer or network.
Control Panel Buttons and Lights
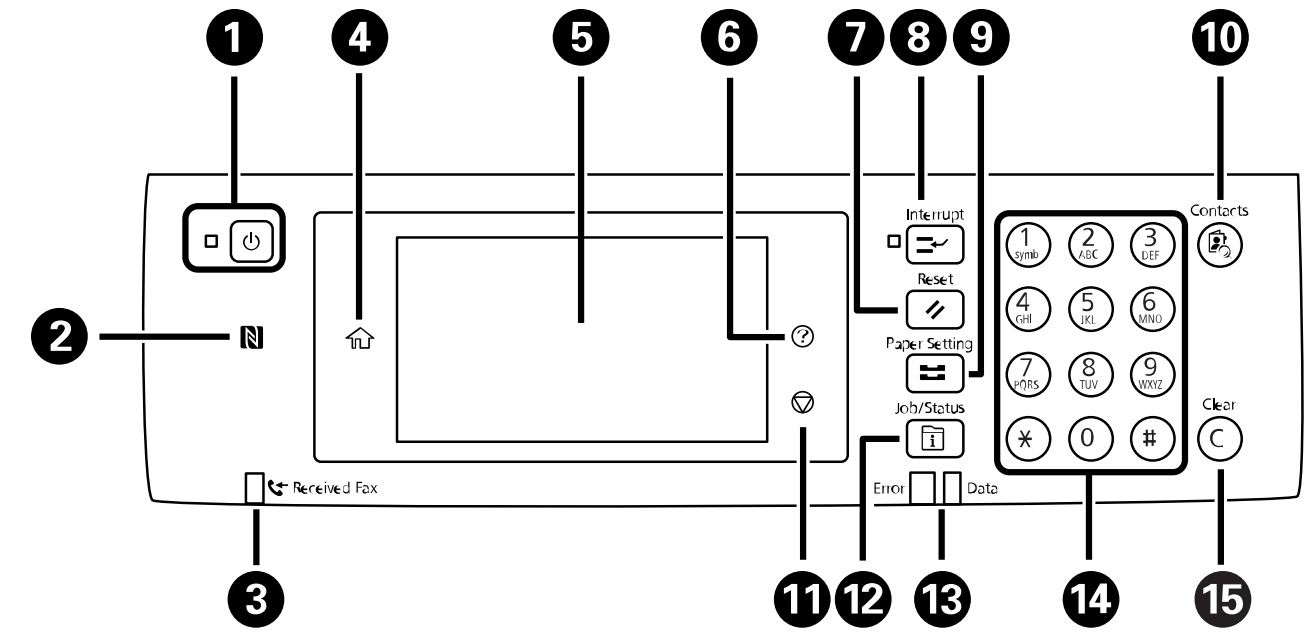
 Power button and light
 NFC (Near Field Communication) tag
- Received Fax light
 home button
- LCD screen
 help button
 Reset button
 Interrupt button
 Paper Setting button
 Contacts button
 stop button
 Job/Status button
- Error and Data lights
- Numeric keypad
- Clear button
Status Icon Information
Your product displays status icons on the LCD screen for certain product status conditions. Press the icon to view or change the current network settings.
Changing LCD Screen Language
You can change the language used on the LCD screen.
- Press
 the home button, if necessary.
 Select Settings > General Settings > Basic Settings > Language.
You see a screen like this: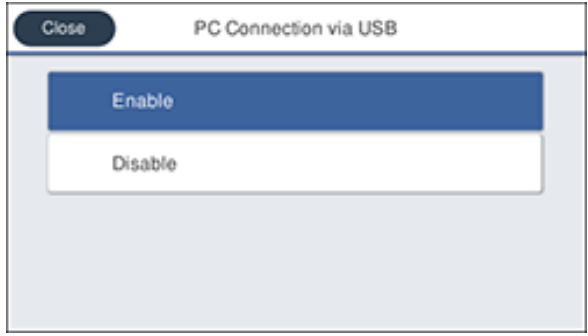
- Select a language.
Selecting the Date and Time
Before faxing, select the current date, time, and daylight saving phase in your area, and choose your preferred date and time format.
- Press the home button, if necessary.
Select Settings > General Settings > Basic Settings > Date/Time Settings.
You see a screen like this: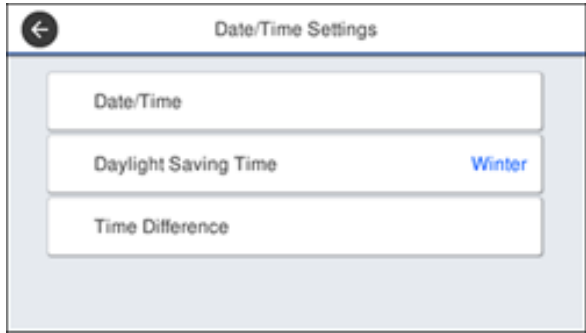
- Select Daylight Saving Time.
- Select the setting that applies to your area:
- Winter: it is winter or your region does not use Daylight Saving Time (DST)
- Summer: it is spring or summer and your region uses Daylight Saving Time (DST)
Note: If your region uses Daylight Saving Time (DST), you must change this setting to match the season. When you change from Winter to Summer, your product automatically sets its clock ahead one hour. When you change from Summer to Winter, it sets its clock back one hour.
- Select Date/Time.
- Select the date format you want to use.
- Use the numeric keypad to enter the current date.
- Select the time format you want to use.
- Use the numeric keypad to enter the current time.
Entering Characters on the LCD Screen
Follow these guidelines to enter characters for passwords and other settings.
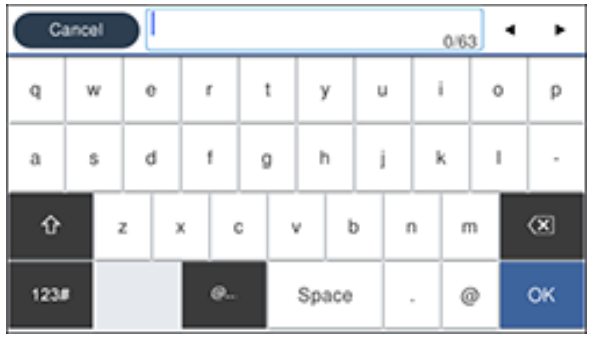
- To move the cursor, select the left or right arrows.
- To change the case of letters, select

- To delete the previous character, select

- To enter numbers or symbols, select

- To enter a space, select Space.
Adjusting Control Panel Sounds
You can adjust the sound level heard when you press buttons on the control panel.
- Press the home button, if necessary.
Select Settings > General Settings > Basic Settings > Sound.
You see a screen like this: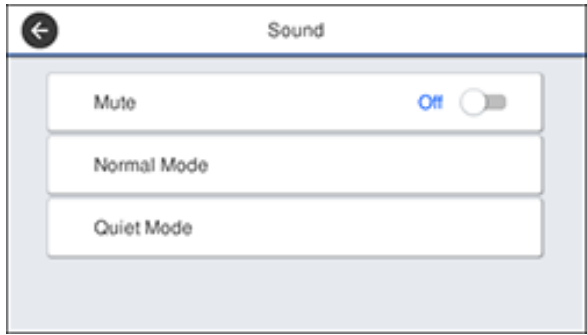
- Do one of the following:
To mute all control panel sounds, turn the Mute setting off.
To select a specific sound level, select Normal Mode or Quiet Mode.
Note: Press the icon on the home screen to switch between Normal Mode and Quiet Mode.
 - If you did not mute the sounds, select Button Press.
- Press
 to decrease or
  to increase the sound.
 - Select OK to exit.
Note: You can also adjust the Sound Type and the sound level for various product functions.
Adjusting the Screen Brightness
You can adjust the brightness of the LCD screen.
- Press the home button, if necessary.
Select Settings > General Settings > Basic Settings > LCD Brightness.
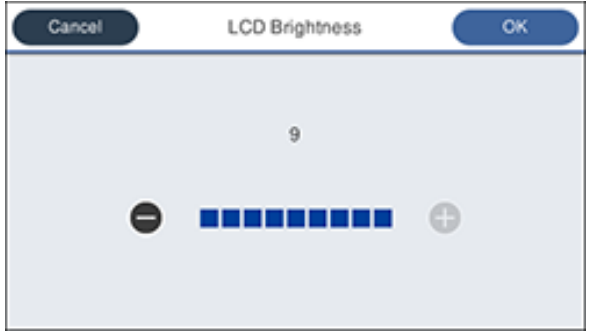
- Press the – or + icons to decrease or increase the brightness.
- Select OK to exit.
Turning Off the Operation Time Out Setting
The Operation Time Out setting causes the LCD screen to return to the Home screen after a few minutes of inactivity. This feature is enabled by default, but you can turn it off.
Note: This setting can be locked by an administrator. If you cannot access this setting, contact your administrator for assistance.
- Press the home button, if necessary.
- Select Settings > General Settings > Basic Settings > Operation Time Out.
- Select Off.
Preventing PC Connection via USB
You can disable access from a USB-connected computer. This restricts non-network access to the product and protects the security of confidential scanned documents.
Note: This setting can be locked by an administrator. If you cannot access this setting, contact your administrator for assistance.
- Press the home button, if necessary.
Select Settings > General Settings > Printer Settings > PC Connection via USB.
You see a screen like this:- Select Disable.
Using Presets
You can save frequently used copy, fax, and scan settings as presets. This lets you easily reuse them whenever necessary.
Note: This setting can be locked by an administrator. If you cannot access this setting, contact your administrator for assistance.
- Press the home button, if necessary.
Select Presets.
You see a screen like this: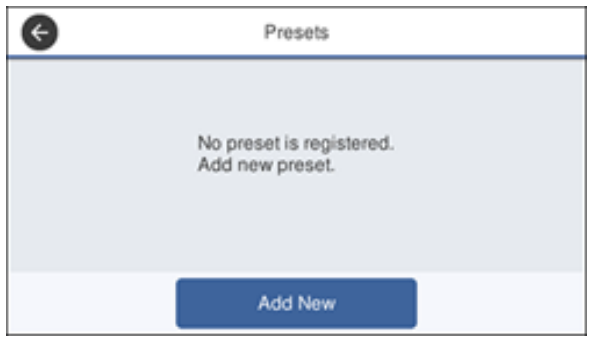
- Select Add New.
Select the function for which you want to set up a preset, such as Copy.
You see the main screen for that function: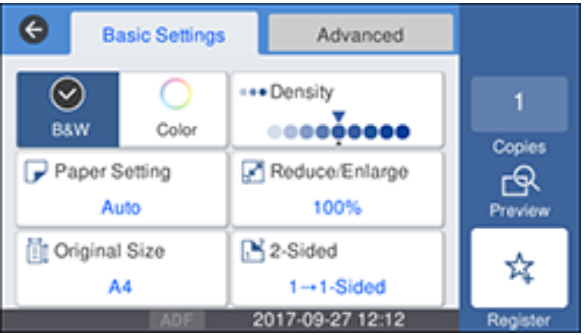
Select the settings you want to save and select Register.
You see a screen like this: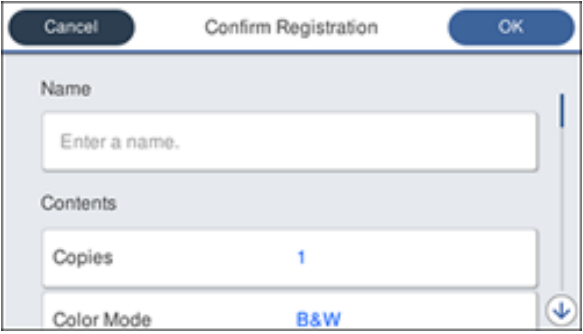
Select Name.
You see a screen like this: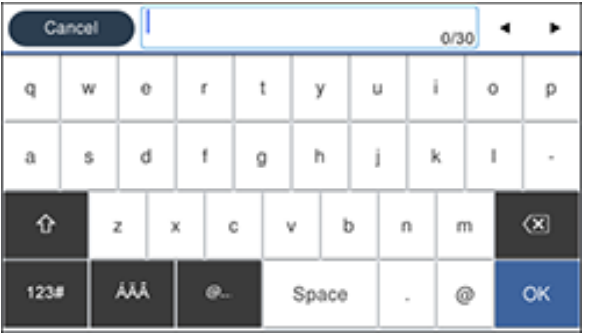
- Use the displayed keyboard to enter a name for the preset and select OK.
- Select OK.
When you copy, fax, or scan, you can use the preset by selecting Presets and selecting your preset name from the list.
Setting a Password and Locking the Control Panel
You can set an administrator password to lock the following settings and prevent them from being changed:
- certain Basic Settings and Printer Settings
- System Administration Settings
- Presets
- Contacts
- Network Settings
- Web Service Settings
- Scan Settings
- Fax Settings
- Press the home button, if necessary.
Select Settings > General Settings > System Administration > Security Settings > Admin Settings > Admin Password > Register.
You see a screen like this: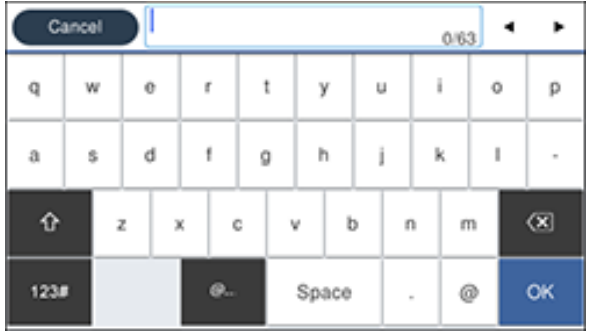
- Use the displayed keyboard to enter a password, then select OK.
- Enter your password again to confirm.
- Select OK.
- Select Lock Setting and select On.
When the control panel is locked, you must enter the password to access any of the locked settings.
Note: If you forget your password, contact Epson for assistance.
Setting User Feature Restrictions (Access Control)
Using Web Config Access Control Settings, you can restrict product features for individual users to prevent misuse of the product. Restricted features require the user to enter an ID and password on the product control panel.
After you set up feature restrictions, you must enable them using the product control panel.
- Press the home button, if necessary.
Select Settings > General Settings > System Administration > Security Settings > Access Control.
You see a screen like this:
_epson_all-in-one_printer_wf-7720.png)
- Select the Access Control field to turn the setting on.
- If you want to allow users to print from generic drivers or use WSD scanning, select the Accept Unknown User Jobs field to turn the setting on.
- Press the home button to exit.
Setup Guide
To set up the Epson All-in-One Printer WF-7720, follow these steps:
- Unpack the printer and remove all packaging materials.
- Turn on the printer and install the ink cartridges.
- Connect the printer to a power source and turn it on.
- Install the driver software on your computer.
- Follow the on-screen instructions to complete the setup process.
Running a Product Check
Running a product check helps you determine if your product is operating properly.
- Disconnect any interface cables connected to your product.
- Load plain paper in the product.
- Press the home button, if necessary.
Select Settings > Maintenance > Print Head Nozzle Check.
You see a screen like this: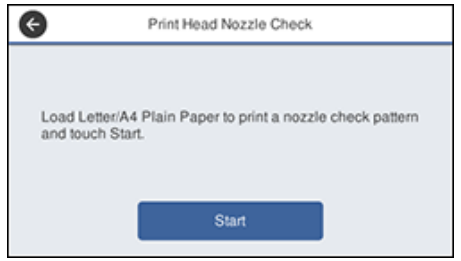
- Select Start.
The nozzle pattern prints. - Do one of the following, depending on the results of the product check:
If the page prints and the nozzle check pattern is complete, the product is operating properly. Any operation problem you may have could be caused by your computer, cable, software, or selected settings. Check the other solutions in this book or try uninstalling and reinstalling your printer software.
If the page prints but the nozzle check pattern has gaps, clean the print head.
If the page does not print, the product may have a problem. Check the other solutions in this manual. If they do not work, contact Epson.
Epson All-in-One Printer WF-7720 Troubleshooting
If you encounter any issues with the Epson All-in-One Printer WF-7720, try the following solutions:
- Check that the printer is properly connected to a power source and a computer or network.
- Make sure that the ink cartridges are installed correctly and that they have enough ink.
- Check that the paper is loaded correctly and that the paper size is set correctly in the printer settings.
- Restart the printer and try printing again.
- If the issue persists, contact Epson support for further assistance.
Pros & Cons
Pros
- High paper capacity and automatic document feeder
- Excellent print and scan resolution
- Multiple connectivity options
- Affordable price point
Cons
- A large footprint may not be suitable for small spaces
- Ink cartridges may need to be replaced frequently for high-volume printing
Customer Reviews
Customers have praised the Epson All-in-One Printer WF-7720 for its high paper capacity, excellent print quality, and affordable price point. However, some customers have complained about the large size of the printer and the frequent need to replace ink cartridges for high-volume printing. Overall, the printer has received positive reviews and is recommended for small businesses and heavy home use.
Faqs
How should I initially configure the Epson All-in-One Printer WF-7720?
What kind of ink is compatible with the Epson?
How can I clean the printhead on an Epson All-in-One Printer?
What size paper can I use with my WF-7720?
Can I use Epson ink cartridges from a third party?
What is the warranty period for the Epson WF-7720?
How can I turn on the Epson Eco Mode?
Leave a Comment