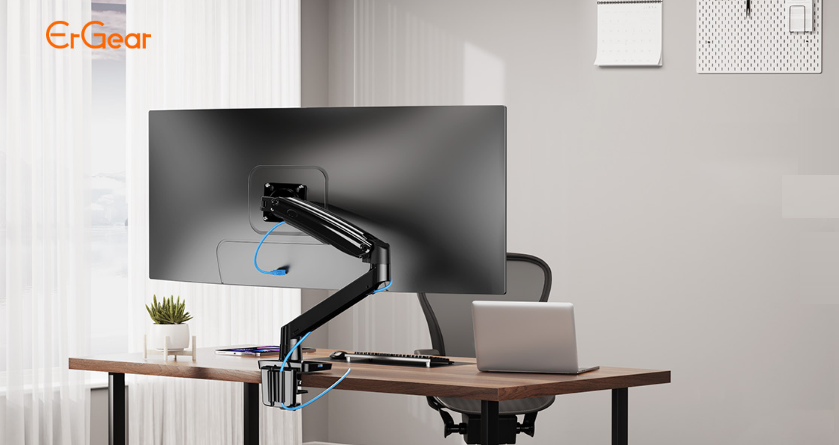
Er-Gear Monitor Desk Mount EGSS2 Instruction Manual

Content
Introduction
The ErGear Monitor Desk Mount EGSS2 is a sturdy and adaptable mounting solution specifically created to improve the ergonomics of your workspace. The device is capable of accommodating two displays, each with a maximum size of 32 inches. This feature enables users to place the monitors in various ways and make effortless changes using the full-motion arms. The EGSS2 offers robust construction, efficient cable management, and effortless installation. It promotes a tidy and productive workspace, while also giving excellent viewing angles to enhance comfort and efficiency.
Detailed Specifications
The er-gear Monitor Desk Mount EGSS2 has the following key features:
- Compatible with monitors ranging from 13 to 32 inches in size
- Supports up to 17.6 lbs
- C-clamp mounting system for easy installation
- Full motion articulating arm for optimal viewing angles
- Integrated cable management system for a clean and organized workspace
- VESA compatible (75x75mm and 100x100mm)
- Smooth and easy to use tension adjustment
Product Features

TENSION ADJUSTMENT SHOULD BE DONE ONLY AFTER MOUNT INSTALLATION
Warning
Do not adjust tension without a monitor.
Ensure the monitor has been attached to the mount.
Read your monitor box or manual to find out the monitor net weight.
Ensure the net weight of the monitor (including accessories) is between 6.6~26.4 Ibs (3-12 kg).

Parts and Hardware Included

Description
Stylish and practical, the er-gear display Desk Mount EGSS2 is the perfect accessory for your computer display. To alleviate pressure on your spine and neck, you can simply move the monitor to the ideal viewing angle with its fully articulating arm. Quick and easy installation is made possible by the C-clamp mounting system, and your workplace will remain clean and clear of clutter thanks to the integrated cable management system. The EGSS2 is compatible with a wide range of monitors because it is also VESA compatible. You may simply modify the arm's tension to meet your individual requirements by using the tension adjustment option.
Install the Base
For Clamp Mounting
A-1 Install the USB Cable and C Clamp to the Base
Detach the C-clamp entirely

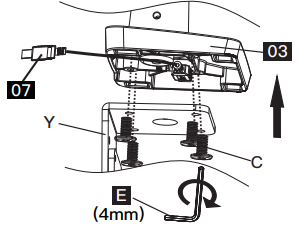
Install the USB cable [07] to the base [03], then secure part [Y] to the base [03]

Connect part [X] to part [Y] according to the thickness of the desktop

A-2 Secure the Base to the Desktop

For Grommet Mounting
B-1 Install USB Cable and the Grommet Bolt to Base

B-2 Secure the Base to Desktop Using Locking Plate and Butterfly Nut

WARNING: Ensure bolts are secured firmly
Install the Arms

Install the Monitor Plate

Attach Monitors to the Arms
4-1 Choose Proper Bolts

4-2 Install Monitors to the Arms
0.1-0.2in.(3-5mm) spacing left

The tension is preset at 8.8-11 LBS(4-5kg). After hanging the monitor to the mount, please release the monitor slowly to prevent it from falling suddenly.
Screwdriver [Not Included]

Adjust Gas Spring Tension

Be sure to keep the arm in a horizontal position during adjustment. Or else, it would be difficult to adjust the mount or damage the mount. .
If the monitor can stay at the desired height by itself, no adjustment is needed.
If the monitor rises up, press the arm to keep it in horizontal position and then use the 13/64 in. (5mm) Alley key (F) to turn the bolts clockwise(“-” direction) to reduce the tension of the arm only until the monitor can stay at the desired height by itself.
If the monitor falls down, lift the arm to keep it in horizontal position and then use the 13/64 in. (5mm) Alley key (F) to turn the bolts counter-clockwise(“+” direction) to increase the tension of the arm only until the monitor can stay at the desired height by itself.

Rotation Restriction

Tilt Adjustment
Adjust the monitor to proper tilt angle, using Allen key (F) to tighten the bolt and fix tilt angle

Route Cables along the Arms
8-1 Route cables along the arm [01]

8-2 Route cables along with the arm extender [02]

Attach the Decorative Cover to C-Clamp
Warm Tips: The decorative cover [04] can only be used for the C-Clamp.

WARNING: Ensure screws are secured firmly.

Setup Guide
To set up the er-gear Monitor Desk Mount EGSS2, follow these steps:
- Attach the mounting plate to the back of your monitor using the included screws.
- Place the C-clamp on the edge of your desk and tighten it in place.
- Attach the mounting plate to the C-clamp.
- Adjust the tension of the arm to your desired level.
- Position the monitor to your preferred viewing angle.
IMPORTANT SAFETY INFORMATION
CAUTION: Avoid potential personal injuries and property damage!
Do not use this product for any purpose that is not explicitly specified in this manual. Do not exceed weight capacity. We are not liable for damage or injury caused by improper mounting, incorrect assembly, or inappropriate use.
This product contains a high-pressure gas spring, fire and percussion are prohibited. Also, it is strictly prohibited to dismantle without professionals. Please return to the manufacturer or hand it over to professional agencies if the product is abandoned.
The desk must be capable of supporting three times the weight of the total load (the mount, the monitor, and all accessories weight). Don’t use the product on particleboard.
Weight Restrictions

Your monitor (including accessories) CANNOT EXCEED 6.6-26.4lbs (3-12 kg)
WARNING
DO NOT exceed the maximum weight indicated. This mounting system is intended for use only with the maximum weights indicated. Use with products heavier than the maximum weights indicated may result in failure of the mount and its accessories, causing possible damage and or injury.
If your monitor weighs more, this mount is NOT compatible.

Check the VESA Pattern of Your Monitor before You Begin the Installation
If your Monitor VESA is greater than 100×100 mm/4×4 in. or less than VESA 75x75mm/3x3in., this mount is NOT compatible.
If this desk mount is NOT compatible, please contact customer service at [email protected] to find a compatible product.
Troubleshooting
If you experience any issues with the er-gear Monitor Desk Mount EGSS2, try the following solutions:
- Check that the mounting plate is securely attached to the back of the monitor.
- Make sure the C-clamp is tightly secured to the edge of the desk.
- Adjust the tension of the arm if the monitor is not staying in place.
- Check that the monitor is properly aligned with the mounting plate.
- If the monitor is still not staying in place, try tightening the screws on the mounting plate.
Pros & Cons
Pros
- Provides optimal viewing angles
- Reduces strain on neck and back
- Saves space on desk
- Easy to install
- Integrated cable management system
Cons
- May not be compatible with some monitors
- Can be a bit difficult to adjust the tension of the arm
Customer Reviews
The Er-gear Monitor Desk Mount EGSS2 has received many positive reviews from customers. They appreciate its sturdy construction, easy installation, and the ability to easily adjust the monitor to their preferred viewing angle. Some customers have mentioned that the arm can be a bit difficult to adjust, but overall they are very satisfied with the product.
Faqs
How big of a screen can I use with my ErGear?
Are curved and flat screens compatible with the Er-gear Monitor Desk Mount?
Which mounting options is available for the Er-gear Monitor?
Is there a tool required to install the Er-gear Monitor Desk Mount EGSS2?
In what range of thicknesses may the Er-gear Monitor Desk Mount be installed on a desk?
Is it possible to position the screens in either landscape or portrait mode?
What is the Er-gear Monitor Desk Mount EGSS2 material composition?
Does the Er-gear Monitor Desk Mount EGSS2 have a guarantee?
After installation, how simple is it to move the screens to different positions?
Is it possible to utilize the Er-gear Monitor Desk Mount EGSS2 with a standing desk?
Leave a Comment
