Fitbit Ionic Stopwatch FB503WTGY-EU User Manual | Specifications
Content
Introducing the Fitbit Ionic Stopwatch FB503WTGY-EU
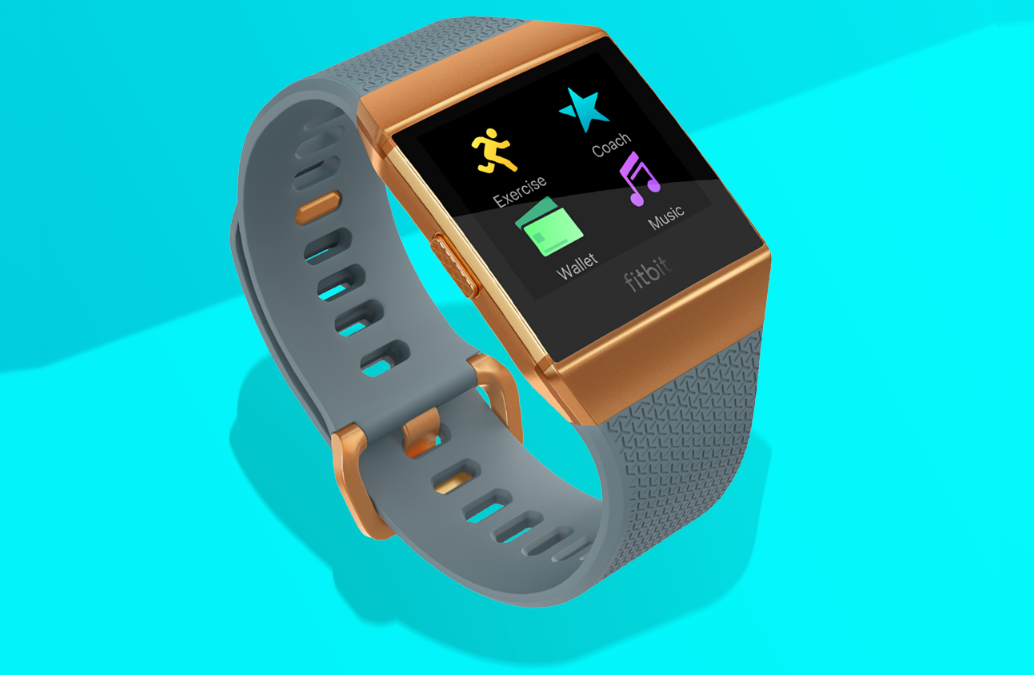
This adaptable wristwatch's cutting-edge tracking capabilities, which include an integrated GPS, continuous heart rate monitoring, and customized exercise suggestions, are intended to assist you in achieving your fitness objectives. In order to help you maintain a healthy lifestyle, The Ionic also provides extensive health insights, including guided breathing sessions and sleep stages. Fitbit Ionic's extended battery life, water resistance, and stylish design make it the perfect partner for both daily use and vigorous exercise. Let's examine the details, attributes, and advantages of this cutting-edge fitness monitor.
What’s in the Box
Your Ionic box includes:

- Watch with large wristband
- Charging cable
- Additional small wristband
Ionic’s detachable wristbands come in a variety of colors and materials, sold separately.
What's in This Manual
We'll explain how to create a Fitbit® account and make sure your watch can transfer the data it collects to your dashboard. The dashboard is where you'll set goals, analyze historical data, identify trends, log food and water, keep up with friends, and much more. As soon as you're done setting up Ionic, you're ready to start moving.
Next, we'll explain how to find and use the features that interest you and how to adjust your preferences.
Set Up Fitbit Ionic
For the best experience, use the Fitbit app for iOS, Android, or Windows 10. If you don’t have a smartphone or tablet, you can also use a Bluetooth-enabled Windows 10 PC.
Your Fitbit account asks for information such as height, weight, and sex in order to calculate your stride length and to estimate distance, basal metabolic rate, and calorie burn. When you set up your account, your name and photos are visible to all other Fitbit users. You have the option to share other information, but most of the information you provide is private by default.
Charge Ionic
To charge your watch:
- Plug the charging cable into the USB port on your computer or a UL-certified USB wall charger.
Hold the other end of the charging cable near the port on the back of the watch until it attaches magnetically.
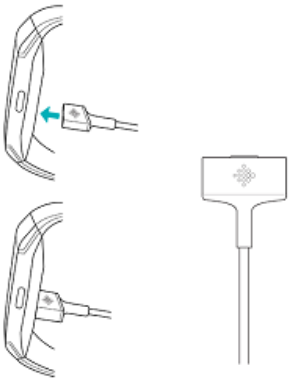
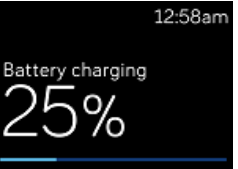
- Make sure the pins on the charging cable lock securely with the port. The connection is secure when the watch vibrates and the battery icon or percent charged appears on the screen.
Charging fully takes up to 2 hours. While the watch charges, you can tap the screen or press any button to check the battery level.
Set Up with Your Phone or Tablet
The free Fitbit app is compatible with more than 200 devices that support iOS, Android, and Windows 10 operating systems. To get started:
- Find the Fitbit app in one of the locations below, depending on your device. If you're unsure if the Fitbit app is compatible with your phone or tablet.
- Apple App Store for iOS devices such as an iPhone or iPad.
- Google Play Store for Android devices such as the Samsung Galaxy S8 and Google Pixel.
- Microsoft Store for Windows 10 devices such as the Lumia phone or Surface tablet.
- Install the app. If you don't have an account with the store, you must create one before you can download the app.
- When the app is installed, open it and tap Join Fitbit to be guided through a series of questions that help you create your Fitbit account, or log in to your existing account.
- Continue following the on-screen instructions to connect, or "pair," Ionic to your phone or tablet. The pairing makes sure the watch and phone or tablet can communicate with one another (sync data back and forth).
When you're done pairing, read through the guide to learn more about your new watch and then explore the Fitbit dashboard.
Set Up with Your Windows 10 PC
If you don't have a smartphone, you can set up and sync Ionic using a Bluetooth-enabled Windows 10 PC and the Fitbit app. To get the Fitbit app for your computer:
- Click the Start button on your PC and open the Microsoft Store.
- Search for "Fitbit app". After you find it, click Free to download the app to your computer.
- If you've never downloaded an app to your computer, you'll be prompted to create an account with the Microsoft Store.
- Click Microsoft account to sign in with your existing Microsoft account. If you don't already have an account with Microsoft, follow the on-screen instructions to create a new account.
- When the app is installed, open it and click Join Fitbit to be guided through a series of questions that help you create your Fitbit account, or log in to your existing account.
- Continue following the on-screen instructions to connect, or "pair," Ionic to your computer. Pairing makes sure the watch and computer can communicate with one another (sync data back and forth).
When you're done pairing, read through the guide to learn more about your new watch and then explore the Fitbit dashboard.
Connect to Wi-Fi
During setup, you're prompted to connect Ionic to your Wi-Fi network. Ionic uses Wi-Fi to more quickly download playlists and apps from the Fitbit App Gallery, and for faster OS updates.
Ionic can connect to open, WEP, WPA personal, and WPA2 personal Wi-Fi networks. Your watch won't connect to 5GHz, WPA enterprise, or public Wi-Fi networks that require logins, subscriptions, or profiles. If you see fields for a username or domain when connecting to the Wi-Fi network on a computer, the network isn't supported.
For best results, connect Ionic to your home or work Wi-Fi network. Make sure you know the network password before connecting.
Sync Data to Your Fitbit Account
Regularly sync Ionic with the Fitbit app to transfer data to your dashboard. The dashboard is where you'll track your progress, see exercise history, track your sleep patterns, log food and water, identify trends, participate in challenges, and much more. We recommend syncing at least once a day.
The Fitbit app uses Bluetooth Low Energy technology to sync data with Ionic and to update apps installed on your watch. Each time you open the Fitbit app, Ionic syncs automatically when it's nearby. Ionic also syncs with the app periodically if All-Day Sync is on. To turn on this feature:
From the Fitbit app dashboard, tap or click the Account icon (![]() ) > Ionic tile > All-Day Sync. You can also use the Sync Now option in the app at any time.
) > Ionic tile > All-Day Sync. You can also use the Sync Now option in the app at any time.
Wear Ionic
Place Ionic around your wrist. The side of the watch marked with "fitbit" should be on the bottom of your wrist. If you need to attach a different size wristband, or if you purchased an accessory wristband, you'll find instructions in "Change the Wristband" on page 14.
Placement for All-Day Wear vs Exercise
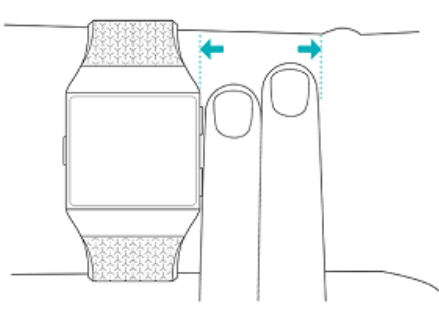
When you're not exercising, wear Ionic a finger's width below your wrist bone.

For optimized heart-rate tracking while exercising, keep these tips in mind:
Try wearing Ionic higher on your wrist during exercise for an improved fit and more accurate heart-rate reading. Many exercises, such as bike riding or weight lifting, cause you to bend your wrist frequently, which can interfere with the heart-rate signal if the watch is lower on your wrist.
- Make sure the watch is in contact with your skin.
- Don't wear your watch too tight; a tight band restricts blood flow, potentially affecting the heart-rate signal. However, the watch should be slightly tighter (snug but not constricting) during exercise than during all-day wear.
- With high-intensity interval training or other activities where your wrist is moving vigorously and non-rhythmically, the movement may limit the sensor's ability to provide a heart-rate reading. If your watch doesn't show a heart-rate reading, try relaxing your wrist and staying still briefly (about 10 seconds). You should see a heart-rate reading.
Handedness
For greater accuracy, you must specify whether you wear Ionic on your dominant or non-dominant hand. Your dominant hand is the one you use for writing and eating. By default, the Wrist setting is set to non-dominant. If you wear Ionic on your dominant hand, change the Wrist setting in the Fitbit app.
Change the Wristband
Ionic comes with a large wristband attached and an additional small wristband in the box. The wristband has two separate bands (top and bottom) that you can swap with accessory bands, sold separately.
Remove a Wristband
To change the wristband, first remove the band attached to the watch. Then follow the steps below to attach a new wristband.
Turn Ionic over and find the band latches—there's one on each end where the band meets the frame.
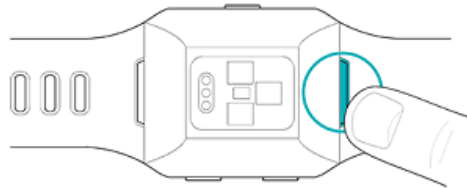
- To release the latch, press down on the flat metal button on the strap.
Gently pull the band away from the watch to release it.
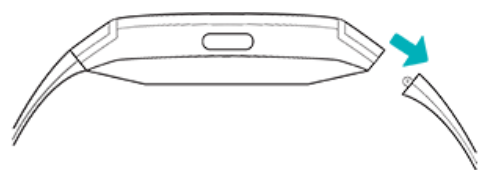
- Repeat on the other side.
If you're having trouble removing the band or if it feels stuck, gently move the band back and forth to release it.
Attach a Wristband
To attach a wristband, press it into the end of the watch until you feel it snap into place. The band with the clasp attaches to the top of the watch.

Basics
Learn how to manage Ionic's settings, set a personal PIN code, navigate the screen, and more.
Navigate Ionic
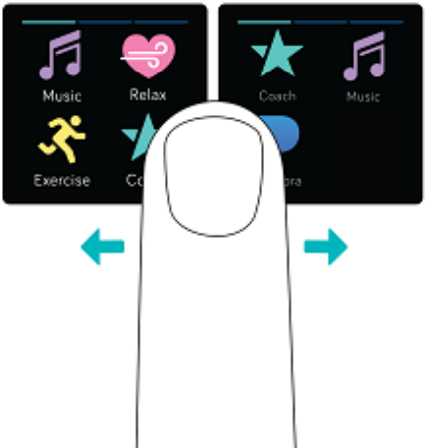
Ionic has a touch screen with a colored LCD and three buttons: back, top, and bottom. Navigate Ionic by tapping the screen, swiping side to side and up and down, or by pressing the buttons. To preserve battery, Ionic's screen turns off when not in use. To turn it on, double-tap the screen or press any button.
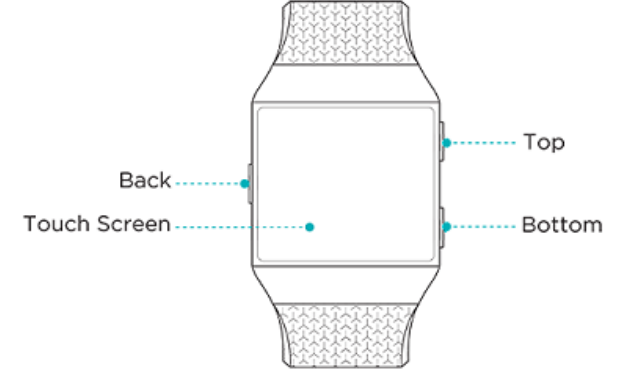
Basic Navigation
The home screen is the clock. On the clock:
- Swipe down to see notifications.
- Swipe up to see your daily tips and stats.
- Swipe left to scroll through the apps installed on your watch.
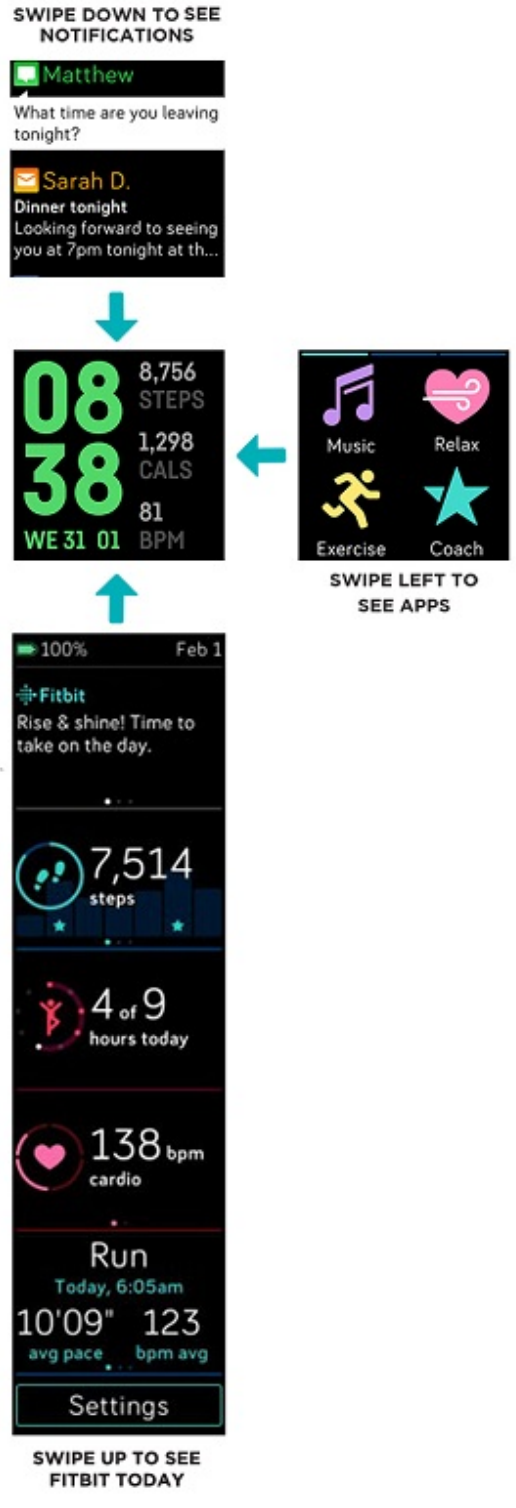
To open an app, swipe to find the app and then tap it. For more information on how to manage apps, see help.fitbit.com.
Button Shortcuts
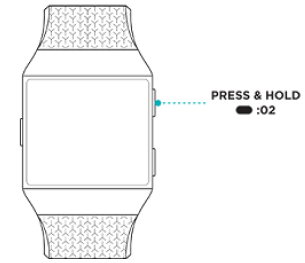
Press and hold the buttons on Ionic for a faster way to use Fitbit Pay, control music, see notifications, and open apps. Ionic shows notifications as they come in and also saves them so you can check later.
Music Controls, Fitbit Pay, and Settings
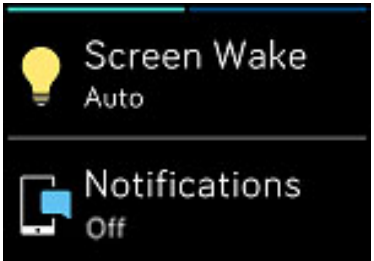
To access music controls, use Fitbit Pay, turn on or turn off notifications, or change your screen wake setting, press and hold the back button:

- Swipe right to access music controls. For more information on music controls.
- On Fitbit Pay-enabled watches, the middle screen is used to make contactless payments. For more information on making payments,.
- Swipe left to access the quick settings screen. On the quick settings screen:
- When Screen Wake is set to Auto, you can turn your wrist towards you to turn the screen on.
When Notifications is set to On, Ionic displays notifications from your phone. For more information on how to manage notifications.
Description
The Fitbit Ionic Stopwatch FB503WTGY-EU is a powerful tool for tracking time during any activity. Its customizable alarms and timers make it easy to set up and use, while its lap timer function and countdown timer provide added flexibility. The history function is also an excellent feature, allowing users to review past timers and track their progress over time.
Notifications
To see your notifications, press and hold the top button:
Swipe up or down to scroll through your notifications.
App Shortcuts
Press the buttons on Ionic for quick access to your favorite apps. To access these shortcuts, navigate to the clock screen.
The buttons are mapped as follows:
- Top button – opens the app located in the top left of the first app screen. If you haven't reordered your apps, the Music app
 opens.
 - Bottom button – opens the app located in the bottom left of the first app screen. If you haven't reordered your apps, the Coach app
 opens.
Customize Ionic by reordering your apps.
Adjust Settings
Manage basic settings including brightness, heart rate, and paired Bluetooth devices directly on your watch. Open the Settings app![]() and tap a setting to adjust it. Swipe up to see the full list of settings.
and tap a setting to adjust it. Swipe up to see the full list of settings.
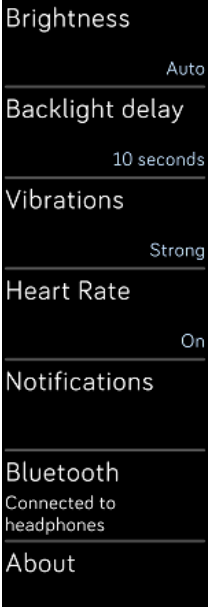
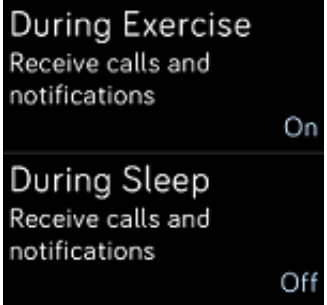
To turn notifications off so that you don't receive them during exercise and sleep, tap Notifications and then tap During Exercise or During Sleep to adjust the setting.
Check Battery Level
A fully charged Ionic has a battery life of up to 5 days. Battery life and charge cycles vary with use and other factors; actual results will vary.
When fully charged, Ionic can:
- Track up to 10 hours of activities that use GPS
- Play up to 12 hours of continuous music
Check your battery level at any time: from the clock, swipe up. The battery level icon is in the top-left corner of the screen.
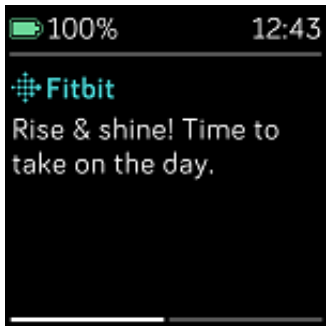
If your battery is low (less than 24 hours remaining), Ionic alerts you with the red battery indicator. If your battery is critically low (less than 4 hours remaining), the red battery indicator flashes.
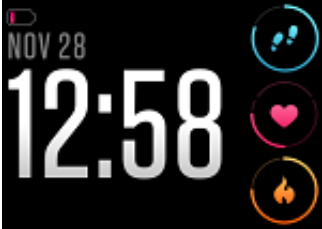
Wi-Fi won't work on Ionic when the battery is 25% or less.
Set Up Device Lock
To help keep your watch secure, turn on device lock in the Fitbit app, which prompts you to enter a personal 4-digit PIN code to unlock your watch. If you set up Fitbit Pay to make contactless payments from your watch, device lock is turned on automatically and you're required to set a code. If you don't use Fitbit Pay, device lock is optional.
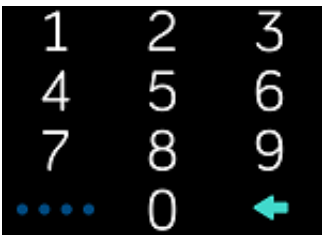
Turn on device lock or reset your PIN code in the Fitbit app:
From the Fitbit app dashboard, tap or click the Account icon (![]() ) > Ionic tile > Device Lock.
) > Ionic tile > Device Lock.
Turn Off the Screen
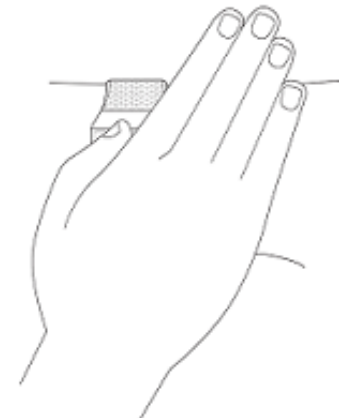
To turn off Ionic's screen when not in use, briefly cover the watch face with your opposite hand.
Care for Ionic
It's important to clean and dry your Ionic regularly. For instructions and more information, see http://fitbit.com/productcare
Apps and Clock Faces
The Fitbit App Gallery offers apps and clock faces to personalize your watch and meet a variety of health, fitness, timekeeping, and everyday needs. Apps are organized in groups of 4 per screen.
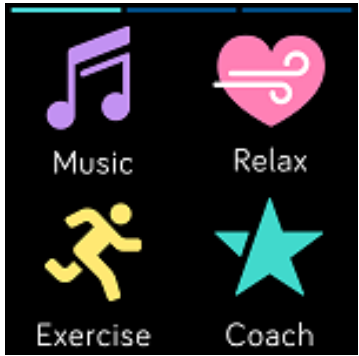
Some apps on Ionic require your paired phone, while other apps for key functions are designed to be used without needing your phone nearby. For more details, see "Use Ionic without your phone" on the previous page.
Open Apps
From the clock face, swipe left to scroll through the apps installed on your watch. To open an app, tap it.
Organize Apps
To change the placement of an app, press and hold an app on Ionic until it's selected, and then drag it to a new location. You know the app is selected when it increases slightly in size and the watch vibrates.
Remove Apps
You can remove most apps installed on Ionic. To remove an app:
- With your watch nearby, from the Fitbit app dashboard, tap or click the Account icon (
 ) > Ionic tile.
 - Tap or click Apps.
- In the My Apps tab, find the app you want to remove. You may have to scroll down to find it.
- Tap or click the app > Remove.
Update Apps
Apps update automatically over Wi-Fi as needed. Ionic searches for updates when plugged into the charger and in range of your Wi-Fi network. For information about manually updating apps, see help.fitbit.com.
Download Additional Apps
Add new apps to Ionic from the Fitbit App Gallery. To add an app:
- With your watch nearby, from the Fitbit app dashboard, tap or click the Account icon (
 ) > Ionic tile.
 - Tap or click Apps > All Apps.
- Browse the available apps. When you find one you want to install, tap or click it.
- Tap or click Install to add the app to Ionic.
Change the Clock Face
A variety of clock faces are available in the Fitbit App Gallery. To change your clock face:
- With your watch nearby, from the Fitbit app dashboard, tap or click the Account icon ( ) > Ionic tile.
- Tap or click Clock Faces > Pick a New Clock.
- Browse the available clock faces. When you find one you want to install, tap or click it.
- Tap or click Select to add the clock face to Ionic.
All apps and clock faces in the Fitbit App Gallery are free to download. However, some apps and clock faces require a paid subscription service or a one-time activation fee to a developer. If a developer requires an activation fee, the developer will process and provide instructions for payment.
Sensors
Fitbit Ionic contains the following sensors and motors:
- A MEMS 3-axis accelerometer, which tracks your motion patterns
- An altimeter, which tracks altitude changes
- A GPS receiver with GLONASS, which tracks your location during a workout
- An optical heart-rate tracker
- An ambient light sensor
- Temperature sensor
Materials
The housing and buckle on Ionic are made of anodized aluminum. While anodized aluminum can contain traces of nickel, which can cause an allergic reaction in someone with nickel sensitivity, the amount of nickel in all Fitbit products meets the European Union's stringent Nickel Directive.
The wristband that comes with Ionic is made of a flexible, durable elastomer material similar to that used in many sports watches. It doesn't contain latex. Accessory wristbands are available in genuine leather.
Wireless Technology
Ionic contains a Bluetooth 4.0 radio receiver and NFC chip.
Haptic Feedback
Ionic contains a vibration motor for alarms, goals, notifications, reminders, and apps.
Battery
Ionic contains a rechargeable lithium-polymer battery.
Memory
Ionic stores your stats and data for 7 days in between the times you sync your watch. Stored data consists of All-Day stats (including steps, distance, calories burned, active minutes, heart rate, and stationary vs. active hours) as well as sleep stages, SmartTrack activity, and exercise data. We recommend syncing your watch at least once a day.
Display
Ionic has a color LCD display.
Wristband Size
Wristband sizes are shown below. Note that accessory wristbands sold separately may vary slightly.
- Small wristband: Fits a wrist between 5.5 and 6.7 inches in circumference
- Large wristband: Fits a wrist between 6.7 and 8.1 inches in circumference
Environmental Conditions
- Operating Temperature: 14° to 113° F (-10° to 45° C)
- Non-operating Temperature: -4° to 14° F (-20 to -10° C), 113° to 140° F (45° to 60° C)
- Water Resistance: Water resistant up to 50 meters
- Maximum Operating Altitude: 30,000 feet (9,144 m)
Activity and Sleep
Ionic continuously tracks a variety of stats whenever you wear it, including hourly activity, heart rate, and sleep. The information is transferred to your dashboard every time you sync your watch.
See Your Stats
From the clock face, swipe up to see Fitbit Today, which shows your daily tips and tracks these stats:
- Core stats: steps taken today, calories burned, distance covered, floors climbed, and active minutes
- Hourly activity: steps taken this hour and the number of hours you met your hourly activity goal
- Heart rate: current heart rate and average resting heart rate over the past 7 days
- Exercise: up to 3 of your most recently tracked exercises over the past 7 days (if you have no tracked exercises over the past 7 days, this tile won't appear)
- Female health tracking: information on the current stage of your menstrual cycle (if you don't use the female health tile in the Fitbit app, this tile won't appear)

Each tile can be swiped left or right to view the complete set of stats. To reorder the tiles, press and hold a row, then drag it up or down to change its position. Find your complete history and other information automatically detected by your watch, such as sleep stages, on your Fitbit dashboard.
All Ionic stats except sleep reset at midnight to begin a new day.
Track a Daily Activity Goal
Ionic tracks your progress towards a daily activity goal of your choice. When you reach your goal, the watch vibrates and shows a celebration.
Choose a Goal
By default, your goal is 10,000 steps per day, but you may have changed this goal during setup. You can change the goal to distance traveled, calories burned, or active minutes and select a corresponding value. For example, you may want to keep steps as your goal but change the target from 10,000 to 20,000 steps.
For instructions on how to change your goal, see help.fitbit.com.
See Goal Progress
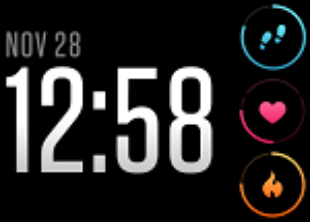
Some clock faces show a goal progress ring or bar to help keep you motivated. For example, on the Gauges clock face, the solid portion of the circle around the step count icon in the top right shows that you're close to hitting your goal. For information on how to see detailed progress toward your goal.
Track Your Hourly Activity
Ionic helps you stay active throughout the day by keeping track of when you're stationary and reminding you to move.
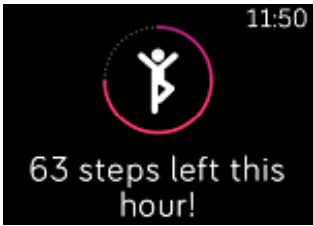
If you haven't walked at least 250 steps in a given hour, at 10 minutes before the hour you'll feel a vibration reminding you to walk. When you meet the 250-step goal after receiving the reminder, you'll feel a second vibration and see a congratulatory message.
Track Your Sleep
Wear Ionic to bed to automatically track your time asleep and sleep stages. To see your sleep stats, sync your watch when you wake up and check your dashboard.
Set a Sleep Goal
By default, you have a sleep goal of 8 hours of sleep per night. Customize this goal to meet your needs.
Set a Bedtime Reminder
The Fitbit dashboard can recommend consistent bedtimes and wake times to help you improve the consistency of your sleep cycle. You can choose to be reminded nightly when it's time to start getting ready for bed.
Learn About Your Sleep Habits
Ionic tracks several sleep metrics including when you go to bed, how long you're asleep, and your time spent in each sleep stage. When you use Ionic with the Fitbit dashboard, your watch can help you understand how your sleep patterns compare to others of the same sex and age range.
See Your Heart Rate
Ionic uses PurePulse technology to track your heart rate automatically and continuously. View your real-time heart rate and your resting heart rate on your watch by swiping up from the clock screen to access your stats. For more information on the stats on your watch, see "See your stats" on page 36. Certain clock faces show your real-time heart rate on the clock screen. During a workout, Ionic shows your heart-rate zone to help you target the training intensity of your choice. For more information about heart-rate zones on Ionic, see "Check your heart rate" on page 49.
Adjust Your Heart Rate Setting
The Heart Rate setting on Ionic has two options:
- Off—Heart rate tracking is off.
- On—Heart rate tracking is on when the watch is on your wrist.
To adjust the Heart Rate setting, on Ionic, tap the Settings app ![]() > Heart Rate. Note that the green LED on the back of Ionic continues to flash even if you turn off heart rate tracking.
> Heart Rate. Note that the green LED on the back of Ionic continues to flash even if you turn off heart rate tracking.
Practice Guided Breathing
The Relax app ![]() on Ionic provides personalized guided breathing sessions to help you find moments of calm throughout the day. You can choose between 2-minute and 5-minute long sessions.
on Ionic provides personalized guided breathing sessions to help you find moments of calm throughout the day. You can choose between 2-minute and 5-minute long sessions.
To begin a session:
- On Ionic, tap the Relax app.
The 2-minute session is the first option. Tap the gear icon
 to choose the 5-minute session or turn off the optional vibration. Then press the back button on your watch to return to the Relax screen.
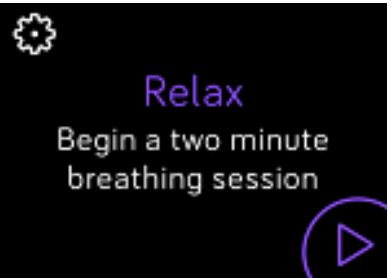
Tap the play symbol to start the session and follow the on-screen instructions.
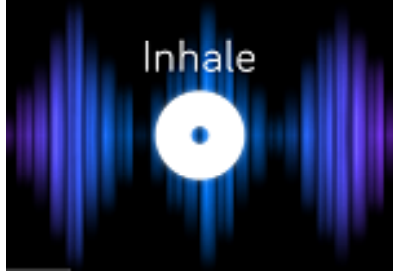
After the exercise, you'll see a summary that shows your alignment (how closely you followed the breathing prompt), your heart rate at the start and end of the session, and how many days you completed a guided breathing session this week.
Troubleshooting
If you encounter any issues with the Fitbit Ionic Stopwatch FB503WTGY-EU, try the following solutions:
- Make sure your Fitbit Ionic is charged and connected to your phone or tablet.
- Check for any software updates for your Fitbit Ionic and the app.
- Restart your Fitbit Ionic and try again.
- If the issue persists, contact Fitbit customer support.
Fitbit Ionic Stopwatch Pros & Cons
Pros
- Customizable alarms and timers
- Lap timer and countdown timer functions
- User-friendly interface
- Affordable price
Cons
- Limited compatibility with non-Fitbit devices
- No cloud syncing feature
Customer Reviews
"I love using the Fitbit Ionic Stopwatch during my workouts. It's easy to use and customize, and the lap timer function is a game-changer. Highly recommend!" - Sarah L.
"I've been using the Fitbit Ionic Stopwatch for my runs, and it's been a lifesaver. The customizable alarms and timers are a great feature, and the history function is very helpful for tracking my progress." - John D.
"I was a little hesitant to spend $3 on a stopwatch app, but the Fitbit Ionic App Timer Stopwatch is worth every penny. It's well-designed, reliable, and easy to use. I highly recommend it." - Emily T.
Faqs
What devices is the Fitbit compatible with?
How do I start the timer on the Ionic Stopwatch?
How do I stop or pause the timer on the Stopwatch?
How do I reset the timer on the Fitbit?
How do I update the software for the Stopwatch FB503WTGY-EU?
Leave a Comment
