Gourmia Ultragrind Turbo Machine GMG7500 User Manual
Content
Introduction
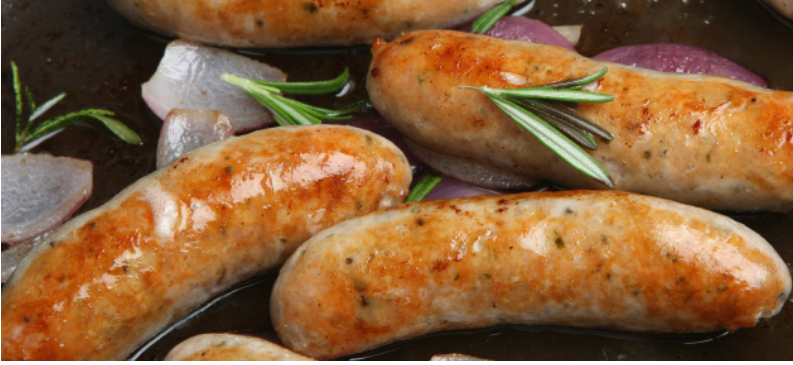
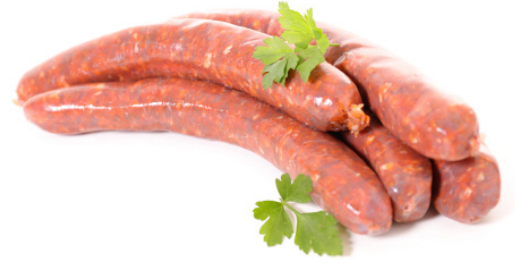
The latest food trends have encouraged us all to find the most naturally-grown, organic beef, poultry, pork and seafood to incorporate them into healthful diets. With the Gourmia UltraGrind Turbo, you can now grind your own meat to make hamburger, chili beef, sausage, stuffed meat rolls and more. You are essentially improving the purity of your food by controlling the amount of fat in your hamburger, the ingredients included in your chicken sausage, and the meaty spice mixture in your kubbe rolls!
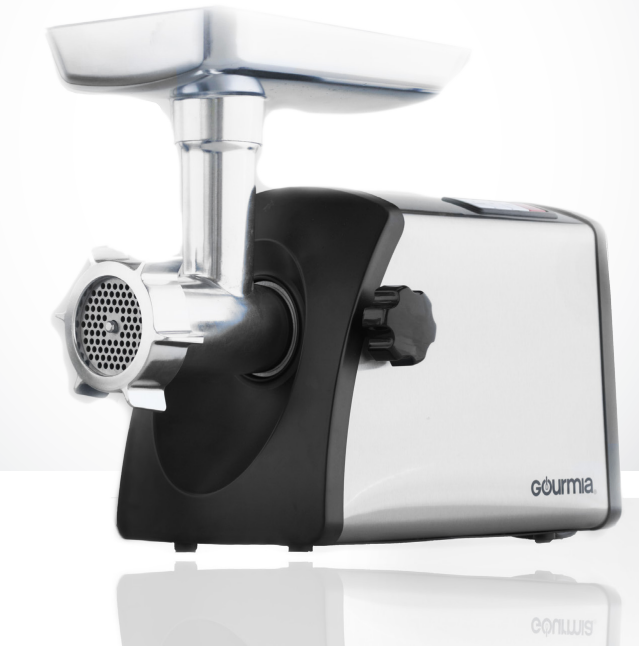
The Gourmia UltraGrind Turbo has a powerful direct-drive 2 speed motor and a stainless steel cutting blade that can handle everything from the toughest cuts of meat to the most delicate filets of seafood. Inside the pages of this manual, you’ll find hints and tips on preparing foods for grinding, assembly of the grinder and complete step-by-step operating instructions so you’ll feel confident the very first time you use the UltraGrind Turbo!
The Gourmia GMG7500 is priced at approximately $79.99.
Usage Purpose
The Gourmia Ultragrind Turbo Machine GMG7500 is perfect for anyone looking to grind coffee beans at home or in a small café. Its robust motor and adjustable grind settings make it versatile for various brewing methods, from espresso to French press.
Detailed Specifications
| Motor | 120V, 200W powerful motor |
|---|---|
| Grind Settings | 60 precise grind settings |
| Bean Capacity | 18-ounce bean hopper |
| Grind Container | Large 12-ounce ground container |
| Material | Stainless steel and BPA-free plastic |
| Dimensions | 6.5 x 7.5 x 10.5 inches |
| Weight | Approximately 7 pounds |
| Noise Reduction | Features a noise-reducing design |
Features & Functions
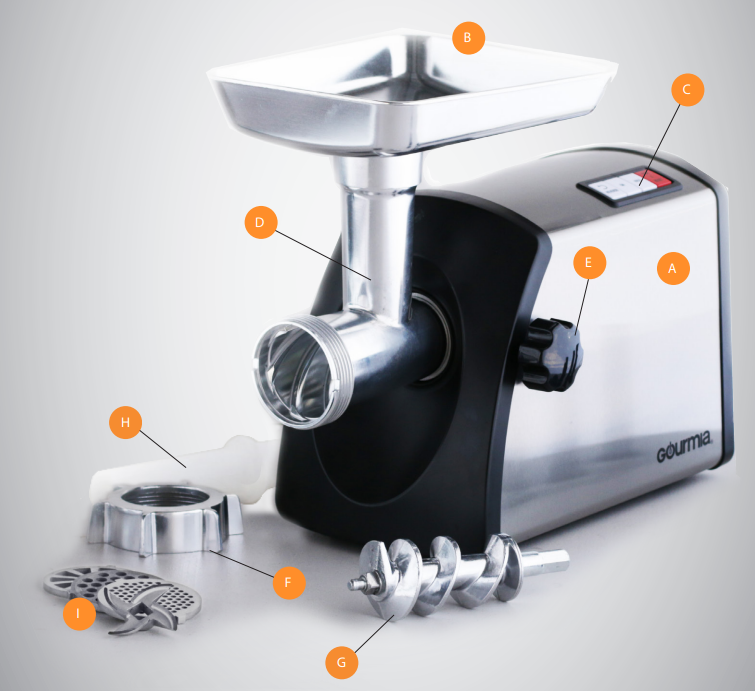
- UltraGrind Turbo Base: Made of stainless steel, the Base holds the powerful motor that drives precision grinding of foods. It holds the Control Panel for operating, the food tray and various attachment parts for the Ultra powerful grinding procedure of your choice.
- Die Cast Food Tray: The Tray is designed to hold enough pieces of food to operate the UltraGrind Turbo at optimum levels. The Food Pusher should always be used to move food to the Grinder/Feeder Head.
- UltraEasy Control Buttons: Designed for ease of use, the operational Buttons offer clear indicators for power settings. (see specific usage for each Button in instructions following).
- Grinder/Feeder Head: An integral part of the working system, the Head connects to the Base, the Cutting Blade system and the Food Tray.
- Locking Gear: The easy-to-use turning knob smoothly locks the Grinder/Feeder Head into place.
- Attachment Locking Ring: All Plates and Attachments are locked into place via the easy operation of tightening the Ring.
- Auger: The sharp blades of the auger move the food to the cutting blade of the Grinder/Feeder Head
- Food Pusher: The ultimate safety tool when grinding foods, the Food Pusher keeps fingers and hands safely away from the grinding process. Do Not use the UltraGrind Pro without using the Food Pusher for safety.
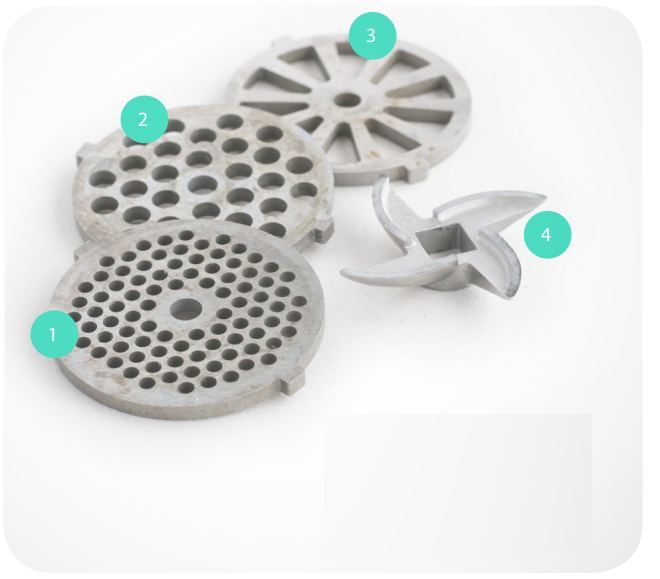
- Cutting Plates: Designed for precision, these 3 plates provide fine, medium and coarse grinds.
OPERATIONAL PARTS
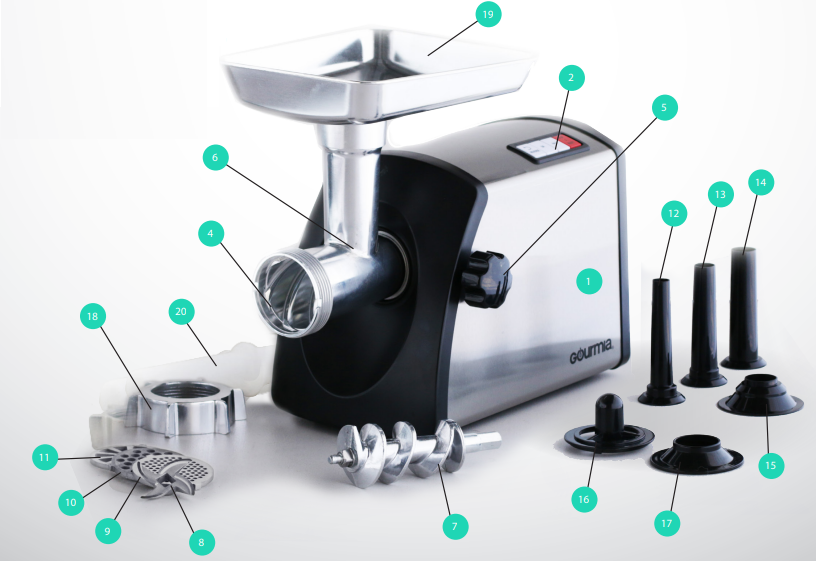
- UltraGrind Turbo Base
- Control Buttons
- Reverse
- On (full speed)
- Half (half speed)
- Stop & Reset
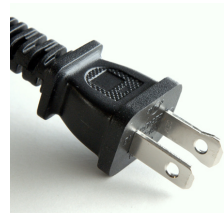
- Power Cord
- Attachment Opening - Grinder/Feeder Head
- Locking Gear
- Grinder/Feeder Head
- Food Auger
- Stainless Steel Cutting Blade
- Fine Cutting Plate
- Medium Cutting Plate
- Coarse Cutting Plate
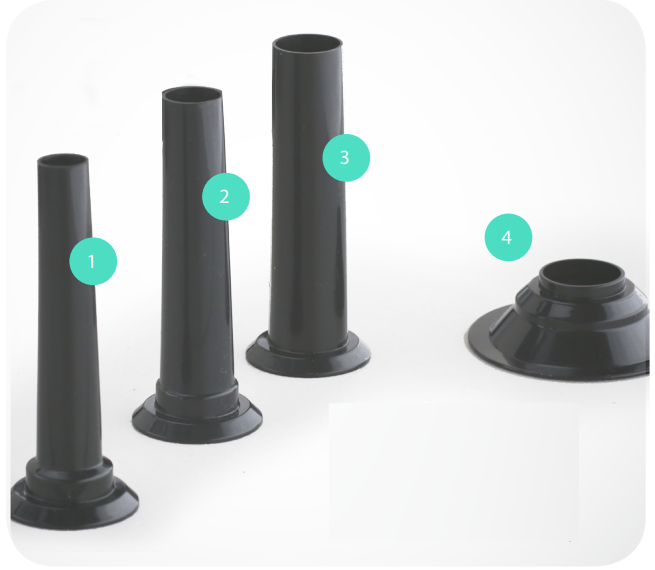
- Small Sausage Stuffing Funnel
- Medium Sausage Stuffing Funnel
- Large Sausage Stuffing Funnel
- Sausage Funnel Retainer Ring
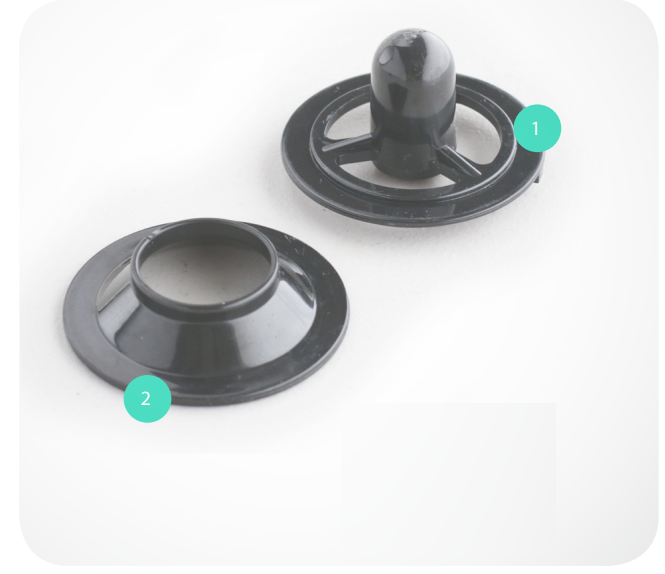
- Kibbe Attachment
- Kibbe Attachment Retainer Ring
- Attachment Locking Ring
- Die Cast Food Tray
- Food Pusher
ACCESSORIES
- Fine Cutting Plate
- Medium Cutting Plate
- Coarse Cutting Plate
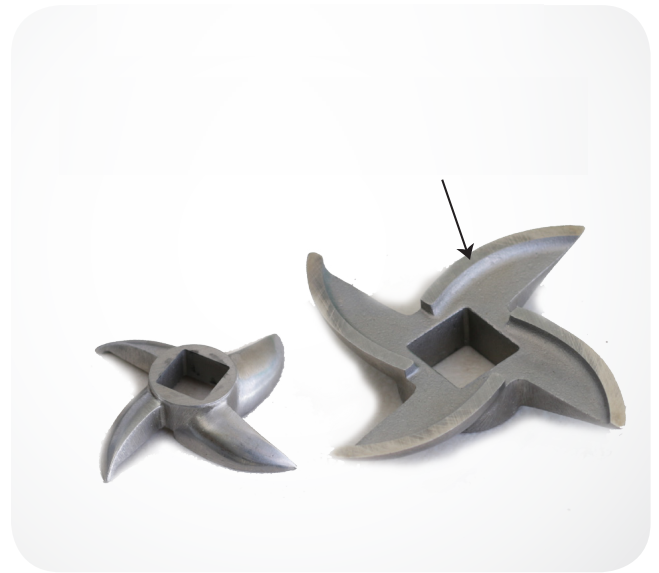
- Precision Cutting Blade
- Kibbe Attachment
- Kibbe Attachment Retainer Ring
Precision Cutting Blade
When attaching Cutting Blade onto the end of the Food Auger, the flat cutting surfaces of the Cutting Blade must face outward
- Small Funnel
- Medium Funnel
- Large Funnel
- Funnel Retainer Ring
Description
The Gourmia Ultragrind Turbo Machine GMG7500 boasts a sleek and durable design, making it a stylish addition to any kitchen. The stainless steel and BPA-free plastic construction ensures longevity and safety. With 60 precise grind settings, users can customize their grind to suit any brewing method. The large bean hopper and ground container make it convenient for frequent use without needing to refill or empty often.
ASSMBLY BEFORE USE
ASSEMBLE THE ULTRA GRIND PRO AS FOLLOWS:
- Place Base on a stable work surface. Ensure the unit is unplugged.*
Insert Grinder/Feeder Head into Attachment Opening on Base. Turn the Locking Gear on the Base clockwise until tight.*
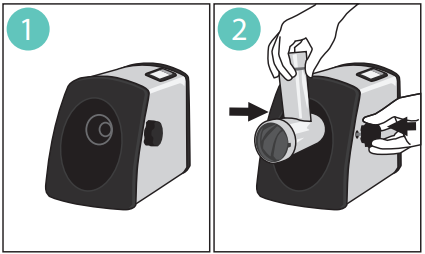
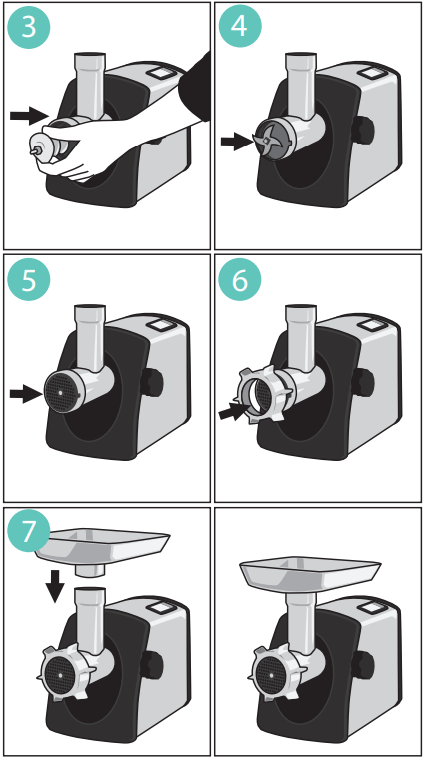
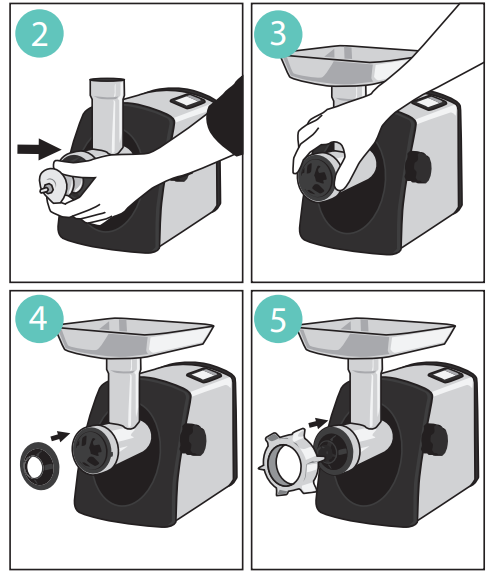
- Insert the Food Auger into the Grinder/Feeder Attachment, with the large hexagon end of the auger positioned in first, until the auger is seated and locked into the motor drive.*
- Place the Cutting Blade onto the end of the Food Auger to position the square opening on the Cutting Blade. When correct, it will fit securely onto the square end of the Food Auger* Note: The flat cutting surfaces of the Cutting Blade must face outward.*
- Place the center opening of the desired Cutting Plate onto the center of the Food Auger shaft against the Cutting Blade. Position the Cutting Plate Tabs into the Slots on the Grinder/Feeder Head.*
- Secure the Attachment Locking Ring to the threaded end of the Grinder/Feeder Head. Turn clockwise by hand until tight.
Place the Food Tray on the Grinder/Feeder Head, aligning the slot in the Food Tray opening with the notch on the Head opening.*
STEP-BY-STEP OPERATING INSTRUCTIONS
GRINDING MEATS
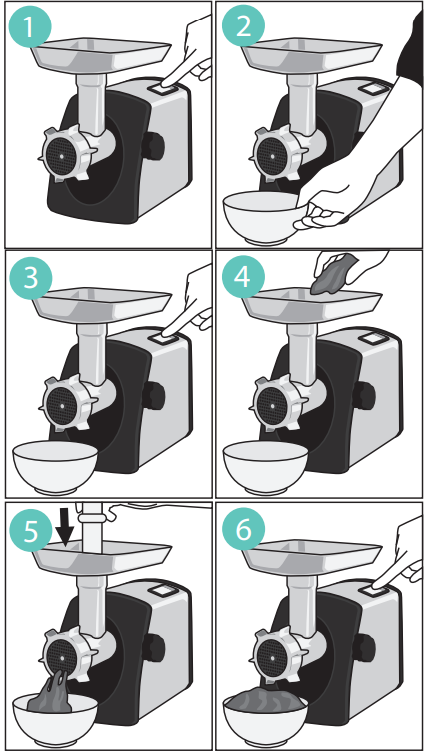
- To ensure the unit is off, press STOP. Plug the unit into the outlet.
- Place a shallow bowl or plate under the Grinder/Feeder Head to catch ground food.
- Press ON (Full speed) or HALF (Half speed) BEFORE placing food into Food Tray.
- Place food into Food Tray. Move the food toward the opening of the Food Tray using the Food Pusher. DO NOT use hands or fingers to move food.
- Press the STOP & RESET Button when food grinding is complete.
NOTE: If the motor slows or stops, the likely cause is food jammed into the Cutting Blade and/or Plate. To correct this, immediately push the STOP & RESET Button to turn the unit off. Push the Reverse Button briefly. This will push the food in the opposite direction to dislodge the food. Push the ON or Half Button to continue grinding food.
If the food remains jammed, push the STOP & RESET Button. Unplug the unit from the outlet. Remove the Grinder/Feeder Head and clean the internal parts. Reassemble and continue the food-grinding process.
TIP: Cutting tough meat into uniform pieces no larger than 1-inch cubes helps avoid food jams. See Food Preparation Hints & Tips for details.
MAKING SAUSAGE
- Follow Steps 1 – 5 of Meat Grinding Instructions.
- Select Sausage Stuffing Funnel of your choice. Slide the Sausage Funnel Retainer Ring over the Funnel.
- Place Sausage Funnel with Retainer Ring on the Grinder Feeder Head with the narrow end of the Sausage Funnel facing outward.
- Secure the Locking Ring with the Sausage Funnel Assay to the threaded end of the Grinder/ Feeder Head. Turn the Locking Ring clockwise by hand until tight.
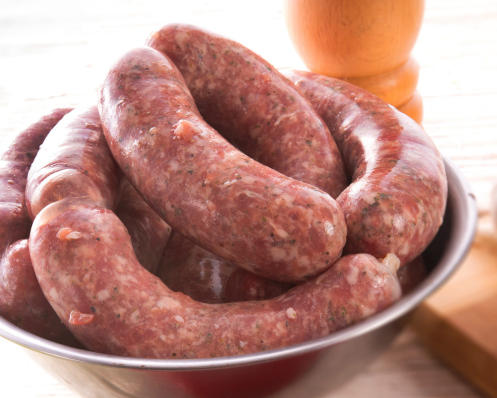
SAUSAGE MAKING HINTS & TIPS
To Prepare Sausage
- Grind meat into a large mixing bowl, using medium Cutting Plate as directed.
- Add recipe spices and herbs all at once to the meat. Lightly allow the meat to fall through your hands once or twice, mixing very loosely (this helps keep meat from becoming tough).
- Run the spiced meat mixture through the UltraGrind Turbo again, using the medium Cutting Plate. Chill for 45 minutes. Keep the meat chilled while making sausage to avoid melting the fat in the process, destroying the sausage.
- If using animal casing, rinse as directed to remove salt. Place one opening of a long, very damp casing tube over the Stuffing Funnel and gently pull the remainder of the casing onto the funnel. Allow an eight-inch portion of casing to drape over the front of the funnel.
- Select Half power and move the meat through the Grinder/Feeder Head to the funnel. Just as the meat reaches the end of the funnel tube, press Stop. Tightly tie the end of the casing close to the meat mixture. Cut off the remaining casing.
- Press Half power and continue allowing the meat to fill the casing, slowly moving the casing through as the meat continues to move. Do not allow the casing to pack tightly; allow some room for tying off individual sausages and expansion during cooking. When meat is through, press Stop. Allow a few inches of additional casing on the end and tie securely.
- Form individual sausages as desired, twist and tie tightly to separate. Use a pin or sharp fork to prick each sausage a few times before cooking. Refrigerate until cooking. Thoroughly cook according to recipe directions.
Use flavorful herbs and spices, such as garlic, fennel, dried thyme, ground cinnamon, fresh cilantro, salt, pepper, smoked paprika, sweet paprika, ground coriander and ground cumin. Add lemon or lime juice for brightness, if desired. Each brings depth of flavor and sweet or spicy elements for interest.
When using chicken breast to make sausage, add a small amount of olive oil to the meat mixture. Chicken breast will become too dry while cooking unless oil is added. Try adding sweet dried fennel and apple for great breakfast sausages.
Tie the ends of the casings as securely as possible. This lessens the potential of meat falling out during cooking.
Although animal casings are the most popular, it is possible to purchase collagen or cellulose casings online. Obtain animal casings through your local butcher, if possible.
Chill and re-chill your sausage meat mixture; it is extremely important that the fat in the meat does not melt, which results in hard, dry cooked meat.
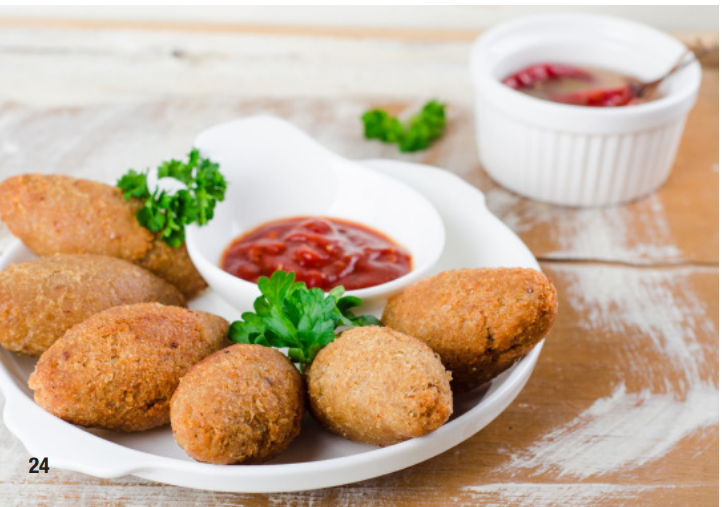
MAKING KIBBE ROLLS
IMPORTANT NOTE: Do NOT attach or use the Cutting Blade or Plates when using the Kibbe Attachment)
- Follow Steps 1-3 of Meat Grinding Instructions.
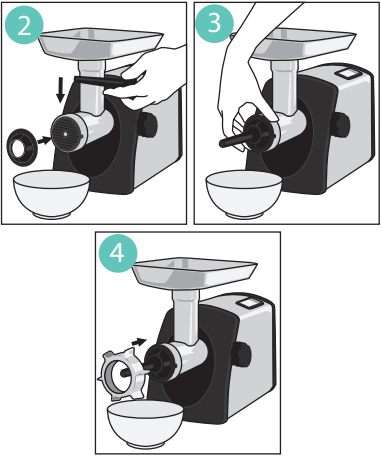
- Place centering hole of the Kibbe Attachment onto the end of the Food Auger shaft. Align the Tabs on the Kibbe Attachment with the Slots on the Grinder/Feeder Head.
- Place the Kibbe Attachment Retainer Ring over the Kibbe Attachment with the cone-shaped portion facing outward.
- Secure the Attachment Locking Ring to the threaded end of the Grinder/Feeder Head. Turn clockwise by hand until tight.
KIBBE MAKING HINTS & TIPS
To Prepare Kibbe:
- Follow the Operating Instructions for the UltraGrind Turbo (see Steps 1-3).
- Follow the Directions for Making Kibbe to set up the Kibbe Attachment and Kibbe Attachment Retainer Ring.
- Chill the prepared Kibbe dough for one hour before molding. Place a large plate beneath the Grinder/Feeder Head.
- Press Half power. Add a large portion of the Kibbe dough to the Food Tray and use the pusher to gently move the dough toward the auger. The dough will move slowly as it forms a tube.
- When the dough tube appears, support the hollow tube with your hands to help keep the tube intact. Cut it or break it when a long tube has been formed and place on the plate. Keep a small bowl of water nearby to moisten the dough as needed in this process. Continue with the rest of the dough. Press OFF.
- Form the long tube into short tubes as desired and shape as preferred.
- Add recipe mixture of sautéed ground meat, spices, onion, and garlic and stuff each short tube with the mixture. Form into traditionally-shaped kibbe.
- Chill for 1 hour before deep frying to perfection.
Use fine-cracked bulgur wheat (#1) for best results when making the dough. Add enough water to create a firm texture, but not a hard texture to the bite.
Grind the beef for the dough using the fine Cutting Plate attached to the UltraGrind Turbo. Toss the freshly ground beef, prepared bulgur wheat, fine-chopped onion, garlic, herbs and spices in a bowl and grind the mixture again through the fine Cutting Plate. This will create a smooth dough.
For the filling, if desired, you may substitute chopped almonds for the traditional pine nuts.
Moisten the dough lightly with water if the Kibbe appears to be too dry or if it breaks apart as the tube forms.
FOOD PREPARATION HINTS & TIPS
Cutting Plate Chart
CUTTING PLATE | FOOD PREPARATION |
Fine | paté, baby food,appetizer spreads, hamburger, smooth sausage |
Medium | hamburger, soups, casseroles, breakfast sausage patties |
Coarse | chili con carne,Italian meat sauces, savory meatpies |
Favorite Cuts of Meat for Grinding
CUTTING PLATE | FOOD PREPARATION |
Beef | Flat ironsteak, Chuck roast,Sirloin steak |
Pork | Shoulder |
Chicken | Breast or thigh |
Seafood | Firm skinless filets, de-boned |
Hints & Tips
- Wash hands thoroughly with antibacterial soap and water before handling meat or assembling the UltraGrind Pro.
- Prior to grinding, clean all surfaces that will come in contact with the raw meat with soap and hot water.
- Note that the more meat is handled, the more prone it is to collecting bacteria. Beef also becomes tough, particularly after grinding, if handled or compacted too much. Handle meat as little as possible and as lightly as possible once ground.
- Before cutting into pieces, remove all pieces of connective tissue from beef, poultry and pork. If “silverskin” is present, the thin gelatinous layer of tissue, use a thin-bladed knife to remove it completely. The more connective tissue that can be removed, the more freely the meat will grind without becoming jammed or dislodged.
- Cut meat into uniform cubes about 1-inch in size. Ensure that they will be small enough to fit through the Grinder/Feeder chute.
- Chill, chill, chill. The meat and fat mixture will process through the UltraGrind Turbo much more easily when thoroughly chilled. After cutting into cubes, place the meat in a single layer on a tray and chill for 30 minutes prior to grinding.
- If you’d like a fine grind on meat, try first grinding it through the Coarse Cutting Plate, then re-grinding through the Fine Cutting Plate. This helps reduce the likelihood of meat jamming in the grinder.
- When grinding, remove only as meat as can be placed on the Food Tray at one time and keep the remainder in the refrigerator until just prior to using. Fat breaks down quickly when warm.
- To absorb any fat that collects as grinding continues; try feeding a dry piece of bread through the UltraGrind Pro occasionally.
BEFORE FIRST USE
- Remove all packaging and discard plastic bags.
- Wash all accessories and plates thoroughly in soapy, hot water. Do not place parts in the dishwasher.
- Clean the Base with a soft cloth and warm water.
Setup Guide
- Assembly:
- Remove all packaging materials.
- Place the bean hopper on top of the grinder.
- Attach the grind container at the bottom.
- Configuration:
- Plug in the machine.
- Adjust the grind setting by rotating the dial at the side.
- Add coffee beans to the hopper.
- Operation:
- Press the pulse or continuous grind button depending on your preference.
- Monitor the grind container to avoid overfilling.
IMPORTANT SAFEGUARDS
When operating this electric appliance, basic safety instructions should always be followed. Refer to the following for these instructions.
- READ ALL SAFETY & USAGE INSTRUCTIONS BEFORE USING ULTRAGRIND TURBO.
- NEVER PLACE FINGERS OR HANDS NEAR THE FOOD CHUTE WHILE OPERATING THE ULTRAGRIND TURBO.
- Unplug from outlet when not in use. DO NOT assemble parts or remove parts while plugged in to outlet. DO NOT clean while plugged in to outlet.
- EXERCISE EXTREME CAUTION: AVOID ELECTRICAL SHOCK. DO NOT immerse cord, plugs or the Base of the UltraGrind Turbo in water or other liquid.
- AVOID ALL CONTACT WITH MOVING PARTS. Wait until parts have completely stopped moving, unplug the unit, and then remove parts from the appliance.
- HANDLE THE CUTTING BLADE WITH EXTREME CARE: IT IS SHARP. Use caution when handling and/or cleaning.
- DO NOT use your hand or fingers to feed food into the chute; always use the food pusher. Keep hands, hair, clothing and utensils away from the grinding plates to reduce the risk of injury.
- Do not attempt to grind nuts, bones or other hard foods or shells. Do not attempt to grind non-food items of any kind. Damage to the unit and/or personal injury may occur.
- UNPLUG the UltraGrind Turbo from outlet when not in use and before cleaning. Allow the unit to cool before cleaning. Do not let cord hang over edge of table or counter or touch hot surfaces.
- Children should never use the UltraGrind Turbo; close supervision is required when appliance is used near children.
- Operate the UltraGrind Turbo on a level surface well away from any hot gas or electrical burner, heat source, combustible spray cans or pressurized items.
- Do not operate the UltraGrind Turbo outdoors.
- Never operate the UltraGrind Turbo with a damaged cord or plug or one that has malfunctioned or been damaged in any way. Immediately contact Customer Service for analysis.
- DO NOT add unauthorized accessory attachments. Such use may result in electric shock, injury or fire.
- Use only factory cord supplied; NEVER add extension cords. When done using, turn OFF, then remove plug from outlet.
- Do not use the UltraGrind Turbo for any use other than intended. Do not use without complete assembly per manufacturer’s instructions.
SAVE THESE INSTRUCTIONS
FOR HOUSEHOLD USE ONLY
The UltraGrind Turbo has a polarized plug (one blade is wider than the other). To reduce the risk of electrical shock, the plug is intended to be used by inserting it into the electrical outlet only one way. If the plug does not fit securely into the outlet, turn the plug and re-insert. Do not modify this plug. If the plug does not fit the outlet securely, call a qualified electrician for assistance. DO NOT use this plug with extension cords of any kind.
WARNING: This product contains oneThis product contains one or more chemicals known to the Stateor more chemicals known to the State of California to cause cancer.of California to cause cancer.
WARNING: This product contains oneThis product contains one or more chemicals known to the Stateor more chemicals known to the State of California to cause birth defects orof California to cause birth defects or other reproductive harm.other reproductive harm.
MAINTENANCE
- After grinding, unplug before cleaning.
- Remove and clean all parts thoroughly in hot, soapy water.
- If food particles or debris are stuck in blade or plates, use a cotton-tipped swab to remove.
- Do not use harsh abrasives or cleaners on parts or Base while cleaning. Do not place parts in the dishwasher. Do not allow parts to sit in water or soap for prolonged periods of time.
- Dry thoroughly and do not air dry.
Troubleshooting
| Common Problems | Solutions |
|---|---|
| Clogged Grinder | Turn off and unplug the machine. Clean out any blockages with a brush or tool. |
| Uneven Grind | Check if the beans are evenly distributed in the hopper. Adjust the grind setting. |
Instructions & Warnings
- Always unplug when not in use to avoid accidental starts.
- Clean regularly to prevent buildup and maintain performance.
- Avoid overloading the bean hopper or grind container.
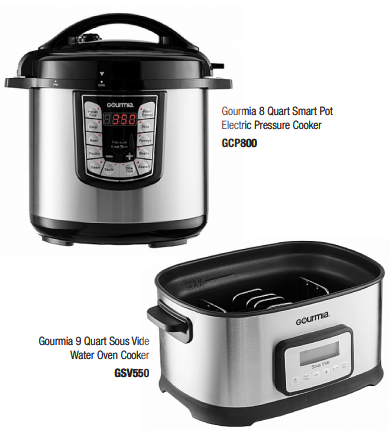
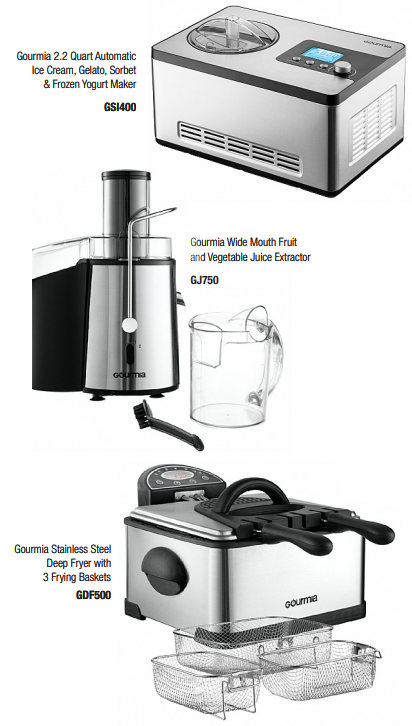
GOURMIA IN YOUR KITCHEN!
Did you know? Although Gourmia is the new kid on the block, we’ve already established ourselves as one of the leading manufacturers of creative and innovative kitchen products.
Check out these new kitchen appliances and check our website often for new products.
Why not Add these Best-selling Appliances to your Kitchen?
Warranty
This Limited Warranty is for one full year from the date of purchase. It is applicable to the original purchaser only and is not transferable to a third party user. Repair or replacement of defective parts is solely at the seller’s discretion. In the event that repair isn’t possible, the seller will replace the product/part. If product repair/replacement won’t suffice, the seller has the option of refunding the cash value of the product or component returned.
Gourmia Ultragrind Turbo Machine GMG7500 Pros & Cons
Pros
- Versatile Grind Settings: 60 precise settings
- Powerful Motor: 200W motor for consistent grind
- Noise Reduction: Minimizes noise
- Large Capacity: 18-ounce bean hopper & 12-ounce container
- Durable Construction: Stainless steel & BPA-free plastic
Cons
- Bulkier Design: Takes up more space than smaller grinders
- Higher Price Point: Generally more expensive
- Cleaning Challenge: Some parts can be tricky to clean
Customer Reviews
The Gourmia Ultragrind Turbo Machine GMG7500 has received positive reviews from customers who appreciate its versatility, power, and durability. However, some users find it bulkier than expected and note that cleaning can be a bit challenging.
Most Common Complaints
- Some users report issues with clogging if not cleaned regularly.
- The machine's size can be a concern for those with limited counter space.
Faqs
What is the Gourmia motor power?
What is the number of grinding plates supplied with the machine?
Is it simple to clean the Gourmia Ultragrind Turbo Machine?
What materials is the Gourmia Ultragrind Turbo Machine made of?
Is there a reverse function on the Gourmia Ultragrind?
How do I prevent clogging in the Gourmia Ultragrind Turbo Machine?
When the GMG7500 is operating, how loud is it?
How much noise does the Gourmia Ultragrind Turbo Machine make during operation?
What is the Gourmia compactness?
Which safety features does the Gourmia Ultragrind Turbo Machine have?
Leave a Comment