Hamilton Beach Ice Cream Maker User Manual | Parts & Features

Content
Introduction
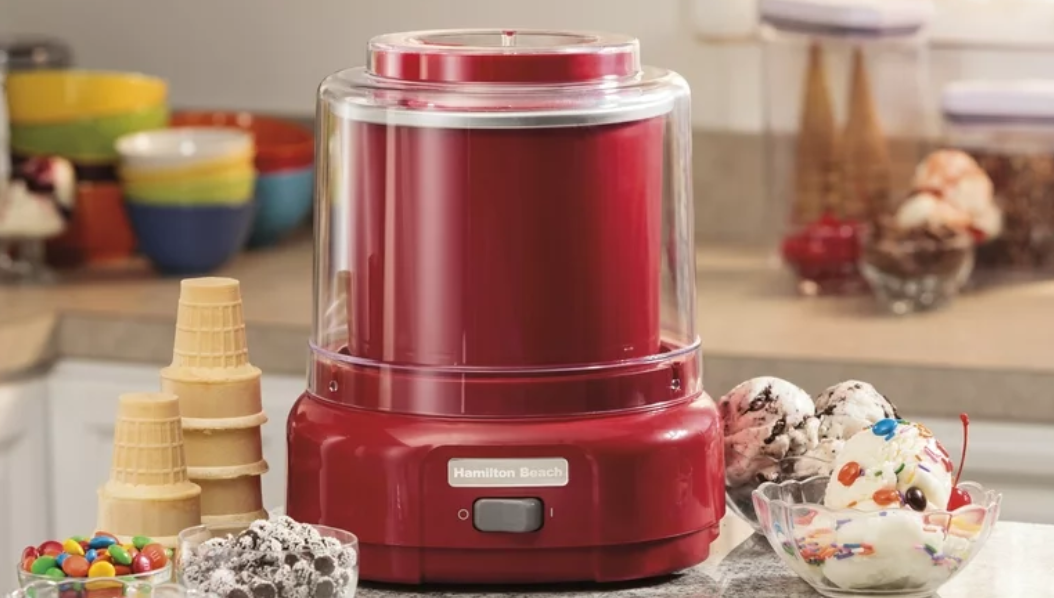
Introducing the Hamilton Beach Ice Cream Maker, a must-have for all ice cream lovers! This versatile appliance allows you to make your favorite frozen treats right at home. With a user-friendly design and a variety of settings, you can create everything from classic vanilla ice cream to fruity sorbets and creamy gelatos. The estimated price of this product is around $30 to $40, making it an affordable addition to your kitchen appliances. Although the exact launching date is not provided, it is available for purchase now.
Detailed Specifications
The Hamilton Beach Ice Cream Maker comes with several key features that make it stand out from its competitors. It has a 4-quart capacity, which is perfect for making enough ice cream for the whole family. The double-insulated freezer bowl ensures that your mixture freezes quickly and evenly, while the easy-lock lid makes it easy to add ingredients and seal the bowl. The appliance also features a simple on/off switch and a transparent lid, so you can monitor the progress of your ice cream. The compact design makes it easy to store in your kitchen, and the cord can be wrapped around the base for added convenience.
Parts and Features
BEFORE FIRST USE: Remove all literature and packing material from inside the ice cream maker. Clean freezer bowl, mixing paddle, and cover in warm, soapy water. Thoroughly rinse and dry all parts. DO NOT immerse motor/base in water. To clean, wipe with a damp cloth.

How to Make Ice Cream
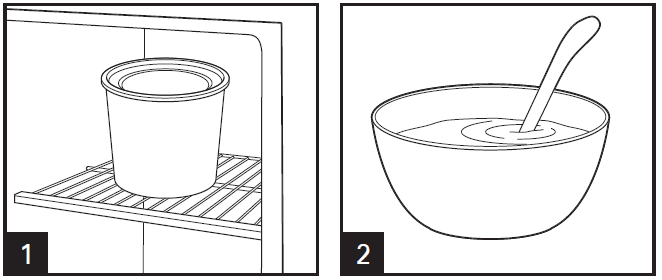
NOTE: ALWAYS freeze freezer bowl in freezer and chill prepared mixture in refrigerator before churning.
Freezer Temperature | Minimum Time for Freezer Bowl to Freeze |
-22°F (-30°C) | 8 to 9 hours |
-13°F (-25°C) | 12 to 13 hours |
0°F (-18°C) | 20 to 22 hours |
- Place freezer bowl in freezer according to chart.
Prepare mixture and chill in the refrigerator.
NOTE: Do not use more than 1 quart (4 cups/946 ml) of recipe mixture. Ice cream needs room to expand.
- Place freezer bowl onto motor/base immediately after it is removed from freezer.
- Place mixing paddle in freezer bowl.
- Place cover onto base, aligning tabs with slots on base.
Plug into outlet.

- Press switch to ON (I).
- Immediately pour chilled mixture into unit through the cover opening.
NOTE: To allow mixture to expand to 1 1/2 quarts (6 cups/ 1420 ml) while churning, do not use more than 4 cups (946 ml) of recipe mixture in ice cream maker at a time.- Use immediately when removed from the freezer. The bowl starts to defrost as soon as it is removed from the freezer.
- Ice cream will be ready in 20 to 40 minutes, depending on the recipe and the amount in the freezer bowl. Check the consistency of the mixture after 20 minutes. When you like the consistency, press switch to OFF ( ), and the ice cream is ready to eat.
NOTE: If freezer bowl repeatedly reverses, the mixture is ready. Unplug from outlet.

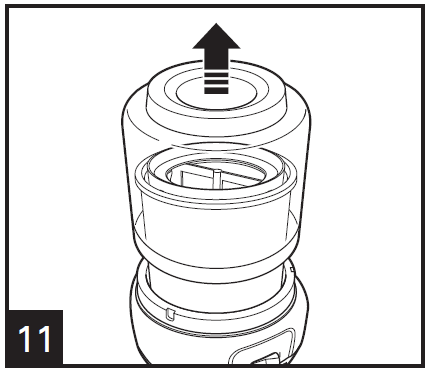
- Remove cover. Ice cream has finished processing and is ready to eat. If storing, transfer to an airtight container and store in freezer. If you would like a firmer ice cream, store in the freezer for at least 2 hours.

Tips for Best Results
- During the churning process, you can add finely chopped or pureed ingredients, such as chocolate, raisins, and nuts, through the opening in the cover after ice cream has churned for at least 15 minutes or when mixture is thick and has started to freeze. Alcohol should not be added until near the end of the process since it significantly slows down the freezing process.
- The machine will run for 20 to 40 minutes. Do not turn ice cream maker off during this time. The mixture may freeze to the walls and prevent the bowl from turning. See Troubleshooting if your unit did not make ice cream in 60 minutes.
- The finished result is a soft, spoon-able ice cream. Homemade ice cream will not be the same consistency as hard, store-bought ice cream.
- Ice cream tastes best when fresh. It will begin to lose its fresh taste after 1 to 2 weeks in the freezer.
- Keep the freezer bowl in the freezer so that you can make ice cream, chill wine, or serve ice cubes at any time.
- For best results, the freezer bowl must be frozen thoroughly. Make sure to set your freezer at the coldest setting (temperature should not be more than 0°F [-18°C]).
- Firmness of ice cream depends on variables such as the recipe used, room temperature, freezer temperature, and temperature of ingredients before churning.
- Some recipes require the mixture to be precooked. Make the recipe at least one day ahead and chill in the refrigerator overnight. This will allow the mixture to cool completely and increase volume. Base mixture may not freeze if it is not thoroughly chilled.
- Do not remove freezer bowl from the freezer until ready to use.
- Do not puncture or heat the freezer bowl.
- To allow mixture to expand to 1 1/2 quarts (6 cups/1420 ml) while churning, do not use more than 1 quart (4 cups/946 ml) of recipe mixture at a time.
Care and Cleaning
WARNING: Electrical Shock Hazard. Disconnect power before cleaning. Do not immerse motor or cord in any liquid.
- Wipe motor/base with a damp cloth. Do not immerse in water or other liquid.
WARNING: Shock Hazard. Disconnect power before cleaning. Do not immerse motor or cord in any liquid. - Wash cover, mixing paddle, and freezer bowl in sink.

Troubleshooting
PROBLEM: Ice cream is not firm enough or ice cream maker is still running after 60 minutes.
SOLUTION
- The freezer bowl was not in the freezer long enough (preferably overnight).
- The freezer is not cold enough. Ice cream sets at 10° to 14°F (-12° to -10°C). Lower freezer temperature setting.
- Too much mixture was put in freezer bowl. Maximum fill is 1 quart (946 ml).
- Ingredients are warm or at room temperature. Prechill liquid ingredients.
- The freezer bowl was left at room temperature for more than 5 minutes before use.
- The freezer door was opened and closed too many times during the freezing process.
- The freezer bowl has a thick coating of ice on the walls. After washing, dry completely prior to placing back in freezer.
PROBLEM: Ice cream maker stops churning before ice cream is ready.
SOLUTION
- Mix-in ingredients, such as chocolate chips or chopped nuts, added too soon. Wait until ice cream has churned for at least 15 minutes or until mixture is thick and has started to freeze.
- The mix-in ingredients are too large, causing the paddle to jam. Pre-chop nuts or other ingredients.
- Too large a quantity of mix-in ingredients have been added. Add one cup or less of mix-in ingredients.
Recipes
NOTE
- ALWAYS freeze freezer bowl in freezer and chill prepared mixture in refrigerator before churning.
- To allow mixture to expand to 1 1/2 quarts (6 cups/1420 ml) while churning, do not use more than 1 quart (4 cups/946 ml) of recipe mixture in ice cream maker at a time.
Old-Fashioned Vanilla Ice Cream
- 3/4 cup (177 ml) sugar
- 1/8 teaspoon (0.6 ml) salt
- 1 3/4 cups (414 ml) whole milk
- 2 large eggs, beaten
- 1 1/2 cups (355 ml) heavy whipping cream 1 teaspoon (5 ml) vanilla extract
- In heavy saucepan, combine sugar, salt, and milk. Cook over medium heat, stirring occasionally until mixture is steaming. Reduce heat to low.
- In medium bowl, slightly beat eggs. Slowly whisk half of the hot mixture into the eggs and pour back into saucepan. Cook over medium-low heat until slightly thick, about 3 minutes. Remove from heat and refrigerate until chilled or overnight.
- When ready to make ice cream, stir heavy cream and vanilla into the chilled custard mixture.
- Start ice cream maker and pour mixture through hole in lid.
- Churn for 20–40 minutes or until desired consistency.
Easy Vanilla Ice Cream
- 2 cups (473 ml) half ‘n half
- 1 cup (237 ml) heavy whipping cream 1 1/2 teaspoons (7.5 ml) vanilla
- 1/2 cup (118 ml) sugar
- Combine all ingredients in bowl. Mix well.
- Start ice cream maker and pour mixture through hole in lid.
- Churn for 20–40 minutes or until desired consistency.
Variations: Add mix-ins, such as chocolate chips or chopped nuts, after ice cream has churned for at least 15 minutes or when mixture is thick and has started to freeze.
Chocolate Ice Cream
- 2 cups (473 ml) heavy whipping cream 1 cup (237 ml) whole milk
- 1/2 cup (118 ml) sugar
- 1/4 cup (59 ml) cocoa powder
- 1 teaspoon (5 ml) vanilla
- Combine sugar and cocoa in small bowl.
- In saucepan over medium heat, warm cream and milk.
- When cream and milk mixture is warm, whisk in sugar and cocoa mixture and vanilla. Whisk until sugar is dissolved and mixture is well-combined.
- Chill in refrigerator overnight.
- When ready to make ice cream, start ice cream maker and pour mixture through hole in lid.
- Churn for 20–40 minutes or until desired consistency.
Strawberry Sorbet
- 1/2 cup (118 ml) sugar
- 1 cup (237 ml) water
- 4 cups (946 ml) fresh or thawed frozen strawberries 1 tablespoon (15 ml) lemon juice
- Combine sugar and water in heavy saucepan. Bring to a boil. Reduce heat to low and simmer until all sugar is dissolved.
- Remove from heat; place in refrigerator and cool completely.
- Puree strawberries; then add lemon juice and sugar water.
- Start ice cream maker and pour mixture through hole in lid.
- Churn for 20–40 minutes or until desired consistency.
Peaches and Cream Ice Cream
- 1 cup (237 ml) chopped fresh or frozen peaches 1/2 cup (118 ml) sugar
- 2 cups (473 ml) heavy whipping cream
- 1/2 cup (118 ml) whole milk
- 2 teaspoons (10 ml) vanilla
- Combine peaches with 1/4 cup (59 ml) of sugar. Let stand for 1 hour.
- Place mixture in food processor and pulse until peaches are coarsely chopped.
- Add remaining 1/4 cup (59 ml) sugar, cream, milk, and vanilla to the peach mixture.
- Start ice cream maker and pour mixture through hole in lid.
- Churn for 20 –40 minutes or until desired consistency.
Cappuccino Gelato
- 2 cups (473 ml) half ‘n half
- 1 cup (237 ml) heavy whipping cream
- 1/2 cup (118 ml) sugar
- 1 teaspoon (5 ml) vanilla
- 2 tablespoons (30 ml) instant espresso or coffee powder 1/8 teaspoon (0.6 ml) cinnamon
- In saucepan over medium heat, warm half ‘n half and cream.
- When cream and milk mixture is warm, whisk in sugar, vanilla, coffee powder, and cinnamon. Whisk until sugar and coffee are dissolved and mixture is well-combined.
- Chill in refrigerator overnight.
- When ready to make ice cream, start ice cream maker and pour mixture through hole in lid.
- Churn for 20–40 minutes or until desired consistency.
Description
The Hamilton Beach Ice Cream Maker is a user-friendly and versatile appliance that allows you to create a variety of frozen treats at home. Whether you're in the mood for classic vanilla ice cream, rich chocolate gelato, or refreshing sorbet, this machine can handle it all. The double-insulated freezer bowl ensures that your mixture freezes quickly and evenly, while the easy-lock lid makes it easy to add ingredients and seal the bowl. The transparent lid allows you to monitor the progress of your ice cream, and the simple on/off switch makes it easy to use. The compact design makes it easy to store in your kitchen, and the cord can be wrapped around the base for added convenience.
Limited Warranty
This warranty applies to products purchased and used in the U.S. and Canada. This is the only express warranty for this product and is in lieu of any other warranty or condition.
This product is warranted to be free from defects in material and workmanship for a period of five (5) years from the date of original purchase in Canada and one (1) year from the date of original purchase in the U.S. During this period, your exclusive remedy is repair or replacement of this product or any component found to be defective, at our option; however, you are responsible for all costs associated with returning the product to us and our returning a product or component under this warranty to you. If the product or component is no longer available, we will replace with a similar one of equal or greater value.
Pros & Cons
Pros
- Affordable price point
- User-friendly design
- Double-insulated freezer bowl for quick and even freezing
- Easy-lock lid for adding ingredients
- Transparent lid for monitoring progress
Cons
- Can be loud during operation
- May take some time to freeze the mixture
- Requires pre-freezing the bowl for several hours
- Can be difficult to clean
Customer Reviews
Customers love the Hamilton Beach Ice Cream Maker for its affordability and ease of use. Many note that it is easy to assemble and use, and that the ice cream turns out creamy and delicious. However, some customers note that it can be loud during operation and that it takes some time to freeze the mixture. Additionally, some customers note that the bowl can be difficult to clean, especially if the ice cream mixture is not removed promptly.
Faqs
How long does it take to make ice cream in the Hamilton Beach Ice Cream Maker?
Do I need to pre-freeze the bowl before using the Hamilton Beach Ice Cream Maker?
Can I make other frozen treats besides ice cream in the Hamilton Beach Ice Cream Maker?
How do I clean the Hamilton Beach Ice Cream Maker?
What is the capacity of the Hamilton Beach Ice Cream Maker?
Can I use the Hamilton Beach Ice Cream Maker without the paddle?
Can I make alcoholic ice cream in the Hamilton Beach Ice Cream Maker?
How do I store the Hamilton Beach Ice Cream Maker?
What is the warranty on the Hamilton Beach Ice Cream Maker?
What is the price range for Hamilton Beach Ice Cream Maker?
Leave a Comment
