Set-up: Hp Scanjet Professional 3000 EN Scanner User Guide | Specifications
Content
Introduction
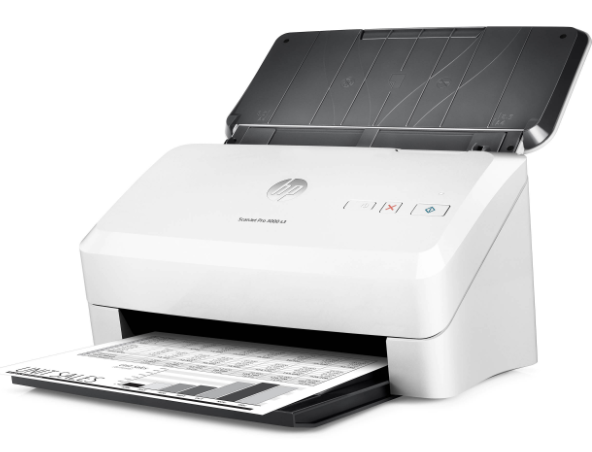
The hp Scanjet Professional 3000 EN Scanner is a high-performance scanner designed for professional document scanning needs. It offers advanced features and reliable performance to streamline your scanning process.
Scanner setup
Follow these steps to set up the scanner.
Check the box contents
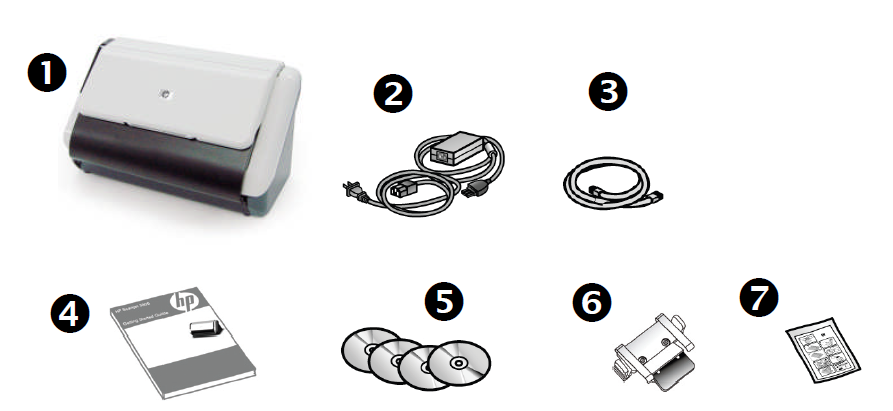
- HP Scanjet 3000 scanner
- Power cable
- USB cable
- Getting Started Guide (this book)
- Scanning software CDs
- Pad assembly (spare)
- Paper-path cleaning cloth
Unpack the scanner hardware. Be sure to remove any shipping tape.
NOTE: The contents of the box, including the number of scanning software CDs, can vary by country/region.
Install the software
CAUTION: Do not connect the USB cable until you are prompted during the software installation.
- Decide what software to install.
- If you will be using the scanner with document-management and scanning software that you already own, you only need to install the HP Scanjet Driver.
- If you do not already have document-management and scanning software, you can use the software that is shipped with the scanner. Read the onscreen descriptions of the software during the installation to decide what software to install. (The software and the number of CDs that are shipped with the scanner might vary by country/region.)
- Insert the HP Scanjet Software CD into the computer CD drive. Wait for the installation dialog box to appear.
- Click Install Software, and then follow the instructions on the screen.
Set up the hardware
Complete the following tasks in order to set up the scanner hardware and prepare it for use.
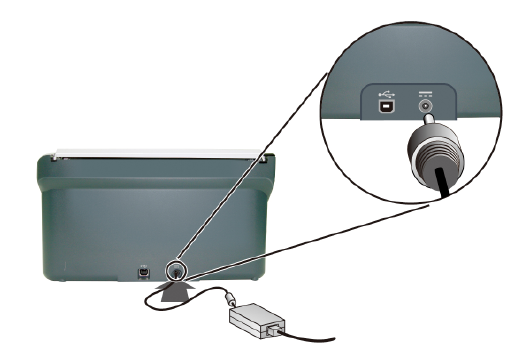
Connect the power supply
The green LED on the power supply case is on when the power supply is functioning correctly.
- Connect the power supply to the power supply cable, and then plug the power supply cable into a power outlet or a surge protector.
Check that the green LED on the power supply case is on.
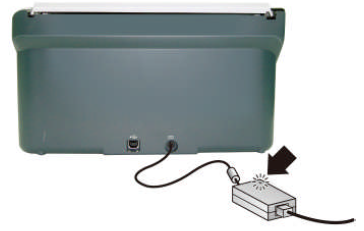
- If the green LED is on, plug the power supply into the back of the scanner.
Connect the USB cable
CAUTION: Be sure you install the HP scanning software before connecting the scanner to your computer with the USB cable. See “Install the software” on page 2.
Use the USB cable that came with the scanner to connect the scanner to the computer. Connect the square end of the cable to the scanner and the rectangular end of the cable to the computer.
NOTE: HP recommends using a USB port on the back of the computer for a more reliable connection to the scanner.
Test the installation
CAUTION: Before placing an item in the document feeder, make sure that the item does not contain wet glue, correction fluid, or other substances that can be transferred to the interior of the scanner.
Make sure there are no curls, wrinkles, staples, paper clips, or any other attached material. Sheets should not be stuck together.
Place a single page in the document feeder. The page should be faced down, with the top of the page pointing down.
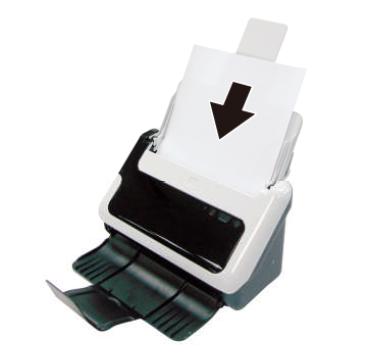
- Adjust the paper guides in the document feeder so they touch both sides of the page. Ensure that the page is straight and the guides are against the edges of the page.
- Start the scan.
- If you have installed the HP Scanjet scanner driver, press the Scan button. The page will feed through the scanner. The Scan Progress Window will appear on your computer screen and the scanned image will be saved in a default location or a user defined location. If the Scan Progress Window does not appear on your computer screen, see the scanner User Guide for installation troubleshooting.
- Scan from the software application you intend to use for scanning. If the scan processes as normal for this application, then the software installation is successful. If it does not process normally, consult the software help for your application.
Product care and support
This section describes the options for product support.
Cleaning and maintenance
Occasional cleaning of the scanner helps ensure higher-quality scans. The amount of care necessary depends upon several factors, including the amount of use and the environment. You should perform routine cleaning as necessary. For in-depth instructions about maintaining the scanner, see the scanner User Guide.
Specifications
This section contains product specifications and warranty information for your scanner.
Scanner specifications
For detailed scanner and paper specifications, see the scanner User Guide.
Environmental specifications
For environmental specifications, see the scanner User Guide.
Description
The hp Scanjet Professional 3000 EN Scanner is equipped with a range of features to enhance productivity and deliver high-quality scans. It offers a scanning resolution of up to 600 dpi, ensuring crisp and clear images. The scanner supports both single-sided and double-sided scanning, allowing you to efficiently scan a variety of documents. With its automatic document feeder (ADF), the scanner can handle up to 50 sheets of paper at a time, saving you time and effort. The ADF also supports different paper sizes, including letter, legal, and A4, making it suitable for various document types. The hp Scanjet Professional 3000 EN Scanner comes with reliable connectivity options, including USB and Ethernet, enabling easy integration into your existing network. It is compatible with both Windows and Mac operating systems, ensuring compatibility with your preferred setup. Additionally, the scanner offers various scanning modes, such as color, grayscale, and black and white, allowing you to choose the best option for your specific scanning needs. It also includes advanced image processing features, such as automatic image rotation and background cleanup, to enhance the quality of your scanned documents. Overall, the hp Scanjet Professional 3000 EN Scanner is a versatile and efficient scanning solution for professionals who require high-quality scans and streamlined document management.
Faqs
Does the Scanjet Professional 3000 EN Scanner support duplex scanning?
What is the maximum scanning resolution?
How many sheets can the automatic document feeder handle?
What paper sizes are supported by the ADF?
What connectivity options does the Scanjet Professional 3000 EN Scanner offer?
Is the Scanjet Professional 3000 EN Scanner compatible with Mac operating systems?
What scanning modes are available?
Does the Scanjet Professional 3000 EN Scanner include image processing features?
Is the Scanjet Professional 3000 EN Scanner suitable for professional document scanning?
What is the warranty period for the Scanjet Professional 3000 EN Scanner?
Leave a Comment