Iogear GWHD11 Transmitter & Receiver User Guide
Content
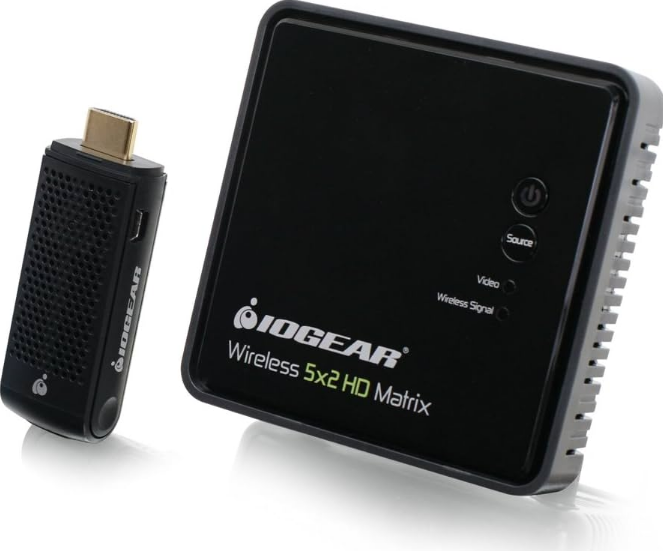
IOGEAR GWHD11 Transmitter & Receiver
The IOGEAR GWHD11 Transmitter & Receiver is a cutting-edge wireless HD video transmission solution designed to deliver uncompressed 1080p video and audio from your HDMI-enabled devices to a display, projector, or TV. With a plug-and-play setup, easy-to-use interface, and a long-range transmission capability, this wireless HD transmitter and receiver set is a must-have for home theaters, gaming setups, or professional presentations. The IOGEAR GWHD11 Transmitter & Receiver is available for an estimated price of $250 and is now available for purchase.
Detailed Specifications
- Wireless HD video transmission up to 1080p @ 60Hz
- Long-range transmission up to 150 feet (line of sight)
- Plug-and-play setup with no software or drivers required
- HDMI 1.4 input and output interface
- Up to 6 devices can be paired with one transmitter
- IR remote control for the receiver
- Powered by AC adapter or USB cable (transmitter and receiver)
- Compact design for easy portability
- FCC, IC, and CE certified
Package Contents
- 1 x Wireless HDMI Transmitter
- 1 x Wireless HDMI Receiver
- 1 x Mini USB to USB Cable
- 2 x USB Power Adapter
- 1 x Remote Control
- 2 x AAA Battery
- 1 x HDMI Cable
- 1 x Quick Start Guide
- 1 x Warranty Card
System Requirements
Display
- HDTV or HD Projector
- HDMI Input
Media Source
HDMI Output
Optional: Additional Wireless HDMI Transmitters (up to 3 additional units), sold separately – Part# GWHDSTX
Overview
Wireless HDMI Transmitter
- LED Status Indicator:
- Solid blue when powered on and wireless link established
- 1 flash/sec when in pairing mode
- 3 flashes/sec when establishing the link with the Receiver
- HDMI Connector
- Pairing Button
- Mini USB Power Jack

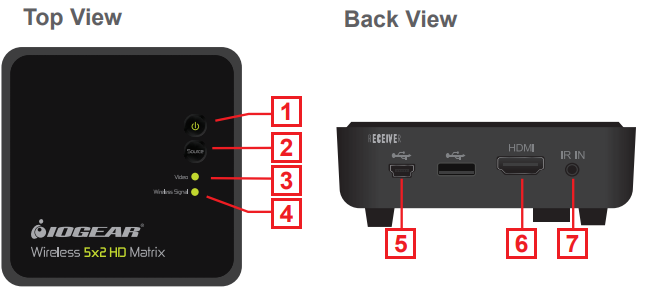
Wireless HDMI Receiver
- Power Button with LED Indicator:
- Lights green when powered on
- Lights red when in Standby Mode
- Source Button
- V ideo Status LED
- Off when in Standby Mode
- Blinks at initial boot up / warm up (15~20 seconds)
- When in wireless linked mode:
- Blinks quickly when there’s no input from a selected source
- Blinks slowly when the video format is not recognized
- Static green when the video format is recognized
- Wireless Status LED
- Off when in Standby Mode
- Blinks at initial boot up / warm-up
- Blinks when searching for available channels
- Static green when in wireless linked mode
- Mini USB Power Jack
- HDMI Output
Description of Transmitter & Receiver
The GWHD11 Transmitter & Receiver provides a seamless wireless HD video transmission solution that delivers high-quality audio and video from your HDMI-enabled devices to a display or projector. This wireless HD transmitter and receiver set is perfect for home theaters, gaming setups, or professional presentations, where cables can be a hassle or an eyesore. The GWHD11 supports up to six devices, including laptops, PCs, gaming consoles, Blu-ray players, and media streamers, allowing you to switch between sources effortlessly.
With a long-range transmission capability of up to 150 feet (line of sight), the IOGEAR Transmitter & Receiver offers a flexible and convenient solution for any setup. The compact design of the transmitter and receiver makes it easy to transport and set up, and the plug-and-play interface ensures a quick and easy setup process without requiring any software or drivers. The Transmitter & Receiver also includes an IR remote control for the receiver, providing you with complete control over your wireless HD video transmission.
Setup Guide
- Connect the IOGEAR GWHD11 Transmitter to the HDMI output of your HDMI-enabled device.
- Connect the IOGEAR GWHD11 Receiver to the HDMI input of your display or projector.
- Plug in the AC adapter or USB cable (transmitter and receiver) for power.
- The transmitter and receiver will automatically pair, and you can start transmitting HD video wirelessly.
- Use the IR remote control to switch between sources or adjust the volume on the receiver.
Hardware Installation
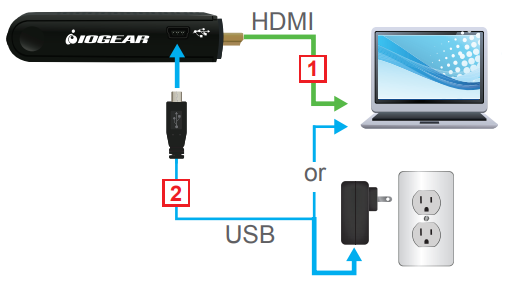
Setup the Wireless HDMI Transmitter
- Connect the Wireless HDMI Transmitter to the HDMI port of the computer or media source.
- Power the transmitter through one of two options:
- If used with a Blu-Ray player or similar device, connect the Wireless HDMI Transmitter to the USB power adapter.
- If used with a computer, connect the Mini SB to USB cable from the transmitter to a USB port on the computer.
Setup the Wireless HDMI Receiver
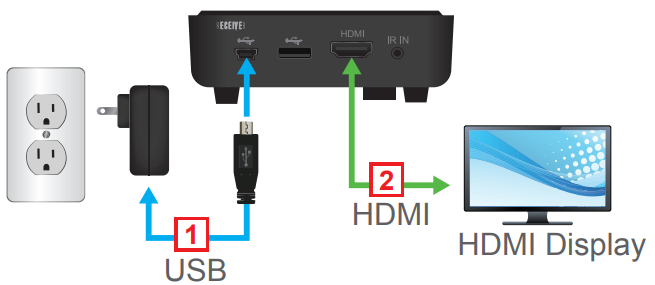
- Connect the USB power adapter to the Mini-USB power jack on the receiver and a wall outlet for power supply.
- Connect the HDMI cable to the HDMI Output on the receiver and to the HDMI Input on the HDTV / HD projector.
- Power on the HDTV / HD projector. Once the link has been established between the transmitter and receiver, video from the connected computer or HDMI media source will be displayed on the HDTV / HD Projector.
Computer Display Setting
You can adjust your display by going to your computer screen resolution preferences to change the display setting to “Duplicate,” “Extend” or “Project Only” on your HDTV / HD projector.

If all operation is normal, the LED lights on both should be static (not blinking).
Pairing Additional Transmitters
The Wireless HDMI Receiver can be paired with up to 3 additional Wireless HDMI Transmitters (Part #GWHDSTX sold separately).
Note: When adding an additional transmitter, make sure the power to any transmitters already linked to the receiver is powered off before entering the receiver into pairing mode.
Pairing Mode for the Transmitter
Once the transmitter is connected to the computer or source player and is powered on, press and hold the Pairing Button.
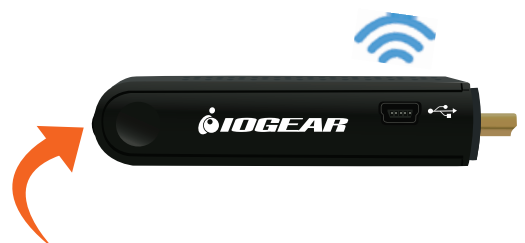
- The transmitter is in Pairing Mode once the Power LED flashes slowly (1 flash/sec).
Pairing Mode for the Receiver
Once the receiver is connected to the HDTV or HD projector and is powered on, press the Transmitter No. button on the Remote Control.
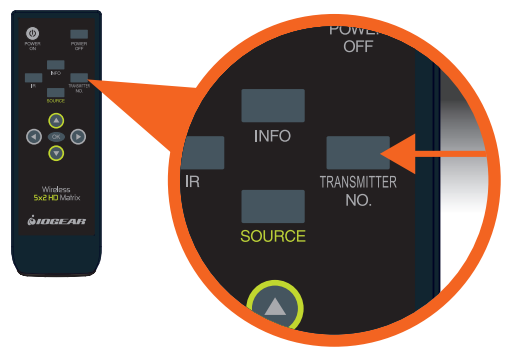
The On-screen Display (OSD) will appear on the HDTV / HD projector. Use the UP or DOWN buttons to select the SETUP menu.
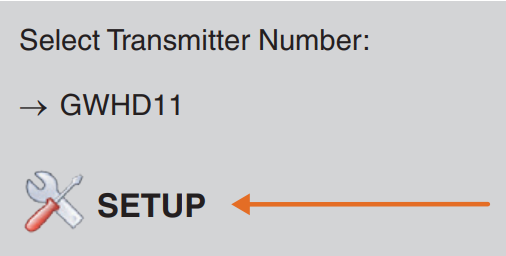
Select Add New Transmitter to search for an available transmitter.
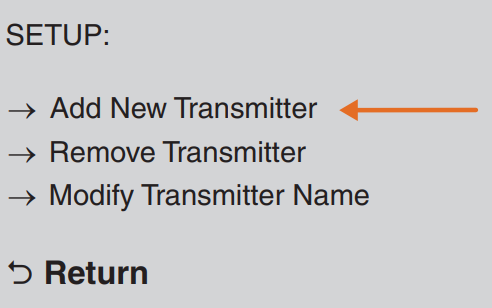
The OSD will display Searching…

- The Power LED on the receiver will flash ORANGE when it is in Pairing Mode.
- To exit Searching Mode, press the Transmitter No. button on the remote control.
When both the transmitter and receiver are in Pairing Mode, they will search for each other and automatically pair.
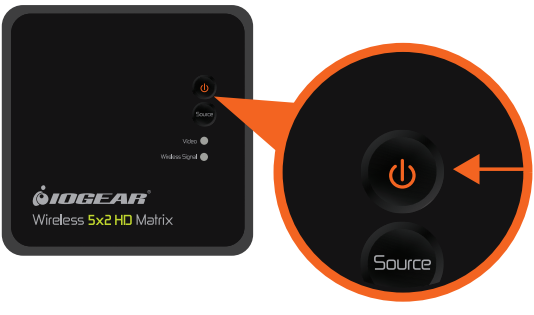
After the pairing is complete, both the transmitter and receiver will reboot and establish the link to each other automatically within 5 seconds.

Repairing Transmitter to Receiver
If the transmitter and receiver lose their linked connection, follow the steps for Pairing Additional Transmitter to re-establish the connection.
Modifying Transmitter Name
If more than one transmitter is linked to the receiver, use the following steps below to modify a transmitter’s name
Press Transmitter No. to display the list of linked transmitters.

Select the SETUP menu by using the Up / Down buttons; press OK to select.
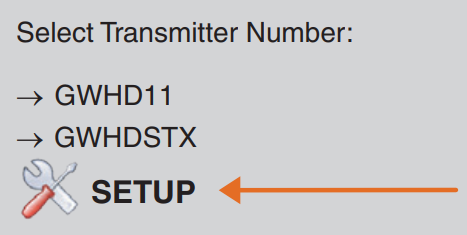
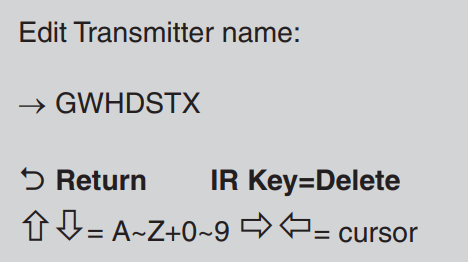
Select the Modify Transmitter Name option to change a transmitter’s name.
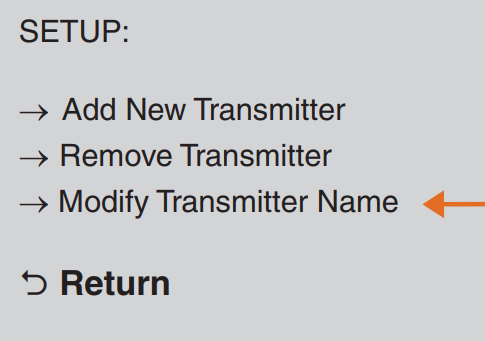
Use the Up / Down buttons to select the transmitter you want to modify.
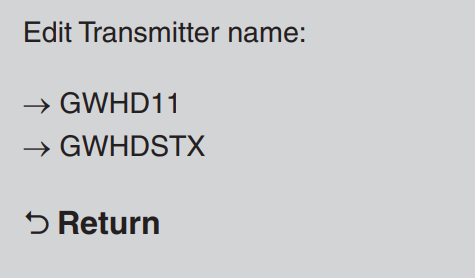
- Then use the Up / Down buttons on the remote to select alphanumeric characters; use the Left / Right buttons on the remote to move the cursor; Press IR button to backspace.
Switching between Wireless HDMI Transmitters
Press the Transmitter No. button. The OSD will show a list of transmitters linked to the receiver.

- Use the Up / Down buttons to select the transmitter you want to display on your HDTV / HD projector. Then press OK and allow ~10-12 seconds for the receiver and transmitter to re-establish a connection.
Removing a Paired Transmitter
Press Transmitter No. to display the list of linked transmitters.

Select SETUP menu by using the Up / Down buttons; press OK to select.

Select Remove Transmitter option.
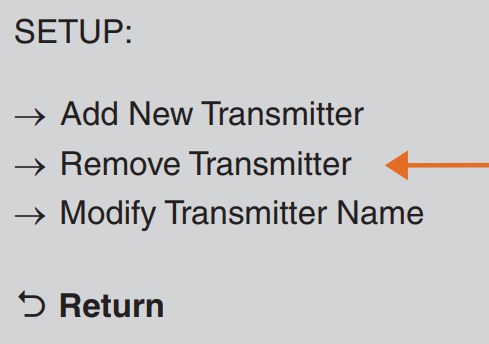
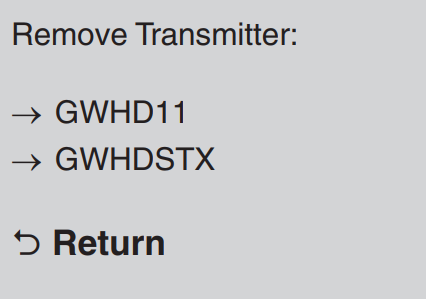
- Use the Up / Down arrow buttons to select the transmitter to be removed and press OK.
Troubleshooting of IOGEAR Transmitter & Receiver
- If the transmitter and receiver are not pairing, try resetting both devices and restarting the setup process.
- If the transmission is choppy or low quality, make sure that both devices are within range and that there are no obstacles blocking the signal.
- If the audio and video are not syncing, try adjusting the settings on your HDMI-enabled device or display.
- If the transmitter or receiver is not powering on, check the power cable and outlet for proper connection.
- Always follow the manufacturer's instructions and warnings when using the IOGEAR GWHD11 Transmitter & Receiver.
Warranty
Warranty Information
The GWHD11 comes with a limited hardware warranty that is valid for one year and covers flaws in both the underlying materials and the craftsmanship.
Customer Reviews of IOGEAR GWHD11 Transmitter & Receiver
Customers love the IOGEAR Transmitter & Receiver's long-range transmission capability, easy-to-use interface, and high-quality audio and video transmission. Some common complaints include occasional transmission issues, the need for a direct line of sight for optimal performance, and the high price point compared to other wireless HD transmitter and receiver sets.
Faqs
In either my home or my office, how do I go about setting up the IOGEAR GWHD11?
I have an IOGEAR GWHD11 transmitter; is it possible to attach numerous receivers to it?
When using the IOGEAR Transmitter and Receiver, what are the various safety instructions that I should adhere to?
The firmware on my IOGEAR GWHD11 has to be updated; how do I accomplish that?
I have a problem with interference with my IOGEAR GWHD11 system; what need I do to fix it?
Is it possible for the IOGEAR Transmitter and Receiver to display content in Full HD?
If my IOGEAR GWHD11 is not sending out a signal, what steps should I take to fix the problem?
Is the IOGEAR GWHD11 compatible with all devices that support HDMI for connectivity?
What steps can I take to ensure that my IOGEAR Wireless HDMI system always performs at its best?
During what time period does the IOGEAR GWHD11 come with a warranty?
Leave a Comment
