Logitech MX Master 2S Mouse & Keyboard User Guide
Content
Introduction
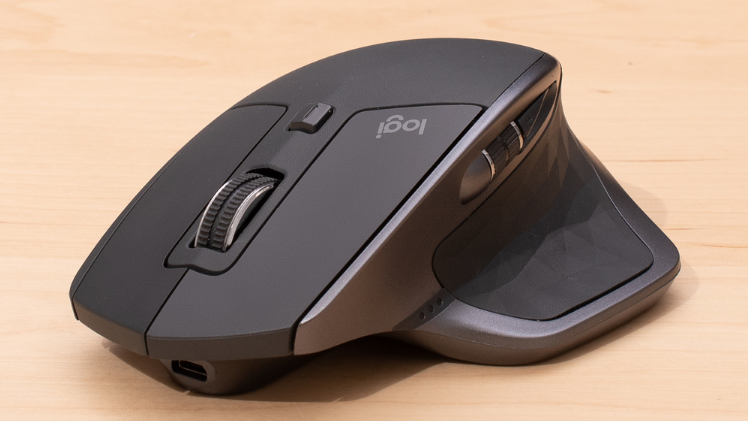
The Logitech MX Master 2S Mouse & Keyboard is a top-tier productivity tool designed for seamless multitasking and comfort. Featuring advanced Darkfield tracking technology, it operates flawlessly on various surfaces, including glass. Its ergonomic design supports long hours of use, while customizable buttons enhance workflow efficiency. With the ability to connect to multiple devices via Bluetooth or USB receiver, this mouse is perfect for professionals on the go. Priced at $99.99, it offers exceptional value for its features and performance.
Specifications
- Sensor technology: Darkfield high-precision
- Nominal value: 1000 DPI
- DPI (Minimal and maximal value): 200 to 4000 DPI (can be set in increments of 50 DPI)
- Battery life: up to 70 days on a single full charge
- *Battery life may vary on the user and computing conditions.
- Battery: rechargeable Li-Po (500 mAh) battery.
- Number of buttons: 7
- Gesture button: Yes
- Scroll Wheel: Yes, with auto-shift
- Standard and Special buttons: Back/Forward and middle click
- Wireless operating distance: 10m
- Wireless technology: Advanced 2.4 GHz wireless technology
- Optional software: Logitech Options and Logitech Flow
GETTING STARTED
- Step-1
Download Logitech Options to use all the possibilities this mouse has to offer. To download and learn more about the possibilities go to https://logitech.com/options - Step-2
Turn your mouse on. - Step-3
This mouse allows you to use it with up to three different computers. Just use the Easy-Switch button to change the channel. Select the channel you want and go to the next step. - Step-4
To connect your mouse to your computer press the Easy-Switch button for 3 seconds. When it blinks fast it means it's in discoverable mode. - Step-5
Choose if you want to pair with Bluetooth or with the provided Unifying receiver.
Product Overview

- Speed-adaptive scroll wheel
- Manual shift button
- Gesture button
- Micro USB port
- On/Off button
- Darkfield high-precision sensor
- Easy-Switch & connect button
- Battery status LED
- Thumb wheel
- Back/forward buttons
Description
The ergonomic design of the Logitech MX Master 2S mouse is well known for making it comfortable to hold. During prolonged usage, the rubber grip and contoured design provide sustained comfort. Using Logitech Options software, users may configure the mouse's thumb wheel and gesture button, among other programmable buttons.
The Logitech MX Keys keyboard has a sturdy metal structure and a simple appearance. Depending on the model, it has a full-sized layout or a small tenkeyless design. The keys are illuminated with a soft light that improves visibility without being obtrusive.
High-quality materials that can tolerate normal wear and tear are used in the construction of both devices with durability in mind.
Features
Speed adaptive scroll-wheel
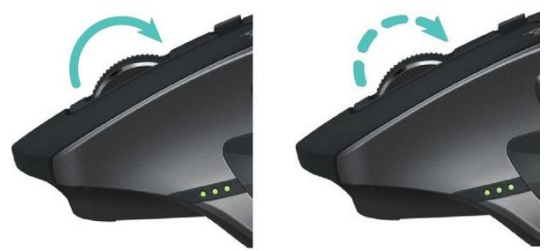
If SmartShift is enabled, the speed-adaptive scroll wheel shifts between two scrolling modes automatically, in response to your touch.
- Click-to-click (ratchet) mode — ideal for precise navigation of items and lists.
Hyper-fast (freespin) mode — near-frictionless spinning, letting you fly through long documents and web pages.
Enable SmartShift
Select Enable from the SmartShift pull-down menu on the Point and scroll tab.
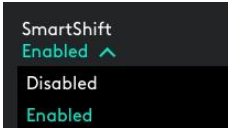
- Turn off SmartShift by selecting Disable from the SmartShift pull-down menu.
- When SmartShift is disabled, spinning or braking the scroll wheel has no effect on the current scrolling mode.
Switch modes manually
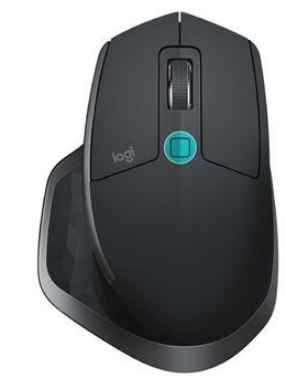
Whether SmartShift is enabled or disabled, you can manually switch between modes by pressing the mode shift button.
By default, mode shift is assigned to the button on top of the mouse. (Check current button assignments on the Mouse tab.)
Set a fixed scroll wheel mode
- If you prefer to use just one mode, you can fix the scroll wheel to either click-to-click (ratchet) or hyper-fast (freespin) mode.
On the Point and scroll tab, select Ratchet or Freespin from the Fixed scroll wheel mode pull-down menu.
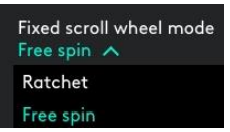
IMPORTANT! You can fix the scroll wheel mode only if SmartShift is disabled and mode shift is not assigned to any MX Master button.
To activate fixed scroll wheel mode:
- Select Disable from the SmartShift pull-down menu.
- On the Mouse tab, click the highlighted mode shift button and select an action other than mode shift.
Thumb wheel
Scroll side to side effortlessly with a stroke of your thumb.
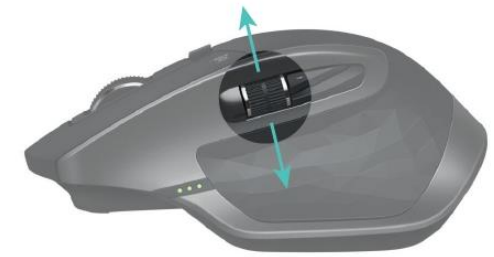
To scroll horizontally:
- Spin the thumb wheel up (to scroll right) or down (to scroll left)
Install Logitech Options software to extend thumb wheel capabilities:
- Invert scrolling direction
- Reproduce touch-based gestures
- Adjust scrolling speed and resolution
- Navigate tabbed content
- Switch apps
- Swipe between full-screen apps (Mac only)
- Switch between full-screen apps (Windows 8 only)
- Zoom in and out
- Adjust volume
- Control screen brightness
- Display notifications (Mac only)
Gesture button
GESTURES STREAMLINE NAVIGATION AND DESKTOP MANAGEMENT
- Install Logitech Options software to enable gestures for managing media, panning, zoom, and rotation, plus custom tasks.
Assign up to five different actions to the Gesture button. Or map gestures to other MX Master buttons, including the middle button or manual shift button.
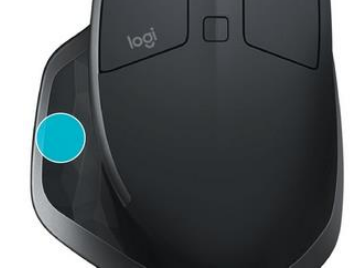
To perform a gesture:
- Hold down the Gesture button while moving the mouse left, right, up, or down.
The figure below shows the gestures for managing windows in Windows 8 and in Mac OS X.

Back/Forward buttons
Conveniently located at your thumb, the back and forward buttons enhance navigation and simplify tasks.
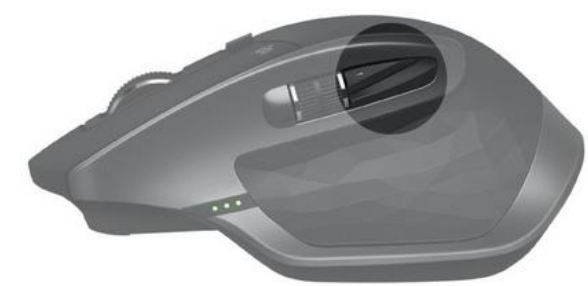
To move back and forward:
- Press the back or forward button to navigate web or document pages, depending on the location of the mouse pointer.
NOTE: On the Mac, enabling of the back/forward buttons requires installation of Logitech Options software. Install Logitech Options software to unlock new capabilities for the back/forward buttons. In addition to enabling the buttons for use with Macs, Logitech Options software lets you map other useful functions to the buttons, including OS navigation, zoom, dictionary lookup, and more.
Battery
Setup Guide
To configure your Logitech MX Master 2S keyboard and mouse,
- Put the batteries in first, or use USB to charge them. You may use the Logitech Unifying receiver or Bluetooth to connect the mouse to your PC.
- Install the Logitech Options program to personalize device pairing and button assignments.
- Just use Bluetooth or, if available, the Unifying receiver to link the keyboard with your smartphone.
- The Logitech Options program also allows you to change key assignments and illumination settings.
- To extend battery life, make sure your gadgets are completely charged before using them.
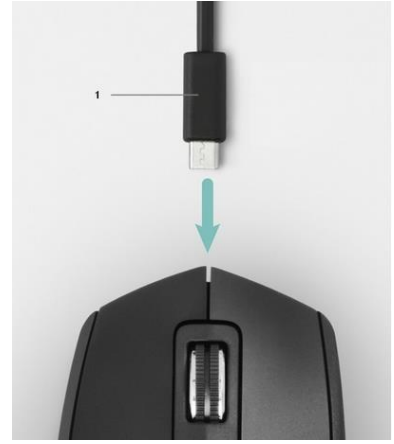
Charging cable
RECHARGE MX MASTER 2S
- Connect one end of the provided charging cable to the Micro-USB port on the mouse and the other end to a USB power source.
A minimum of 3 minutes charging gives you enough power for a full day of use. Depending on how you use the mouse, a full charge can last up to 70 days*.
Based on eight hours of daily use. Battery life may vary depending on user and operating conditions.
CHECK BATTERY STATUS
Three LED lights on the side of the mouse indicate battery status.
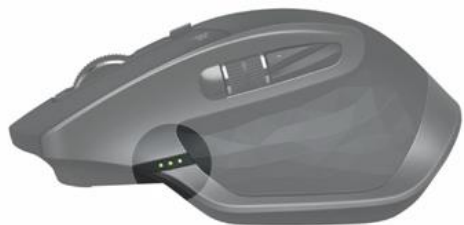
Install Logitech Options software to receive battery status notifications, including low-charge warnings.
LEDs Lit | Color | Indications |
3 | Green | 100% Charge |
2 | Green | 66% Charge |
1 | Green | 33% Charge |
1 | Red | 10% Charge Recharge now! |
Troubleshooting
- Make sure the Unifying receiver is connected in correctly and that the batteries are not dead if your mouse or keyboard is not connecting. After restarting your device, attempt to reconnect.
- Verify the power settings in the Logitech Options program or make sure the ambient light sensor is not overloaded if your keyboard's backlight is not turning on.
- Restart your devices and update your Logitech Options software to the most recent version if you're experiencing any software problems.
To prevent damage, always adhere to the cleaning and maintenance guidelines provided by the manufacturer.
Logitech MX Master 2S Pros & Cons
Pros
- The mouse has a high-precision optical sensor for precise tracking.
- The mouse's battery lasts for up to 70 days between charges.
- Srgonomic design to provide comfort throughout time.
- Personalized motions and buttons with Logitech Options software.
- Smooth communication across several devices.
- long-lasting construction using premium materials.
Cons
- More expensive than alternative mouse and keyboard setups.
- For certain users, the mouse may feel heavy.
- The Unifying receiver does not have USB passthrough capability.
- Some people may find software difficult to operate.
Customer Reviews
The Logitech MX Master 2S has received great reviews from customers for its outstanding comfort, performance, and personalization possibilities. Many customers value the lengthy battery life and the smooth transition between numerous devices. But for other people, the program is too complicated and the mouse is too big.
The expensive cost and the Unifying receiver's absence of USB passthrough are frequent concerns.
Faqs
How do I pair my mouse with multiple devices?
What is the battery life of the Logitech MX Master 2S Mouse & Keyboard?
Can I customize the buttons on my 2S mouse?
Is the Logitech backlit?
How do I clean my Logitech?
Can I use the Logitech with macOS?
What is the warranty period for the Logitech MX Master 2S Mouse & Keyboard?
Can I use the Logitech Mouse & Keyboard Unifying receiver with other Logitech devices?
How long does it take to charge the Mouse & Keyboard?
Is the mouse suitable for gaming?
Leave a Comment
