Logitech MX Master 3 Wireless Mouse Instruction Manual
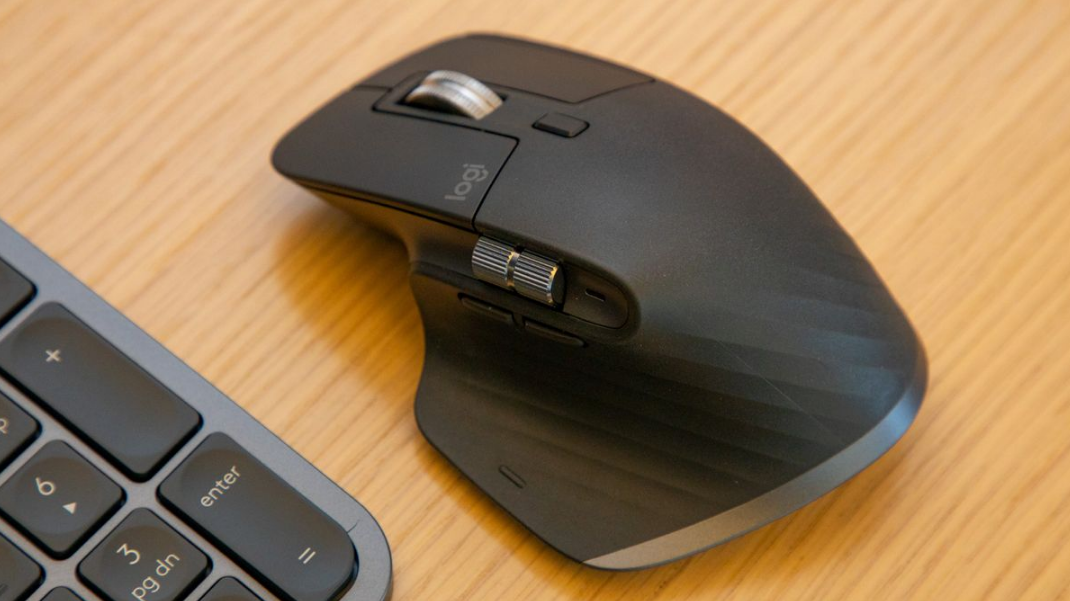
Content
Introduction
The Logitech MX Master 3 Wireless Mouse is a premium productivity tool designed for professionals and enthusiasts alike. Featuring advanced ergonomic design, it includes a high-precision 4000 DPI sensor that works on virtually any surface, including glass. The innovative MagSpeed scroll wheel allows for both precise and hyper-fast scrolling, enhancing efficiency during long tasks. With the capability to connect to up to three devices simultaneously, it’s perfect for multitaskers. The MX Master 3 is priced at approximately $99.99, reflecting its exceptional features and performance.
DETAILED SETUP
- Make sure the mouse is turned on — the number 1 LED on the bottom of the mouse should blink quickly.
NOTE: If the LED is not blinking quickly, perform a long press (three seconds). - Choose how you want to connect: o Use the included wireless USB receiver Plug the receiver into a USB port on your computer o Connect directly using Bluetooth Open the Bluetooth settings on your computer to complete the pairing. Click here for more details on how to do this on your computer. If you experience issues with Bluetooth, click here for Bluetooth troubleshooting.
- Install Logitech Options Software. Download Logitech Options to use all the possibilities this mouse offers. To download and learn more about Logitech Options, go to logitech.com/options.
LEARN MORE ABOUT YOUR PRODUCT

Product Overview
- MagSpeed scroll wheel
- Mode shift button for the scroll wheel
- Gesture button
- Thumb wheel
- Battery status LED
- USB-C charging port
- On/Off button
- Darkfield 4000DPI sensor
- Easy-Switch & connect button
- Back/forward buttons
Specifications
- Sensor: Logitech Dark Field™ 4,000 CPI optical sensor
- Connectivity: Bluetooth, Logitech Unifying receiver (2.4 GHz)
- Battery Life: Up to 70 days on a single charge
- Buttons: 7 programmable buttons
- Scrolling: MagSpeed Electromagnetic scrolling wheel
- Compatibility: Windows, macOS, Linux
- Durability: Durable construction with up to 2 million clicks
Pair to a second computer with Easy-Switch
Your mouse can be paired with up to three different computers using the easy-switch button to change the channel.
- A short press on the Easy-Switch button lets you switch channels. Select the channel you want and go to the next step.
- Press and hold the Easy-Switch button for three seconds. This puts the mouse in discoverable mode so that it can be seen by your computer. The LED will start blinking quickly.
Choose how you want to connect the keyboard to your computer: o Bluetooth: Open the Bluetooth settings on your computer to complete the pairing.
You can find more details here. o USB receiver: Plug the receiver to a USB port and open Logitech Options. In Options, select Add devices > Setup Unifying device, and follow the instructions.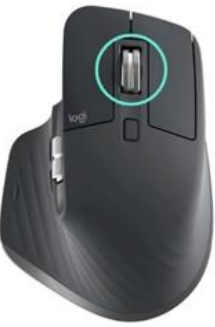
MagSpeed adaptive scroll-wheel
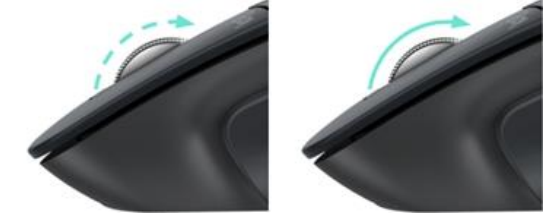
The speed-adaptive scroll wheel shifts between two scrolling modes automatically. As you scroll faster, it will automatically shift from line-by-line scrolling to free-spinning.
- Line-by-line (ratchet) mode — ideal for precise navigation of items and lists.
Hyper-fast (free-spin) mode — near-frictionless spinning, letting you fly through long documents and web pages.
Switch modes manually
You can also manually switch between modes by pressing the mode shift button.
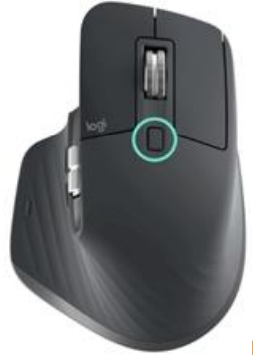
- By default, mode shift is assigned to the button on top of the mouse.
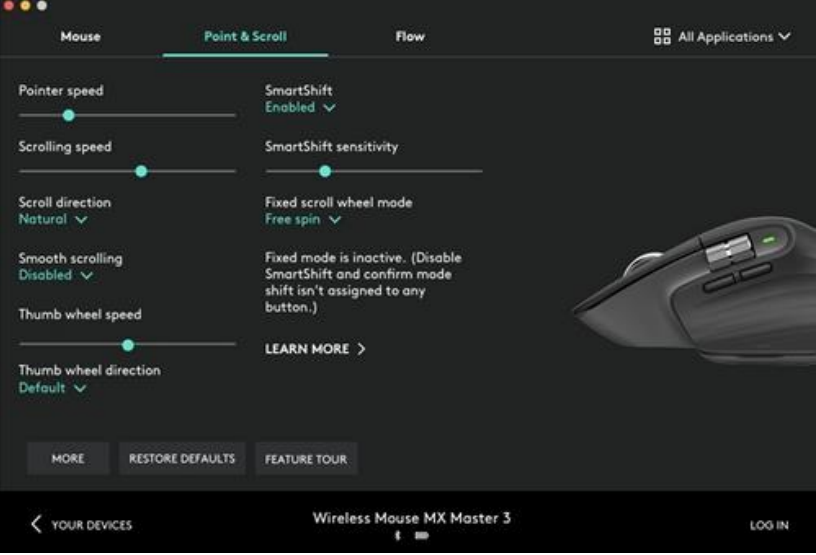
- Use the Logitech Options Software, to disable SmartShift if you prefer to stay in a single scrolling mode and shift manually.
You can also adjust the SmartShift sensitivity, which will change the speed required to automatically shift into free spinning.
Thumb wheel
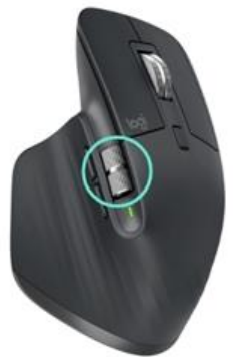
Scroll side to side effortlessly with a stroke of your thumb. Install Logitech Options software to extend thumb wheel capabilities:
- Adjust thumbwheel scrolling speed, and direction
- Enable app-specific settings for the thumbwheel: o Zoom in Microsoft Word and PowerPoint o Adjust brush size in Adobe Photoshop o Navigate your timeline in Adobe Premiere Pro o Switch between tabs in the browser o Adjust volume o Assign custom keystrokes to the wheel rotation (up and down)
Description
The Logitech MX Master 3 Wireless Mouse is engineered with precision and comfort in mind. Its contoured shape fits comfortably in the hand, reducing fatigue during extended use. The mouse features a MagSpeed scrolling wheel that provides fast and precise scrolling, making it ideal for navigating large documents or web pages.
The mouse also includes a unique thumb wheel that allows for horizontal scrolling and other custom actions. The 7 programmable buttons can be customized using Logitech’s Flow software, enabling users to tailor the mouse to their specific needs.
Gesture Button
Install Logitech Options software to enable gestures. To use the Gesture button: Hold down the Gesture button while moving the mouse left, right, up, or down.
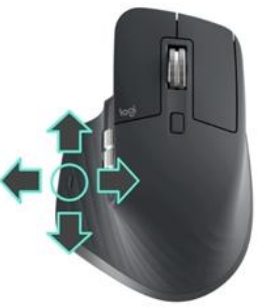
Gesture Button
- Single press O
- Hold and move down ↑
- Hold and move up ↓
- Hold and move right →
- Hold and more left ←
Windows 10
- Task View O
- Start Menu ↑
- Show/hide desktop ↓
- Switch between desktops →
- Switch between desktops ←
Mac OS
- Mission Control
- Mission Control
- App Expose
- Switch between desktops
- Switch between desktops
You can use gestures for desktop navigation, app management, pan, zoom, and more. You can assign up to five different actions to the Gesture button. Or map gestures to other MX Master buttons, including the middle button or manual shift button.
Back/Forward buttons
Conveniently located, the back and forward buttons enhance navigation and simplify tasks.
To move back and forward:
Press the back or forward button to navigate web or document pages, depending on the location of the mouse pointer.
NOTE: On the Mac, enabling of the back/forward buttons requires installation of Logitech Options software. Install Logitech Options software to unlock new capabilities for the back/forward buttons. In addition to enabling the buttons for use with Macs, Logitech Options software lets you map other useful functions to the buttons, including undo/redo, OS navigation, zoom, volume up/down, and more.
App-Specific Settings
Your mouse buttons can be assigned to perform different functions for different applications. For example, you can assign the thumb wheel to do horizontal scrolling in Microsoft Excel and zoom in Microsoft PowerPoint. With Logitech Options, you can install predefined appspecific settings that adapt the mouse button behavior to be optimized in selected applications. The following app-specific settings have been created for you:
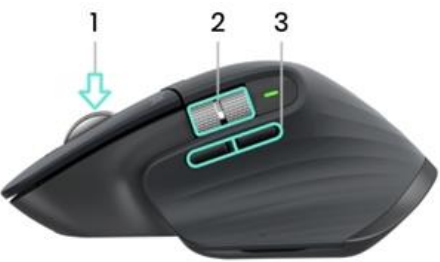
With these settings, the Gesture button and the wheel mode-shift button are keeping the same functionality across all applications. Each of these settings can be customized manually, for any application.
Setup Guide
To set up the Logitech MX Master 3, start by inserting the included Unifying receiver into a free USB port on your computer or pairing the mouse via Bluetooth. Download and install the Logitech Options software to configure the mouse buttons and other settings.
Pairing via Bluetooth can be done by pressing the Easy-Switch button on the bottom of the mouse until the LED light starts blinking, then selecting the mouse from your device's Bluetooth settings. For wireless connectivity, plug in the Unifying receiver and follow the on-screen instructions to complete the pairing process.
| Application Default settings | 1 Middle Button | 2 Horizontal scroll | 3 Back / Forward |
|---|---|---|---|
| Browser (Chrome, Edge, Safari) | Open link in a new tab | Switch between tabs | Back / Forward |
| Microsoft Excel | Pan (Hold and move the mouse) | Horizontal scroll | Undo / Redo |
| Microsoft Word | Pan (Hold and move the mouse) | Zoom | Undo / Redo |
| Adobe Photoshop | Pan (Hold and move the mouse) | Brush size | Undo / Redo |
| Adobe Premiere Pro | Pan (Hold and move the mouse) | Horizontal timeline navigation | Undo / Redo |
| Apple Final Cut Pro | Pan (Hold and move the mouse) | Horizontal timeline navigation | Undo / Redo |
Flow
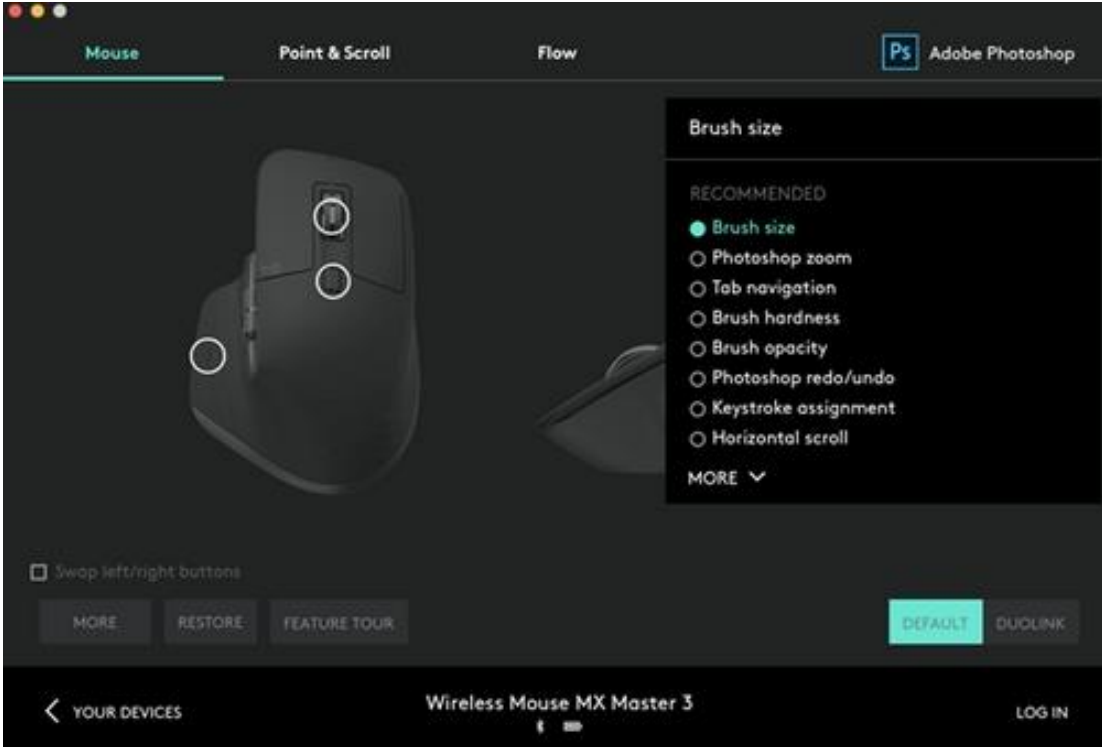
- With Logitech Flow, you can work on multiple computers with a single MX Master 3.
- You can use the mouse cursor to move from one computer to the next.
- You can even copy and paste between computers, and if you have a compatible Logitech Keyboard, such as MX Keys, the keyboard will follow the mouse and switch computers at the same time.
- You will need to install Logitech Options software on both computers and follow these instructions.
Battery
Charge mouse battery: Connect one end of the provided charging cable to the USB-C port on the mouse and the other end to a USB power source. A minimum of 3 minutes of charging gives you enough power for a full day of use. Depending on how you use the mouse, a full charge can last up to 70 days.
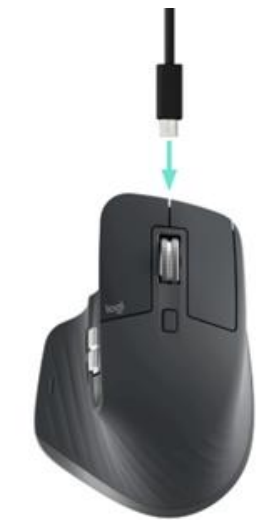
NOTE: Battery life may vary depending on user and operating conditions.
Check mouse battery status: Three LED light on the side of the mouse indicates battery status.
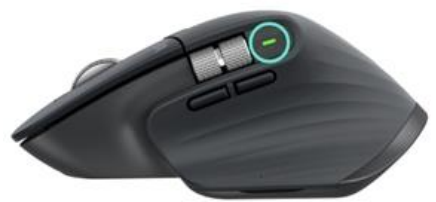
Install Logitech Options software to receive battery status notifications, including low-charge warnings.
| LED Color | Indication |
|---|---|
| Green | From 100% to 10% charge |
| Red | 10% charge or below |
| Pulsing Green | While charging |
Troubleshooting
Common issues with the Logitech MX Master 3 include connectivity problems and battery drain.
- To resolve connectivity issues, ensure the Unifying receiver is properly plugged in or that Bluetooth is enabled on both the mouse and your computer.
- If the battery is draining quickly, check for any firmware updates and ensure that the mouse is turned off when not in use.
- Also, avoid exposing the mouse to extreme temperatures or physical stress.
- For more detailed troubleshooting, refer to Logitech’s official support website for specific guides and FAQs.
Logitech MX Master 3 Pros & Cons
Pros
- Advanced ergonomic design for comfort and reduced fatigue
- High-precision MagSpeed scrolling wheel for fast and precise scrolling
- Long battery life with up to 70 days on a single charge
- 7 programmable buttons for customization
- Supports multiple connectivity options including Bluetooth and 2.4 GHz wireless
Cons
- High price point compared to other wireless mice
- Large size may not be suitable for all hand sizes or preferences
- Some users may find the thumb wheel and additional buttons cumbersome to use initially
Customer Reviews
Customers generally praise the Logitech MX Master 3 for its exceptional performance, ergonomic design, and long battery life. Many users appreciate the customizable buttons and the MagSpeed scrolling wheel, which significantly enhances their productivity.
However, some users have reported that the mouse can be quite large and may not fit comfortably in smaller hands. There have also been occasional complaints about the high price point, but overall, the consensus is that the mouse offers excellent value for its features and quality.
Faqs
What is the battery life of the Logitech MX Master 3?
How do I pair the Logitech MX Master 3 with my computer?
Can I customize the buttons on the Logitech MX Master 3?
Is the Logitech MX Master 3 compatible with macOS?
How durable is the Logitech MX Master 3?
What types of connectivity does the Logitech MX Master 3 support?
How does the MagSpeed scrolling wheel work?
Can I use the Logitech MX Master 3 on multiple devices?
How do I update the firmware of my Logitech MX Master 3?
What if my Logitech MX Master 3 mouse is not recognized by my computer?
Leave a Comment
