How to Assemble: Owc ENVOYPRO USB Device User Guide
Content
Introduction of OWC ENVOYPRO USB device
Minimum System Requirements
- Apple Mac Requirements
USB 3.1 Gen 1 port: OS X 10.6 or later - PC Requirements
USB 3.0 port: Windows XP or later
Package Contents
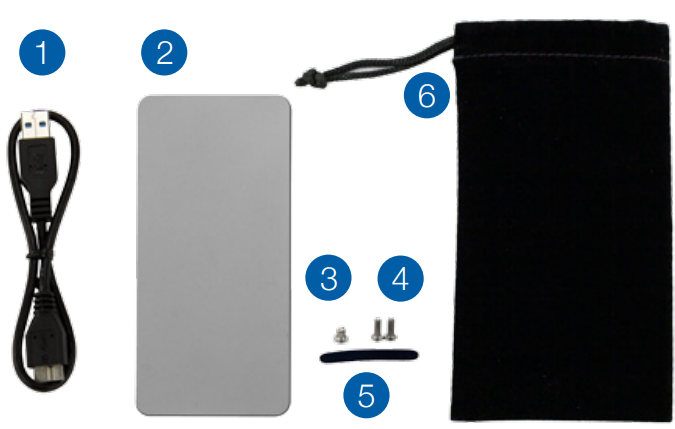
- USB 3.1 Gen 1 cable (Standard-A to Micro-B)
- OWC Envoy Pro
- Short Torx T5 screw (1)
- Long Torx T5 screws (2)
- Adhesive rubber foot
- Carrying Case
Note: A Torx T5 screwdriver is required to install an SSD in the Envoy Pro. If you purchased the Envoy Pro as part of a kit including an OWC SSD, a Torx T5 screwdriver is included. If you purchased the Envoy Pro by itself without an SSD, the screwdriver is not included, but can be purchased separately.
Detailed Specifications
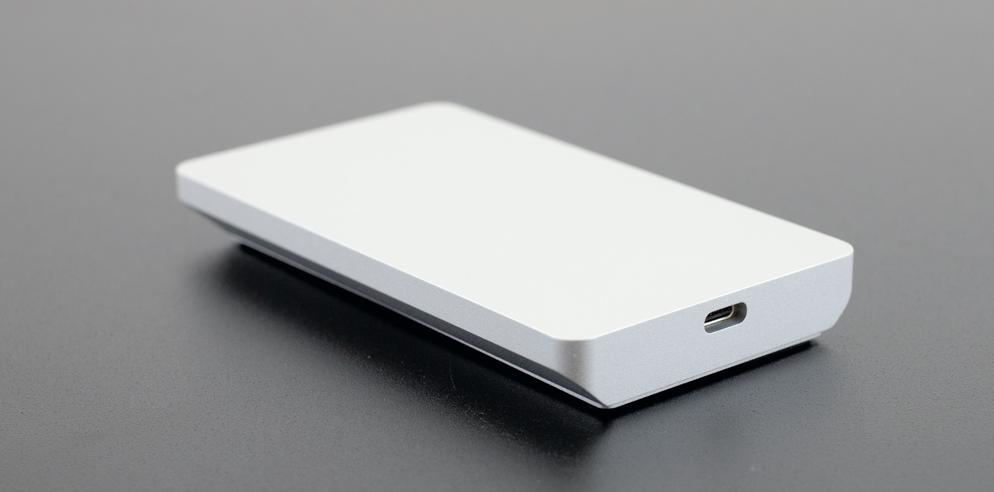
The OWC ENVOYPRO USB device is a high-speed, portable storage solution designed for creative professionals and Mac users. Here are its key features:
- Up to 4TB of storage capacity
- USB 3.2 Gen 2 interface with transfer speeds up to 10Gb/s
- Made with durable aluminum body
- Bus-powered; no external power supply required
- Compatible with Mac, Windows, Linux, and iPad Pro
- Shock-resistant design for added durability
- Includes soft-scratch rubber sleeve for added protection
- Dimensions: 4.5 x 3.3 x 0.9 inches
- Weight: 0.5 lbs
About This Manual
The images and descriptions may vary slightly between this manual and the unit shipped. Functions and features may change depending on the firmware version. Please visit the product web page for the most recent product specifications.
Enclosure Features
- LED indicator (front) This LED emits a solid white light when the Envoy Pro is powered on and flashes during drive activity.
- USB 3.1 Gen 1 port (rear) Attach the included USB 3.1 Gen 1 cable here.
DEVICE SETUP
Drive Compatibility
The OWC Envoy Pro is compatible ONLY with original Apple SSDs. Third-party SSDs, including OWC SSDs, are NOT compatible. Consult the following lists for more detailed compatibility information.
Envoy Pro for SATA Drives
This Envoy Pro is compatible with the original Apple SSD from these Mac computers:
- iMac13,1 (21.5” late 2012, early 2013)
- iMac13,2 (27” late 2012)
- MacBookPro10,1 (Retina 15” early 2013)
- MacBookPro10,2 (Retina 13” late 2012, early 2013)
Envoy Pro for PCIe Drives
This Envoy Pro is compatible with the original Apple SSD from these Mac computers:
- iMac14,1 (21.5” late 2013)
- iMac14,2 (27” late 2013)
- iMac14,3 (21.5” late 2013)
- iMac14,4 (21.5” mid 2014)
- iMac15,1 (Retina 5K 27” late 2014, mid 2015)
- iMac16,1 (Retina 21.5” Late 2015)
- iMac16,2 (4K 21.5” Late 2015)
- iMac17,1 (5K 27” Late 2015)
- MacBookAir6,1 (11” mid 2013, early 2014)
- MacBookAir6,2 (13” mid 2013, early 2014)
- MacbookAir7,1 (11” early 2015)
- MacbookAir7,2 (13” early 2015)
- MacBookPro11,1 (Retina 13” late 2013)
- MacBookPro11,2 (Retina 15” late 2013)
- MacBookPro11,3 (Retina 15” late 2013)
- MacBookPro11,4 & 11,5 (Retina 15” Mid 2015)
- MacBookPro12,1 (Retina 13” Early 2015)
- Macmini7,1 (Late 2014)
- MacPro6,1 (Late 2013)
Assembly
NOTE: The assembly process is identical for both versions of the OWC Envoy Pro, but the black connector has a slightly different appearance in the Envoy Pro for PCIe drives. The pictures used in the assembly steps use the Envoy Pro for SATA drives.
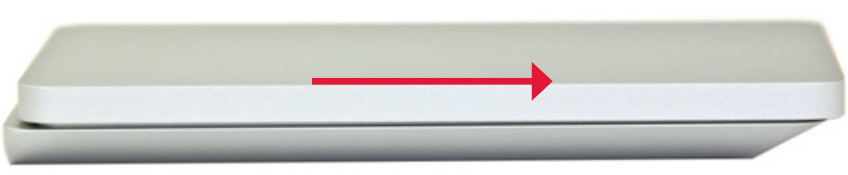
Remove the Envoy Pro from its packaging. Slide the top cover in the direction shown below, then lift up and set the cover aside.
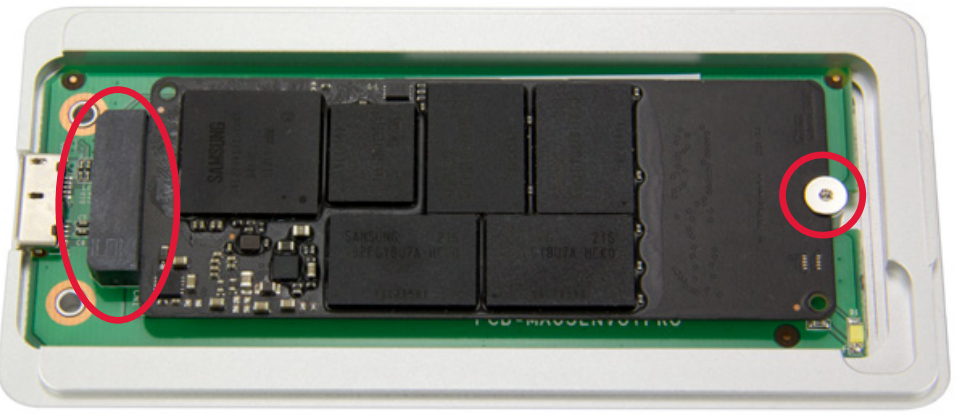
Inside the enclosure, there is a green circuit board. Notice also the black connector at left, and a screw hole at far right.
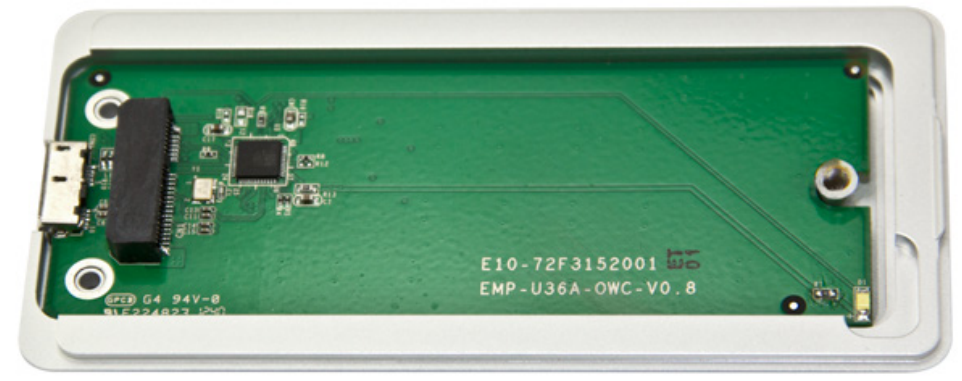
Insert the SSD into the black connector (see below-left). The connector is notched so that the SSD fits using only one orientation. Next, use the short Torx T5 screw to hold the SSD in place (circled below-right). Do not over-tighten the screw.
Replace the top cover and slide it in the direction shown below, until it is flush with the bottom cover.

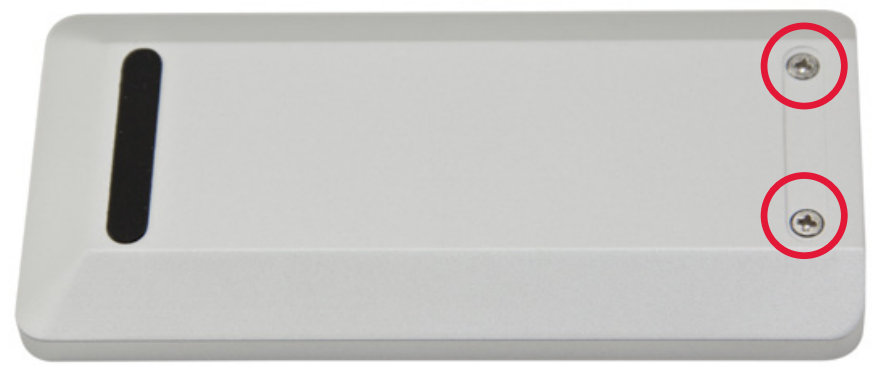
Flip over the Envoy Pro. Insert the two long Torx T5 screws into the screw holes (circled below) and fasten them.
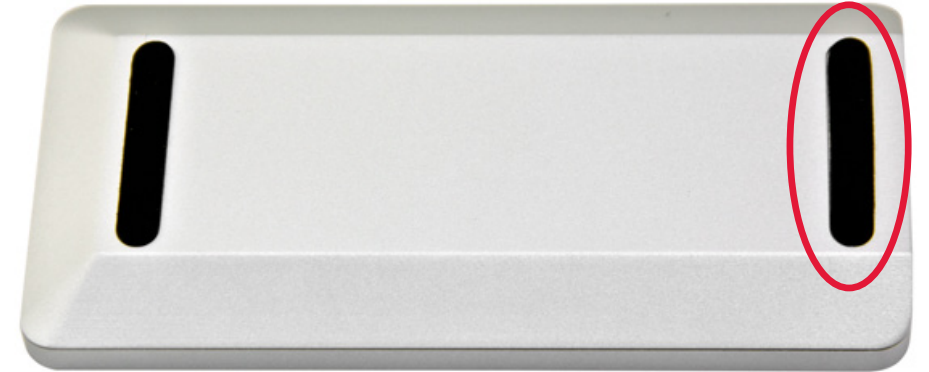
Remove the backing on the adhesive rubber foot and place the sticky side of the foot in the groove to cover the screws.
The assembly process is now complete. You can begin using the Envoy Pro right away. If you need to format the SSD inside the Envoy Pro, see Section 3.1 to view our recommended formatting tips.
SUPPORT RESOURCES
Formatting
To format the OWC Envoy Pro for Mac or Windows, please visit: https://eshop.macsales.com/tech_center/drive-formatting-data-migration
Troubleshooting
Begin troubleshooting by verifying that both ends of your cable are properly plugged into the computer and the Envoy Pro. If the Envoy Pro is still not working properly, try connecting the cable to a different USB port, and also using a different USB cable if necessary. If problems persist, remove the SSD from the Envoy Pro, then re-connect the SSD to the Envoy Pro and try again.
About Data Backup
To ensure that your files are protected and to prevent data loss, we strongly suggest that you keep two copies of your data: one copy on your OWC Envoy Pro and a second copy on either your internal drive or another storage medium, such as an optical backup, or on another external storage unit. Any data loss or corruption while using the Envoy Pro is the sole responsibility of the user, and under no circumstances may OWC, its parent, partners, affiliates, officers, employees, or agents be held liable for loss of the use of data including compensation of any kind or recovery of the data.
Usage Notes
- To see a step-by-step walkthrough for migrating your data from an old drive to a new one, go to: www.owcdigital.com/support/data-transfer.html
- The Envoy Pro is designed to receive all needed power through the USB cable, therefore a separate power adapter is not necessary.
- For the safe removal of your drive and to ensure that no data is lost, always eject or unmount the drive from your operating system before disconnecting.
Description
The OWC ENVOYPRO USB device is a compact, high-performance portable storage solution for creative professionals and Mac users. With transfer speeds of up to 10Gb/s, you can quickly transfer files, photos, and videos between devices. The device is made with a durable aluminum body that is both stylish and shock-resistant, ensuring that your data remains safe even when the device is bumped or dropped. The ENVOYPRO USB device is bus-powered, so you can use it on-the-go without the need for an external power supply. The device is compatible with Mac, Windows, Linux, and iPad Pro, making it a versatile storage solution for all your devices.
Pros & Cons
Pros
- Fast transfer speeds
- Durable and shock-resistant design
- No external power supply required
- Compatible with multiple operating systems and devices
- Includes soft-scratch rubber sleeve for added protection
Cons
- Limited storage capacity (up to 4TB)
- May be more expensive than other portable storage solutions
- No USB-C cable included (only USB-A to USB-C)
- No hardware encryption or backup software included
Customer Reviews
Customers have praised the OWC ENVOYPRO USB device for its fast transfer speeds, durable design, and compatibility with multiple devices. However, some have noted that the device may be more expensive than other portable storage solutions. Some common complaints include the lack of a USB-C cable (only a USB-A to USB-C cable is included), as well as the lack of hardware encryption or backup software. Despite these minor drawbacks, the OWC ENVOYPRO USB device has received generally positive reviews from customers.
Faqs
What do I need to do to set up the OWC ENVOYPRO USB device for the first time?
How do I go about moving data to the USB OWC Envoy Pro device?
How can I make sure my computer and the OWC ENVOYPRO USB device work together as efficiently as possible?
When partitioning the OWC Envoy Pro USB device to use with different operating systems, what should I take into account?
What is the OWC Envoy Pro USB device's maximum data transfer rate?
Which file systems is the OWC Envoy Pro USB device compatible with?
What is the recommended way to eject the OWC Envoy Pro USB device from a computer?
How do I encrypt data on the OWC ENVOYPRO USB device to protect sensitive information?
How can I resolve connectivity issues with the OWC OWC ENVOYPRO USB device?
How do I transfer data from my computer to the OWC OWC ENVOYPRO USB device?
Leave a Comment