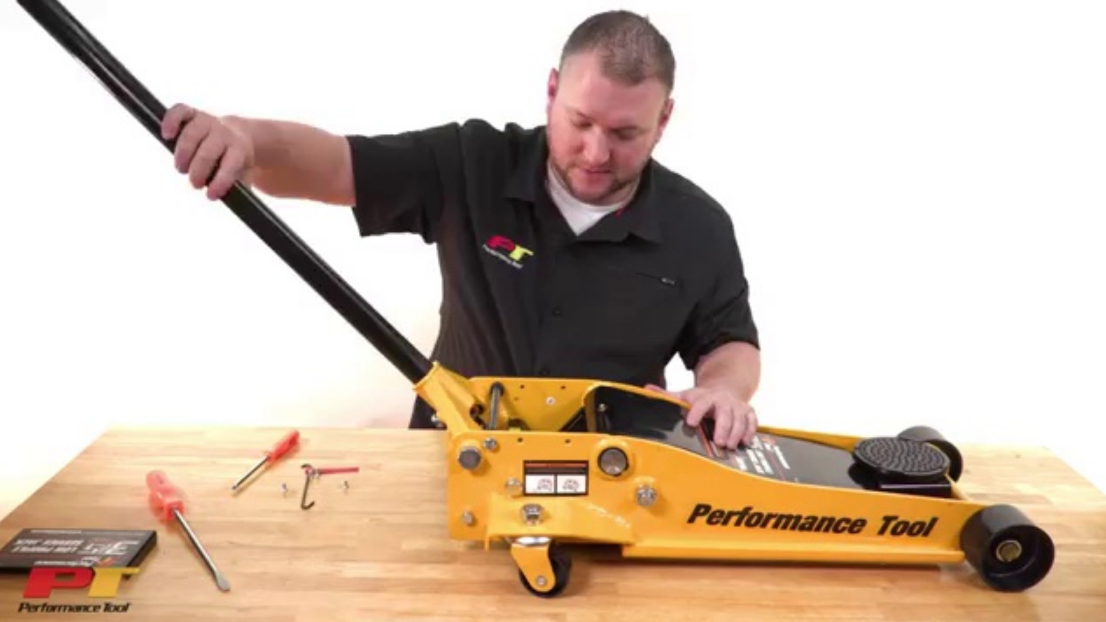
Performance Tool 3 Ton Rapid Lift Floor JAck W1616 Instruction Guide

Content
Performance Tool 3 Ton Rapid Lift Floor Jack W1616
The Performance Tool Rapid Lift Floor Jack W1616 is a heavy-duty and high-quality floor jack designed for professional use. This powerful Performance Tool 3 Ton Rapid Lift Floor Jack W1616 is capable of lifting up to 3 tons, making it perfect for garages, workshops, and auto repair shops. The estimated price of this product is around $300 to $400, and it is now available in the market.
Detailed Specifications
The 3 Ton Rapid Lift Floor Jack W1616 features a rapid pump design that can lift a load up to 16 inches in just 5 pumps. It has a built-in saddle pad that protects the vehicle's frame and a built-in safety overload system that prevents the jack from lifting beyond its capacity. The jack also has a swivel casters and rear wheels that provide easy mobility and positioning. Additionally, it has a steel lift arm and a reinforced lift pad for added durability and strength.
- Capacity: 6,000 lbs.
- Low Height: 4-5/8"
- Max. Height: 19-3/4"
- Lift Range: 15-1/8"
Description of Rapid Lift Floor Jack W1616
The Performance Tool 3 Ton Rapid Lift Floor Jack W1616 is built to last, with a heavy-duty steel construction that can withstand even the toughest working conditions. Its rapid pump design makes it easy to lift heavy loads quickly, while its built-in safety features ensure that the jack is always used safely. The jack's swivel casters and rear wheels make it easy to move and position, while its reinforced lift pad and steel lift arm provide added stability and strength. With a lifting range of 5.5 to 16 inches, this floor jack is suitable for a wide range of vehicles, including cars, trucks, and SUVs.

| # | Description | Qty. |
|---|---|---|
| 1 | Main Frame | 1 |
| 2 | Front Wheel | 2 |
| 3 | Washer | 2 |
| 4 | Retaining Ring | 2 |
| 5 | Caster | 2 |
| 6 | Lock Washer | 2 |
| 6A | Hex Nut | 2 |
| 7 | Power Unit | 1 |
| 8 | Lock Washer | 2 |
| 9 | Cap Screw | 2 |
| 10 | Link Block | 1 |
| 11 | Cotter Pin | 1 |
| 12 | Return Spring | 1 |
| 13 | Lift Arm | 1 |
| 14 | Link Bolt | 2 |
| 15 | Lock Washer | 2 |
| 16 | Hex Nut | 2 |
| 17 | Shaft | 1 |
| 18 | Snap Ring | 2 |
| 19 | Snap Ring | 2 |
| 20 | Saddle | 1 |
| 21 | Grease Fitting | 1 |
| 22 | Handle Socket | 1 |
| 23 | Gear Shaft | 1 |
| 24 | Gear | 1 |
| 25 | Washer | 1 |
| 26 | Hex Nut | 1 |
| 27 | Washer | 1 |
| 28 | Cotter Pin | 1 |
| 29 | Lock Washer | 2 |
| 30 | Bolt | 2 |
| 31 | Torsion Spring | 1 |
| 32 | Pin | 1 |
| 33 | Lower Handle | 1 |
| 34 | Upper Handle | 1 |
| 35 | Hex Head Screw | 1 |
| 36 | Handle Bolt | 1 |
| 37 | Washer | 1 |
| 38 | Release Valve | 1 |
| 39 | Release Valve Gear | 1 |
| 40 | Retaining Ring | 2 |
REPLACEMENT PARTS LIST

Ram Assembly Parts List
Parts List
| # | Description | Qty. |
|---|---|---|
| 1 | Top Nut | 1 |
| *2 | O-Ring | 1 |
| *3 | O-Ring | 2 |
| 4 | Reservoir | 1 |
| 5 | Oil Fill Plug | 1 |
| 6 | Ram | 1 |
| *7 | O-Ring | 1 |
| *8 | Guide Plate | 1 |
| 9 | Cylinder | 1 |
| 10 | O-Ring | 1 |
| 11 | Washer | 1 |
| 12 | Spring | 1 |
| 13 | Shaft | 1 |
| 14 | Ram | 1 |
| 15 | Ball | 1 |
| 16 | Spring | 1 |
| 17 | Screw | 1 |
| *18 | O-Ring | 1 |
| 19 | Small Cylinder | 1 |
| *20 | Screw | 1 |
| *21 | Ball | 2 |
| *22 | Ball | 3 |
| *23 | Ball | 3 |
| 24 | Filter Oil Tubes | 2 |
| *25 | Pin | 1 |
| *26 | Release Valve Shaft | 1 |
| 27 | Release Valve Gear | 1 |
| 28 | Washer | 1 |
| 29 | Nut | 1 |
| *30 | Plug Screw | 1 |
| *31 | Washer | 1 |
| *32 | Overload Valve Screw | 1 |
| *33 | Spring | 1 |
| *34 | Spring Base | 1 |
| *35 | Ball | 1 |
| 36 | Pump Piston | 1 |
| *37 | Backup Ring | 1 |
| *38 | O-Ring | 1 |
| 39 | Valve Block | 1 |
(*) Denotes item included in repair kit #W1616CK
Replacement parts available
| Part Number | Description |
|---|---|
| W1616CK | Ram Repair Kit |
| W1616-1 | Front Stationary Wheel |
| W1616-2 | Rear Caster Wheel |
| W1616-3 | Saddle |
| W1616-4 | Release Valve Gear Set |
| W1616-5 | Handle Socket Bolt |
| W1616-6 | Torsion Spring |
| W1616-7 | Handle Assembly |
| W1616-8 | Handle Retaining Bolt |
| W1616-9 | Pump Piston |
OPERATION
Before using your jack
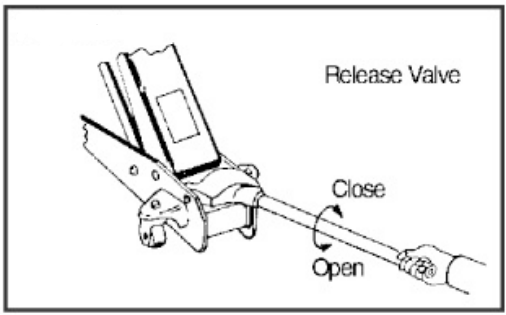
Turn release valve counter-clockwise to open. Pump jack handle about 6 full strokes to assure complete distribution of hydraulic fluid.

To raise
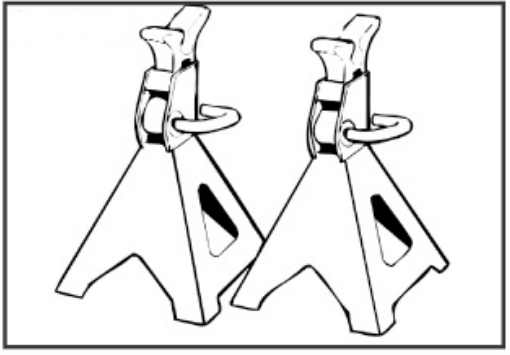
Turn release valve clockwise to close. Make certain that load is on center of saddle. Pump the jack handle to raise load to desired height. Transfer load to jack stands or other appropriate supports before working under load.

To lower
Raise load slightly to remove jack stands. Slowly turn release valve counter-clockwise just enough to allow controlled descent. (Never turn counter-clockwise more than 3 full turns)
CARE & MAINTENANCE
- When jack is not in use, lifting arm and handle sleeve should be infully down position to keep their precision machined surfaces free from corrosion.
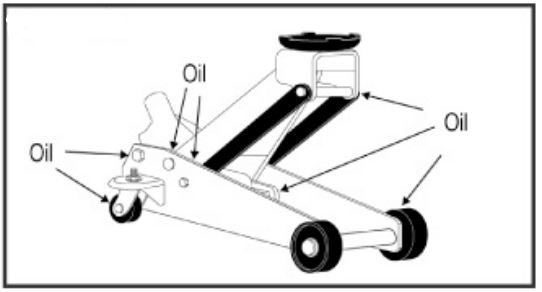
Keep jack clean and well lubricated.

- For best results, use only hydraulic fluid with a rating of SAE 10 for refills. Check fluid level with jack in fully down position. Fluid level should be 5mm below filler hole.
- Regularly check for loose, worn or damaged parts and repair or replace as necessary.
- Replace worn or damaged parts with Performance Tool replacement parts. Be sure that only qualified personnel perform repairs.
IMPORTANT SAFETY INFORMATION
Read these safety warnings before operation.
WARNING
- Failure to heed these warnings may result in loss of load, damage to jack, and/or jack failure resulting in personal injury or property damage.
- This is a lifting device only. Do not move load while it is on the jack. Load must be supported immediately by Jack Stands or other appropriate means.
- Do not overload jack beyond rated capacity. Overloading can cause damage to or failure of the jack.
- REFER TO YOUR VEHICLE OWNERS MANUAL FOR PROPER JACKING PROCEDURES. Lift only on areas of the vehicle as specified by the vehicle manufacturer.
- This jack is designed for use only on hard level surfaces capable of sustaining the load. Use of jack on other than hard level surfaces can result in jack instability and possible loss of load.
- Be sure all personnel are clear of load before lowering load.
- Ensure that no personnel pass underneath load until load is securely supported by jack stands.
TROUBLESHOOTING
Your Performance Tool hydraulic jack was constructed of quality materials and workmanship and will give you many years of trouble-free use when cared for as described in the "Care & Maintenance" section on page 3. However, as with any mechanical device, periodic adjustments are necessary to maintain a peak level of performance. Should your jack be displaying any of the following symptoms, the simple procedures shown below will correct the problem.
WARNING: Remove jack from service before making adjustments

NOTE: Problems listed above with more than one solution may have a combination of causes. Please be sure that all solutions listed for each problem have been checked to eliminate the possibility of further trouble. Sometimes solutions may need to be repeated for best results.
Pros & Cons
Pros
- Rapid pump design for quick lifting
- Built-in safety overload system
- Swivel casters and rear wheels for easy mobility
- Reinforced lift pad and steel lift arm for added durability
- Lifting range of 5.5 to 16 inches
Cons
- Heavy and difficult to transport
- Expensive compared to other floor jacks
- Not suitable for low-profile vehicles
- May require some assembly upon delivery
Customer Reviews of Performance Tool 3 Ton Rapid Lift Floor Jack W1616
Customers have praised the Rapid Lift Floor Jack W1616 for its quick lifting and easy mobility. Many have noted its durability and strength, with several users reporting that they have been using the jack for several years without any issues. However, some customers have criticized its heavy weight and high price. The most common complaint is that the jack is not suitable for low-profile vehicles, as the lifting pad may not be able to reach the lift points.
Faqs
Does the Performance Tool W1616 Floor Jack have a simple and straightforward layout?
What security measures are included in the Performance Tool 3 Tonne Rapid Lift Floor Jack?
What kinds of cars can be raised with the Performance Tool W1616 Floor Jack?
How does the W1616 Performance Tool handle vehicles with reduced clearance?
Is it possible to utilise the Performance Tool W1616 for business?
What are the materials that go into making the Performance Tool W1616 Floor Jack?
What upkeep is necessary for the W1616 Floor Jack Performance Tool?
What extra equipment is required in order to operate the Performance Tool W1616?
On uneven surfaces, how stable is the Performance Tool W1616?
Is there a warranty for the Performance Tool W1616?
Leave a Comment
