How to Adjust: Perlesmith TV Wall Mount PSLF6 Manual
Content
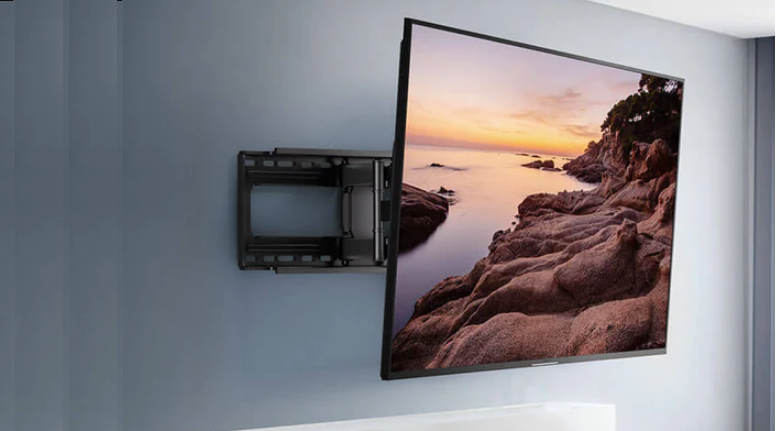
Introduction of Perlesmith TV Wall Mount PSLF6
The TV Wall Mount is a versatile and robust mounting solution designed to accommodate TVs ranging from 37 to 70 inches. With a load capacity of up to 132 lbs, this mount is suitable for a wide range of TV models and brands. The estimated price of the Perlesmith TV Wall Mount PSLF6 is around $40 to $50, making it an affordable option for those looking for a high-quality TV mount. The product was launched in 2020 and has since gained popularity among consumers for its durability and ease of installation.
Detailed Specifications
- Compatible with TVs from 37 to 70 inches
- Load capacity of up to 132 lbs
- VESA compatible (100x100, 200x100, 200x200, 300x200, 300x300, 400x200, 400x300, 400x400, 600x400, 600x600)
- Full-motion articulating arm with a 15-inch horizontal extension
- Tilt range of -5 to 15 degrees
- Swivel range of +/- 45 degrees
- Bubble level for easy installation
- Magnetic stud finder included
- Cable management system for a clean and organized look
- Constructed with heavy-duty steel for durability
Tools Needed (Not included)
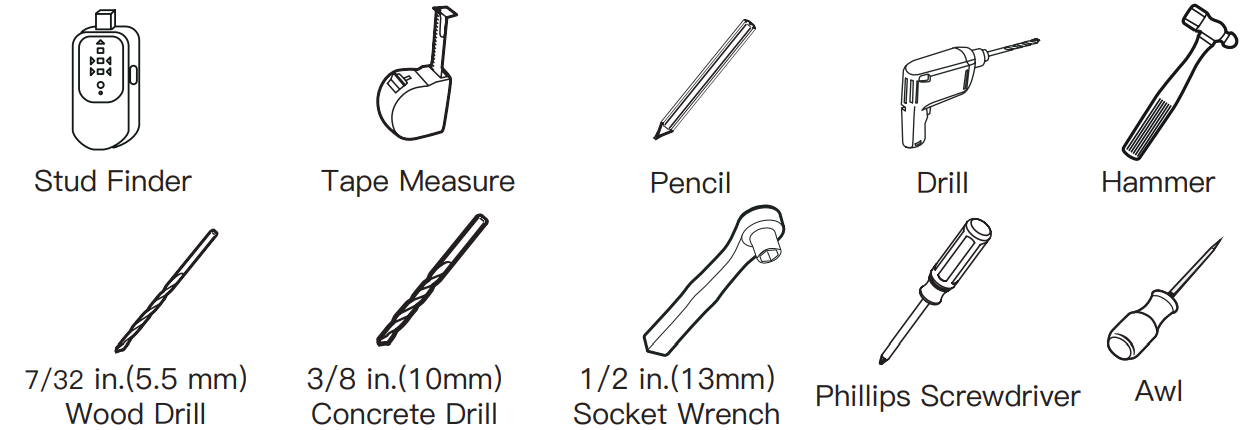
Description
The Perlesmith TV Wall Mount PSLF6 is a full-motion articulating mount that provides maximum flexibility for TV placement. The mount can be extended up to 15 inches from the wall, tilted up to 15 degrees, and swiveled up to 45 degrees in both directions. This allows for optimal viewing angles and reduces glare on the screen. The mount is VESA compatible, meaning it can accommodate TVs with a variety of mounting patterns. The heavy-duty steel construction ensures that the mount is sturdy and can support the weight of larger TVs. The included bubble level and magnetic stud finder make installation easy, and the cable management system ensures that cords are organized and out of sight.
Weight Restrictions
If your TV weighs more, this mount is NOT compatible.
WARNING
DO NOT exceed the maximum weight indicated. This mounting system is intended for use only within the maximum weights indicated. Use with products heavier than the maximum weights indicated may result in failure of the mount and its accessories, causing possible damage and or injury.
Check the VESA Pattern of Your TV before the Installation
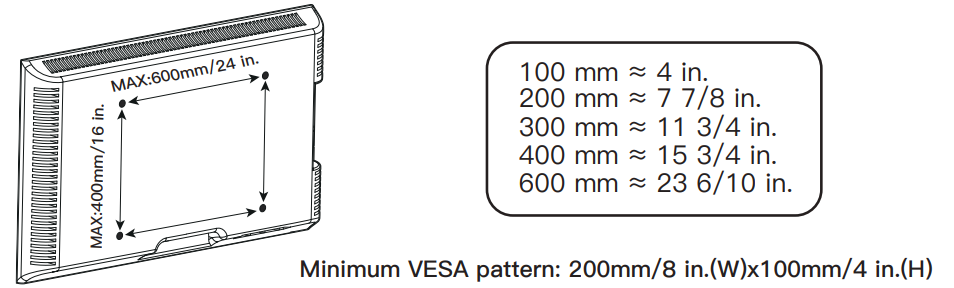
If your TV VESA is greater than 600x400 mm/24x16 in. or less than VESA 200x100mm/8x4in., this mount is NOT compatible.
Setup Guide
- Determine the location on the wall where you want to mount the TV.
- Use the magnetic stud finder to locate the studs in the wall.
- Mark the center of the studs with a pencil.
- Attach the mounting plate to the wall using the included hardware and level to ensure it is straight.
- Mount the TV to the articulating arm using the VESA pattern on the back of the TV.
- Attach the articulating arm to the mounting plate on the wall.
- Connect the cables and use the cable management system to organize them.
- Adjust the tilt and swivel as needed for optimal viewing.
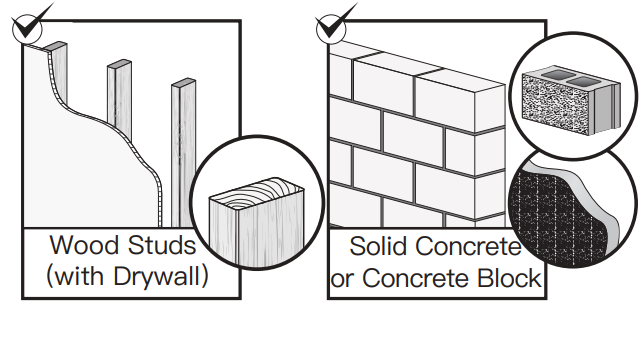
Verify Your Wall Construction
CAUTION
DO NOT install into drywall alone
Supplied Parts and Hardware
Warning: This product contains small items that could be a choking hazard if swallowed.
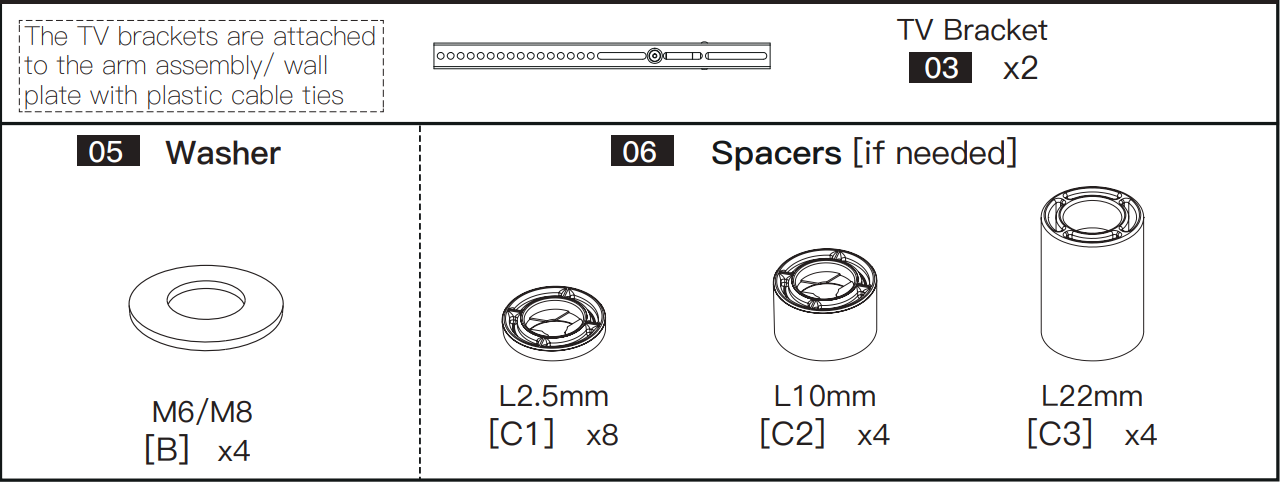


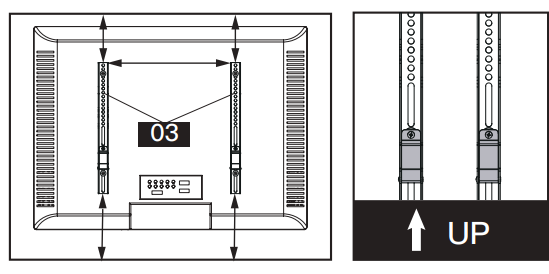
Secure the TV Brackets to TV
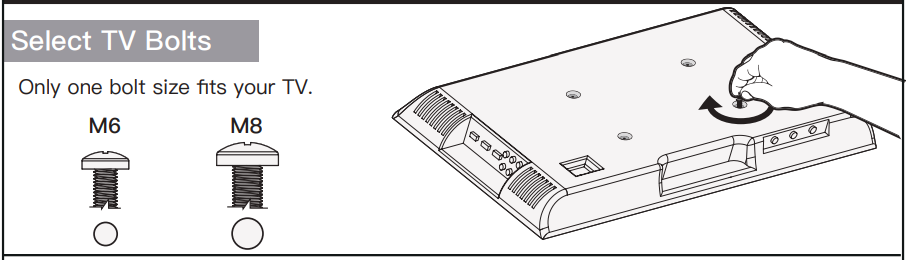
Bolt length: Verify adequate thread engagement with bolts or bolts/spacers combination. We recommend thread engagement by at least 5 turns.
- Too short will not hold the TV.
- Too long will damage the TV.

CAUTION: Ensure the TV brackets [03] are EQUALLY CENTERED on your TV AND securely fastened in place.
(For Flat Back TV)
.png)
(For Round Back TV)
.png)
(For TV with A “Bump”)
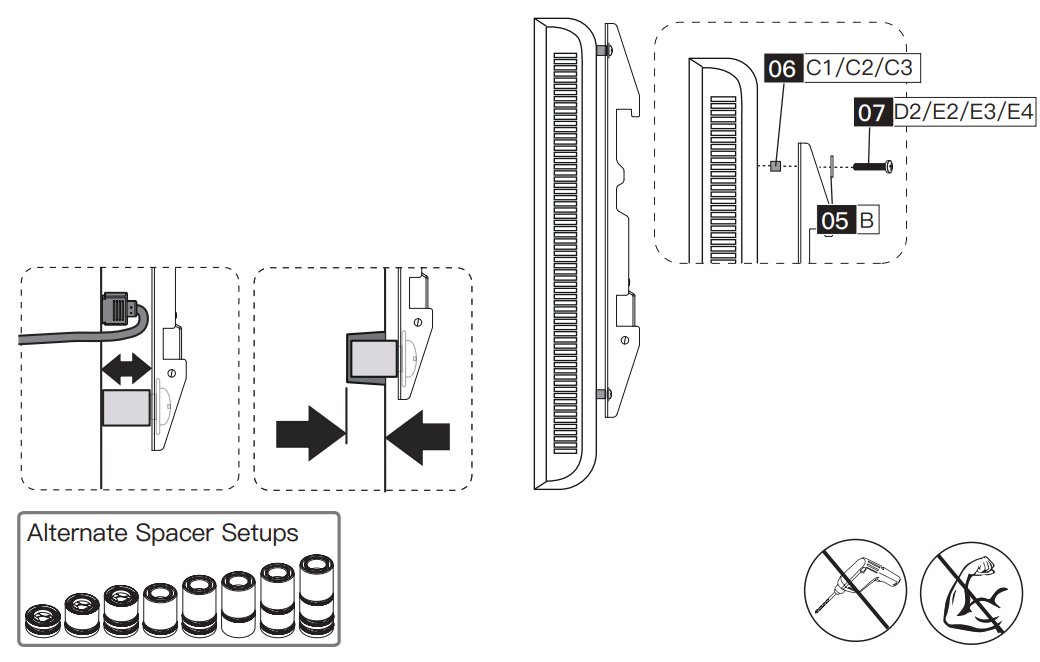
Spacers may be necessary for 2 holes ONLY.
.png)
For cable interference or inset holes, use spacers [06] to create extra space between the TV and TV brackets
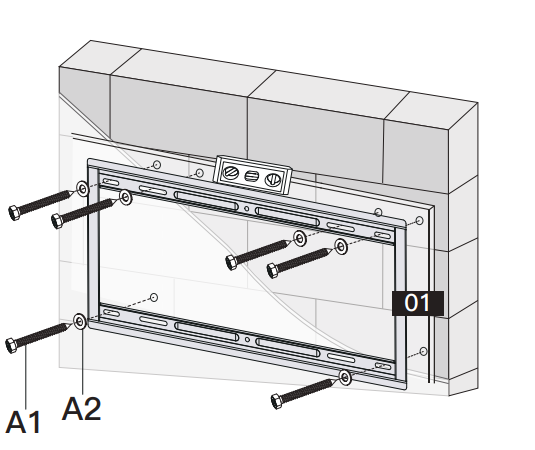
Attach the Wall Plate [01] to Wall
- For wood stud installation
- For concrete installation
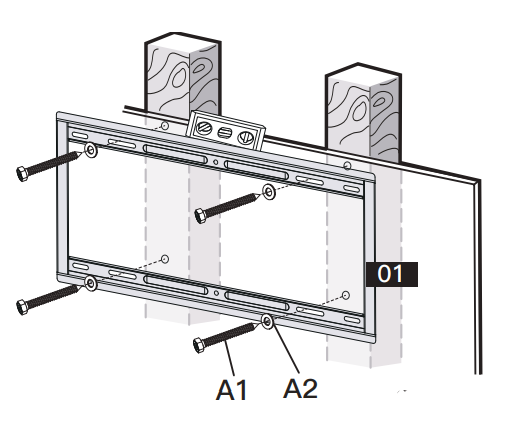
Wood Stud Option
WARNING
- Avoid potential personal injury or property damage! DO NOT over-tighten the lag screws [A1]. Tighten the lag screws [A1] only until the washers [A2] are pulled firmly against the wall plate.
- DON'T USE ANCHOR [A3] FOR THIS STEP!
- Ensure the wall plate [01] is securely fastened to the wall before continuing to the next step.
- Any material covering the wall must not exceed 5/8 in. (16 mm)
- Nominal wood stud size: common 2 x 4 in. (51 x 102 mm) minimum 1½ x 3½ in. (38 x 89 mm)
- Stud center must be verified
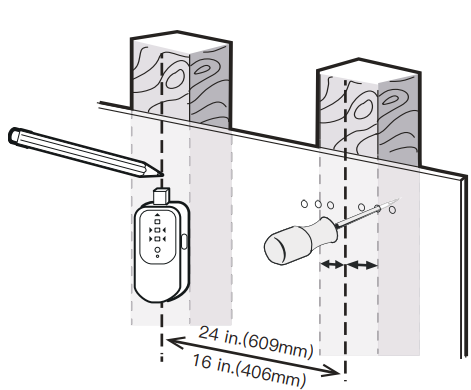
Use a stud finder(not included) to locate wood studs or use an awl (not included) to verify the edges. Mark the edge and center locations.
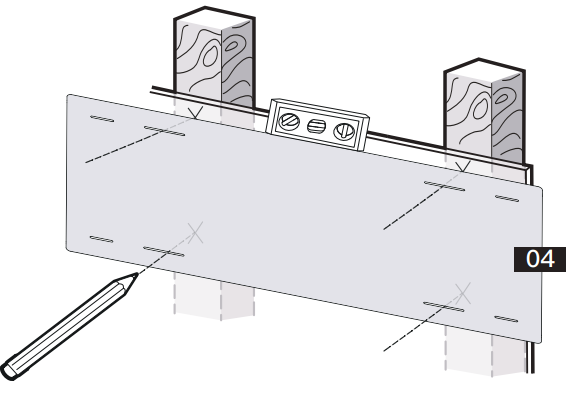
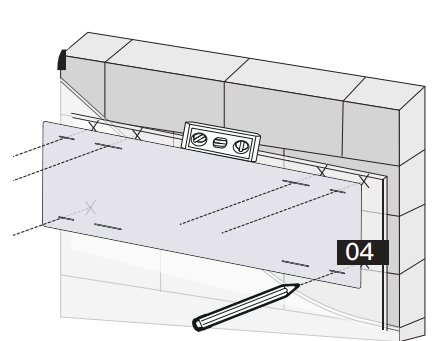
Position the wall plate template [04] at your desired height and line up the holes with your stud center line. Level the wall plate template [04] and mark the holes.
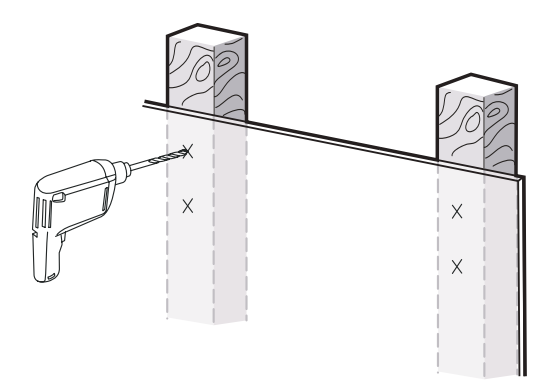
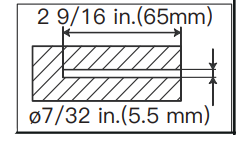
Drill 4 pilot holes using a 7/32 in.(5.5 mm) diameter drill bit. Make sure the depth is not less than 2 9/16 in.(65mm).
Install the wall plate using lag screws [A1] and washer [A2]. Tighten the lag screws [A1] only until the washers [A2] are pulled firmly against the wall plate.
Solid Concrete or Concrete Block Option
WARNING
- Avoid potential personal injury or property damage! DO NOT over-tighten the lag screws [A1]. Tighten the lag screws [A1] only until the washers [A2] are pulled firmly against the wall plate.
- Ensure the wall plate [01] is securely fastened to the wall before continuing to the next step.
- Any material covering the wall must not exceed 5/8 in. (16 mm)
- Mount the wall plate directly onto the concrete surface
- Minimum solid concrete thickness: 203 mm (8 in.)
- Minimum concrete block size: 203 x 203 x 406 mm (8 x 8 x 16 in.)
- Never drill into the mortar between blocks
Position the wall plate template [04] at your desired height, level the wall plate template and mark the pilot hole locations.
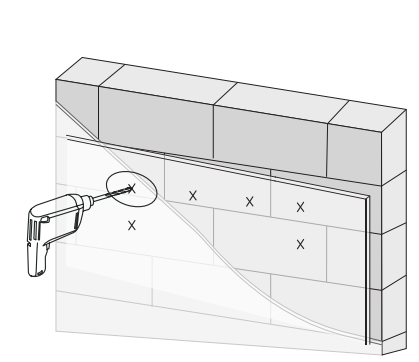
Drill 6 pilot holes using a 3/8 in.(10mm)diameter drill bit. Make sure the depth is not less than 2 ¾ in.(70mm). Never drill into the mortar between blocks.
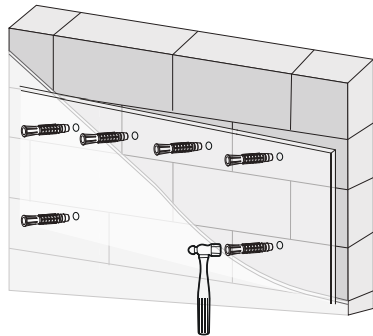
Use the hammer to knock anchors [A3] into the wall. Be sure the anchors [A3] are seated flush with the concrete surface.
Install wall plate using lag screws [A1], washers [A2] and anchors [A3]. Tighten the lag screws [A1] only until the washers [A2] are pulled firmly against the wall plate. DO NOT over-tighten the lag screws [A1].
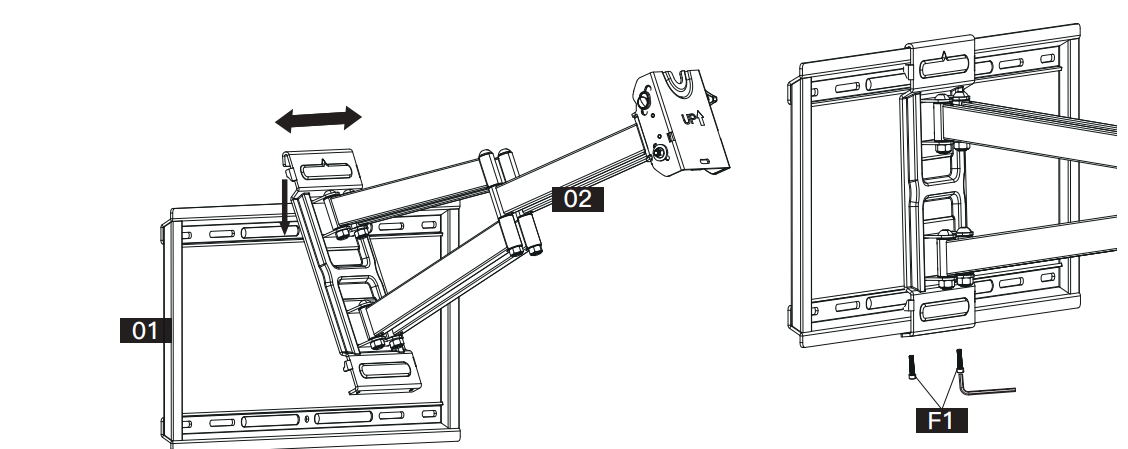
Secure the Arm Assembly [02] to Wall Plate [01
- Hang the arm assembly [02] to wall plate [01].
- Shift the arm assembly [02] along the wall plate [01] to your desired position.
- Secure the arm assembly [02] to wall plate [01] using bolts [F1].
Secure Front Support to Arm Assembly
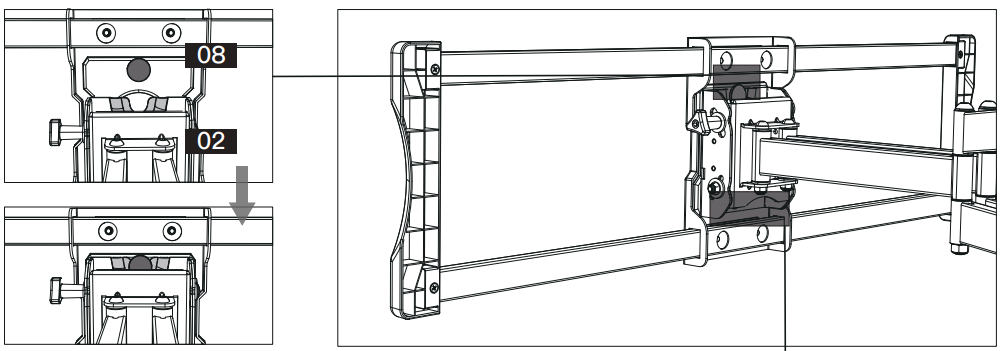
- Make sure the big button in Front Support [08] hangs on the hook of the arm assembly.
- Secure the front support [08] to arm assembly [02] using bolts [F2].
Hang the TV onto the Front Support

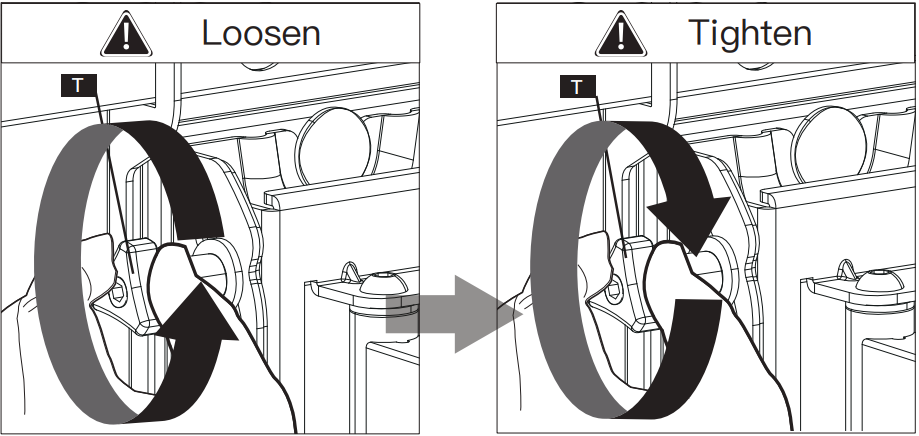
Adjustments
- Loosen the preassembled knob [T].
- Adjust TV to your desired tilt angle.
- Tighten the preassembled knob [T] to secure the TV in place.
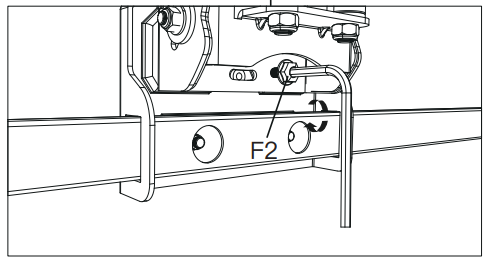
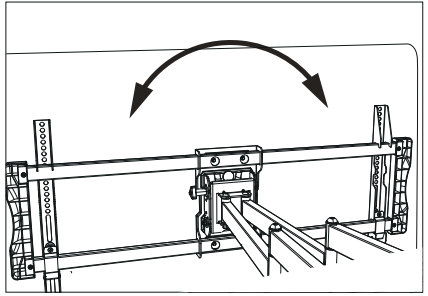
CAUTION
DO NOT over-loosen these four nuts when adjusting the level angle to prevent the TV from falling off.
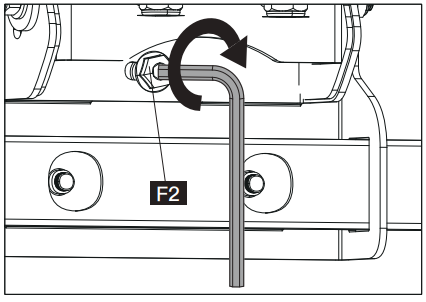
Loosen the bolt [F2] .
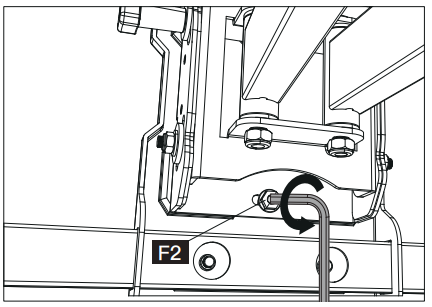
Level your TV.
Tighten the bolt [F2] to secure the TV in place.
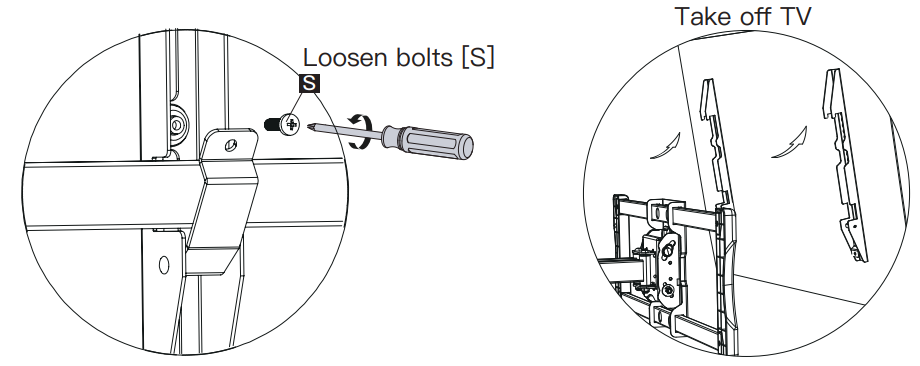
Note: Please take off the TV before shifting the arm assembly along the wall plate
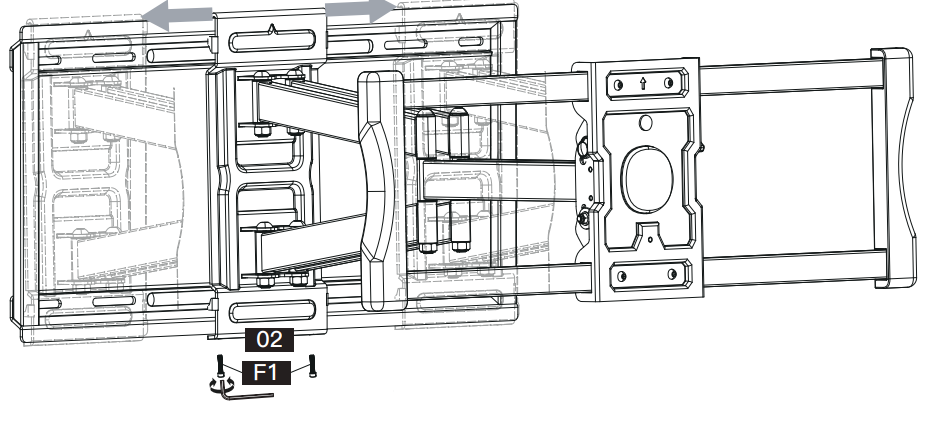
To better position your mount and TV on your wall, the mount can be horizontally shifted left to right by following these steps.
- Loosen the bolts [F1].
- Shift the arm assembly [02] to your desired position.
- Tighten the bolts [F1] hard.
- Repeat the procedures in Step 5 to rehang and secure the TV onto the front support[08].
Troubleshooting
- If the mount is not level, use a level to adjust the mounting plate on the wall before attaching the articulating arm.
- If the TV is not sitting flush against the wall, check the VESA pattern on the back of the TV to ensure it is compatible with the mount.
- If the articulating arm is not moving smoothly, check for any obstructions or debris in the joints and lubricate as needed.
- If the TV is not staying in place, make sure the mounting hardware is tightened properly and the TV is securely attached to the articulating arm.
Pros & Cons
Pros
- Full-motion articulating arm for maximum flexibility
- Heavy-duty steel construction for durability
- Easy installation with included hardware and instructions
- Cable management system for organized cords
- Affordable price point
Cons
- May not be compatible with some older TV models
- Some users may find the installation process time-consuming
Customer Reviews
Customers have praised the TV Wall Mount PSLF6 for its sturdy construction and easy installation. Many have noted that the mount is able to support their large and heavy TVs without issue. Some have commented that the cable management system is a great feature that helps keep their home theater area organized. However, some users have reported that the mount is not compatible with their older TV models. Overall, the Perlesmith TV Wall Mount PSLF6 has received positive reviews from consumers and is a great option for those looking for a high-quality and affordable TV mount.
Faqs
How is the Perlesmith TV Wall Mount PSLF6 installed?
How should I proceed if my TV on the PSLF6 mount appears unsteady or tilts to one side?
Is it possible to use the Perlesmith TV Wall place PSLF6 to place my TV on a plaster wall?
After my TV is installed on the PSLF6, how can I change its tilt and swivel positions?
For the Perlesmith TV Wall Mount PSLF6 installation, what tools will I need?
Can I use the Perlesmith TV Wall Mount PSLF6 with any kind of TV?
Can I use a TV bigger than 70 inches with the Perlesmith TV Wall Mount PSLF6?
How can I make sure my TV is safe to use with the Perlesmith TV Wall Mount PSLF6?
After my TV is installed on the Perlesmith TV Wall Mount PSLF6, how do I handle the cables?
What kind of guarantee is included with the PSLF6 Perlesmith TV Wall Mount?
Leave a Comment