Ring eero Wifi Alarm Pro LennarHome Guide
Content
Introduction of Ring eero Wifi Alarm Pro LennarHome
The Ring eero Wifi Alarm Pro is a cutting-edge smart home security solution, designed to provide seamless and reliable whole-home Wi-Fi coverage and advanced home security features, all in one bundle. This Ring eero Wifi Alarm Pro LennarHome is a result of a collaboration between Ring, eero, and LennarHome, ensuring a top-notch user experience. The estimated price is around $400, and it is now available for purchase.
Detailed Specifications
- Tri-band Wi-Fi 6 technology for fast and efficient internet coverage
- Advanced eero TrueMesh technology to eliminate dead zones
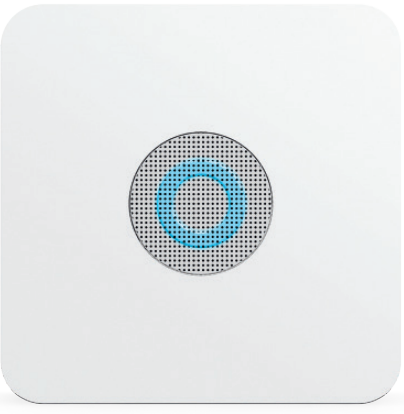
- Ring Alarm Pro base station with built-in eero Wi-Fi 6 router
- 24/7 professional monitoring with optional cellular backup
- Integrated Z-Wave Plus for compatibility with various smart home devices
- Ethernet ports for wired connectivity (1 WAN, 2 LAN)
- Up to 1,500 square feet of Wi-Fi coverage per eero Pro device
- Dimensions: 4.45 in x 4.45 in x 1.26 in (each eero Pro device)
- Weight: 0.68 lbs (each eero Pro device)
Description of Wifi Alarm Pro LennarHome
The Wifi Alarm Pro LennarHome bundle combines the powerful eero Pro 6 mesh router with the Ring Alarm Pro base station, providing an all-in-one solution for home security and Wi-Fi connectivity. The eero Pro 6 mesh router delivers ultra-fast Wi-Fi 6 technology to eliminate dead zones and ensure seamless coverage throughout your home. With advanced eero TrueMesh technology, this system intelligently routes traffic to provide optimal performance and reduce congestion. The Ring Alarm Pro base station offers 24/7 professional monitoring and optional cellular backup, ensuring maximum protection for your home. This system is also compatible with Z-Wave Plus devices, allowing you to expand your smart home ecosystem effortlessly.
Before you begin
- Use this guide. We’ll tell you how to set up each product in the home that is included in the Lennar Communities Connected by Ring program.
- Open up your Lennar Connectivity DIY Kit. You should find several devices inside the kit, including: eero Pro, Ring Alarm Keypad and Ring Alarm Base Station. Please follow the full installation instructions and safety warnings included with each product. This Homeowner’s Guide provides only a high-level overview.
- Find the Installation Checklist that your Lennar installer filled out. It should be in the Lennar Connectivity DIY Kit. It will help you find each product.
- When you’re done, we recommend keeping the packaging and manuals for future reference.
Do you have power and internet access?
Electrical power and internet access are needed to set up the rest of the products. When you have broadband internet access in your home, you can begin setting up your smart home, starting with your wifi network.
Setup of Ring eero Wifi Alarm
- Install the eero app on your smartphone and create an account.
- Connect the eero Pro device to your modem using the Ethernet cable provided.
- Add additional eero Pro devices as needed to cover your entire home.
- Power on the Ring Alarm Pro base station and follow the in-app instructions to configure it.
- Connect your smart home devices to the network and customize your alarm settings within the app.
eero Wifi Router
- Find your eero product(s) in your Lennar Connectivity DIY Kit and open the box.
- Download the latest version of the eero app at eero.com/app.
- Disconnect your modem and anything connected to it.
- With the modem unplugged, open the app and follow along.
- Write down your wifi network name and password.
Download the Ring app
Before you set up your Ring devices, download the Ring app. Create an account or use your existing Ring account.
Ring Alarm Base Station and Security Devices
- Use the Installation Checklist to find your Ring Alarm devices around the house. Your Base Station and Keypad should be in your Lennar Connectivity DIY Kit.
- Your Ring Alarm devices and the blue boxes they come in have matching QR codes. If you run into any issues while adding any security devices to the Ring app, you can use these codes to add them manually.
- Note: Do not pull out all of the battery tabs on your Ring Alarm devices until prompted by the Ring app. Wait until you’re ready to set up each device, then pull them one at a time. If your installer accidentally removed it, you can press the button on the front of the device when you’re ready to connect it to the app. The Keypad does not have a button, you can plug it in instead.
- The Ring Alarm manual has additional setup instructions. Find the manual in the box or online at ring.com/alarm-manual, and follow along. We’ve provided extra notes here.
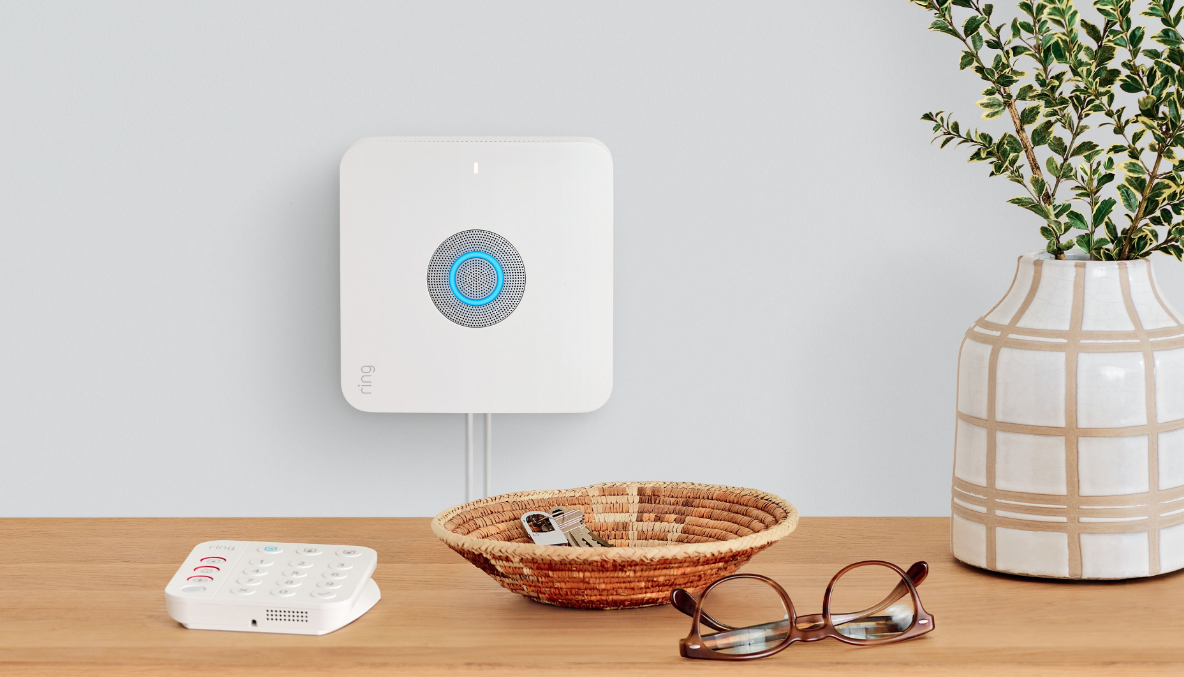
- Base Station
Move your Base Station to a central location in your home. We suggest choosing a spot with good wifi reception where the siren will be heard throughout the home. Don’t plug it in until the Ring app tells you to. - Open the Ring app.
Tap Set up a device from the menu. - Find your Ring Alarm Base Station.
Before you begin setup, open the Ring app, tap the Menu, tap Security, then tap Alarm Base Station. Follow the instructions in the app to connect your Ring Alarm Base Station.
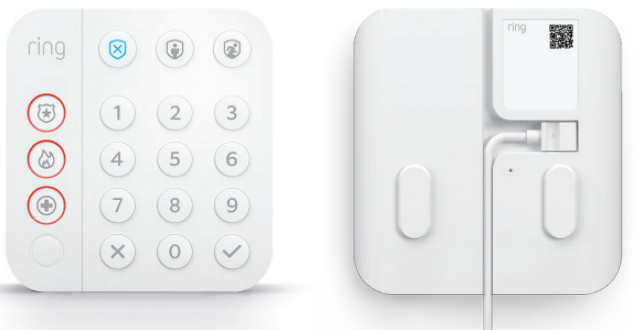
Keypad
Follow the Ring Alarm manual instructions for setting up and mounting the Keypad, if you wish to mount it on a wall. You can also place it on a table or shelf.
You may need to charge the Keypad before the first time you use it, and you can use it plugged in or leave it unplugged. If you need to scan a QR code to manually add the Keypad to the Ring app, you can find it on the back of the Keypad.
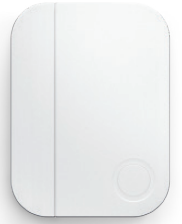
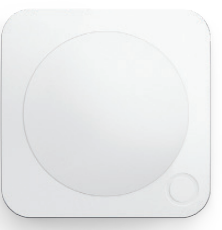
Contact Sensor
Use the Installation Checklist to find the Contact Sensors, then remove the battery tab to connect each one to the Ring app. When the app prompts you, pull out the battery tab to power it on. Follow the app to complete the setup. Complete each one before you move on to the next one. If there is no battery tab to remove, tap the button on the front. If you need to scan a QR code, you can find it on the blue box it came in.
Note: If you have fewer than 3 entry doors, your extra Contact Sensors will be in the packaging. You can mount your extra Sensors on any window.
Motion Detector
Use the Installation Checklist to find the Motion Detector in your home, then remove the battery tab to begin the Ring app setup process. If there is no battery tab to remove, tap the button on the front. If you need to manually scan a QR code, you can find it on the blue box it came in.
Ring Alarm Smoke & CO Listener
- Before you begin, you’ll need the following:
- Find the Smoke & CO Listener box with the Listener inside.
- Find the QR code on a small slip of paper inside the box.
- Find the Listener manual inside the box.
- Using the Installation Checklist, find the Smoke & CO Listener mounting bracket on the ceiling in your home.
- Use the manual and follow the instructions to add the Smoke & CO Listener to your Ring app and test it.
- You’ll need to get on a ladder in order to install the device and complete the Listener test. Ask someone to hold the ladder and use common sense safety precautions.

Safety note: You’ll need to use a ladder in order to install this device and complete the Listener test. Always exercise caution and ask someone to help you stabilize the ladder.
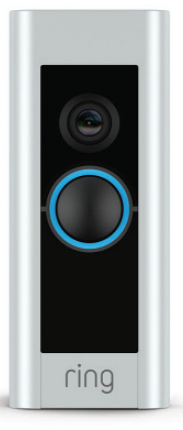
Ring Video Doorbell Pro
To set up your Doorbell Pro, remove the doorbell’s faceplate using the provided screwdriver. Press and hold the button on the side of the doorbell for 10 seconds. A spinning white light on the front of the device indicates the doorbell is now in Setup Mode.
Next, open the Ring app and select Set Up a Device to get started with step-by-step installation instructions. For more installation help, refer to the user guide in the box.
Note: If you have 2 Ring Video Doorbells, set them both up using the same steps. You can also set them up using the same Ring account, or using two different Ring accounts, depending on
your preference.
Honeywell Home T6 Pro Z-Wave Smart Thermostat
This product has two manuals. Use the User Guide to complete your product setup. To add your Honeywell Home T6 Pro Z-Wave Smart Thermostat to the Ring app:
- Open the Ring app, tap on the menu, tap Devices, then tap Set up a device.
- Tap Security.
- Scroll down and tap Works with Ring.
- Pick up the Honeywell Home T6 Pro Z-Wave Smart Thermostat. On the thermostat menu, tap the arrows until you see Z-WAVE SETUP, then tap Select.
- When you’re ready, in the Ring app tap Add. Your Ring Alarm is now listening for Z-Wave devices.
- Tap Select on the thermostat.
- If pairing succeeds, you’ll see “INCLUDED”, the node ID, and the “Z-Wave connected” icon on the thermostat screen.
- If pairing fails, you’ll see “FAILED TO INCLUDE”. Move the Ring Alarm Base Station closer to the thermostat and try adding again.

Honeywell Home T6 or T10 Pro Smart Thermostat
This product has two manuals. Use the User Guide to complete your product setup.
To add your Honeywell Home T6 or T10 Pro Thermostat to the Ring app
- Open the Ring app, tap on the menu.
- Tap Set Up Device.
- Scroll down and tap Thermostats.
- If asked how to connect your thermostat, select Wifi, then tap Begin Setup.
- Follow the steps to link your Amazon and Ring accounts.
- Follow the steps to link your Amazon and Honeywell Home accounts.

When you finish this step, you’ll have a new tile on your Ring app dashboard linking to the Honeywell Home app where you can monitor and manage your Honeywell Home T6 or T10 Pro Thermostat.
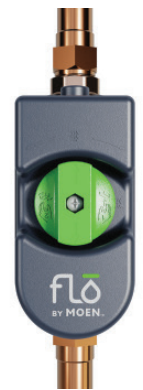
Flo by Moen
Download the Flo by Moen app from the App Store or Google Play and use the Setup Guide to complete your product setup.
To set up your Flo by Moen Smart Water Valve using the Ring app
- Open the Ring app, tap on the menu, tap Devices, then tap Set up a device.
- Scroll down and tap Smart Water Valves.
- On the “Add Flo to your Shortcuts” screen, tap Begin Setup.
- Follow the steps to link your Amazon and Ring accounts.
- Follow the steps to link your Amazon and Flo by Moen accounts.
- When you finish this step, you’ll have a new tile on your Ring app dashboard. Using this tile, you can see your device status and be able to turn the valve on and off.
LiftMaster myQ Smart Garage Control
Use the manual included in your Lennar Connectivity DIY Kit to complete your product setup.
To add your LiftMaster myQ Smart™ Garage Control to the Ring app
- Open the Ring app, tap on the menu, tap Devices, then tap Set up a device.
- Scroll down and tap Garage Door Openers.
- On the “Add myQ to your Shortcuts” screen, tap Begin Setup.
- Follow the steps to link your Amazon and Ring accounts.
- Follow the steps to link your Amazon and my accounts.
- When you finish this step, you’ll have a new tile on your Ring app dashboard linking to the myQ app where you can monitor and manage your LiftMaster myQ Smart Garage Control.
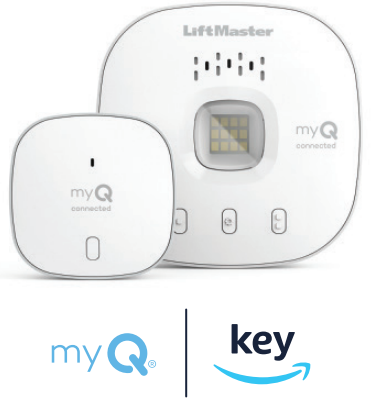
Make the most of your LiftMaster myQ Smart™ Garage Control by enabling In-Garage Delivery from Key by Amazon after device setup in the myQ app. With Key by Amazon, Prime members in select cities can get their Amazon packages securely delivered inside their garages.
Schlage Encode Smart WiFi Deadbolt
Download the Schlage Home app and follow the in-app instructions to set up your deadbolt
Add your deadbolt in the Ring app
- Open the app and select Set Up a Device.
- Select Locks and Access Control.
- Select Schlage Home
- Follow the steps to connect your Schlage Home and Ring accounts

Level Lock
Use the in-box instructions to complete your setup.
To set your Level Lock in the Ring app
- Install and perform initial setup per Level Lock instructions.
- Continue setup in the Ring app:
- Open the Ring app, tap on the menu, then tap Set up a device.
- Scroll down and tap Locks and Access Control.
- Select Level Lock on the Set Up a Device Screen.
- Tap Begin Setup.
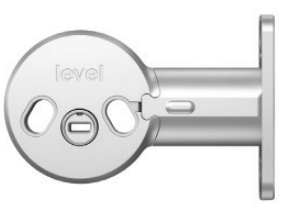
When you finish above, you’ll have a new shortcut tile on your Ring app dashboard. Use it to lock and unlock or access and manage lock function and settings.
Troubleshooting
- Issue: Slow Wi-Fi performance
Solution: Check for interference, relocate eero devices, and ensure your devices support Wi-Fi 6. - Issue: Difficulty pairing smart home devices
Solution: Ensure devices are compatible with Z-Wave Plus and follow the manufacturer's instructions for pairing.
Pros & Cons
- Pro: Seamless Wi-Fi 6 coverage
- Pro: Advanced home security features
- Pro: Easy setup and integration with smart home devices
- Con: Higher price point than some competitors
- Con: Limited customization options for the alarm system
Customer Reviews of Ring eero Wifi Alarm Pro LennarHome
Many customers praise the Wifi Alarm Pro LennarHome bundle for its seamless Wi-Fi coverage and reliable home security features. However, some users mention that the price point is higher than other solutions on the market. Common complaints include limited customization options for the alarm system and occasional connectivity issues.
Faqs
How does the Ring eero Wifi Alarm Pro differ from other mesh Wi-Fi systems?
Can I expand the eero Pro mesh network with additional devices?
What is the range of each eero Pro device?
Is the Ring eero Wifi Alarm Pro compatible with other Ring devices?
Can I manage my Wi-Fi network remotely?
What is the warranty on the Ring eero Wifi Alarm Pro?
Are there any subscription fees for the Ring alarm monitoring services?
How many smart home devices can the Ring Alarm Pro base station support?
Can I use the Ring eero Wifi Alarm Pro with a satellite internet connection?
Can the Ring eero Wifi Alarm Pro be used in an apartment or smaller home?
Leave a Comment