How to Setup: Saferhome Wireless Alarm Receiver | All Setting Guide
Content
Introduction of Wireless Alarm Receiver
The Saferhome Wireless Alarm Receiver is a state-of-the-art device that provides homeowners with real-time alerts and notifications when their wireless security system is triggered. Designed to integrate seamlessly with Saferhome's wireless sensors and cameras, this receiver offers reliable and secure monitoring for your home or business. With an estimated retail price of $199 and a launch date set for late 2023, this product is a must-have for anyone looking to enhance their home security.
Configuration List Wireless Alarm Receiver
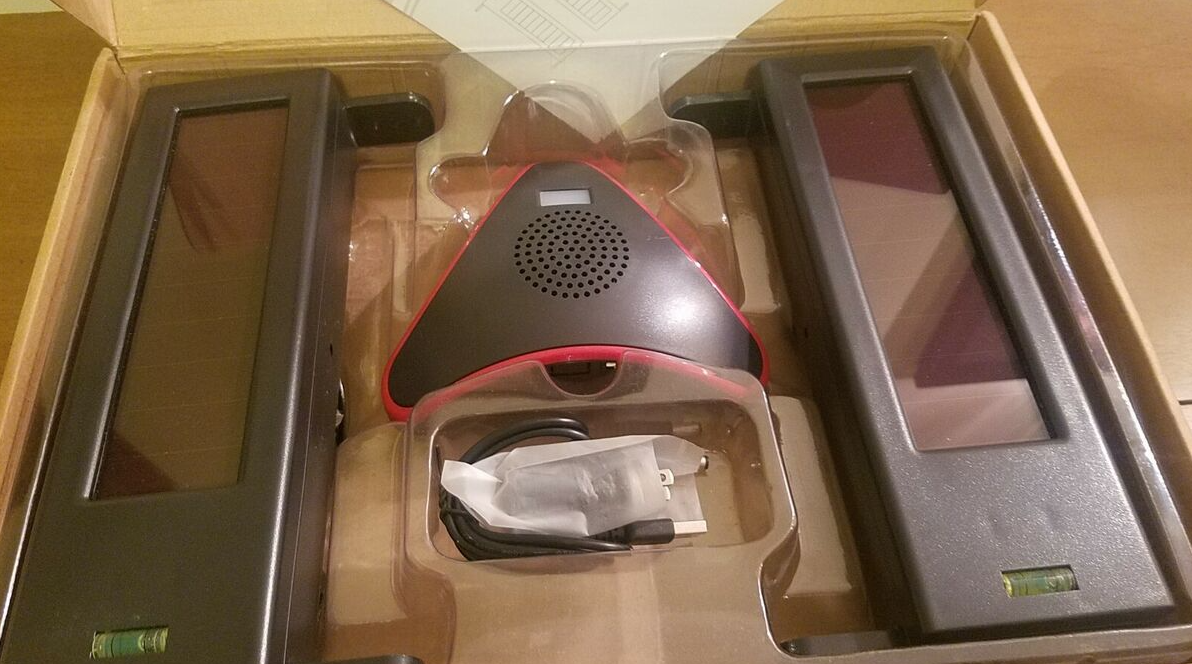
Wireless Alarm Receiver | 1piece (includes 1 power adapter) |
Solar&Wireless Photoelectric BeamSensor | 1 pairs (includes 1 set installation accessories) |
English Manual | 1 piece |
Note:The alarm system has been programmed already,please operate the system according to the part 3 of the manual;
System Components And Usage
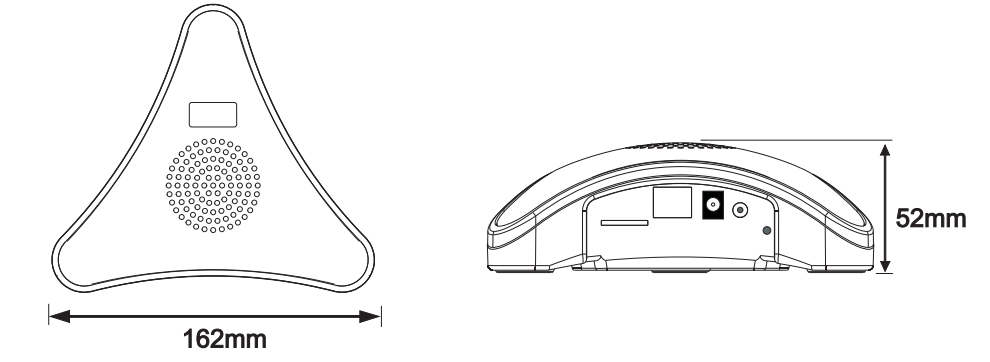
Wireless Alarm Receiver
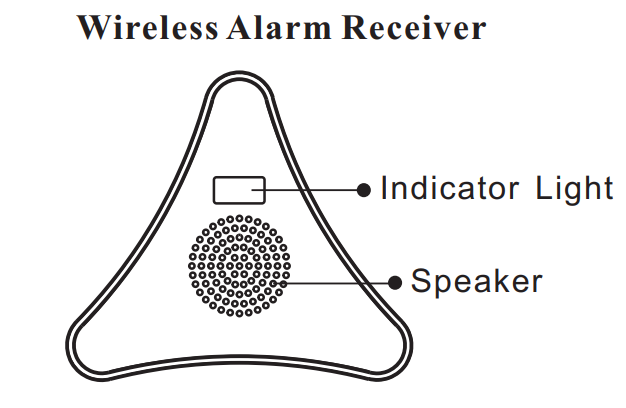
- Indicator Light: Will be red if power on;Will flash if on setting mode
- Speaker: Will alarm for several seconds if the sensor be triggered
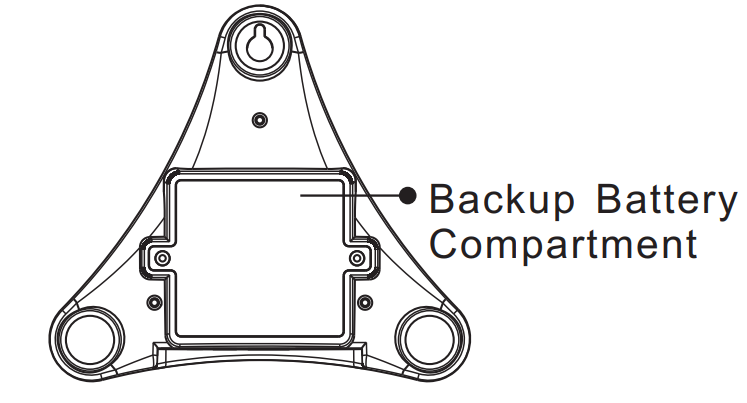
Backup Battery Compartment:4 pieces AA 1.5V batteries (can keep the wireless alarm receiver working continuously for 100 hours if AC power off)
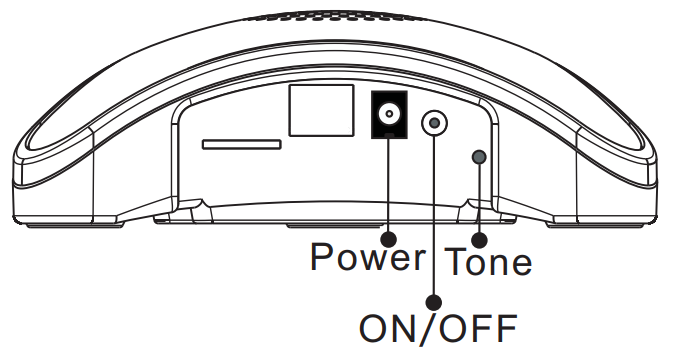
- Power : power jack(DC5V)
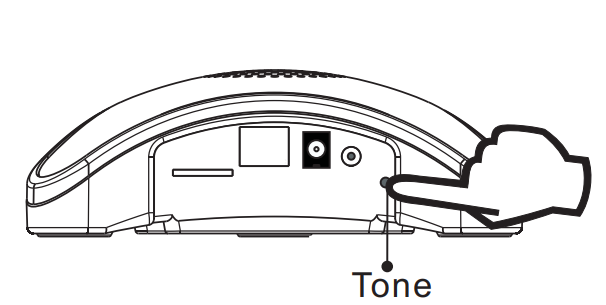
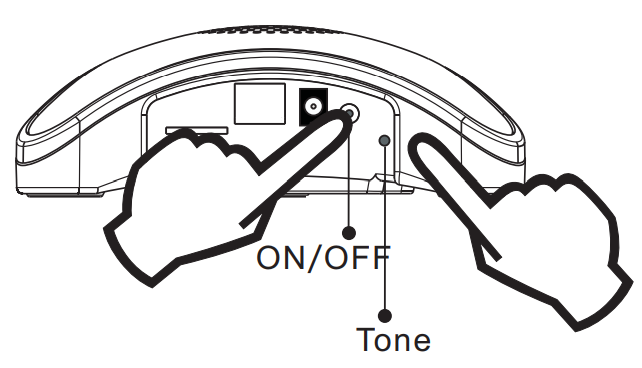
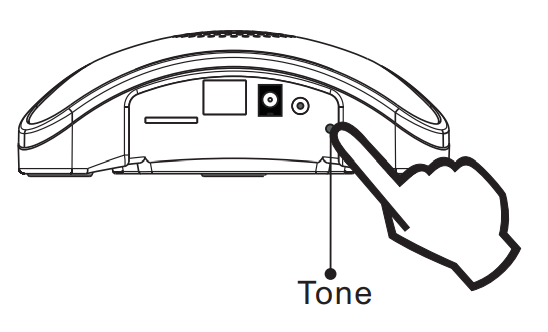
ON/OFF: power switch(turn on/off the wireless alarm receiver) set button(add/delete the sensors of the wireless alarm receiver) Tone: Choose the ring tones(total 35 ring tones optional) Volume:Press and hold the“ON/OFF”button first,and then press the“Tone”button to adjust the alarm volume,total 4 volume levels.
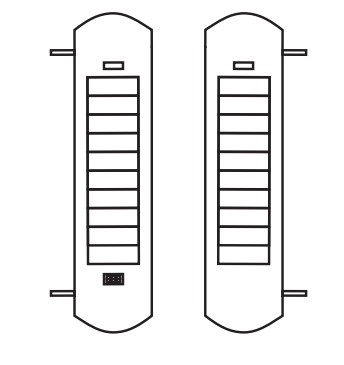
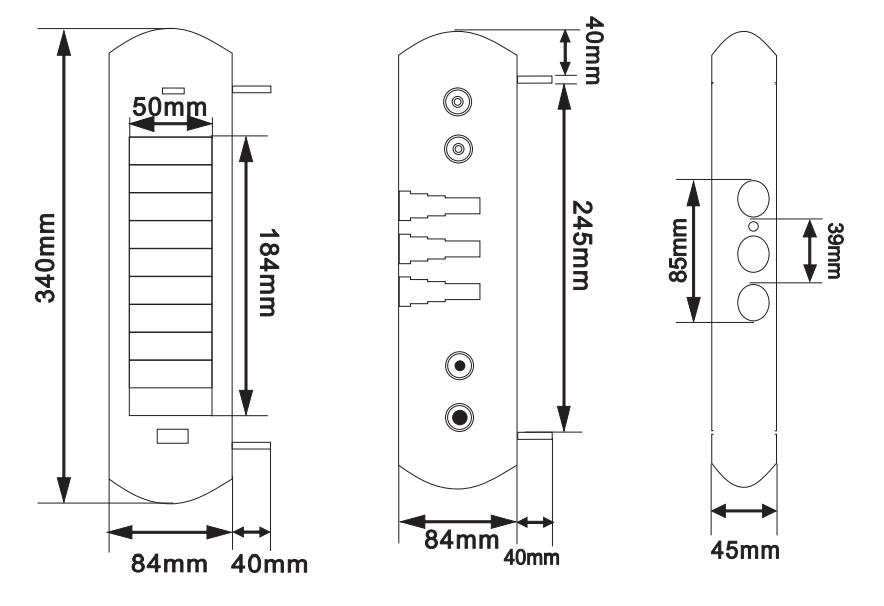
Solar & Wireless Photoelectric Beam Sensor
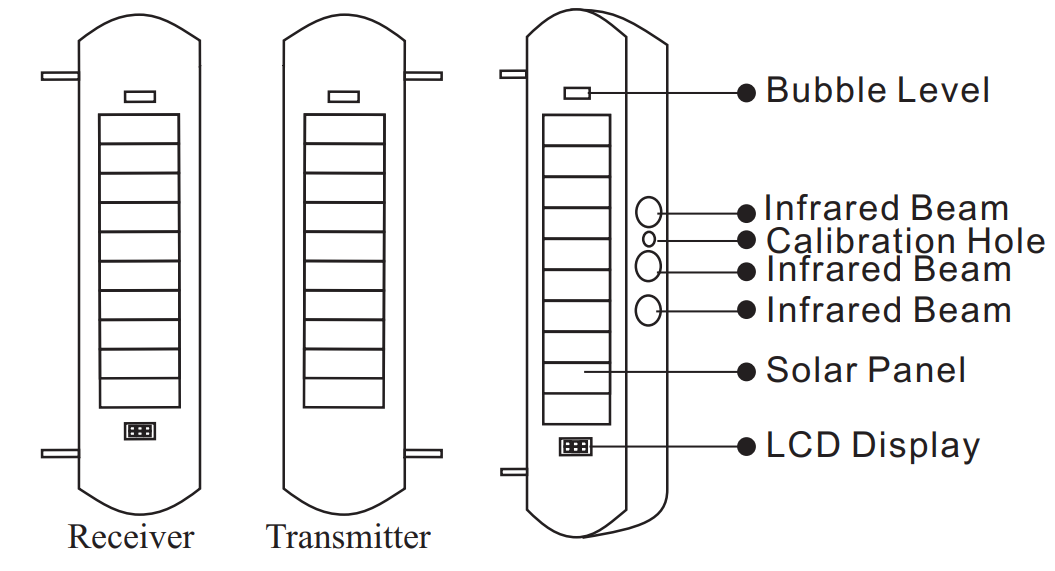
- Bubble Level: easy to know the beams be installed horizontally Infrared Beam: used to detect the intruder
- Calibration Hole: easy to align with another beam sensor if the beams apart far away
- Solar Panel: charge the battery of the beam sensor even in cloudy or rainy days
- LCD Display: easy to know how well the beam sensor be aligned with each other
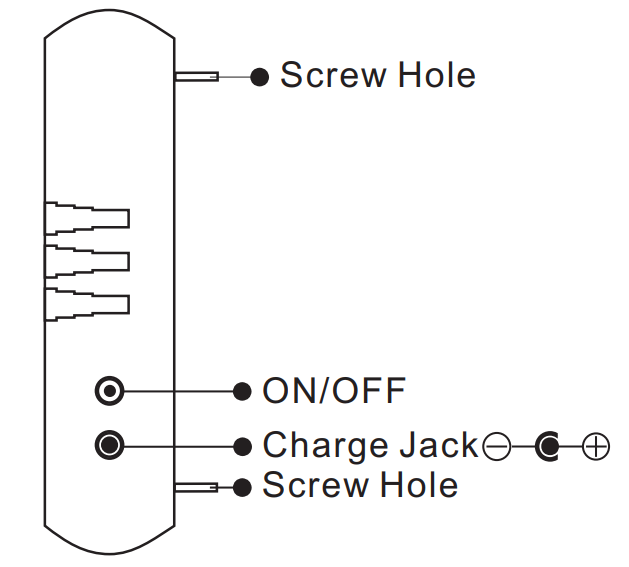
- ON/OFF: turn on/off the solar beam sensor
- Charge Jack:pull out the red plug to charge the solar beam sensor by DC5V-12V power adapter if the battery of the beam sensor go flat Screw
- Hole: used to fix the installation accessories
Opration Instructions
Step 1
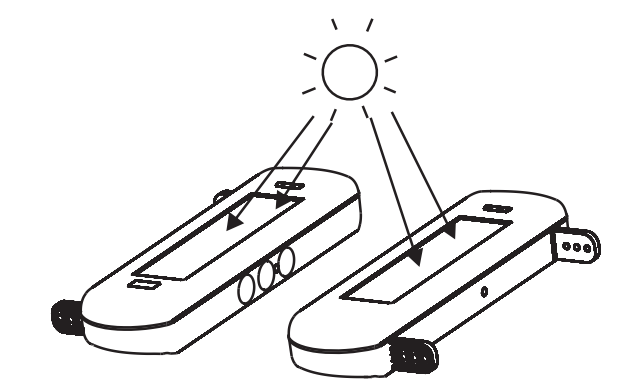
Charge the solar beam sensors before use
Method 1: charge the solar beam sensors by the sunlight for a whole day
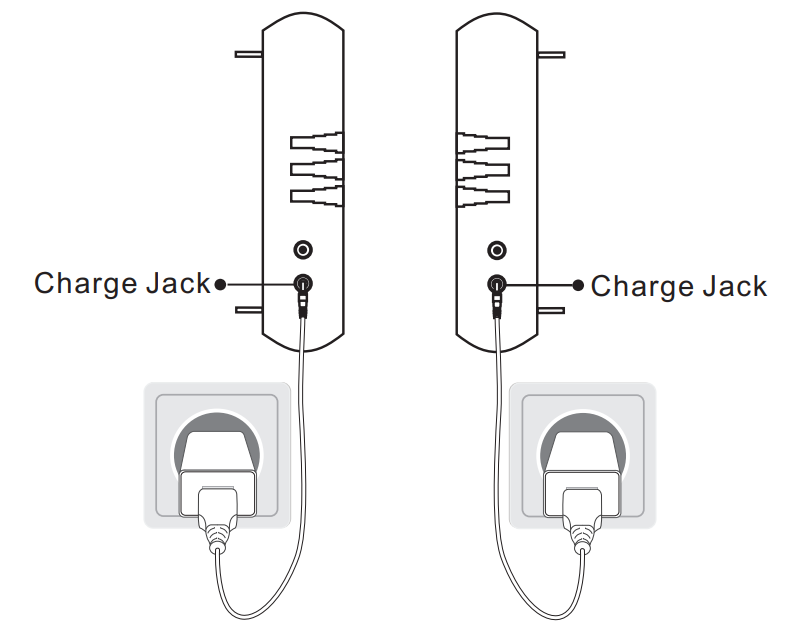
Method 2: pull out the red plug to charge the solar beam sensors for 4 hours by the DC5V-12Vpower adapter(the power adapter of the alarm receiver is available)please insert the red plug back to the charge jack after charging.
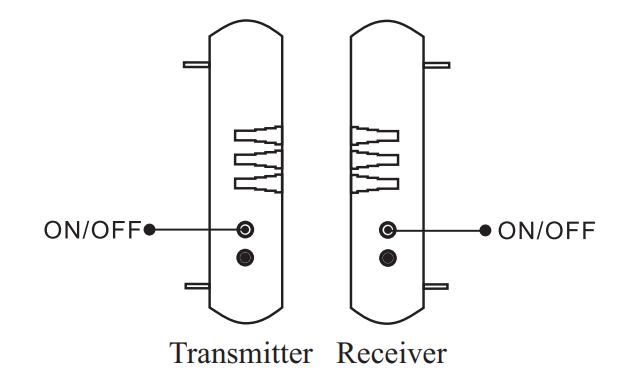
Step2
Turn on the Solar&Wireless Photoelectric Beams: Press the ON/OFF button 3 times(Both the transmitter and receiver)
Step 3
Make sure the beams aligned with each other
(bleep prompt and LCD display more than “100” means the beam sensors work properly, Please note: “100” is a reference value, different weather will get different value and bigger value means better alignment)
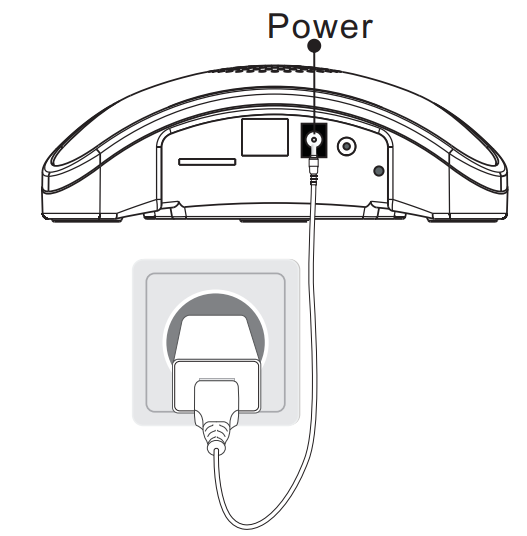
Step 4
Power on the wireless alarm receiver by the power adapter
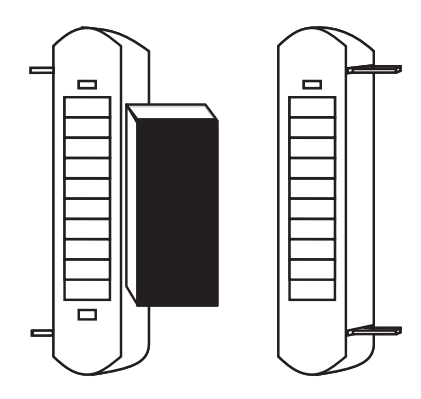
Step 5
Trigger the sensor
(completely block all the 3 infrared beams by thick materials, such as books,and the wireless alarm receiver will alarm for several seconds)
Step 6
Press“Tone” button to choose the ring tone for this sensor, there are 35 tones to choose from;
Step 7
Adjust the alarm volume.
Press and hold the“ON/OFF”button first,and then press the“Tone”button to adjust the alarm volume, total 4 volume levels adjustment.
STEP 8
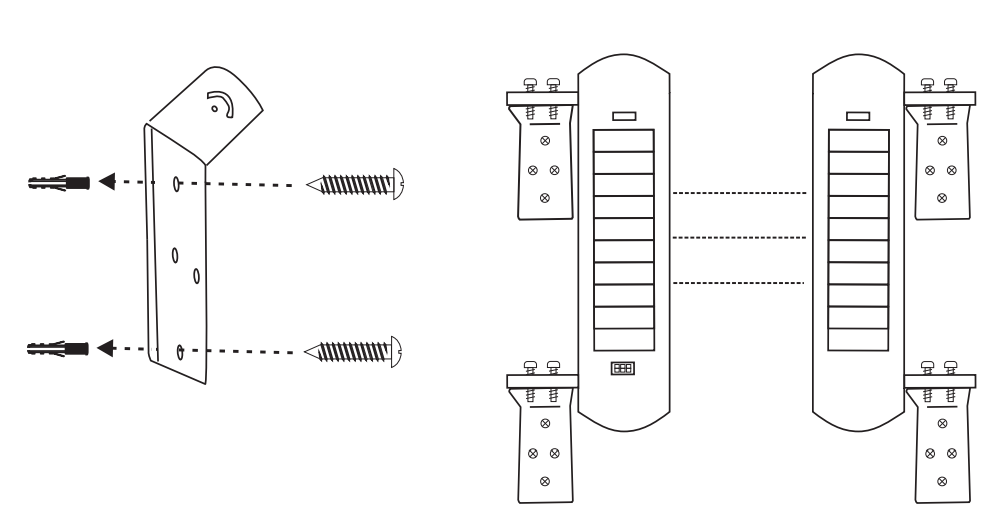
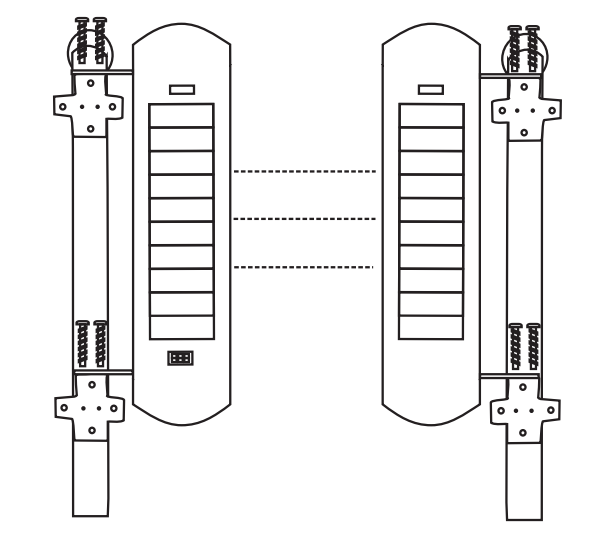
Installation
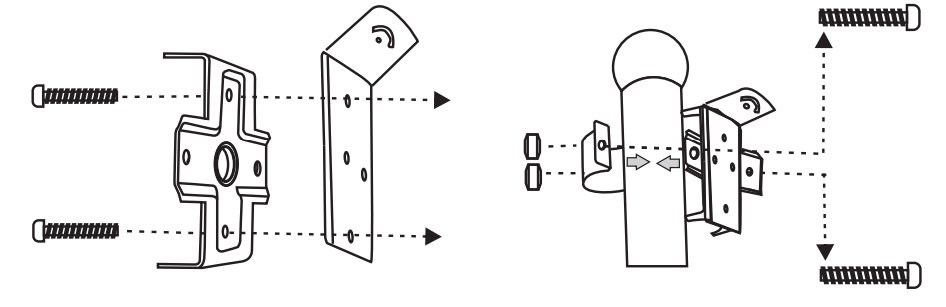
1 installation method
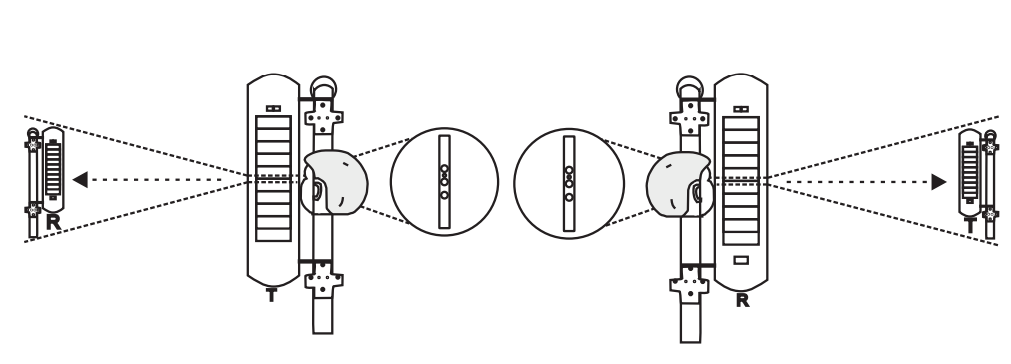
Calibration
- Place the beam sensor on the same height.
- Ensure the beam sensor is vertical (the bubble of the horizontal pipe should be in the middle).
- Adjust the direction of the beam sensor to make them align with each other.
- Calibration Hole:used to find another device.
- LCD Display:used to know how well the beam sensor be aligned with each other (the LCD Display will shut down in an hour).
- bleep prompt and LCD display more than “100” means the beam ( sensors work properly,
Please note: “100” is a reference value, different weather will get different value and bigger value means better alignment - Tighten the screws to ensure the position and direction will not be moved easily.
2 Installation method
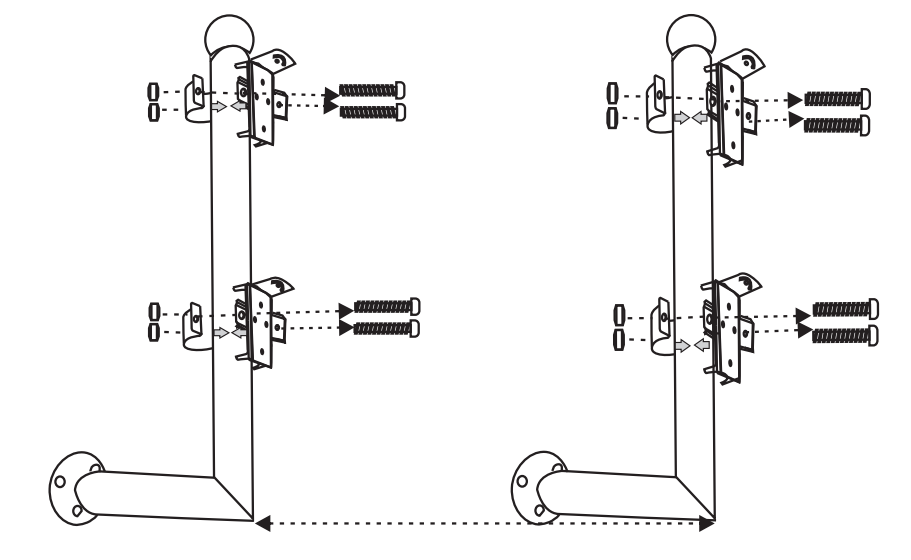
Calibration
- Place the beam sensor on the same height.
- Ensure the beam sensor is vertical (the bubble of the horizontal pipe should be in the middle).
- Adjust the direction of the beam sensor to make them align with each other.
Calibration Hole:used to find another device.
LCD Display:used to know how well the beam sensor be aligned with each other (the LCD Display will shut down in an hour). - bleep promote and LCD display more than 100 means the beam sensors work properly,
Please note: “100” is a reference value,different weather will get different value and a bigger value means better alignment. - Tighten the screws to ensure the position and direction will not be moved easily.
Step 9
Test and verify the alignment
Block the infrared beams by thick materials(such as books)
- Block only top 2 beams---No Alarm
- Block only bottom 2 beams---No Alarm
- Block all 3 beams---Alarm
The same way to test and verify another sensor
Other Settings
- How to add extra sensors to the wireless alarm receiver (up to 32 sensors can be added to the receiver)
- Power on the wireless alarm receiver by the power adapter;
Press and hold the “ON/OFF” button for 5 seconds and release the button when the indicator light flashing;
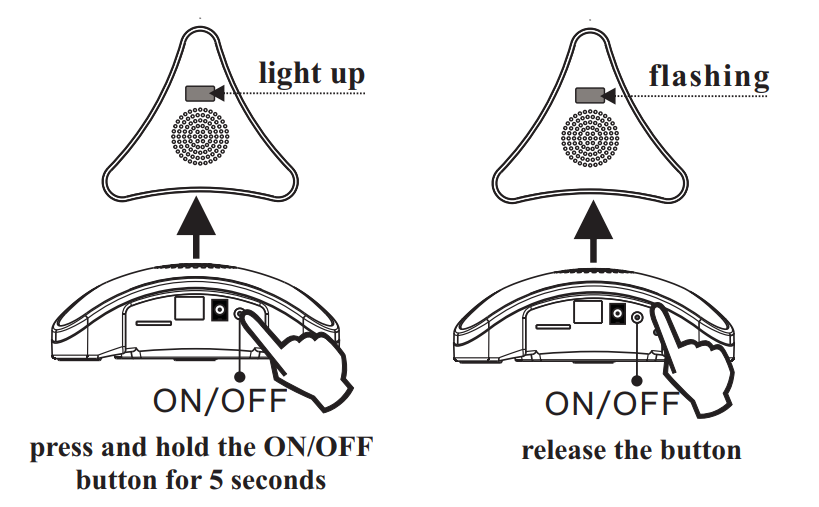
Trigger the sensor (for example,trigger the solar& wireless photoelectric beam sensor)
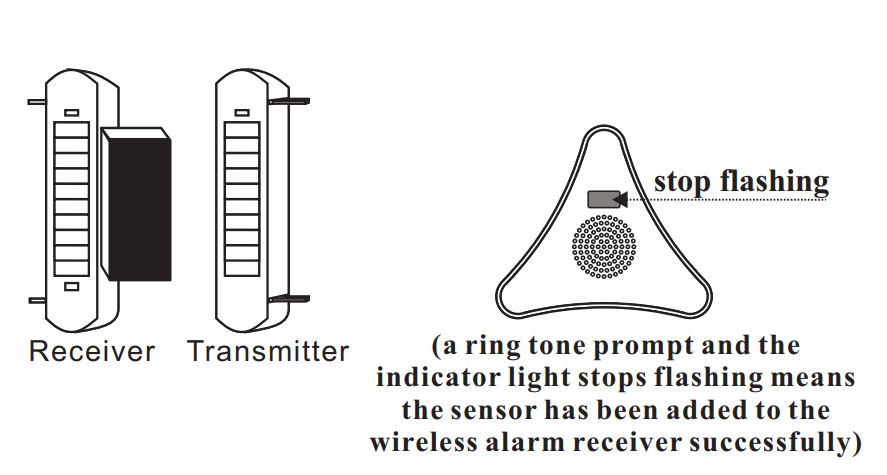
- Trigger the sensor again to confirm the sensor has been added to the wireless alarm receiver already.
Press“Tone ”Button to choose the ring tone for this sensor, there are 35 tones to choose from
- How to delete the sensors of the wireless alarm receiver
- Power on the wireless alarm receiver by the power adapter
Press and hold both the “ON/OFF” button and “Tone”button for 10 seconds and release the buttons when you heard a long bleep; Note: all the sensors will be deleted by this operation;
- How to adjust the alarm volume
- Power on the wireless alarm receiver by the power adapter
Press and hold the“ON/OFF”button first,and then press the“Tone”button to adjust the alarm volume,total 4 volume levels
- How to change the ring tone for the sensors
- Power on the wireless alarm receiver by the power adapter
- Trigger the sensor first,and then press the "Tone" button to choose the ring tone for this sensor; Same steps for other sensors which have been added to the wireless alarm receiver already.
- How to adjust the sensitivity of the solar beams
Sensitivity of the solar beams divided into 2 types: 200ms(factory default) and 100ms Please follow up the operation steps if you want to adjust the sensitivity of the beams to be 100ms- Turn on the solar beams by press the ON/OFF button 3 times(both the transmitter and receiver)
- Press and hold the ON/OFF button for 10 seconds and release the button when you hear bleep prompt,and then press the ON/OFF button 6 times quickly(both the transmitter and receiver)
Note: if adjust the sensitivity of the beams back to factory default (200ms),press the ON/OFF button 5 times - Make sure the solar beams aligned with each other Step
- Press and hold the ON/OFF button for 10 seconds and release the button when you hear bleep prompt (only the receiver)
- Press the ON/OFF button 4 times(only the receiver)
- Adjustment is successful when you heard 6 times bleep prompt
Technical Parameters
Wireless Alarm Receiver
Technical parameters
Item | Technical Parameters |
Working Voltage | DC5V |
Working Current | Static Current 20mA; Alarming Current 300mA |
Wireless Frequency | 433MHz FSK+FHSS |
Backup Battery | 4 pieces AA 1.5V batteries(package is not included) |
Solar&Wireless Photoelectric Beam Sensor
Technical parameters
Item | Technical Parameters |
Infrared Detection Range | 100m(300 feet) |
Wireless Transmission Range | 1KM(3000 feet) |
Beam Quantity | 3 |
Wireless Frequency | 433MHz FSK+FHSS |
Maximum Trigger Number In24 Hours | ≤200 times |
Working Voltage | 3.3V |
Battery Type | Chargeable LiFePO4 Battery |
Battery Capacity | Transmitter:500mAh,Receiver:500mAh |
Static working Current | ≤0.5mA |
Infrared Wavelength | 940nm±20nm |
Solar Panel Output Current | 1800L ux illumination levl: ≥2mA (Remarks:The outdoor illumination intensity on rainy days is about 2000L ux) |
Working Temperature Range | -22°F to 158°F(-30℃ to 70℃) |
Troubleshooting of Saferhome Wireless Alarm Receiver
While the Wireless Alarm Receiver is designed to be highly reliable, there are a few common issues that users may encounter. Here are some solutions to the most common problems
- No Alerts Received: Ensure that the receiver is properly connected to your home network and that your wireless sensors are functioning correctly.
- Intermittent Connectivity: Move the receiver closer to your wireless router or consider upgrading to a more powerful router to improve connectivity.
- False Alarms: Check the placement of your wireless sensors to ensure that they are not being triggered by nearby pets or other sources of interference.
Warning: Always follow the manufacturer's instructions when installing and using the Saferhome Wireless Alarm Receiver. Failure to do so could result in injury or damage to the product.
Pros & Cons of Saferhome Wireless Alarm Receiver
Pros
- Integrates seamlessly with Saferhome's wireless sensors and cameras
- Provides real-time alerts and notifications when security system is triggered
- Reliable and secure monitoring for your home or business
- Easy to install and use
Cons
- Requires a stable and reliable internet connection
- May be subject to false alarms if wireless sensors are not placed correctly
- Higher price point compared to some competing products
Customer Reviews
Customers have generally praised the Wireless Alarm Receiver for its ease of use, reliability, and high-quality construction. However, some have noted that the product is on the pricier side compared to similar offerings from other brands. The most common complaint is intermittent connectivity issues, which can be resolved by moving the receiver closer to the wireless router or upgrading to a more powerful router.
Faqs
A wireless alarm receiver from Saferhome—what is it and how does it operate?
If I have a Saferhome wireless alarm receiver, how do I configure it?
Can the Saferhome Wireless Receiver be used with any kind of alarm system?
Can the Saferhome Receiver be used in conjunction with other smart home devices?
If my Saferhome Receiver isn't receiving signals, what am I to do?
Is it possible to change the Saferhome Receiver's alarm volume?
If my Saferhome Receiver keeps going off, what's the best way to fix it?
If an alarm is detected by the Saferhome Receiver, how will I be notified?
Does the Saferhome Wireless Alarm Receiver run on batteries or does it need to be plugged in?
Is a warranty included with the Saferhome Wireless Alarm Receiver?
Leave a Comment