Configure & Setup: Sensi Touch 2 smart thermostat RS01-SG Setup Guide
Content
Introduction of Sensi Smart Thermostat RS01-SG
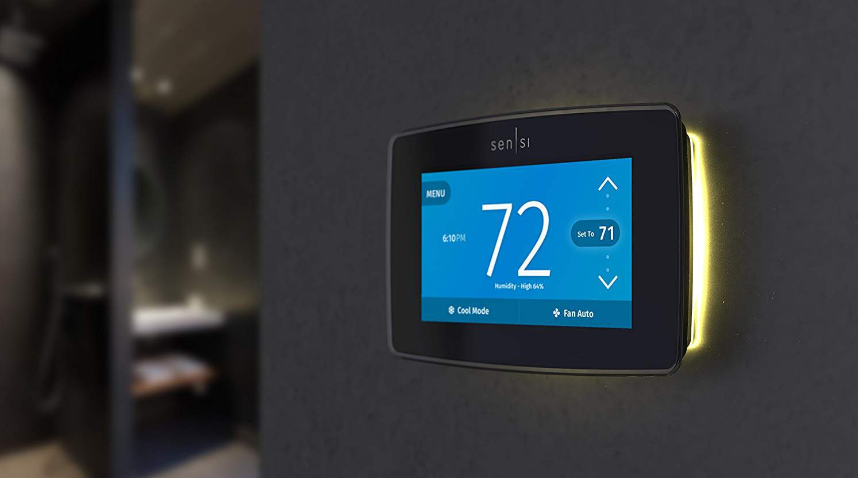
The Sensi Touch 2 Smart Thermostat RS01-SG is a state-of-the-art device designed to give you ultimate control over your home's heating and cooling systems. With its sleek touchscreen display and intuitive interface, this smart thermostat is easy to use and can help you save money on your energy bills. The estimated price for the Sensi Touch 2 Smart Thermostat RS01-SG is $169, and it is now available for purchase.
RS01-SG Detailed Specifications
The Sensi Touch 2 Smart Thermostat RS01-SG comes with a range of features designed to make your life easier and more convenient. Here are some of its key specifications:
- 7-day scheduling with flexible programming options
- Touchscreen display with adjustable temperature and humidity levels
- Integration with Amazon Alexa, Google Assistant, and Apple HomeKit
- Smart alerts for extreme temperature changes and filter changes
- Energy Star certified and designed to meet the needs of most home heating and cooling systems
ENSOR INSTALLATION
Follow these directions to pair up to 15 Sensi room sensors to your Sensi Touch 2 smart thermostat.
Add sensor to your thermostat
At the thermostat, tap on the menu icon in the top left corner.

Tap on Remote Sensors.

Tap on Add Sensor.

Connect your sensor
Insert batteries into the sensor and tap OK on the Touch 2 screen
If the sensor already had batteries or was already paired, press and hold the Reset button located in the battery compartment for 5 seconds.

Compatible sensors will appear on your Touch 2 screen. Tap Connect next to a sensor to pair it.
Pro Tip: Pair one sensor at a time so you know which one you’re setting up, if you have multiple sensors.
It may take a minute to connect. If the connection is successful, you’ll see a green check mark.

You will then be prompted to go into your Sensi app to rename the sensor.

Name your sensors
In the Sensi Smart Thermostat RS01-SG, tap on your Touch 2 thermostat. You will see your sensors above the room temperature. Tap Sensors to view your sensor status and rename them.

- IOS: Tap the i icon next to the sensor
- Android: Tap the 3 vertical dots.
- In the Sensor Name field, rename the sensor to something that helps you remember where it is in your home such as living room, kids’ bedroom, etc.
Tap Save to save the name change.

Place or mount your Sensi Smart Thermostat RS01-SG
Place your sensors in their corresponding room locations. You can choose from several install options:
- Mount the wall on using the enclosed hardware
- Assemble the enclosed stand by sliding the sensor onto the base and snap into place
- Simply place the sensor on a flat surface such as a table or shelf
For the best placement of your Sensi room sensor, make sure the sensor is 5 feet off the ground in a location facing the room with good airflow. Avoid locations that could impact the temperature reading such as in direct sunlight, near air vents, windows or direct heat sources.

Prioritize your sensors
After installing your sensors, by default, there will be a checkmark next to all sensors and the thermostat in the mobile app. This means that your temperature setpoint will be comprised of a average temperature across all of the selected devices.
To prioritize the temperature and humidity of a certain room or sensor, ensure only the sensors you want to prioritize are selected.
The temperature and humidity shown on the top of your app screen will display the average temperature across all selected devices in your home.

Detailed Description
The Sensi Touch 2 Smart Thermostat RS01-SG is a versatile and easy-to-use device that can help you take control of your home's heating and cooling systems. With its intuitive touchscreen display, you can easily adjust the temperature and humidity levels to your liking. The device also features 7-day scheduling with flexible programming options, so you can set up custom schedules for different days of the week.
One of the standout features of the Sensi Touch 2 Smart Thermostat RS01-SG is its integration with popular smart home platforms like Amazon Alexa, Google Assistant, and Apple HomeKit. This means you can control your thermostat using voice commands or from your smartphone, even when you're not at home. The device also features smart alerts that can notify you of extreme temperature changes or when it's time to change your air filter.
Troubleshooting of Sensi Smart Thermostat RS01-SG
My sensor won’t connect
If you see a failed message or your sensor does not appear on the screen after the thermostat looks for it, try this:
- Hold the Reset button on the sensor for 5 seconds and then try to connect again.
- If resetting the sensor does not work, replace with 2 new AAA batteries.
My sensor has lost connection
Remove the batteries for 5-10 seconds to power cycle it and put them back in.
Where should I place my sensors to get the most accurate temperature readings?
For the best placement of your Sensi room sensor, make sure the sensor is 5 feet off the ground in a location facing the room with good airflow.
Avoid locations that could skew the temperature reading. Also, do not paint or spray anything on your sensor or it may not function as expected.
Sensi room sensors use low frequency radio waves, not Wi-Fi, for secure connection to your Sensi Touch 2 smart thermostat. Ensure that the thermostat is within 45 feet from the thermostat, and avoid obstacles like thick walls or other devices broadcasting on a low frequency (~900MHz) like cordless phones, baby monitors, etc.
Avoid placing sensor
- In direct sunlight
- Near air vents
- Near heat sources like stoves or hot water pipes/radiators
- Do not install a sensor in an area where temperatures are not within our operating standards (in a refrigerator or greenhouse)
- On or near a window
- On or near an uninsulated surface or wall
Enclosed area where the air won’t circulate – in a closet, behind books or wall art, etc.

RS01-SG Pros & Cons
Pros
- Easy to use with intuitive touchscreen display
- Integrates with popular smart home platforms for added convenience
- Smart alerts can help you stay on top of temperature changes and maintenance needs
- Energy Star certified to help you save money on your energy bills
Cons
- May be more expensive than some other thermostat options
- Requires a C-wire for installation, which may not be present in all homes
- Some users may find the device's Wi-Fi connectivity to be unreliable at times
Customer Reviews Sensi Smart Thermostat
Customers who have used the Sensi Touch 2 Smart Thermostat RS01-SG generally have positive things to say about the device. Many praise its easy-to-use interface and smart home integration, while others appreciate the energy savings and smart alerts. However, some users have reported issues with Wi-Fi connectivity and installation requirements.
Faqs
What is RS01-SG Sensi Touch 2 Smart Thermostat?
How do I install RS01-SG Sensi Touch 2 Smart Thermostat?
Can my smartphone manage the Sensi Touch 2 Smart Thermostat RS01-SG?
Use the Sensi Touch 2 Smart Thermostat RS01-SG with heating and cooling systems?
How much is the RS01-SG Sensi Touch 2 Smart Thermostat?
How energy-efficient is Sensi Touch 2 Smart Thermostat RS01-SG?
Has the Sensi Touch 2 Smart Thermostat RS01-SG a battery backup?
Is the Sensi Touch 2 Smart Thermostat RS01-SG compatible with numerous HVAC systems?
How to reset Sensi Touch 2 Smart Thermostat RS01-SG?
How long does the Sensi Touch 2 Smart Thermostat RS01-SG manufacturer's warranty last?
Leave a Comment