Tenlog3d DMP Printer Machine TL-D3 User Manual
Content
Introduction
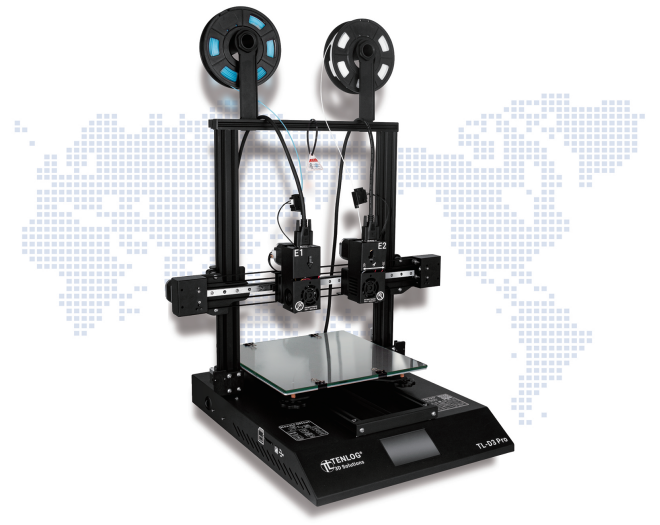
The Tenlog3D DMP Printer Machine TL-D3 is a high-performance desktop 3D printer designed for professional and industrial use. With a build volume of 260 x 260 x 300 mm, this printer is capable of producing large and complex parts with ease. The estimated price of the TL-D3 is around $2,500, and it is now available for purchase.
Parts List
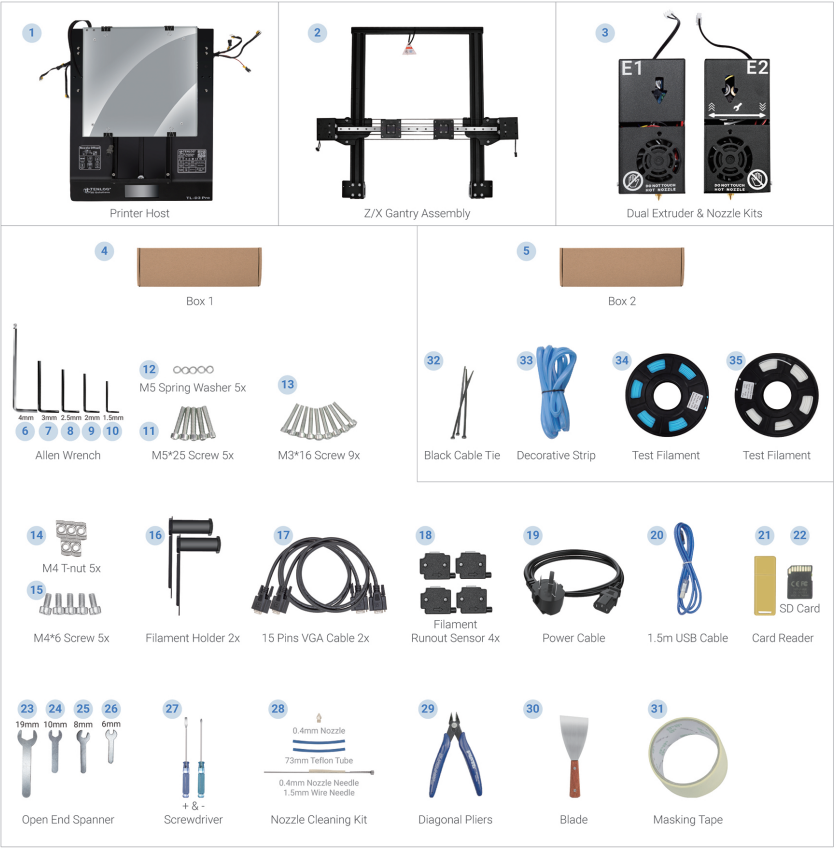
Detailed Specifications
The TL-D3 is equipped with a dual-extruder system, allowing for the use of two different materials or colors in a single print. The printer has a maximum print speed of 150 mm/s and a layer resolution of 100 microns, ensuring high-quality and detailed prints. The machine also features a heated build plate, which can reach temperatures up to 100°C, making it suitable for printing with a wide range of materials including ABS, PLA, and TPU. The TL-D3 is also compatible with a variety of slicing software, providing users with the flexibility to choose the software that best meets their needs.
Tenlog3D Cura Interface Overview
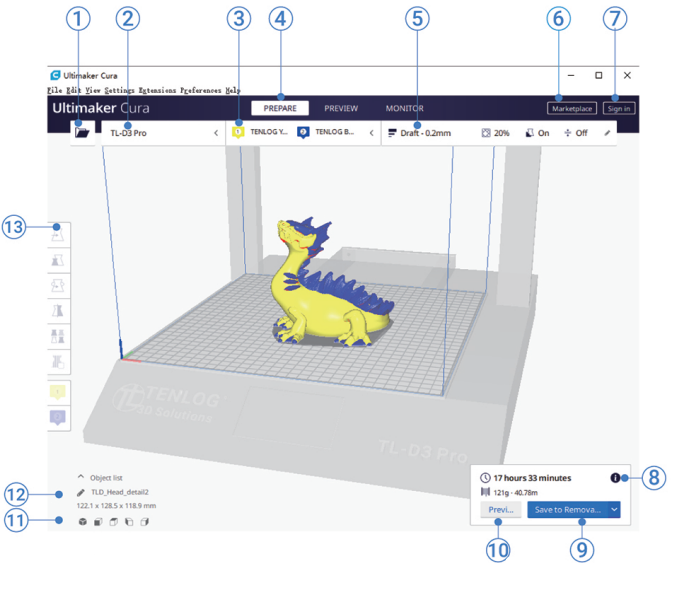
- Open file. Opens a 3D file.
- Printer selection panel. Displays the selected printer.
- Configuration panel. Contains the material and print core setup.
- Stages. The prepare. Preview and monitor stage. Each stage is arranged to efficiently go through each 3D printing step.
- Print settings panel. Contains all slice strategy parameters.
- Marketplace. Contains plugins and material packages.
- Ultimaker account. Allows access to cloud functionality, Marketplace plugins and print profiles, backups and more.
- Action panel. Contains an action button dependent on the current stage.
- Print over network. Save to removable disk or save to file.
- Preview. Proceeds to the next stage, the preview stage.
- Camera position tool. Easily positions the camera to default show default viewing angles.
- Model information. Contains the 3D model name and dimensions of all printable models on the build plate.
- Adjustment Tools. This allows you to easily position, scale, and rotate models on the build plate in the most efficient way.
Description
The Tenlog3D DMP Printer Machine TL-D3 is a versatile and reliable 3D printer that is suitable for a wide range of applications, including prototyping, manufacturing, and education. The printer is easy to use, with a touchscreen interface and intuitive software. The TL-D3 also features a closed print chamber, which helps to maintain a consistent temperature and prevents warping during the printing process. Additionally, the printer has a removable build plate, making it easy to remove finished prints and prepare the machine for the next job.
How to Assemble
Assemble Z/X Gantry Assembly to the Printer Host
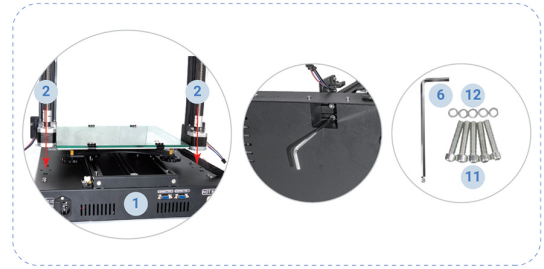
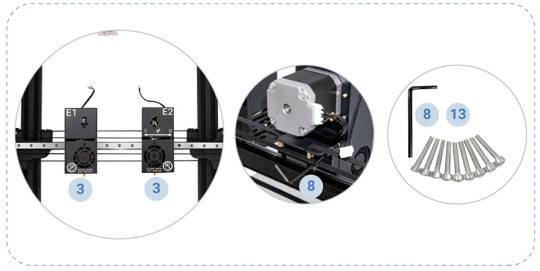
Assemble Dual Extruder & Nozzle Kits
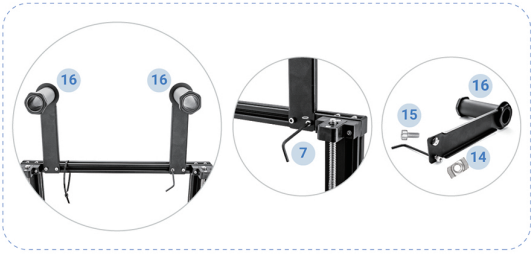
Assemble the Filament Holder
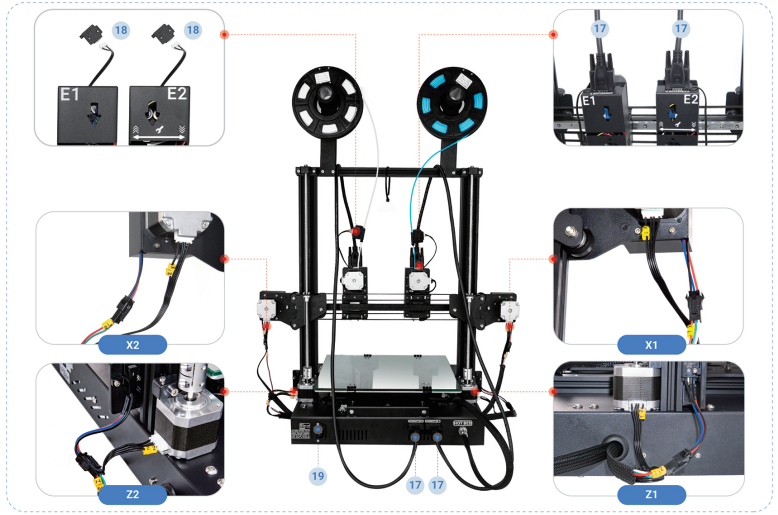
Wiring
Enable Filament Runout Detection

How to Use Touch Screen
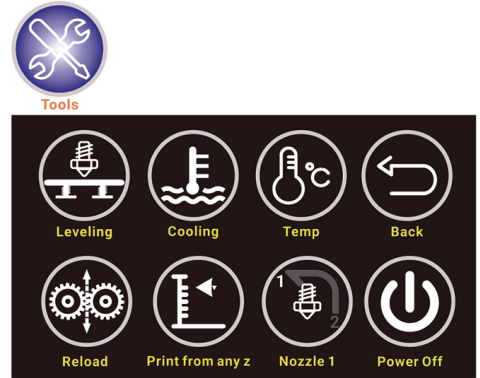
- Click on Tool button, you can get:
- Semi-automatic Leveling
- Preheat PLA ABS
- Filaments Reload
Printing from any Height etc.
- Click on the Dual Material button, you can switch the print mode:
- Dual Material
- Duplication
Mirror
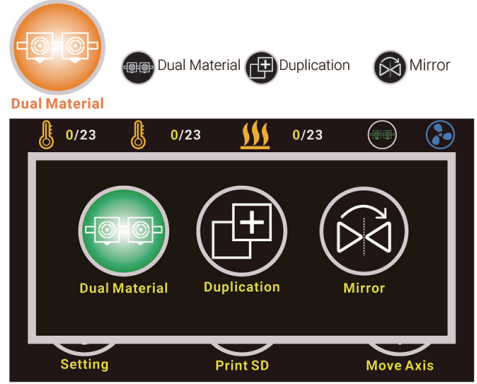
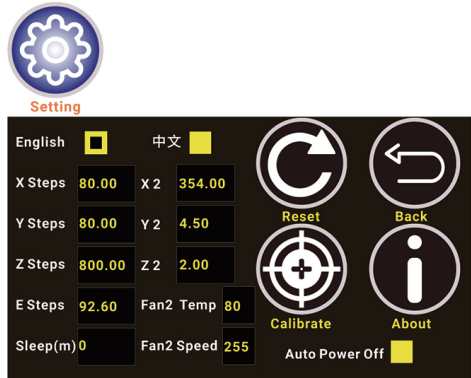
- Click on the Setting button, you can configure the printer:
- XY ZE Steps: The values of Steps per millimeter of each axis
- X2 Y2 Z2: Nozzle Offset of Nozzle 2 Relative to Nozzle 1
- Fan2 Temp : Set the startup temperature of the Nozzle Cooling Fan
Fan2 Speed: Speed of Nozzle Cooling Fan
How to Use
How to Level

How to Set Nozzle Offset

How to Print

Setup Guide
Setting up the Tenlog3D DMP Printer Machine TL-D3 is a straightforward process. First, unpack the printer and remove any protective packaging. Next, level the build plate by adjusting the thumbscrews located on each corner of the plate. Then, install the filament by threading it through the extruder and feeding it into the printer. Once the filament is loaded, use the touchscreen interface to select the desired print settings and start the print. It is also recommended to perform a test print to ensure that the printer is properly calibrated and functioning correctly.
Safety Alerts
- Minors are not allowed to use alone
Do not plug or unplug under power

- Double check voltage before first use
Do not touch the hot nozzle and hat bed

- A grounded wire is required
Do not touch any loving art

Troubleshooting
Common issues with the TL-D3 include printing errors, such as warping or poor layer adhesion, and connectivity issues with the software. To address printing errors, it is recommended to check the print settings, such as temperature and layer height, and ensure that the filament is properly loaded. Connectivity issues can often be resolved by updating the printer's firmware and checking for any software updates.
Pros & Cons
- Pros:
- Large build volume
- Dual-extruder system
- Heated build plate
- Compatible with a variety of materials
- Easy to use
- Cons:
- Expensive
- Large footprint
- Closed print chamber may not be suitable for all users
Faqs
What is the build volume of the Tenlog3D DMP Printer Machine?
What materials can the Tenlog3D DMP print with?
For the first time, how do I configure the Tenlog3D DMP Printer Machine TL-D3?
How do I level the build plate on the Printer Machine?
If the print isn't adhering to the bed, what should I do?
How do I load filament into the Tenlog3D?
How can I correct inconsistent or uneven extrusion?
What is the layer resolution of the Tenlog3D DMP Printer Machine?
How can I keep my printer operating at its best?
How do I perform a test print on the Tenlog3D DMP Printer Machine TL-D3?
Leave a Comment
