Xp-Pen Graphic Display Artist 22 Pro User Manual | Connection & Installation
Content
Introduction
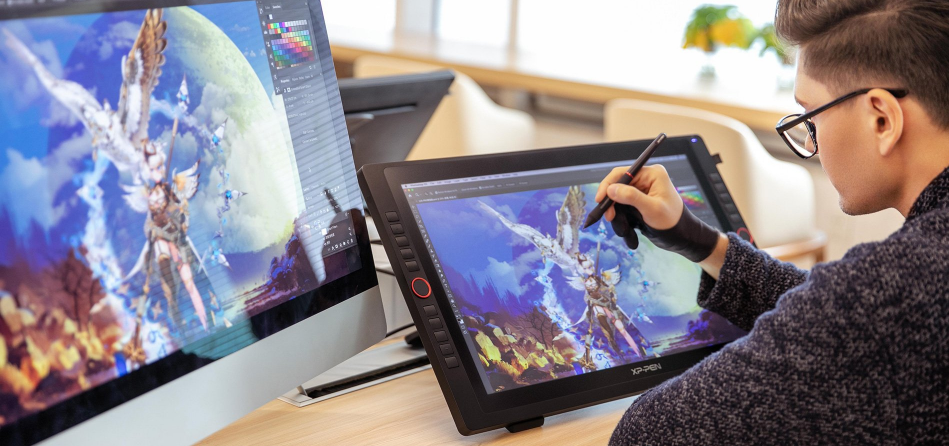
The XP-Pen Graphic Display Artist 22 Pro is a professional-grade drawing tablet made for artists and designers, and it will be covered in this article. This tablet provides accurate control and a natural drawing experience with its 21.5-inch HD display and 8192 levels of pressure sensitivity. With its wide color gamut support and customizable shortcut keys, it's the perfect tool for graphic design and digital production.
Detailed Specifications
| Brand | XP-PEN |
|---|---|
| Manufacturer | XP-PEN |
| Place of Business | Chino Hills, CA 91709 |
| Model | Artist 22R Pro |
| Part Number | Artist 22R Pro |
| Memory Type | RDRAM |
| OS | Windows |
| Number of Processors | 1 |
| Hardware interface | VGA, USB, HDMI |
| Compatible Devices | Personal Computer |
| Special features | Adjustable, Stylus Dock |
| Mounting Hardware | Stand, Cleaning Cloth, Pen Holder, Power Cord, HDMI Cable, Digital Pen, Stylus |
| Standing screen display size | 21.5 Inches |
| Display type | LCD |
| Display Resolution | 1920x1080 |
| Maximum vertical resolution | 1080 Pixels |
| Batteries included | No |
| Batteries Required | No |
| Connector Type | USB, HDMI |
| Has auto-focus | No |
| Has Programmable Buttons | No |
| Manufacturer | XP-PEN |
| Item model number | Artist 22R Pro |
| Product Dimensions | 57 x 33.48 x 4.48 cm; 7 kg |
| ASIN | B07ZJLXDZP |
Product Overview
.png)
- Display/Working area
- Power indicator light
- On, Blue: The Artist 22 Pro is connected to your computer and powered on.
- On, Red: The Artist 22 Pro is powered on, but not connected to a computer.
- Off: The Artist 22 Pro is powered off.
- Power button
- Menu button
- + button
- – button
- Display auto adjust button
- VGA port
- DVI port
- HDMI port
- Power jack
- USB port
- Stand adjustment lever
- Stand
Active Area
.png)
Stylus
.png)
- Pen tip
- Power indicator
- On/red: Low battery.
- On/green: Battery is charging.
- Off: Battery is fully charged.
- Barrel button 2
- Barrel button 1
- Charger port
NOTES: Barrel button functions can be customized in the tablet’s driver settings.
Pen Tip Replacement
.png)
- Turn the pen stand upside-down and insert the stylus tip into the hole in its center. Tilt the stylus slightly so that the tip catches on the edge of the hole, then pull the stylus and pen stand apart to remove the pen tip.
- Twist the pen stand’s top half counter-clockwise to separate it from the bottom.
- Take a new pen tip from the inside of the pen stand.
Pen Stand
.png)
Connecting the Artist 22 Pro
- Connect the Artist 22 Pro to your computer via the included USB cord.
- Connect the Artist 22 Pro’s power cord. Plug the cord into the included adapter, then into a wall outlet.
Connect the Artist 22 Pro to your computer via the included HDMI cord.
.png)
Driver Installation
Supported Operating Systems: Windows 10, 8, or 7
NOTES
- Disable any antivirus or firewall software and close any non-essential background software before beginning the installation. Some software, such as OneDrive and Dropbox, may monopolize important files and prevent a successful installation. On Windows computers, check the system tray on the bottom-right of the screen and close any software unrelated to your computer hardware.
- Uninstall any existing tablet software before attempting to install the Artist 22 Pro driver. Other tablet drivers will conflict with the Artist 22 Pro driver or prevent installation entirely.
- You can download the latest driver version from the XP-Pen website (http://www.xp-pen.com). If you choose to download the driver from the website, be sure to extract the .zip file contents before running “.exe” or “.pkg.”
Windows
- Connect the Artist 22 Pro to your computer using the included HDMI, USB & Power cords. Turn on the tablet.
- Please download the Artist 22 Pro latest driver from the support section of our website.
- Extract the “.zip” file contents before running “.exe”.
- After a successful installation, the driver’s icon ( ) will appear in your system tray and on your desktop. If the icon is not present, uninstall the driver, reboot, and repeat step 2.
(Recommended) Open [Control Panel] > [Display], then set Change the size of text, apps, and other items to 100%.
.png)
- In [Control Panel] > [Display], change your dual monitor settings to Extend mode/Extend these displays.
- In Extend mode, set your Artist 22 Pro to monitor 2 and choose a resolution of 1920x1080.
In Duplicate these displays mode, set both of your monitors’ resolutions to 1920x1080.
.png)
- Apply and exit.
- Double-click the driver’s system tray icon to open your tablet settings, then set your Artist 22 Pro to Monitor 2 on “Current screen.” Apply and exit.
Note: To use Paint Tool Sai (SAI) with the Artist 22 Pro, please open your computer's Display setting and set “Size of text, apps, etc.” to 100%.
Mac
- Connect the Artist 22 Pro to your computer using the included HDMI, USB & Power cords. Turn on the tablet.
- Please download the Artist 22 Pro latest driver from the support section of our website.
Extract the “.zip” file contents before running “.pkg”.
.png)
- If you run into the error message below, please complete the following steps:
Open “System Preferences,” then “Security & Privacy”.
.png)
Click “Open Anyway” button.
.png)
Input your username and password, then click “Unlock.”
.png)
Open [System Preferences] > [Display]. In the Display tab, set your resolution to Default for display.
.png)
- In the Arrangement tab, you may choose to Mirror Displays. With Mirror Displays enabled, both monitors’ resolutions should be set to 1920x1080.
- Open [Finder] > [Applications] > [Touch Tablet] > [Pen Tablet Setting].
In the Monitor tab, set Monitor Mapping to Color LCD.
.png)
.png)
- With Mirror Displays disabled, set your Artist 22 Pro’s resolution to 1920x1080.
- Open [Finder] > [Applications] > [Touch Tablet] > [Pen Tablet Setting].
In the Monitor tab, set Monitor Mapping to Artist 22 Pro.
.png)
Description
The XP-Pen Graphic Display 22 Artist Pro is a high-quality pen display designed for professional digital artists and graphic designers. Its large screen and full HD resolution provide a clear and spacious canvas for your artwork, while its tilt functionality and pressure sensitivity allow for precise and expressive brushstrokes. The pen display is also compatible with a variety of devices and has a number of ports for easy connectivity. Whether you're working on detailed illustrations or designing graphic layouts, the XP-Pen Display Graphic Artist 22 Pro is a reliable and versatile tool for all your digital art needs.
Driver Settings UI
Windows
The Artist 22 Pro's driver settings can be opened in two ways: Double-click the driver's icon ( ) in system tray or your desktop.
Driver UI
.png)
Barrel Button Settings
You may customize the functions of your tablet pen's barrel buttons here. Use the “Function Key” option to program custom keystrokes..png)
Note: Pen/Eraser Toggle With the stylus in range of the Artist 22 Pro's working area, press the assigned barrel button to toggle between pen and eraser modes in compatible drawing software. The current mode will briefly be displayed on your monitor.
Click Sensitivity & Current Pen Pressure
You can adjust pen pressure to “Output” or “Press” sensitivity on here. Current Pen Pressure shows the current pressure level being exerted on your tablet and can be used to test pen pressure..png)
Current Screen
The Artist 22 Pro may be configured for use with single or dual monitors. Generally, this should be set to “Monitor1” or “Monitor 2.”.png)
Mouse Mode
Absolute (Pen) Mode: Standard tablet mode; Each point of the tablet’s work area corresponds to an absolute point on your computer display.
Relative (Mouse) Mode: Mouse mode; The tablet’s work area does not correspond to absolute points on your computer display and your pen works as a standard mouse..png)
Windows Ink
Windows Ink capability can be toggled on and off here. Enabling this will allow support for Windows Ink and applications that run using Windows Ink..png)
Calibration
The Calibration tab allows you to set up calibration for your tablet..png)
Display Setting
Rotate: You may rotate the Artist 22 Pro’s display in this tab.
Note: The Artist 22 Pro can not adjust “Color temperature” and “User” in the display settings. This can be done through your video card settings..png)
XP-Pen Logo
If a driver update is available, you will see a blue arrow here (⤒).
Click the arrow to update your driver. Click our logo to visit our website..png)
Mac
To open the Artist 22 Pro's driver settings, open Finder > Applications > PenTabletSetting.
Driver UI
.png)
Pen
In this tab, you may customize the functions of your stylus' barrel buttons, adjust pressure sensitivity, and test your pen pressure. Pressure No Support function can disable pen pressure when drawing. Click “Default Button Setting” to revert to manufacturer settings..png)
Note: Pen/Eraser Toggle With the stylus in range of the Artist 22 Pro's working area, press the assigned barrel button to toggle between pen and eraser modes in compatible drawing software. The current mode will briefly be displayed on your monitor..png)
Monitor
The “Monitor” tab allows you to configure your tablet for use monitor1 or monitor2..png)
Calibration
The Calibration tab allows you to calibrate your tablet or rotate your display. To calibrate, click Calibration and follow the on-screen instructions. Rotate: You may rotate the Artist 22 Pro's display in this tab..png)
About
This tab displays the current version of your driver software..png)
Driver Uninstallment
Windows
In the Start menu, open [Settings] → [Apps & features]. Find “Pentablet” and click “Uninstall.” Follow the on-screen instructions.
Mac
Open [Finder] → [Application] → [Pen Tablet], then click “Uninstall Pen Tablet” and follow the on-screen instructions.
.png)
NOTE: When attempting to reinstall the Artist 22 Pro driver, be sure to reboot your computer after the uninstall is complete.
Setup Guide
To set up the XP-Pen Graphic Display Artist 22 Pro, follow these steps:
- Connect the pen display to your computer using the HDMI, USB-C, or USB-A cables provided.
- Install the XP-Pen driver and software from the XP-Pen website.
- Calibrate the pen display's screen using the calibration tool in the XP-Pen software.
- Customize the pen display's settings, such as the pressure sensitivity and tilt functionality, to your preference.
Safety Precautions
This manual uses the following symbols to ensure that the XP-PEN Tablet is used correctly and safely. Be sure to read and observe the Safety Precautions.
- Do not use this product in a control system area that requires a high degree of safety and reliability. In such a system, this product could negatively affect other electronic devices and
- Turn the power off in areas where use of electronic devices is prohibited. Turn the power off your tablet when onboard an aircraft or in any other location where use of electronic devices is prohibited, otherwise it may negatively affect other electronic devices in the area.
- Keep the product away from infants and young children. Accessories to this gadget may present a choking hazard to small children. Keep all accessories away from infants and young children.
- CAUTION: Do not place this product on unstable surfaces. Avoid placing this product on unstable, tilted surfaces or any locations exposed to excessive vibrations. This may cause the tablet to fall or impact surfaces which can
- Do not place heavy objects on top of this product. Do not place heavy objects on the product. Do not step on, or place your body weight on this product as this may cause damage.
- Avoid extreme high or low-temperature exposure to the XP-Pen tablet. Do not store this product in areas that drop below 5℃ or above 40℃. Avoid locations with excessive temperature fluctuations. This may result in damage to the product and
- Do not disassemble or modify this product. Doing so may expose you to heat, fire,
- Do not use alcohol for cleaning. Never use alcohol, thinner, benzene or other mineral solvents that may discolor and cause deterioration to the product.
- Do not expose to water. Be cautious of water and all liquids that may be near the tablet. Exposure to water or
- CAUTION: Avoid placing metallic objects and especially magnetic objects on the tablet. Placing metallic and/or magnetic objects on this product during operation may cause malfunction or permanent damage.
- Do not strike the pen against hard objects. Striking the pen against hard objects can cause damage to the pen.
- Avoid gripping the pen too tightly, and DO NOT use excessive weight/pressure on the Express Key button and pen. The stylus pen is a high-precision instrument. Avoid pressing too tightly on the Express Key button, and keep any objects from covering the pen to avoid potential damage. Keep the pen away from areas of high dust, contaminants, or any particulate
Limitation of Liability
- XP-Pen shall in no event be liable for damages resulting from fires or earthquakes, including those caused by third parties and those arising from user misuse, abuse or neglect.
- XP-Pen shall in no event be liable for incidental damages- including but not limited to loss of business income, interruption of business activities, corruption or loss of data – that arise from use or failure to use this product correctly.
- XP-Pen shall in no event be liable for damage resulting from uses not documented in this manual.
- XP-Pen shall in no event be liable for damages or malfunction arising from the connection to other devices or use of third-party software.
Troubleshooting
- Make sure the pen display is properly connected to your computer and that the cables are not damaged.
- Ensure that the pen display is calibrated correctly using the calibration tool in the XP-Pen software.
- Check that the pen display's driver and software are up to date.
- If the pen display is still not functioning properly, try restarting your computer and the pen display.
Pros & Cons
- Pro: Large, high-resolution screen provides a clear and spacious canvas for artwork
- Pro: Tilt functionality and pressure sensitivity allow for precise and expressive brushstrokes
- Pro: Compatible with a variety of devices and has a number of ports for easy connectivity
- Con: Higher price point may not be suitable for all budgets
- Con: May require calibration to ensure accurate color reproduction
Faqs
How do I know that the Artist 22 Pro driver installed successfully?
Leave a Comment