Xpertmatic Digital Angle Gauge DL1909 User Manual
Content

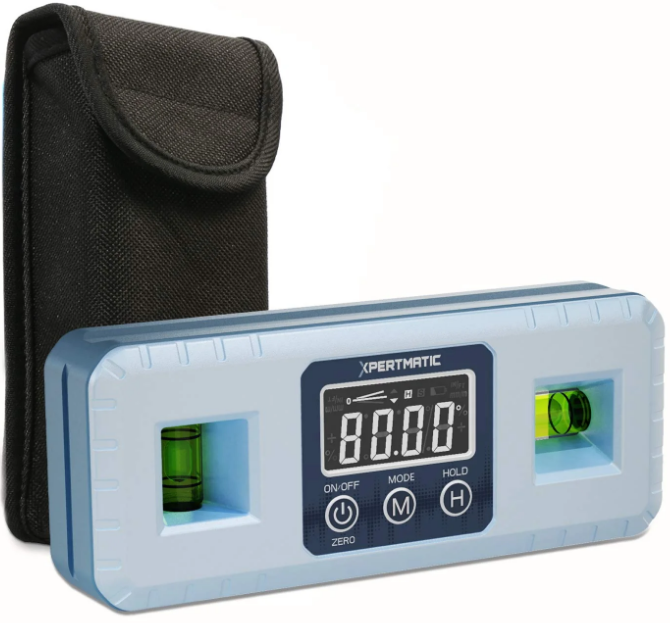
Introducing the Xpertmatic Angle Gauge DL-1909
It is an accurate level tool designed for fast and easy measurement. The Xpertmatic Angle Gauge DL-1909 is a precision measurement tool designed to accurately determine angles. With its digital display and magnetic base, it offers efficient and reliable angle measurement for various applications including woodworking, welding, and construction. The estimated price of the product is only $34.99.
Specifications
| Measuring Range | 4 × 90° (0~360°) |
Digital Display Resolution | 0.05° |
Digital Display Accuracy | ±0.1° at 0° and 90°, ±0.2° at other angles |
| Measurement Units | °degrees, %, mm/m, IN/FT |
| Power | 2 x 1.5VAAA Batteries (Not included) |
| Working Temperature | 32°F~104°F (0°C~40°C) |
| Storage Temperature | 14°F~122°F (-10°C~50°C) |
| Dimensions | 5.5 x 1.2 x 2.2 inches / 140 x30 x 56mm(L x Wx H) |
| Weight | 0.28lbs (129g) |
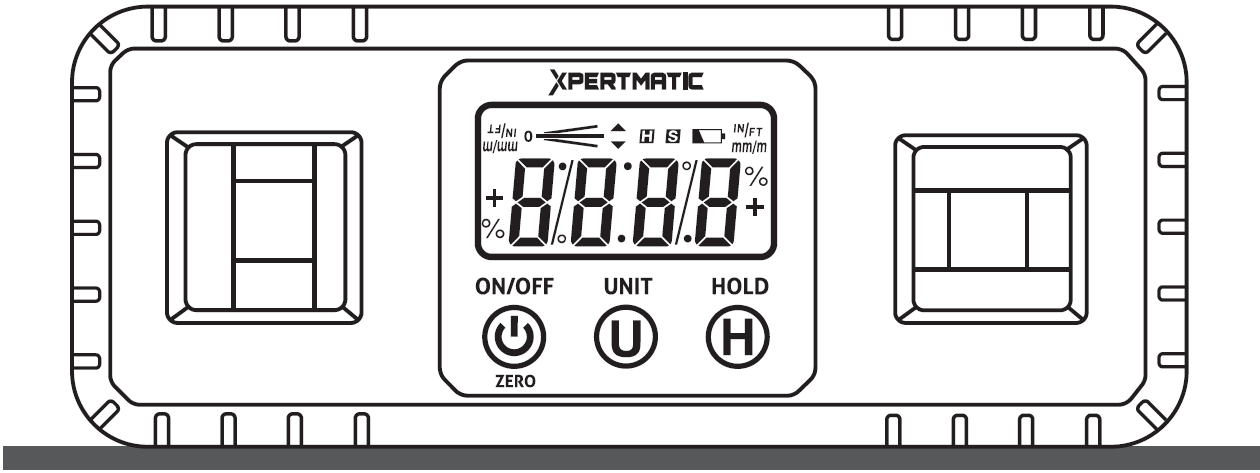
Xpertmatic Structure Introductions
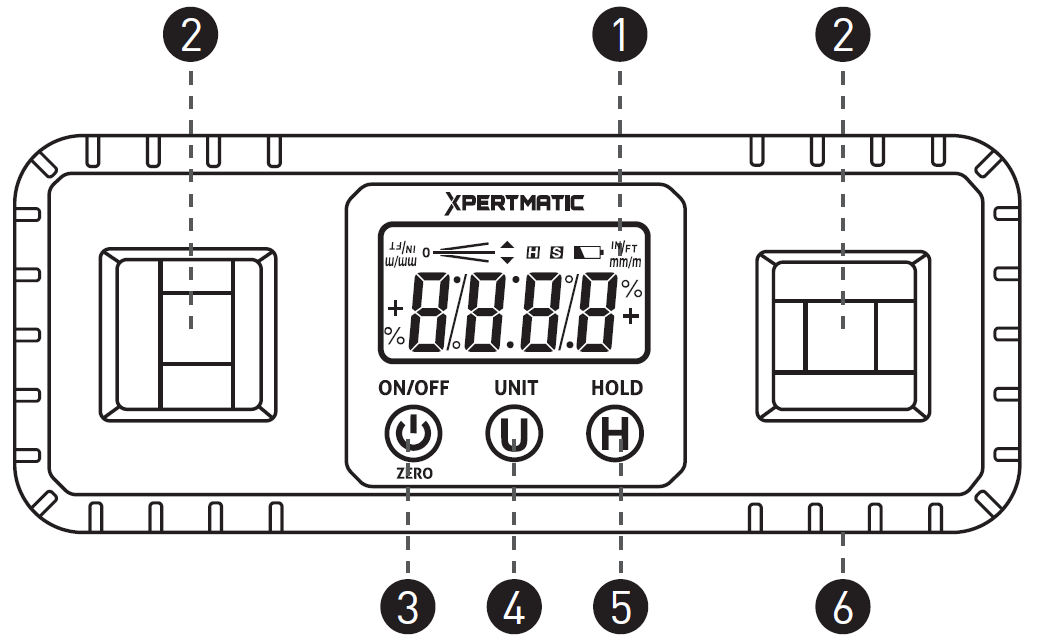
- VA Display Screen
- Level Vial
- Power ON/OFF
- Zero (Relative Measurement)
- Mode: Unit Switch
- Hold Function (Freeze the Display)
- Magnetic Base
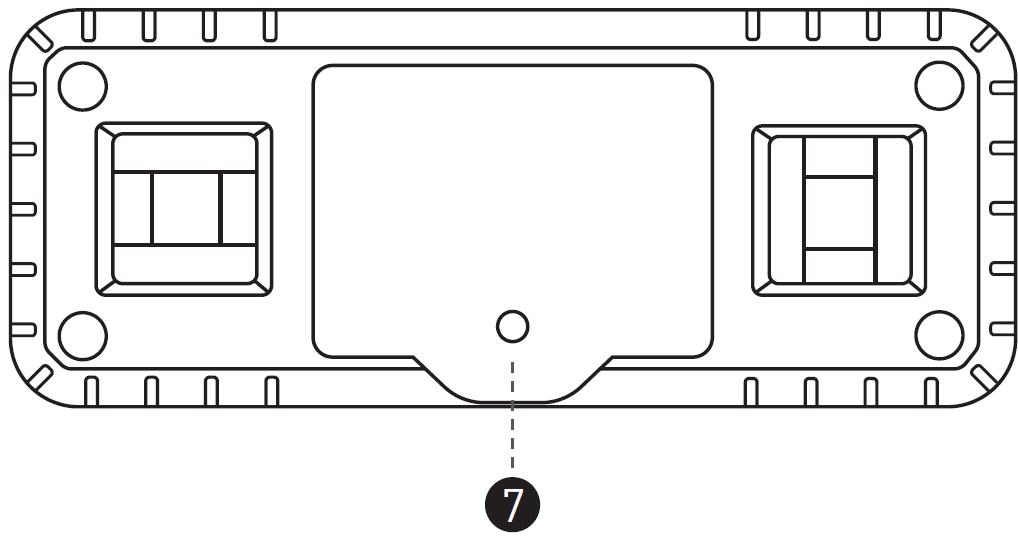
- Battery Cover
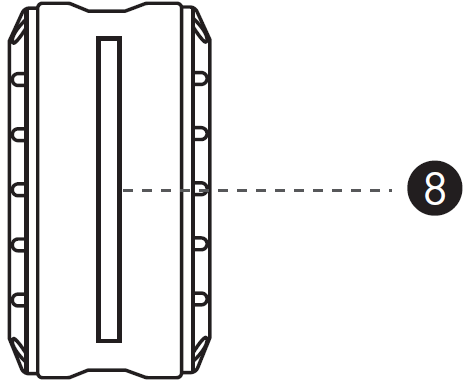
- Groove
Description
The xpertmatic Angle Gauge DL-1909 is a versatile and accurate tool that can be used in various applications, such as construction, woodworking, metalworking, and mechanical engineering. It features a large LCD display with backlight, making it easy to read the measurements even in low-light conditions. The angle gauge is powered by a 9V battery, which is included in the package. Its compact size and lightweight design make it easy to carry around and use in different locations.
Operations
- Battery installation
Unscrew and remove the rear battery cover by using a screwdriver. Put 2“AAA” batteries into it and then screw the battery cover. The digital angle gauge is ready to use.
Tips: Battery Replacement
Please replace 2 new“AAA” batteries when the low battery indicator “ ” shows on the screen.
 - Power ON/OFF
Press the button to turn on the digital angle gauge. Long press thebutton for 3 seconds to turn it off. The digital angle gauge will turn off automatically when there are no operations for 3 minutes.
 - Level Measurement
Put the digital angle gauge on the measured surface and start to level measuring.
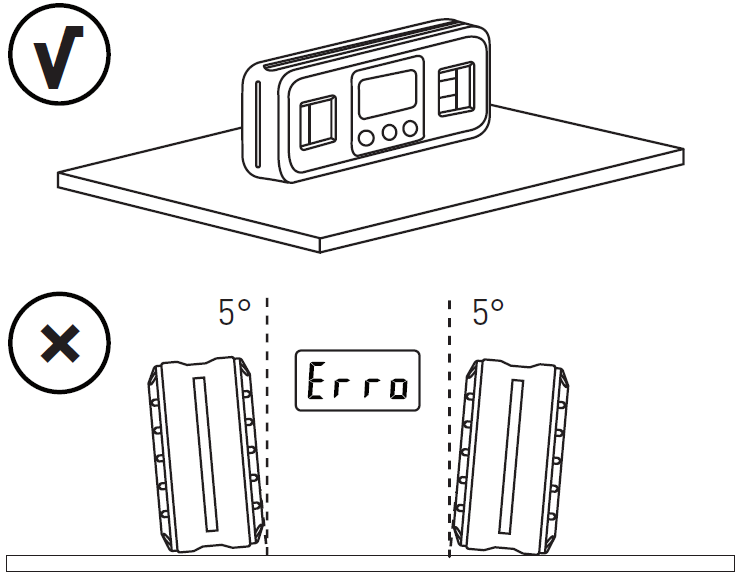
Tips: The level measurement must be processed on a flat and smooth surface which tilt is less than 5°. When it exceeds 5°, "Erro" displays on the screen, you will not be able to measure.
The Meaning of The Icon
The “ ” icon indicates that the measured surface is horizontal/vertical;
The “ ” & “
” & “ ” icons indicate that the measured surface deviates from the horizontal /vertical position;
The “ ” icon indicates the adjust direction.
For example: It shows the measured surface is 0.70° above the horizontal level, and the adjust direction is downward.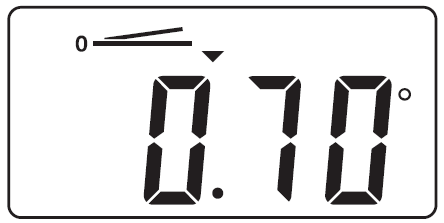
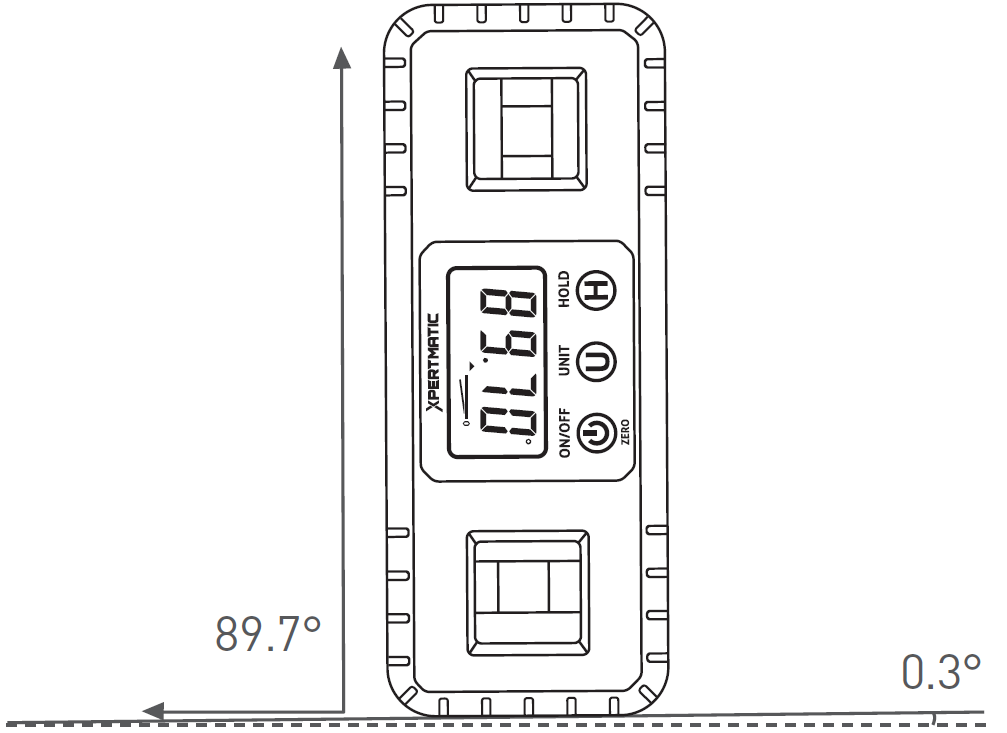
Vertical and Horizontal Measurement
The value shows the angle between the magnetic base and the horizontal plane.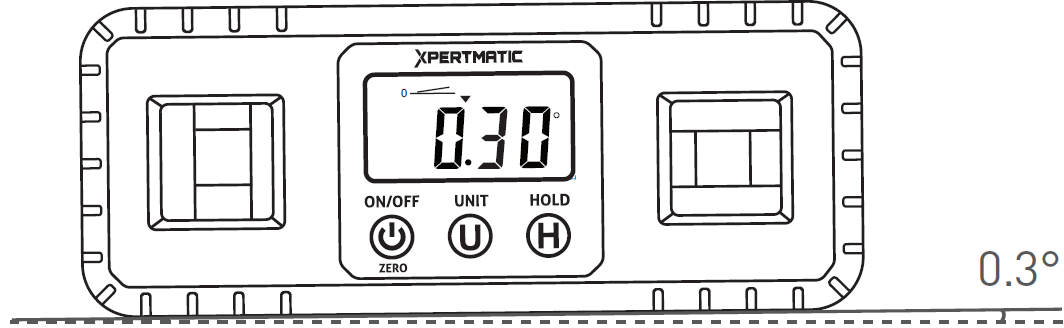
- Unit Switch (°degrees, %, mm/m, IN/FT) The default measurement unit is “°degree”. By pressing the
 button once to switch among degrees (°) , percent (%), mm/m and pitch (in/ft). The pitch reading is incremented by 1/8 in/ft.
 - Hold Function
You can press the button once to freeze the current display. And then press again to back to measuring mode. The
  icon will show up when it is under the hold status.
 - Relative Measurement
The digital angle gauge supports relative measurement.
Press the ZERO button once to set the current angle to zero. The icon will flash for 3 seconds, and then it will stop flashing when it is under relative measurement mode.
Press the ZERO button again to back to absolute measurement mode. Theicon will disappear. - Recalibration(Not Recommended)
Note:
Don't move the digital angle gauge during recalibrating.
After the recalibration is completed, the original factory data will be replaced with new data. We do not recommend you to use this function.Turn off the digital angle gauge. Put the equipment on a flat and smooth solid surface.(Refer to below picture)
- Long press the button, then long-press the button till “CAL” shows up on the display screen. Then the screen displays angle in degrees.
- Keep the digital angle gauge still for a short time and then press the button, “CAL1” will show up on the screen and keep flashing, then the screen will display angle in degrees.
Keep the digital angle gauge in the same location then rotate it 180° to show the back of the digital angle gauge. (Refer to below picture), then press the
button, “CAL2” will show up on the screen and keep flashing. After the “CAL2” disappears, the calibration is completed and then the LCD will show the current angle in high-accuracy-display.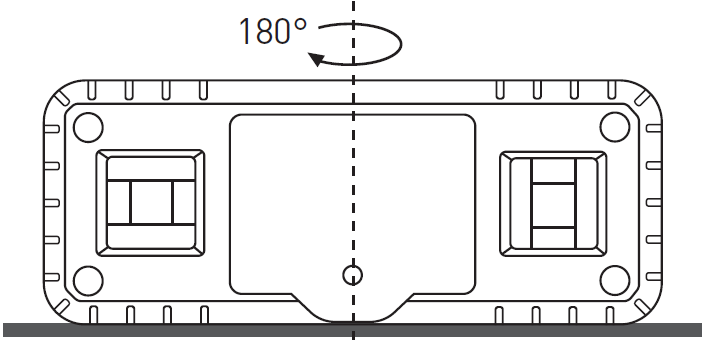
Setup Guide
To operate the xpertmatic Angle Gauge DL-1909, follow these steps:
- Insert the 9V battery in the designated slot.
- Switch on the angle gauge by pressing the power button.
- Place the angle gauge on the surface or object you want to measure.
- Adjust the angle gauge until the needle points to the desired angle.
- Read the measurement on the LCD display.
Troubleshooting
Here are some common problems and solutions for the xpertmatic Angle Gauge DL-1909:
- Problem: The angle gauge is not turning on.
Solution: Check if the battery is inserted correctly and has enough power. If not, replace the battery with a new one. - Problem: The angle gauge is giving inaccurate readings.
Solution: Calibrate the angle gauge according to the manufacturer's instructions. If the problem persists, contact the manufacturer's customer support. - Problem: The LCD display is hard to read.
Solution: Adjust the angle gauge's position or the lighting conditions. If the problem persists, use the backlight function to improve the visibility.
Warranty
XpertMatic guarantees 60 days no reason replacement or refunds from the day you purchase. We provide a 2-year warranty and provide lifetime technical support. Please reach us via [email protected] You can register as a member on xpertmatic.com to get the extended warranty.
Xpertmatic Angle Gauge DL-1909 Pros & Cons
Pros
- Accurate and reliable measurements
- Large and clear LCD display
- Compact and lightweight design
- Easy to use and calibrate
- Reasonable price
Cons
- The battery life could be longer
- The backlight function could be brighter
Customer Reviews
The xpertmatic Angle Gauge DL-1909 has received positive reviews from customers, who praise its accuracy and ease of use. However, some customers have complained about the short battery life and the dim backlight. Overall, the angle gauge is recommended for professionals and DIY enthusiasts who need a reliable and affordable tool for precise angle measurements.
Faqs
Does the Gauge provide low-light condition backlight capability?
Can angles on pipes or curved surfaces be measured with the DL-1909?
On the DL-1909, how large is the LCD display?
How can I swap out the DL-1909 battery?
Exists a program or tool fit for the Xpertmatic Angle Gauge data logging?
Should the DL-1909 fail to read as expected?
How do I calibrate the Xpertmatic DL-1909 Angle Gauge?
How might I turn the Xpertmatic Angle Gauge on and off?
Does the Gauge have waterproofing?
Does the DL-1909 have a warranty?
Leave a Comment