Settings: Yolin Electric Bike Display YL61F User Manual
Content
Introduction
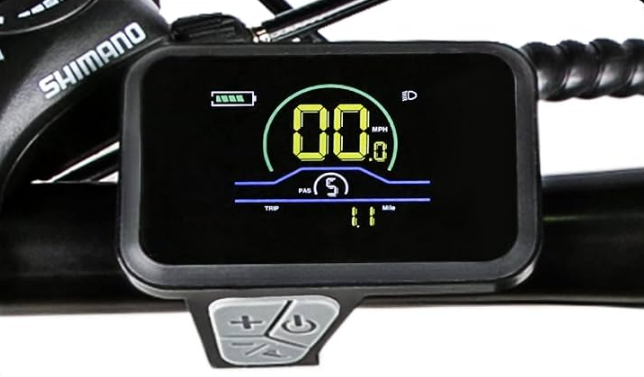
The Yolin Electric Bike Display YL61F is a smart LCD instrument designed to enhance the cycling experience by providing essential information at a glance. Compatible with 24V, 36V, and 48V systems, it features a clear display that shows battery level, current speed, and other vital metrics. Its waterproof design ensures durability in various weather conditions. The YL61F is priced at approximately $45, making it an affordable upgrade for electric bike enthusiasts.
Product name and model number
Smart LCD display for electric bicycle; Model: 61F.
Specification
- 36V/48V power supply
- Display rated current 15mA
- Display maximum current 30mA
- Shutdown leakage current <1uA
- Supplied current to the controller 50mA
- Operating temperature -20~60℃
- Storage temperature -30~70℃
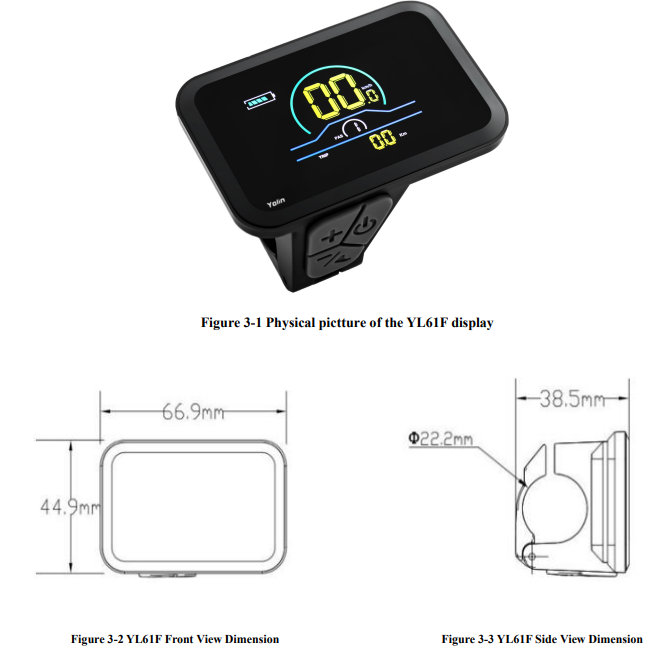
Appearance and Size
Function overview and Functional areas
Functional overview
The YL61F display offers a variety of features to suit riding needs, including:
- Battery level indicator
- Pedal assist (PAS) level indicator
- Speed (current speed, maximum speed, average speed)
- Mileage display (single and total mileage)
- Walk boost mode
- Light ON/OFF
- Error code indicator (optional)
- Cruise control indicator (optional)
- Bluetooth connection indicator (optional)
- Personalized parameter settings (e.g. wheel diameter, speed limit, battery power setting and PAS parameter setting, password setting, controller current limit setting, etc.).
- Factory default parameter recovery function
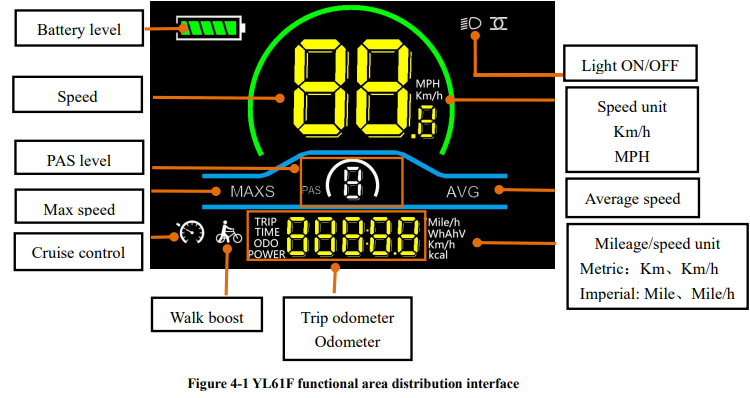
Functional areas
Description
The Yolin Electric Bike Display YL61F boasts a sleek and durable design, ensuring it withstands the rigors of regular use. The high-resolution LCD screen provides clear visibility even in direct sunlight or low light conditions, thanks to its adjustable backlight. The intuitive button controls allow riders to navigate through various menus and settings effortlessly. Additionally, the display features a built-in USB port, enabling riders to charge their smartphones or other devices while on the move.
Button definitions
The YL61F display is equipped with three buttons on the correction-ding operating unit: power on/off![]() , plus
, plus![]() and minus.
and minus.![]()
Routine operation
Power on/off
Long press![]() to power on/off the display. When the display is off, it will not use the battery power and the leakage current is less than 1uA.
to power on/off the display. When the display is off, it will not use the battery power and the leakage current is less than 1uA.
WARNING: The display will automatically shut off if it is not used for more than 10 minutes.
Display interface switching
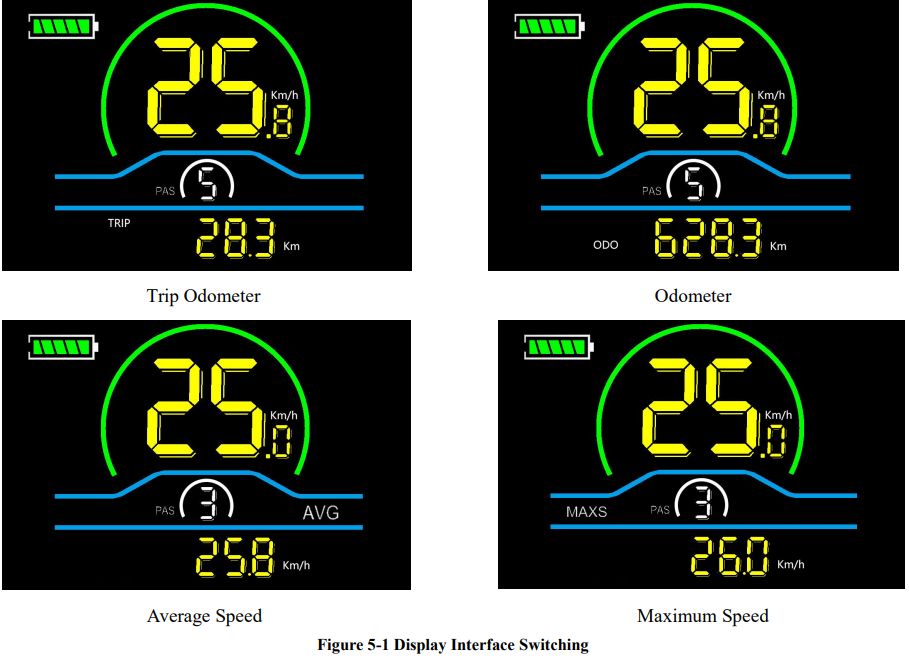
When the display is powered on, it will show the Current Speed (Km/h) and trip Odometer (km) by default. Short press ![]() to switch between Trip Odometer (km), Odometer (km), Maximum Speed (km/h), and Average Speed (km/h).
to switch between Trip Odometer (km), Odometer (km), Maximum Speed (km/h), and Average Speed (km/h).
Walk boost mode
Long press and hold![]() , the electric bicycle enters the walk boost mode. The electric bicycle will walk ata a fixed speed of 6km per hour and the display shows
, the electric bicycle enters the walk boost mode. The electric bicycle will walk ata a fixed speed of 6km per hour and the display shows![]() . Release the button to stop the power output immediately and restore to the state before walk boost.
. Release the button to stop the power output immediately and restore to the state before walk boost.
WARNING: The walk boost mode can only be used when pushing the electric bicycle, please do not use it while riding.
Turning on/off lights
Long press the![]() to make the controller turn on the lights and display backlight becomes dim. Long press
to make the controller turn on the lights and display backlight becomes dim. Long press![]() again to make the controller turn off the lights and the backlight restore brightness.
again to make the controller turn off the lights and the backlight restore brightness.
PAS level selection
Press ![]() /
/![]() to switch PAS level of electric bicycle, thus changing the motor output power.
to switch PAS level of electric bicycle, thus changing the motor output power.
Battery level display
The Battery level is shown as 5 bars. When the battery is full charged, all of the 5 bars lighten up. When the battery is fully depleted, the bar will begin to flash, warning the user to charge the battery as soon as possible.
Error code display
If there is a fault occurs in the electric system of the electric bicycle, the display will automatically show an error code, see Schedule 1 for a detailed definition of the error code.
WARNING: When the error code appears on the display, please troubleshoot the problem in time, the electric bicycle will not be able to drive normally after the problem occurs.
Personalized parameter settings
Each setting needs to be done with the bicycle stationary. The personalized parameter setting procedure is as follows When the display is ON and the speed shows 0,
The following options are available on the personalized parameter setting interface:
- Press and hold
 and
and simultaneously for more than 2 seconds to enter the personalized parameter setting interface.
 - Press
 /
/ to toggle between the personalized parameter setting interface, and press
 to enter the parameter changing state.
 - Press
 /
/ to select the parameter, long press for addition
 operation, long press
  for subtraction operation.
 - Press
 to save the parameter settings and return to the personalized parameter setting interface.
 - Long
 press to save the parameter settings and exit the personalized parameter setting interface.
Backlight luminance setting
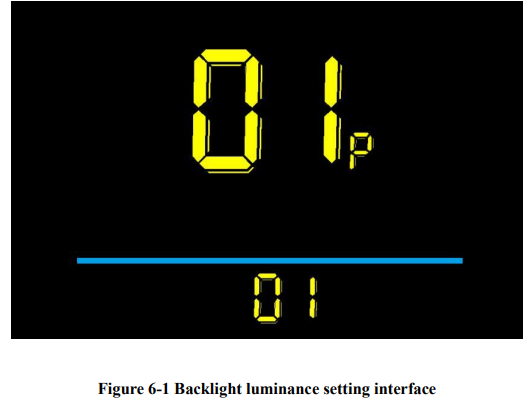
- 01P refers to the backlight luminance setting option. The adjustable range is: 1-3, 01 for the minimum luminance, 02 for the standard luminance, 03 for the maximum luminance.
- Press
 to enter the parameter changing state. Press the
  /
/ to select the parameter and press
  to save the parameter setting and return to the personalized parameter setting interface.
- Press
Metric and Imperial setting
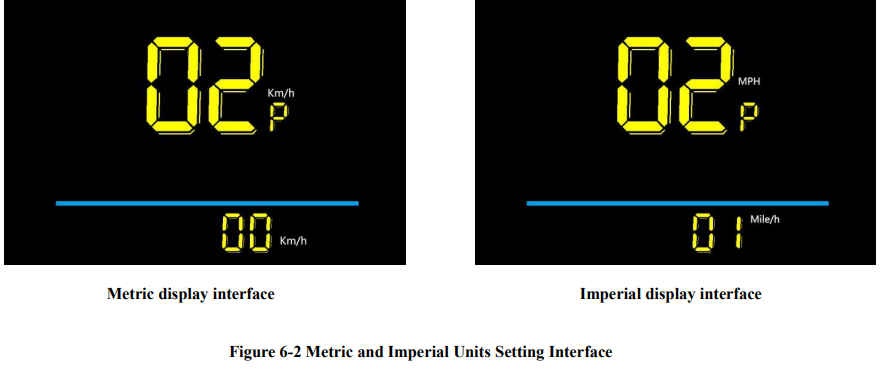
- 02P is the metric and imperial setting option, 00 for metric and 01 for imperial.
- Press to enter the parameter changing state. Press the / to select the parameter and press to save the parameter setting and return to the personalized parameter setting interface.
Rated voltage setting

- 03P is the rated voltage setting option. The available rated voltage range is: 36V/48V.
- Press
 to enter the parameter changing state. Press the
  /
/ to select the parameter and press
 to save the parameter setting and return to the personalized parameter setting interface.
- Press
Auto Sleep Time Setting
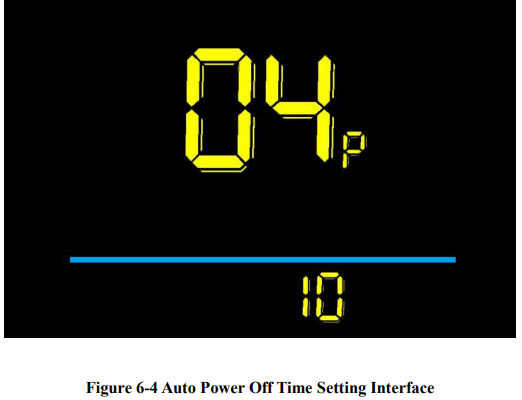
- 04P is the auto sleep time setting. To save the battery power and reach higher range, this dispaly will be turned off after it has not been used for a time. The adjustable range is: 1~60min, 00 means no auto shutdown. The factory default setting is 10 minutes.
- Press
 to enter the parameter changing state. Press the
  /
/ to select the parameter and press
 to save the parameter setting and return to the personalized parameter setting interface.
- Press
PAS level setting
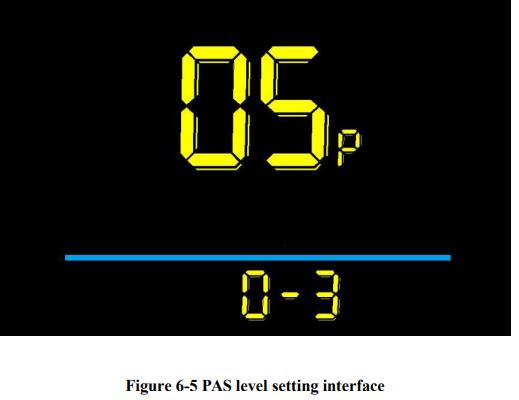
- 05P is the Pedal assist (PAS) level setting option. The available Pedal assist level settings are: 0~3, 1~3, 0~5, 1~5, The factory default setting 0~5.
- Press
 to enter the parameter changing state. Press the
  /
/ to select the parameter and press
 to save the parameter setting and return to the personalized parameter setting interface.
- Press
Wheel diameter setting
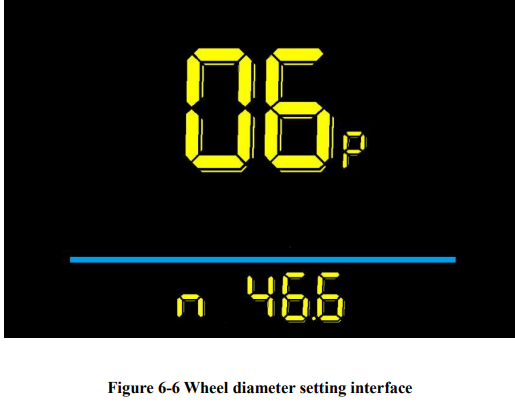
- 06P is the wheel diameter setting option. Unit: inch, accurace: 0.1, The adjustable wheel diameter range is: 0~50inch.
- Press
 to enter the parameter changing state. Press the
  /
/ to select the parameter and press
 to save the parameter setting and return to the personalized parameter setting interface.
- Press
Number of speed sensor magnets setting

- 07P is the speed sensor magnet number setting option. The adjustable speed sensor magnet number range is: 01~255pcs.
- Press
 to enter the parameter changing state. Press the
  /
/ to select the parameter and press
 to save the parameter setting and return to the personalized parameter setting interface.
- Press
Speed limit setting
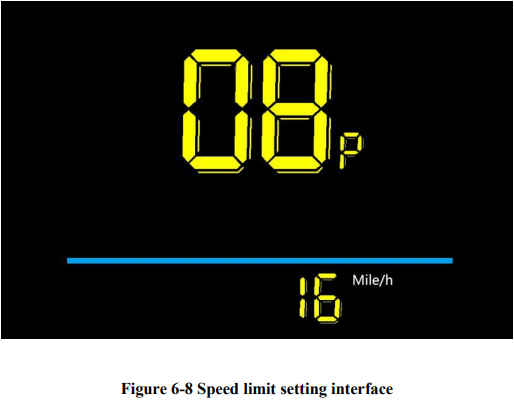
- 08P is the speed limit setting option. Change this value to set the maximum riding speed of the electric vehicle; The adjustable speed limit range is: 0~100km/h, 100 means no speed limit.
- Press
 to enter the parameter changing state. Press the
  /
/ to select the parameter and press
 to save the parameter setting and return to the personalized parameter setting interface.
- Press
Start-up setting
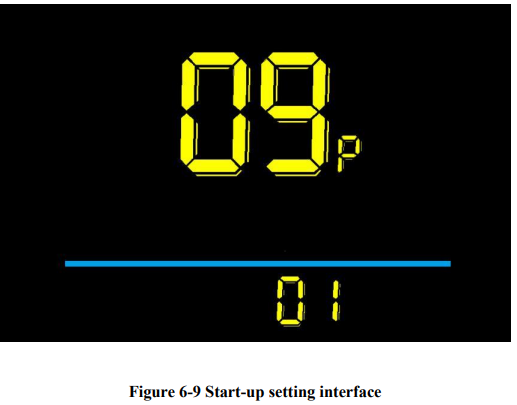
- 09P is the start-up setting option. The display can choose the following start modes: 00 → zero start, 01→ non-zero start.
- Press
 to enter the parameter changing state. Press the
  /
/ to select the parameter and press
 to save the parameter setting and return to the personalized parameter setting interface.
- Press
Drive mode setting
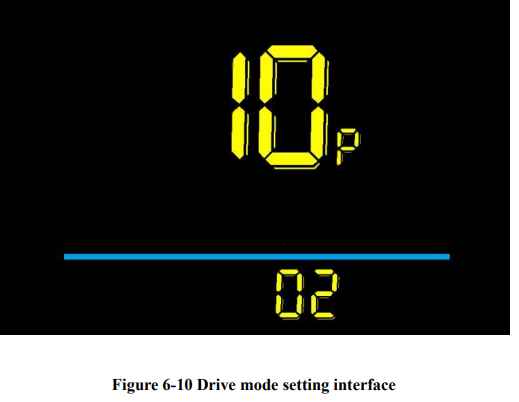
- 10P is the drive mode setting option. The available drive modes are: 00 → Pedal assist only, 01 → Electric only, 02 Both Pedal and assist electric.
- Press
 to enter the parameter changing state. Press the
  /
/ to select the parameter and press
 to save the parameter setting and return to the personalized parameter setting interface.
- Press
Pedal assist sensitivity setting
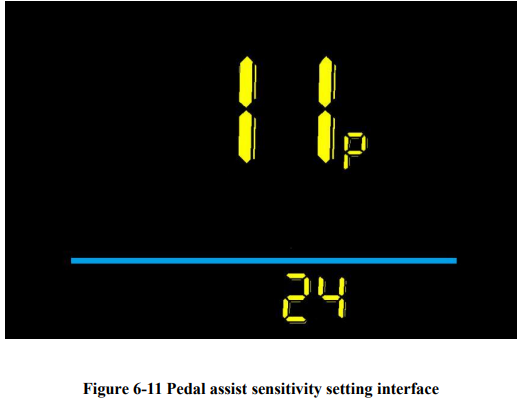
- 11P is the pedal assist sensitivity setting option. The adjustable range is: 1~24.
- Press
 to enter the parameter changing state. Press the
  /
/ to select the parameter and press
 to save the parameter setting and return to the personalized parameter setting interface.
- Press
Pedal assist strength setting
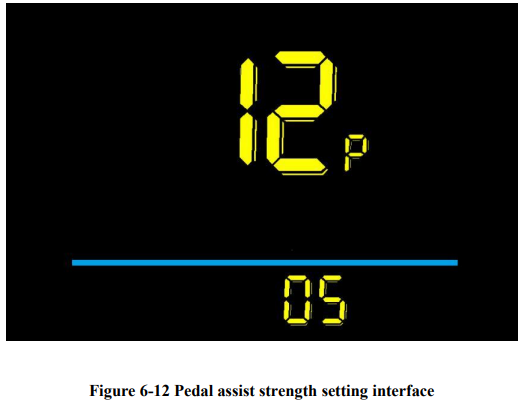
- 12P is the Pedal assist strength setting option. The adjustable range is 0~5. 0 is the weakest strength and 5 is the strongest.
- Press
 to enter the parameter changing state. Press the
  /
/ to select the parameter and press
 to save the parameter setting and return to the personalized parameter setting interface.
- Press
Number of pedal assist sensor magnets setting

- 13P is the number of pedal assist sensor magnets setting options. The adjustable range: 5pcs, 8pcs,12pcs.
- Press
 to enter the parameter changing state. Press the
  /
/ to select the parameter and press
 to save the parameter setting and return to the personalized parameter setting interface.
- Press
Controller Current Limit Setting
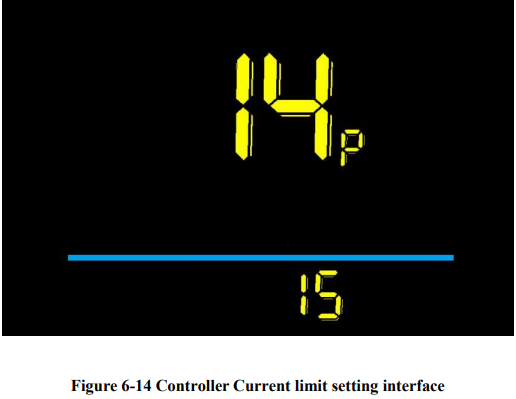
- 14P is the controller current limit setting option. The adjustable range is: 1~50Ah, The factory default setting is 12Ah.
- Press
 to enter the parameter changing state. Press the
  /
/ to select the parameter and press
 to save the parameter setting and return to the personalized parameter setting interface.
- Press
Controller under voltage value setting

- 15P is the controller under voltage value setting option.
- Press
 to enter the parameter changing state. Press the
  /
/ to select the parameter and press
 to save the parameter setting and return to the personalized parameter setting interface.
- Press
ODO reset operation
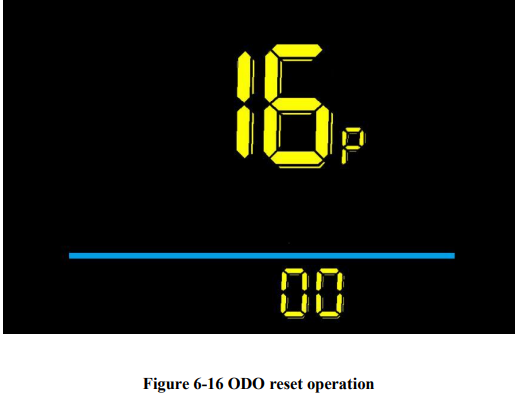
- 16P is the odometer reset setting option. Optional 00、01.
- Press
 to enter the parameter changing state. Press the
  /
/ to select the parameter and press
 to save the parameter setting and return to the personalized parameter setting interface.
- Press
Cruise enable setting
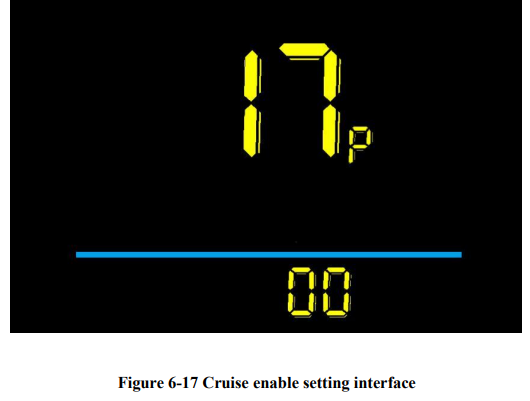
- 17P is the cruise enable setting option. 00 means disabled cruise, 01 means enable cruise, The factory default 00.
- Press
 to enter the parameter changing state. Press the
  /
/ to select the parameter and press
 to save the parameter setting and return to the personalized parameter setting interface.
- Press
Promotion function setting
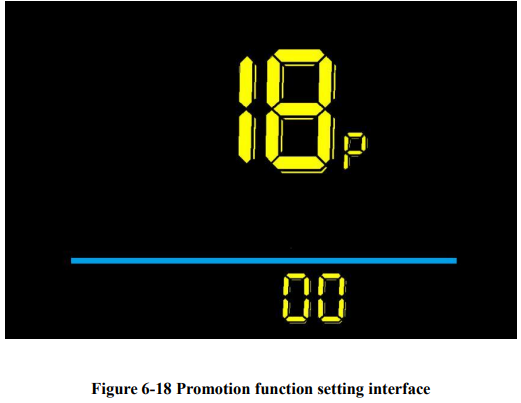
- 18P is the promotion function setting option. 00 represents no 6km, 01 represents 6km. The factory default 00. Press to enable the parameter changing state.
- Press
 to enter the parameter changing state. Press the
  /
/ to select the parameter and press
 to save the parameter setting and return to the personalized parameter setting interface.
- Press
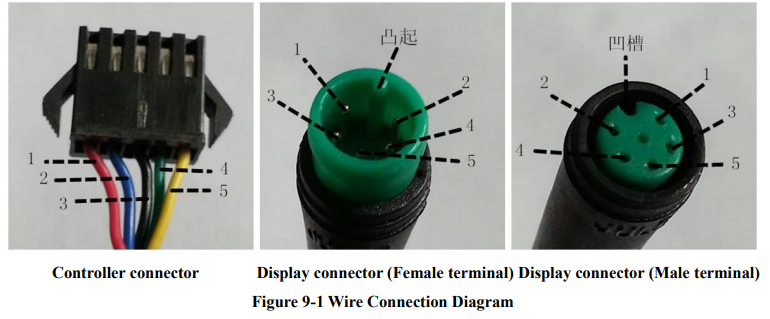
Wire connection diagram
Standard wire connection sequence
Setup Guide
To set up the Yolin Electric Bike Display YL61F,
- Start by connecting the display to your e-bike's control system using the provided cables.
- Ensure all connections are secure and properly aligned. Next, mount the display on your handlebars using the included bracket system.
- Once installed, turn on your e-bike and follow the on-screen instructions to configure the display settings according to your preferences.
- For pairing with additional accessories, refer to the user manual for specific instructions.
Precautions
Pay attention to all the general operating when using the products and do not plug and unplug the display while it is powered on.
- Avoid bumping to all the general operating when using the products and do not plug and unplug the display while it is powered on.
- Please do not change the parameter settings at will, otherwise normal riding cannot be guarantteed.
- If display does not work properly, please send it to the repair center as soon as possible.
- There may be differences between the physical products and this manual due to normal upgrade. Please refer to the physical products.
Table 9-1 Standard connector wire sequence table
Standard Wire Sequence | Standard wire color | Function |
1 | Red (VCC) | Display powerwire |
2 | Blue (Kp) | Controller powerwire |
3 | Black (GND) | Display groundwire |
4 | Green (RX) | Display datareception wire |
5 | Yellow (TX) | Display datatransmit wire |
Some models are equipped with waterproof connectors and color inside wires can not be seen.
Schedule 1: Error Code Definition
YL-01、YL-02 Error codes: | ||||
Error code | Definition | Error code | Definition | |
E001 | Controller failure | E004 | Throttle failure | |
E002 | Communication failure | E005 | Brake failure | |
E003 | Hall failure | E006 | Motor phasefailure | |
Schedule 2: Error Code Definition
Customized YL-02(LKLS)Error codes: | ||
Error code | Status significance | Processing method |
Error05 | Brake failure | Whether thebrake is in position; Replace
the brake handle |
Error06 | Battery undervoltage | Requires batteycharging |
Error07 | Motor fault | Check whether the power line is loose |
Error08 | Throttle failure | Whether the handle is returned; Checkthe handle link. If it is normal, replace the handle |
Error09 | Controller failure | Check the controller hallconnection |
Error10 | Communication reception
failure | Check whether the instrument cableis
connected properly |
Error11 | Communication transmission
failure | Check whether the instrument cableis
connected properly |
Quality Assurance and Warranty
Warranty info
- Yolin will offer a limited warranty for any failure caused by the product defects under normal use during the warrant period.
- The product is warranted for 12 months from the date out of factory.
Pros & Cons
Pros:
- Clear and high-resolution display
- Intuitive and user-friendly interface
- Durable and water-resistant construction
- Compatible with multiple e-bike systems
- Built-in USB port for convenient charging
Cons:
- Potentially higher cost compared to basic displays
- Some users may find the setup process slightly complex
- Limited customization options for the display layout
Customer Reviews
Early reviews of the Yolin Electric Bike Display YL61F have been overwhelmingly positive, with many users praising its clarity and ease of use. Some common feedback includes appreciation for the built-in USB port and the display's robust build quality. However, a few users have noted that the setup process can be a bit more involved than expected, and there is a desire for more customization options in future updates.
Common complaints include minor issues with cable management and some users finding the menu navigation slightly cumbersome at first. However, these are generally seen as minor drawbacks in an otherwise excellent product.
Faqs
How do I install the Yolin on my e-bike?
Is the Display YL61F compatible with my e-bike brand?
Can I customize the display layout of the Yolin?
How do I update the software of my YL61F?
What is the estimated battery life of the Yolin?
Is the Yolin Electric Bike water-resistant?
Can I use the Yolin at night?
How do I pair additional accessories with the Electric Bike Display?
What if I encounter issues with my Bike Display?
Is there a warranty on the Yolin Electric Bike Display YL61F?
Leave a Comment
