Acer Nitro 34" Curved LCD Monitor XZ342CK User Manual
Content

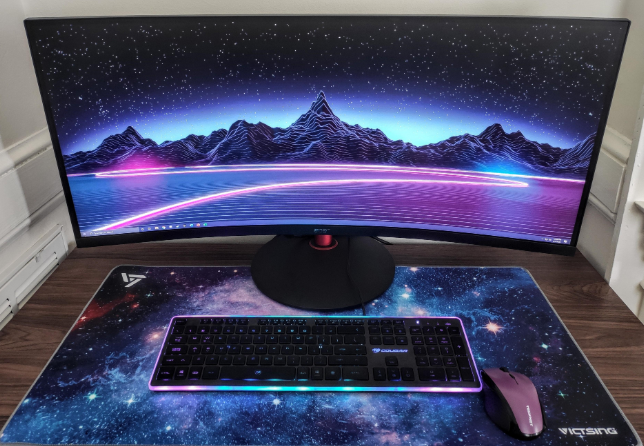
Introducing the Acer Nitro 34" Curved LCD Monitor XZ342CK
The Acer Nitro 34" Curved LCD Monitor (XZ342CK) is a powerhouse of a display, perfect for gaming, graphic design, and other visual-intensive tasks. This monitor features a stunning 34-inch curved VA panel with a 3440 x 1440 resolution, providing an immersive viewing experience. With a 1ms response time, 144Hz refresh rate, and AMD Free Sync Premium technology, this monitor delivers smooth and seamless visuals, even in the most demanding situations. The XZ342CK is expected to launch in Q2 2023 and will be competitively priced around $500.
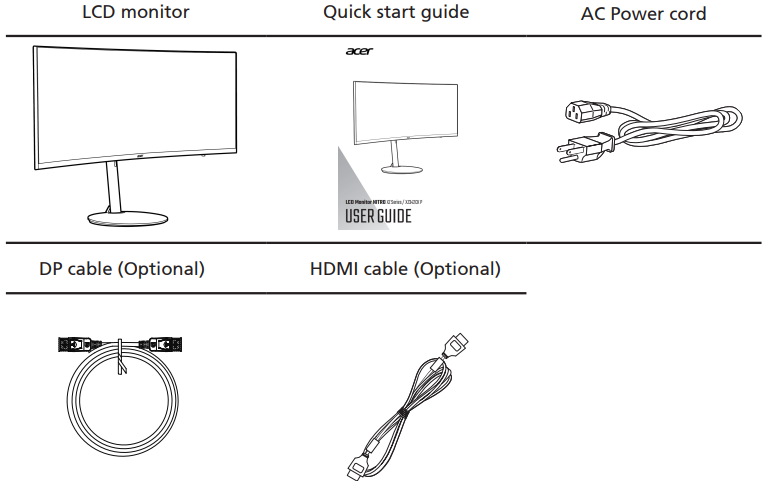
Unpacking
Please check that the following items are present when you unpack the box, and save the packing materials in case you need to ship or transport the monitor in the future.
Detailed Specifications
- Screen size: 34-inch curved VA panel
- Resolution: 3440 x 1440 UWQHD
- Refresh rate: 144Hz
- Response time: 1ms (Visual Response Boost)
- Display aspect ratio: 21:9
- Contrast ratio: 3000:1
- Brightness: 300 cd/m²
- Color gamut: 90% DCI-P3
- Viewing angles: 178°/178° (CR≧10)
- Connectivity: DisplayPort 1.4, HDMI 2.0, USB 3.0
- Additional features: AMD Free Sync Premium, Acer Vision Care, Blue Light Shield, Flicker less
Acer Installation XZ342CK
To install the monitor on your host system, please follow the steps below:
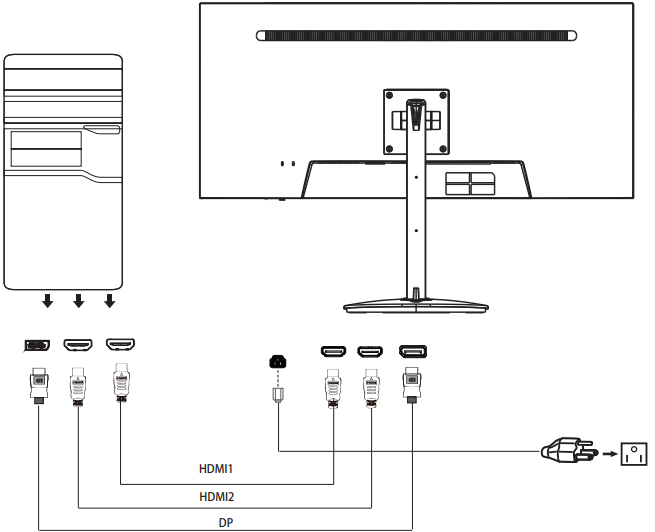
Connecting Your Monitor to a Computer
- Turn off your monitor and unplug your computer’s power cord.
-
- Connect HDMI Cable (Option Only HDMI-input model)
- Make sure both the monitor and computer are powered-OFF.
- Connect the HDMI cable to the computer.
- Connect D P Cable (Optional, Only DP-input model)
- Make sure both the monitor and computer are powered-OFF.
- Connect the DP cable to the computer.
- Connect HDMI Cable (Option Only HDMI-input model)
- Insert the monitor power cable into the power port at the back of the monitor.
Plug the power cords of your computer and your monitor into a nearby electrical outlet.
In order to prevent damage to the monitor, do not lift the monitor by its base.
External controls
Function key
- Monitor power off status Press to switch power on. In the normal display, anytime to Press more than 5 seconds switch to turn off the power.
- Blue indicates power on. Red indicates standby/power saving mode. No light display indicates Power off.
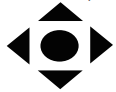
- Press to any directions switch key to display First Menu. Press again to enter next function in the First Menu.
- The single toggle button on the bottom of the Display bezel operates like a joystick. To move the cursor, simply toggle the button in four directions. Press the button to select desires option. In Main Menu , Red indicates operable, Dark grey indicates inoperable.
Using the Shortcut Menu LCD Monitor XZ342CK
Note: The following content is for general reference only. Actual product specifications may vary.
The OSD (onscreen display) can be used to adjust the settings of your LCD monitor. Press the MENU key to open the OSD. You can use the OSD to adjust the picture quality and general settings. For advanced settings, please refer to following page:
Main page
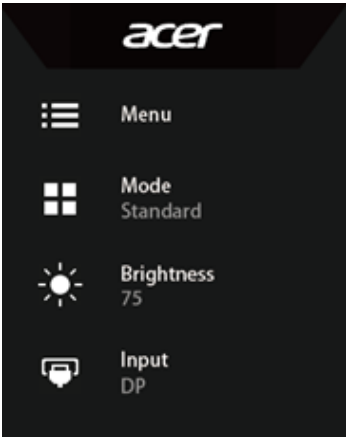
- Menu OSD
- Hot Key1 (Modes Brightness Volume Gamma Contrast Blue Light Over Drive VRB)
- Hot Key2 (Modes Brightness Volume Gamma Contrast Blue Light Over Drive VRB)
- Input selection
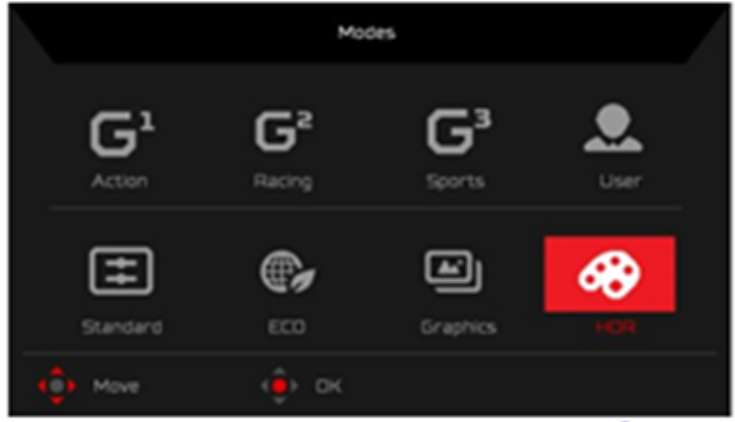
Hot key1 (default: Standard mode)
To choose scenario mode(Action Racing Sports,User, Standard, ECO, Graphics, HDR)
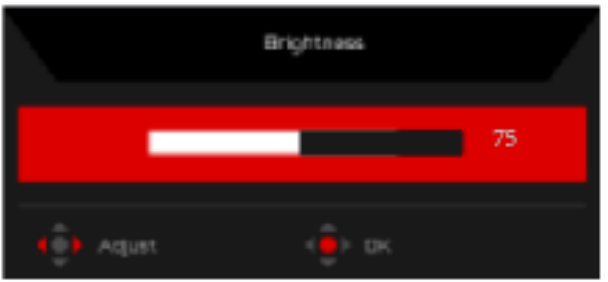
Hot key2 (default: Brightness)
Open the Brightness control and select your preferred brightness setting . When you are done, press the joystick to quit current page and store.
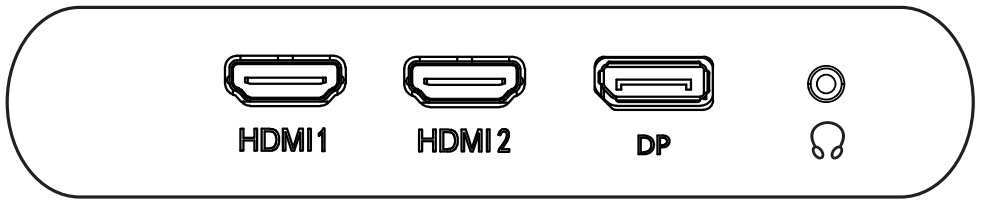
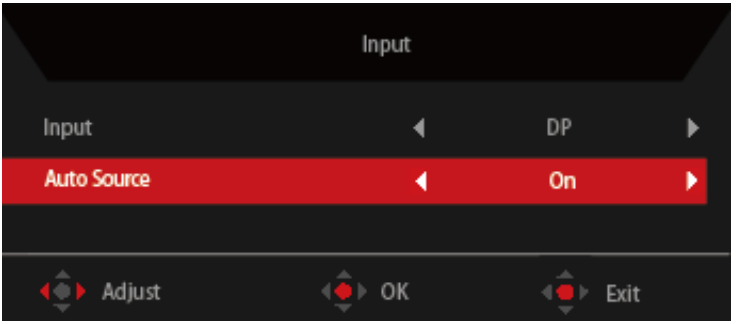
Selecting the input
Open the Input control and select HDMI1(2.0), HDMI2(2.0), DP or Auto Source. When you are done, press the joystick to exit current page and store.
Function page
Open the Function page to adjust the functions, settings which you want using the arrows. When you are done, toggle the joystick to the left or right to go back one level.
Adjusting the Picture
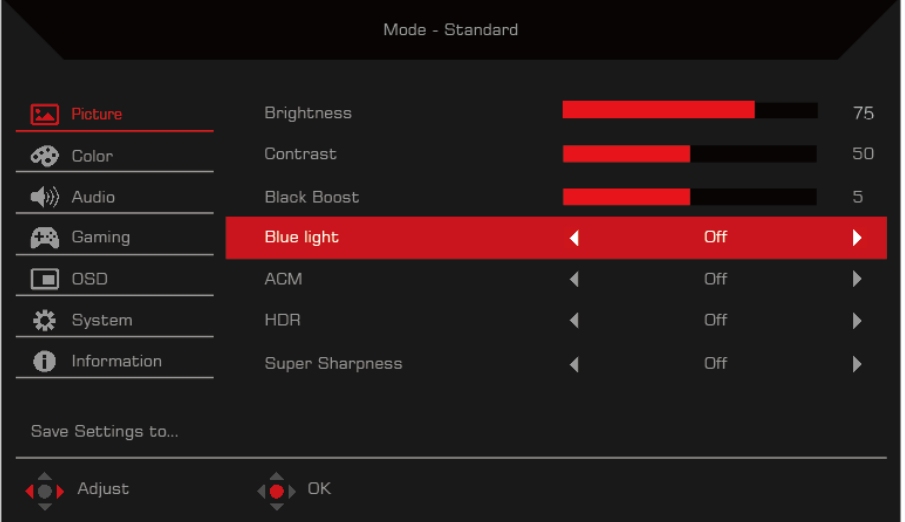
- Press the MENU key to open the OSD.
- Toggle the joystick to the up or down to select Picture from the OSD. Then toggle to the right to navigate to the element you wish to adjust and press the joystick to enter it.
- Toggle to the left or right to adjust the sliding scales.
- The Picture menu can be used to adjust the Brightness, Contrast, Black Boost, Blue Light, ACM, HDR, Super Sharpness.
- Brightness: Adjust the brightness from 0 to 100.
Note: Adjusts the balance between light and dark shades. - Contrast: Adjust the contrast from 0 to 100.
Note: Sets the degree of difference between light and dark areas - Black Boost: This boosts the amplitude of the dark color levels of the display-blacks will be less black. The higher the level the higher the boost.
- Blue Light: Filters out blue light to protect your eyes by adjusting how much blue light is shown -- 80%, 70%, 60%, or 50%.
Note: Higher values allow more blue light through. For the best protection select a lower value. - ACM: Turn ACM on or off. The default is off.
- HDR: Turn HDR off or Auto . The default is off. Select Auto enables this function to automatically detect and process HDR signal.
HDR=Auto , The source signal content is SDR, the brightness can to adjustment, but content is HDR the brightness is fixed at 100 and gray out.
HDR = Auto , features: (ACM/Gamma/Contrast/Blue Light/Color Temp/Black Boost/6-axis Hue & Saturate) is gray out and unavailable, default parameter please refer to "Modes".
HDR = Auto , Color Page only shows the adjustable function, other functions (Gamma and Color Temp are hidden). - Super Sharpness: Turn the Super Sharpness On or Off. Super Sharpness technology can simulate high-resolution images by boosting the pixel density of the original source to make images sharper and clearer.
Adjusting the Color

- Press the MENU key to open the OSD.
- Toggle the joystick to the up or down to select Color from the OSD. Then toggle to the right to navigate to the element you wish to adjust and press the joystick to enter it.
- Toggle to the left or right to adjust the sliding scales.
- Gamma mode allows you to adjust the luminance tone. The default value is 2.2 (standard value for Windows).
- Color temperature: Default is warm. You can choose Cool, Normal, Warm, Blue light or User.
- Modes: further open the modes menu selection.
- Color Space: You can choose Standard,SMPTE-C,DCI,EBU,HDR,Rec.709 or sRGB.
- If Color Space is "HDR",then Modes is set to "HDR" automatically.
- If Color Space is not "HDR",then Modes is set to "Standard".
- Grayscale Mode: Default is off. Based on favorite to turn on or off.
- 6-axis Hue: Adjust the red, green, blue, yellow, magenta and cyan hue.
- 6-axis Saturate: Adjust the red, green, blue, yellow, magenta and cyan saturation.
Adjusting the Audio
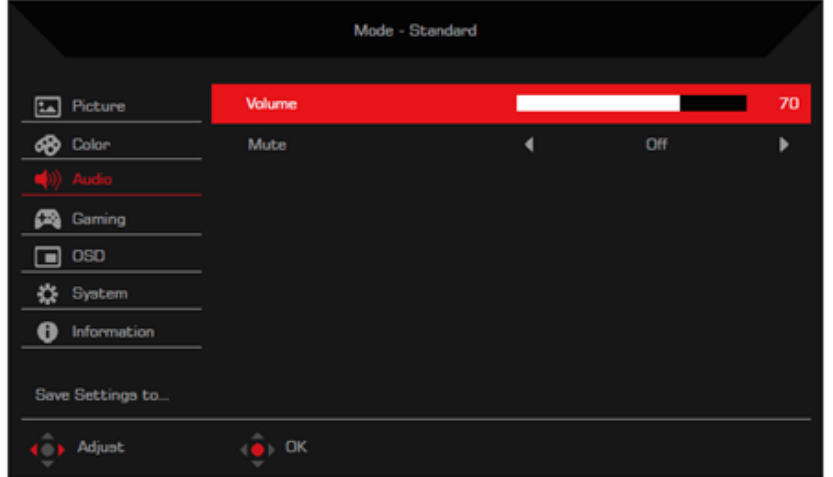
- Press the MENU key to open the OSD.
- Toggle the joystick to the up or down to select Audio from the OSD.Then toggle to the right to navigate to the element you wish to adjust and press the joystick to enter it.
- Toggle to the left or right to adjust the sliding scales.
- Volume: Adjust the volume
- Mute: Default is off. When mute is on, the volume is “0”.
Adjusting the Gaming
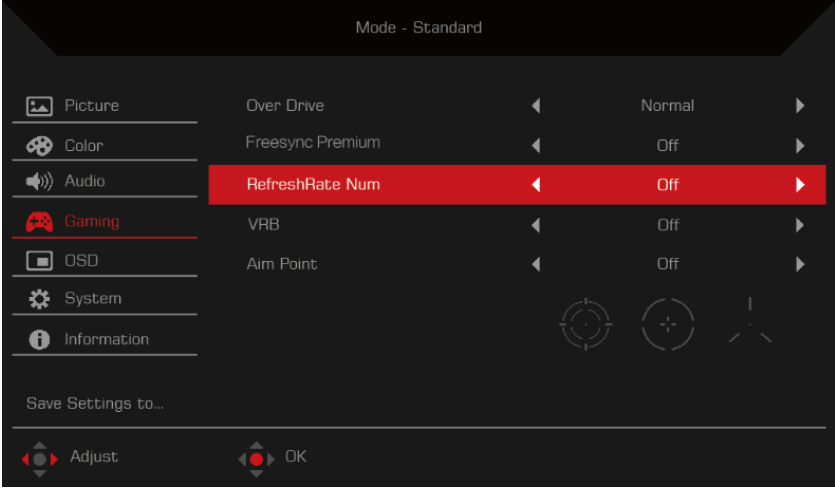
- Press the MENU key to open the OSD.
- Toggle the joystick to the up or down to select Gaming from the OSD. Then toggle to the right to navigate to the element you wish to adjust and press the joystick to enter it.
- Toggle to the left or right to adjust the sliding scales.
- Over Drive: Select Off, Normal, or Extreme.
- If Free Sync Premium is "ON", then the Over Drive selection is set to "Normal" automatically.
- If Free Sync Premium is "OFF", then the user can set Over Drive to either one of the three settings including: (a) Extreme (b) Normal (c) Off.
- Free Sync Premium: Select On or Off. Free Sync Premium is available for AMD supported graphic cards only.
- VRB: Select Off, Normal, or Extreme.
- If Free Sync Premium is "ON", then the VRB selection is set to "OFF" automatically.
- If Free Sync Premium is "OFF", then the user can set VRB to either one of the three settings including: (a) Extreme (b) Normal (c) Off.
- Refresh rate num: Display the panel’s current refresh rate on the screen.
Note: If Free Sync Premium set "On" you can see the V Frequency to changes in the OSD. - Aim point: Show an Aim point on the screen for shooting games.
Note: Aim Point is not supported in PBP mode.
Adjusting the OSD
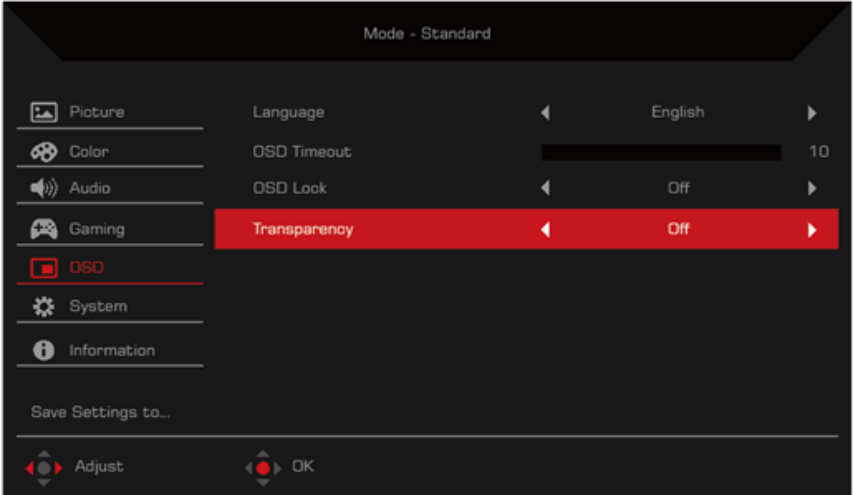
- Press the MENU key to open the OSD.
- Toggle the joystick to the up or don to select OSD from the OSD. Then toggle to the right to navigate to the element you wish to adjust and press the joystick to enter it.
- Toggle to the left or right to adjust the sliding scales.
- Language: Set the OSD menu language.
- OSD timeout: Adjust the delay before turning off the OSD menu.
- Transparency: Select the transparency when using gaming mode. The transparency can be 0% (OFF), 20%, 40%, 60%, or 80%.
- OSD Lock: OSD Lock function after the start of all Key unavailable.
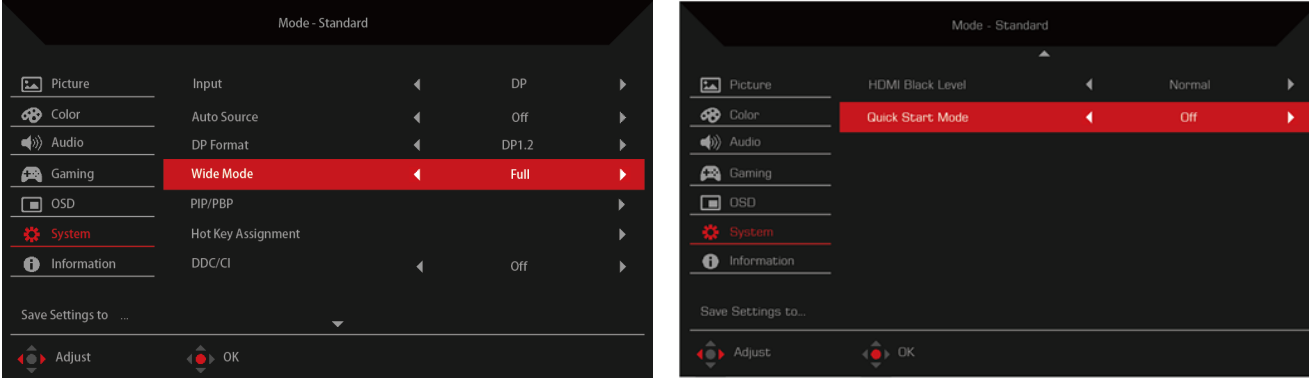
Adjusting the System
- Press the MENU key to open the OSD.
- Toggle the joystick to the up or down to select System from the OSD.Then toggle to the right to navigate to the element you wish to adjust and press the joystick to enter it.
- Toggle to the left or right to adjust the sliding scales.
- Input: Select the source from HDMI1(2.0) ,HDMI2(2.0) ,DP(1.4).
- Auto Source: Automatically searches for available input sources.
- DP Format: Select the source from DP 1.1,DP1.2,DP1.4
- Wide mode: You can select which screen aspect you are using. The options are Full, Aspect.
- PIP/PBP: The options for PIP/PBP Mode are Off, PIP Large, PIP Small, and PBP. You can also adjust the PIP Position, Sub Source, Source Swap, and Audio Source.
- Hotkey Assignment: Select the function of shortcut key 1(Modes, Brightness, Volume, Gamma, Contrast, Blue Light, Over Drive, VRB) and shortcut keys 2 (Modes, Brightness, Volume, Gamma, Contrast, Blue Light, Over Drive, VRB)
- DDC/CI: Allows the monitor settings to be set through the software on the PC.
Note: DDC/CI, short for Display Data Channel/Command Interface, which allows monitor controls to be sent via software. - HDMI Black Level: You can select the level of blackness under HDMI source. The options are Normal and Low.
- Quick start mode: Select Off or On. Turn on to speed up boot speed.
Attaching / Removing the base
- Remove the monitor from the packaging.
- Secure the stand to the monitor by turn the screw clockwise using a screwdriver.
Secure the base to the stand by turn the screw clockwise using a screwdriver.
Free Sync Premium (HDMI/DP only)
It can allow a FreeSync Premium supported graphics source to dynamically adjust display refresh rate based on typical content frame rates for power efficient, virtually stutter free and low-latency display update.
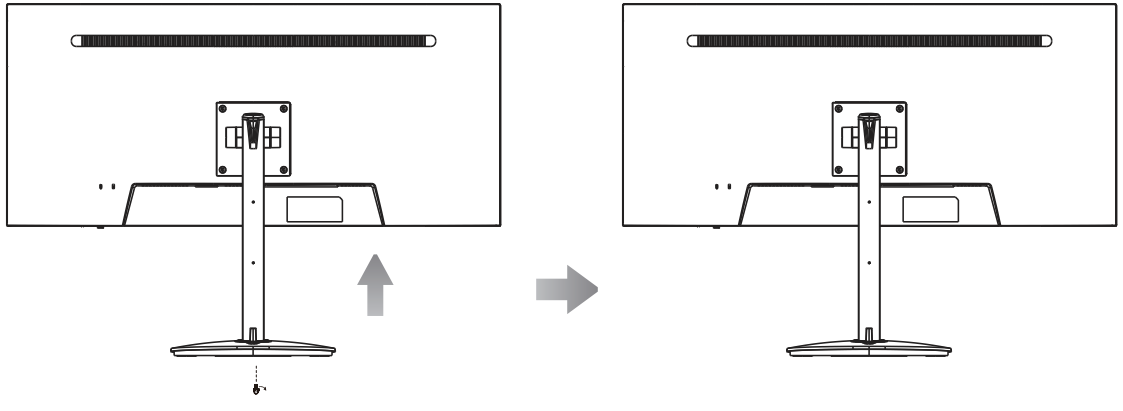
Screen position adjustment
- To optimize the viewing position, you can adjust the monitor tilt by using both of your hands to hold the edges of the monitor as shown below. The monitor can be adjusted to 35 degrees up or 5 degrees down.
- With the built-in pedestal, you can swivel the monitor for the most comfortable viewing angle.
- After pressing the top of the monitor then you can adjust the height of the monitor
Connecting the Power cord
- Check first to make sure that the power cord you use is the correct type required for your area.
- The monitor has a universal power supply that allows operation in either 100/120 V AC or 220/240 V AC voltage area. No user-adjustment is required.
- Plug one end of the power cord to the AC inlet, and plug the other end into an AC outlet.
- For units using 120 V AC: Use a UL-listed cord set, type SVT wire and plug rated 10 A/125 V.
- For units using 220/240 V AC: Use a cord set consisting of H05VV-F cord and plug rated 10 A/250 V. The cord set should have the appropriate safety approvals for the country in which the equipment will be installed.
Power saving
The monitor will be switched to “power saving” mode by the control signal from the display controller, as indicated by the red-colored power LED.
Mode LED light
- On: Blue
- Power saving: Red
The power saving mode will be kept until a control signal has been detected or the keyboard or mouse is activated. The recovery time from “power saving” mode back to “on” is around 3 seconds.
Display Data Channel (DDC)
To make installation easier, so long as your system supports the DDC protocol, the monitor is able to plug-and-play. The DDC is a communication protocol through which the monitor automatically informs the host system about its capabilities; for example, supported resolutions and corresponding timing. The monitor supports the DDC2B standard.
Description of Acer Nitro 34" Curved
The Acer Nitro 34" Curved LCD Monitor (XZ342CK) is designed to deliver an exceptional viewing experience, whether you're gaming, working on graphic design, or just browsing the web. The 34-inch curved VA panel offers a wide viewing angle and an immersive, cinematic experience. The monitor's 3440 x 1440 UWQHD resolution provides crisp and clear visuals, while the 1ms response time and 144Hz refresh rate ensure smooth and seamless motion, even during fast-paced action. AMD Free Sync Premium technology further enhances the visual experience by eliminating screen tearing and stuttering. The XZ342CK also offers a range of connectivity options, including DisplayPort 1.4, HDMI 2.0, and USB 3.0. With Acer Vision Care, Blue Light Shield, and Flicker less technology, this monitor is not only designed for visual excellence but also for eye comfort during long usage sessions.
Connector pin assignment
19-Pin Color Display Signal Cable*
PIN | Meaning | PIN | Meaning |
1. | TMDS Data2+ | 10. | TMDS Clock+ |
2. | TMDS Data2 Shield | 11. | TMDS Clock Shield |
3. | TMDS Data2- | 12. | TMDS Clock- |
4. | TMDS Data1+ | 13. | CEC |
5. | TMDS Data1 Shield | 14. | Reserved (N.C. on device) |
6. | TMDS Data1- | 15. | SCL |
7. | TMDS Data0+ | 16. | SDA |
8. | TMDS Data0 Shield | 17. | DDC/CEC Ground |
9. | TMDS Data0- | 18. | +5V Power |
19. | Hot Plug Detect |
20-Pin Color Display Signal Cable
PIN | Description | PIN | Description |
1. | Lane0(p) | 11. | GND |
2. | GND | 12. | Lane3(n) |
3. | Lane0(n) | 13. | Config1 |
4. | Lane1(p) | 14. | Config2 |
5. | GND | 15. | AUX_CH (n) |
6. | Lane1(n) | 16. | GND |
7. | Lane2(p) | 17. | AUX_CH (p) |
8. | GND | 18. | Hot Plug Detect |
9. | Lane3(n) | 19. | DP Power_Return |
10. | Lane3(p) | 20. | DP Power |
Standard timing table
No. | Mode | Resolution | Refresh Rate | |
1 |
VGA | 640x480 | 60 | Hz |
2 | 640x480 | 72 | Hz | |
3 | 640x480 | 75 | Hz | |
4 | MAC | 640x480 | 66.66 | Hz |
5 | VESA | 720x400 | 70 | Hz |
6 |
SVGA | 800x600 | 56 | Hz |
7 | 800x600 | 60 | Hz | |
8 | 800x600 | 72 | Hz | |
9 | 800x600 | 75 | Hz | |
10 |
XGA | 1024x768 | 60 | Hz |
11 | 1024x768 | 70 | Hz | |
12 | 1024x768 | 75 | Hz | |
13 |
VESA | 1152x864 | 75 | Hz |
14 | 1280x960 | 60 | Hz | |
15 | SXGA | 1280x1024 | 60 | Hz |
16 | VESA | 1280x720 | 60 | Hz |
17 |
WXGA | 1280x800 | 60 | Hz |
18 | 1360x768 | 60 | Hz | |
19 |
WXGA+ | 1440x900 | 60 | Hz |
20 | 1440x900 | 75 | Hz | |
21 | WSXGA+ | 1680x1050 | 60 | Hz |
22 | UXGA | 1600x1200 | 60 | Hz |
23 | FHD | 1920x1080 | 60 | Hz |
24 |
QHD | 2560x1440 | 60 | Hz |
25 | 2560x1440 | 144 | Hz | |
26 | 3440x1440 | 60 | Hz | |
27 | 3440x1440 | 75 | Hz | |
28 | 3440x1440 | 100 | Hz | |
29 | 3440x1440 | 120 | Hz | |
30 | 3440x1440 | 144 | Hz | |
Note
- DP:3440x1440 (up to 144Hz), support Free Sync Premium and HDR technology.
- HDMI1/HDMI2: 3440x1440 (up to 100Hz), support Free Sync Premium and HDR technology.
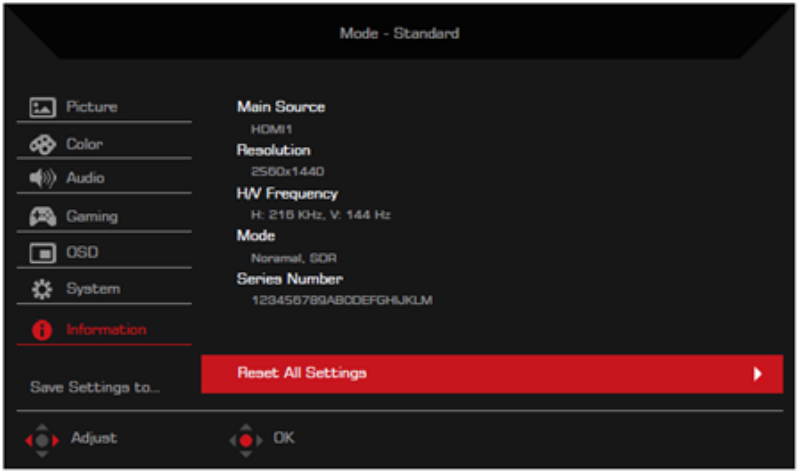
Acer Nitro 34" Curved LCD Monitor Information
Reset All Settings: Reset all settings to the defaults. Save Setting to…(User mode only)
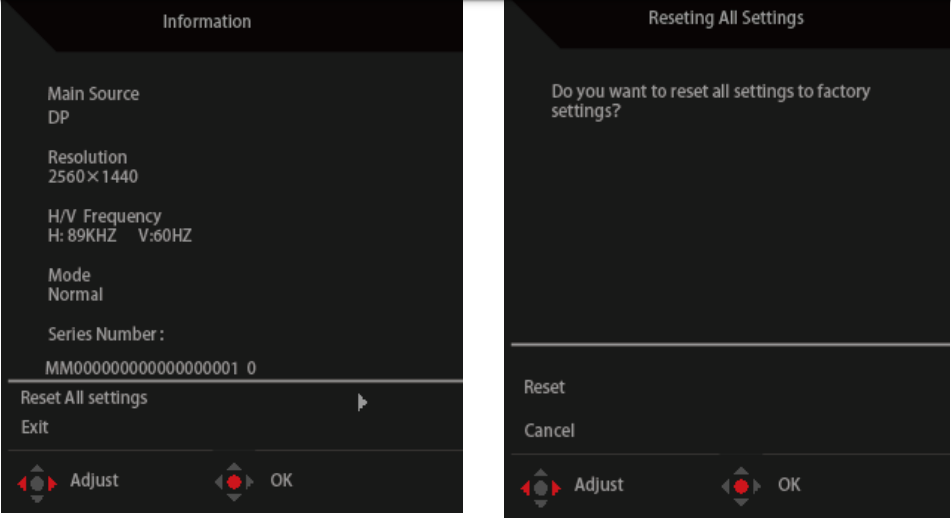
- Press the MENU key to open the OSD.
- 2. Toggle the joystick to the up or down to select "Save Setting to..." from the OSD. Then toggle to the right to navigate to the element you wish to adjust and press the joystick to enter it.
Troubleshooting of Acer Nitro 34" Curved LCD Monitor XZ342CK
Before sending your LCD monitor for servicing, please check the troubleshooting list below to see if you can self-diagnose the problem.
HDMI1(2.0) /HDMI2(2.0)/DP Mode
Problem | LED status | Remedy |
No picture visible | Blue | Using the OSDmenu, adjust brightness and contrast to maximumor reset to their default setting. |
Off | Checkthe power switch. | |
Check if the AC power cord is properly connected to the monitor. | ||
Red | Check if the videosignal cable is properly connected at the back of monitor. | |
Check if the computer system is switched on and in power saving/standby mode. |
Acer Pros & Cons
Pros
- Curved 34-inch VA panel for an immersive viewing experience
- 3440 x 1440 UWQHD resolution for crisp and clear visuals
- 1ms response time and 144Hz refresh rate for smooth motion
- AMD Free Sync Premium technology for eliminating screen tearing and stuttering
- Wide range of connectivity options
- Acer Vision Care, Blue Light Shield, and Flicker less for eye comfort
Cons
- Not VESA mount compatible
- No built-in speakers
- May be expensive for some users
Customer Reviews & Most Common Complaints about XZ342CK
Customers have praised the Acer Nitro 34" Curved LCD Monitor XZ342CK for its immersive viewing experience, crisp and clear visuals, and smooth motion. However, some users have expressed disappointment with the monitor's lack of VESA mount compatibility and built-in speakers. Some users have also reported issues with the monitor's stand, stating that it is not sturdy enough. Overall, the XZ342CK has received positive reviews from customers, with an average rating of 4.5 out of 5 stars.
Faqs
How do I set up my Acer Nitro 34" Curved LCD Monitor XZ342CK monitor for the first time?
What are the optimal display settings for the Acer Nitro 34" Curved LCD Monitor XZ342CK?
How can I calibrate the colors on my Acer Nitro 34" Curved LCD Monitor XZ342CK?
Can I wall-mount my Acer Nitro 34" Curved LCD Monitor XZ342CK?
What should I do to maintain the clarity of the Acer Nitro 34" Curved LCD Monitor XZ342CK screen?
What are the benefits of the curved screen on the Acer Nitro 34" Curved LCD Monitor XZ342CK?
Is the Acer Nitro 34" Curved LCD Monitor XZ342CK monitor suitable for gaming?
How do I adjust the refresh rate on my Acer Nitro 34" Curved LCD Monitor XZ342CK?
What to do if the built-in speakers of the Acer Nitro 34" Curved LCD Monitor XZ342CK aren't working?
What type of backlight does the Acer Nitro 34" Curved LCD Monitor XZ342CK use?
Comments ( 1 )
Leave a Comment
Paul
Can we improve refresh rate of the Acer Nitro?