Anycubic Photon Mono SLA 3D Printer Instruction Manual
Content
Introduction
A desktop resin printer with great precision that can be used by both professionals and enthusiasts is the Anycubic Photon Mono SLA 3D Printer. It is perfect for producing detailed models, prototypes, and more since it has a fast monochrome LCD screen, great detail, and an easy-to-use interface.
Technical Specification
Printing System
- Operation: 2.8-inch Color TFT Screen
- Software: ANYCUBIC Photon Workshop
- Connectivity: USB memory stick
Specification
- Technique: LCD Shadow Masking
- Light source: UV-LED (wavelength 405nm)
- XY Resolution: 0.051 mm, 2560x1620 (2K)
- Z axis Accuracy: 0.01mm
- Suggested Layer Thickness: 0.01 ~ 0.15mm
- Print Speed: Max 50mm/h
- Rated Power: 45W
Physical Dimensions
- Dimension: 222mm (L) x 227mm (W) x 383mm (H)
- Build Volume: 130mm (L) x 80mm (W) x 165mm (H)
- Materials: 405nm UV-resin
- Net Weight: ~4.25kg
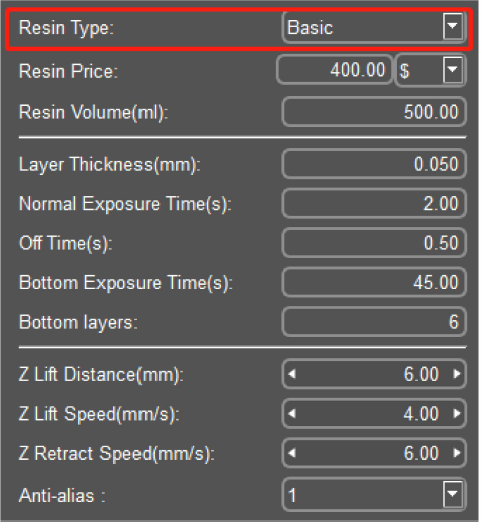
Recommended Printing Parameters
- Layer Thickness: 0.05 mm
- Normal Exposure Time: 2s
- Off Time: 0.5 s
- Bottom Exposure Time: 45 s
- Bottom Layers: 6
- Z Lift Distance: 6mm
- Z Lift Speed: 4 mm/s
- Z Retract Speed: 6 mm/s
- Anti-alias: 1
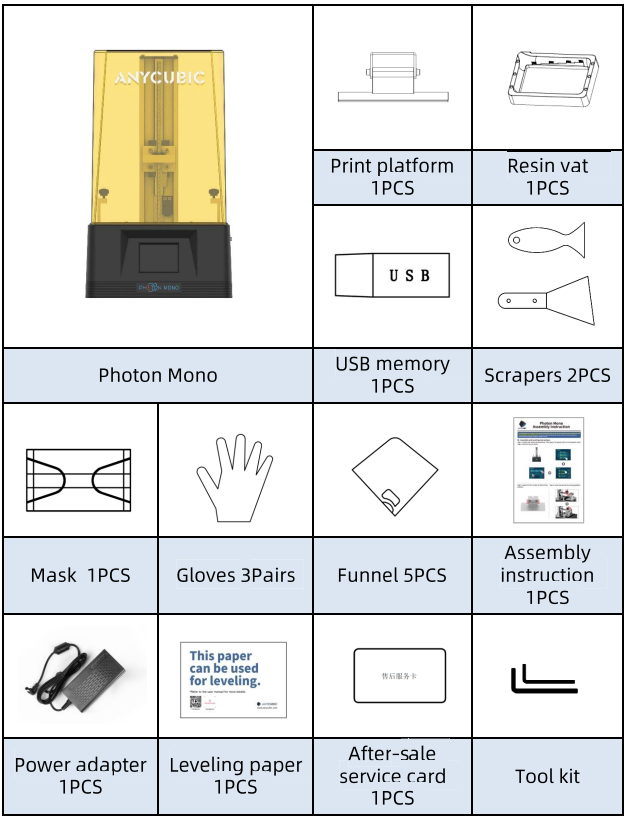
Anycubic Photon Mono SLA 3D Printer Packing List
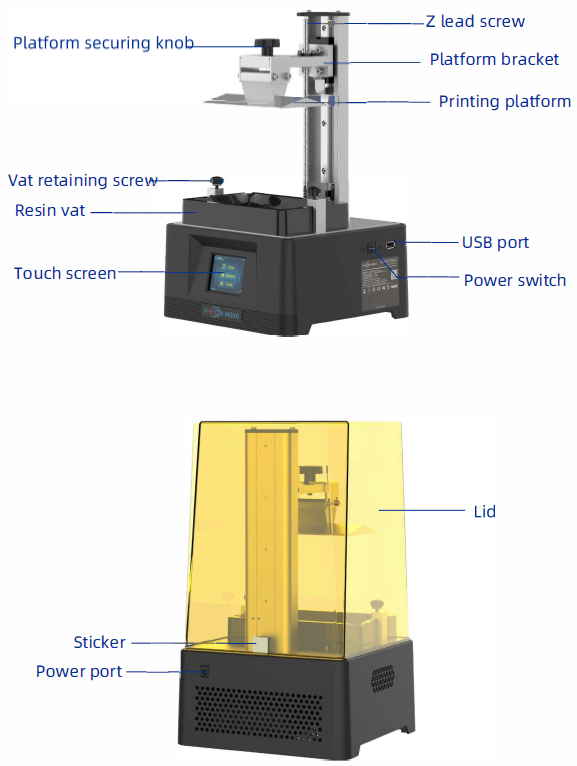
Product Overview
Menu Directory
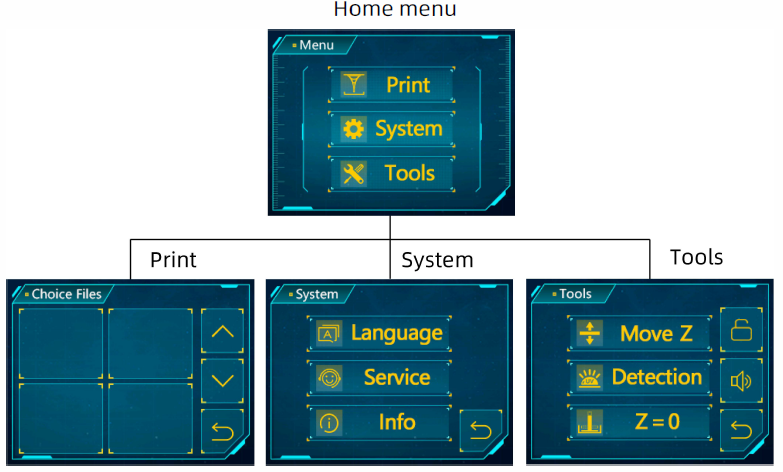
Home menu
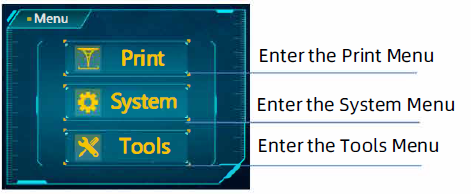
System
Language: Change language(English/Chinese)
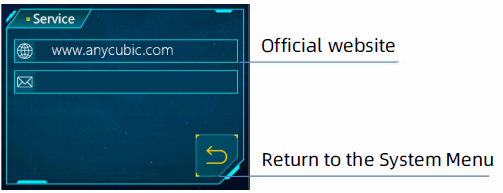
Service
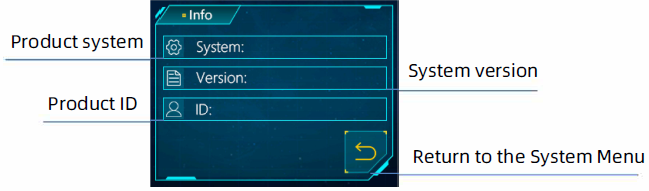
Information
Description
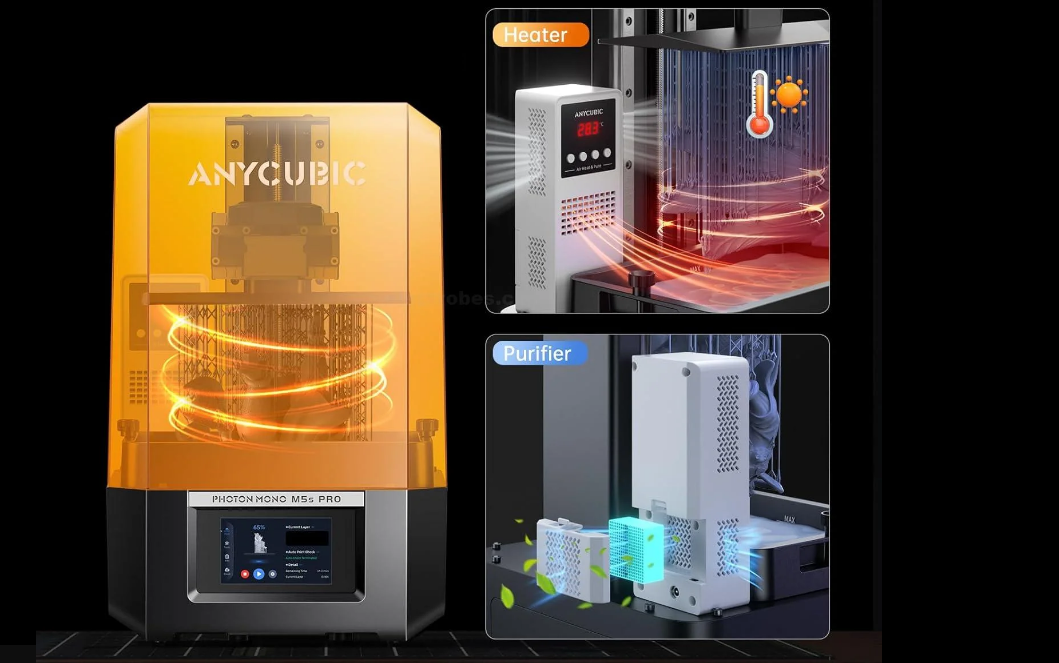
Applications for the Anycubic Photon Mono SLA 3D Printer are numerous and include dentistry, jewelry, engineering, and prototyping. It is made for high-resolution 3D printing. Its monochrome LCD screen offers higher print success rates and faster print speeds, and both novice and expert users will find it easy to operate thanks to its small size and intuitive interface. Additionally, the printer has an integrated carbon filter to eliminate offensive smells, and it can easily transmit files between computers via USB or Wi-Fi connections.
First Print Instructions
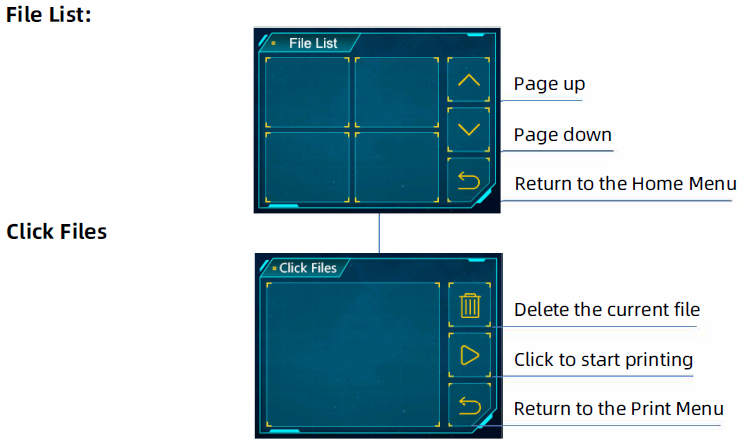
Print
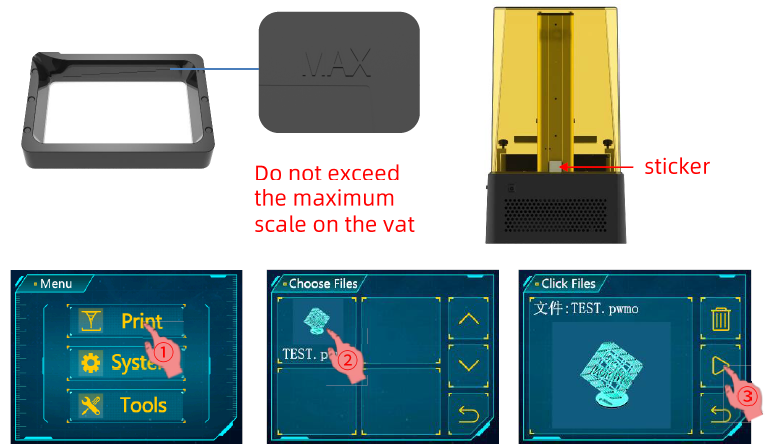
Insert the USB memory (the test file"TEST.pwmo" has been saved in it) into the USB port. Then wear masks and gloves, slowly pour the resin into the vat and the resin cannot exceed the maximum scale in the vat. After that, cover the lid and the side with sticker needs to face backward. Take off the gloves, select the "TEST.pwmo" test file and start printing. {The printing time on the screen is for reference only, we make no guarantee that it is the actual printing time.)
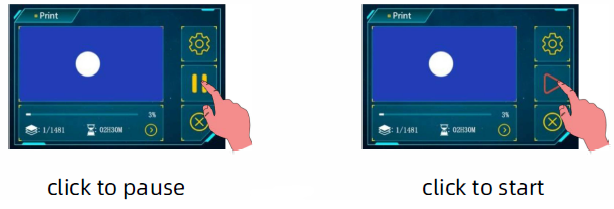
If you think the resin is insufficient to finish an ongoing print (or you wish to change the resin color), you can click "Pause'', the platform will rise, and you can slowly pull (or change) the resin into the vat. After that, click "Start" to resume.
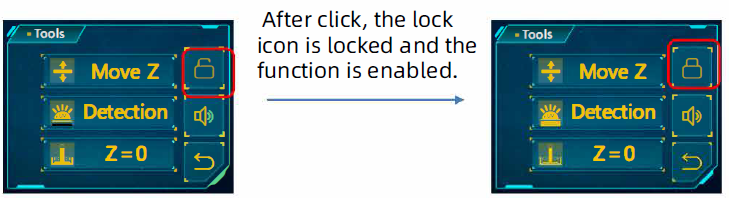
Door detection function
Door detection function is disabled by def a ult. If this function is enabled, the printer can detect whether the lid is on or not. If the lid is removed, the printing will be paused. And the printing will resume if put back the lid.
Click the lock icon on "Tools11 interface to enable/disable this function.
Handling models and residues
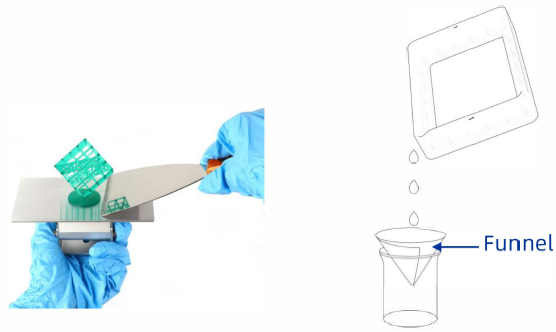
After printing, wait until the resin stop dropping from the platform and then unscrew and remove the platform. The model can be removed by scrapper carefully. The removed model should be washed with ethanol 95vol% concentration. The printed model may need post curing to achieve better hardness by direct sunlight or UV-curing box.
Slicing Software of Anycubic Photon Mono SLA 3D Printer
Photon Mono 3D printer reads "pwmo'' file and prints. It is necessary to convert 3D files (such as stl file or obj files) into two files for the machine to recognize. Software that convert 3D files into pwmo files is called slicing software.
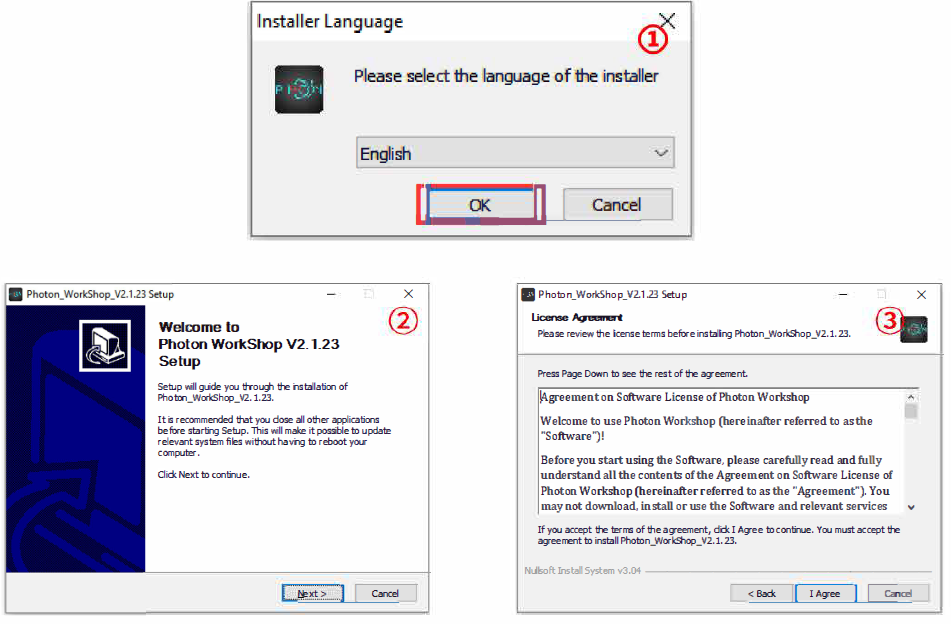
Slicing software installation
Here Windows PC is taken for example. Slicing software is located in memory stick: "File_English_Photon Mono" _,. "slicing software"_,. "windows". (You may have to close the anti-virus software before installing the slicing software.) Double click "Photon_WorkShop_ V2. l .23.exe", and then follow the installation guide as shown below:
- Open, save, undo and redo. (l) Model mirror, hollow and infill, punching, text paste and spilt model - explained in the following parts.
- Click to switch the preset view.
- Switch between slice/machine settings and support settings.
- Drag the slider to preview each layer of the model.
- 3D model preview.
- Click to slice.
- Move, rotate, scale and layout.
- Click to switch to the AutoConfig Mode.
Parameter Settings
Slice Settings
The default printing mode is "Normal Mode". In this mode, four resin types are preset-"Basic11, "Plant-based", "Dental Castable" and "Custom". Different resin types have different printing parameters. You can directly select the "Resin Type" according to which Anycubic Resin you are using.
- You can always modify the parameters.
And, you can add a custom resin type. Click "Configure" __,. "Resin Manage".
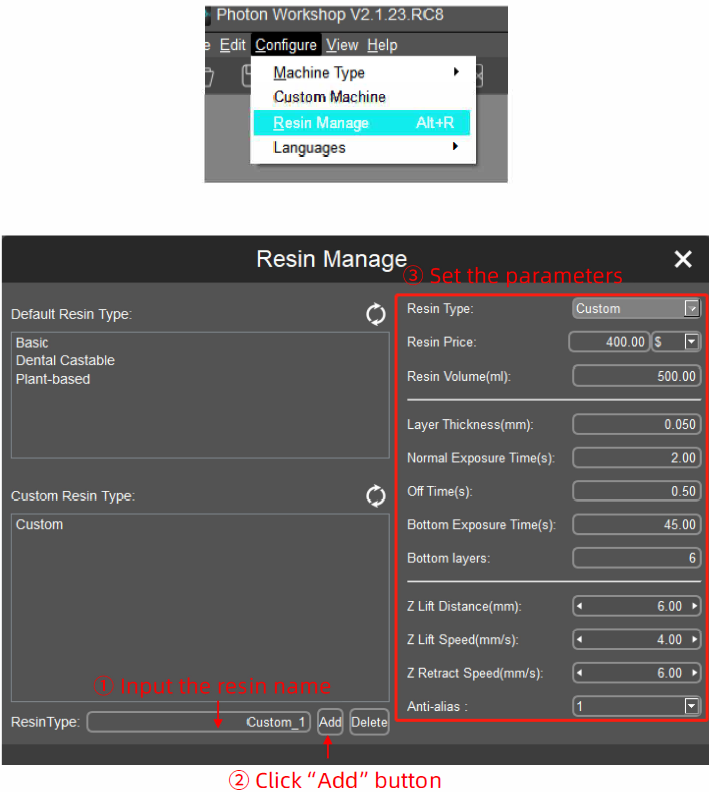
Note: Click the refresh icon can restore the def ult parameters of the resin.
Slice parameters
- Resin Price: Set the price according to the purchased resin.
- Resin Volume: Set according to the volume of a bottle of resin you purchased. During slicing, it will automatically calculate the resin consumption and price in total
- Layer thickness: The thicker the layer, the longer the exposure time for each layer.
- Normal exposure time: Setting range: 1 ~4s, the exposure time is set according to the thickness of each layer, the complexity of the model details, and the resin materials.
- Off time: The UV light interval between each layer ranges from 0.5~45.
- Bottom Exposure Time: Setting range: 30~60s, the longer the bottom exposure time is, the easier the bottom layer of the model sticks onto the build platform.
- Bottom layers: Setting range: 4~ 10.
- Z Lift Distance: It is suggested to set it to 6mm.
- Z Lift Speed: It is suggested to set it to 4mm/s.
- Z Retract Speed: It is suggested to set it to 6mm/s.
- Anti-alias: A higher grade of anti-alias value could enhance the ability to smooth the edges for each layer during printing, thereby resulting better surface of the printed objects. A higher grade of anti-alias value also means longer slicing time and larger files. The suggested value is 1.
Slicing Software
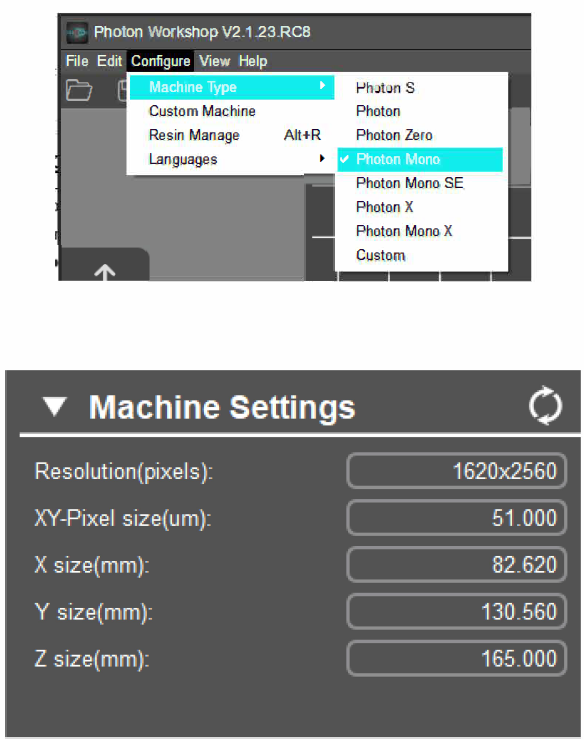
Machine Settings
These parameters seldom need modification. But if the printed model shows a big dimensional error along a particular axis (X,Y, or Z), you can modify the corresponding values for that axis proportionally.
Setup Guide
- Setting up the Anycubic Photon Mono SLA 3D Printer is a simple process.
- Start by unboxing the printer and checking that all components are included.
- Connect the power supply and turn on the printer, then install the build plate and resin tank.
- Follow the instructions in the user manual to level the build plate, then pour resin into the tank.
- Finally, use the printer's touchscreen to load your 3D model and start the print.
Anycubic Photon Mono SLA 3D Printer Troubleshooting
- Common problems with the Anycubic Photon Mono SLA 3D Printer include failed prints, warping, and poor adhesion.
- To resolve these issues, make sure the build plate is leveled correctly, use a higher layer thickness, and ensure that the resin is properly mixed before use. It is also important to properly cure the printed parts, as they may be fragile immediately after printing.
- Always follow the instructions in the user manual to ensure safe and successful printing.
Pros & Cons
Pros
- High-resolution prints
- Fast print speeds
- User-friendly interface
- Compact size
- Built-in carbon filter
Cons
- Higher cost compared to FDM printers
- Requires careful handling of resin
- Not suitable for large prints
- May have a learning curve for beginners
Faqs
What is the duration of the Anycubic Photon Mono SLA 3D Printer screen?
For what kind of resin does the Mono work well?
What is the Anycubic Anycubic Photon Mono SLA resolution?
Which software is utilized by the Photon Mono?
How should the Anycubic Photon Mono SLA 3D Printer resin vat be cleaned?
What safety measures are recommended for the Photon Mono?
How should I use the Photon Mono if I have unsuccessful prints?
Leave a Comment