Conair SU7 Sound therapy & Relaxation Clock Radio User Guide
Content
Introduction of Conair SU7 Sound Therapy & Relaxation Clock Radio
The Conair Sound Relaxation Clock Radio SU7 is a versatile and feature-packed product that combines the functions of a clock radio, a sound machine, and a USB charging station. It is perfect for anyone who wants to wake up to their favorite radio station, relax with soothing sounds, or keep their devices charged. The estimated price of the product is around $30 to $40, and it is currently available on the market.
Detailed Specifications
The Conair Sound Relaxation Clock Radio SU7 has the following key features:
- Dual alarm with weekday, weekend, and nap settings
- FM radio with 20 preset stations
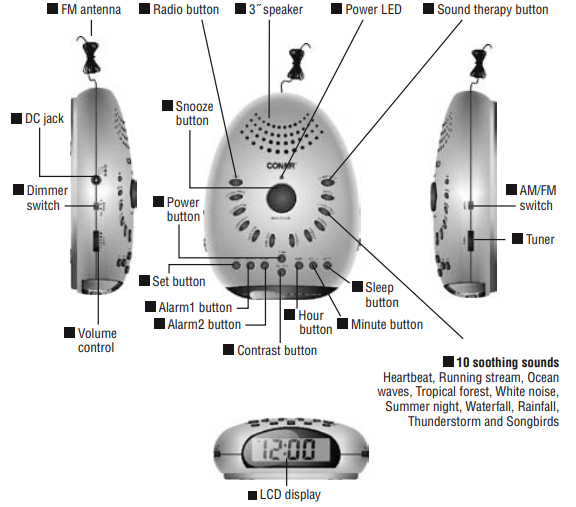
- 6 nature sounds (ocean, rain, thunder, brook, summer night, and white noise)
- USB charging port with 1 amp output
- Gradual wake and sleep feature
- 0.6-inch green LED display with dimmer control
- Snooze and sleep buttons
- 3.25 x 5.5 x 3.25 inches (HWD)
- 12.8 ounces
FEATURES
- 10 high quality digital recordings
- Summer night: Relax to the soothing sounds of a gentle summer.
- Rainfall: Ease the mind with the peaceful patter of rain.
- Ocean waves: Wash away tension with the calming effect of the incoming tide.
- Waterfall: Provide an ideal working background with the refreshing cascade of falling water.
- White noise: Mask unwanted noise with a background of muffled static.
- Running stream: Soothe your soul with the serenity of a flowing stream.
- Heartbeat: Calm little ones with the rhythmic beating of a heart.
- Tropical forest: Travel to a world full of tranquil tropical sounds.
- Songbirds: Wake to the sound of birds singing.
- Thunderstorm: Lull yourself to sleep with the rumbling of a thunderstorm.
- Three-inch speaker for realistic sound quality.
- Dimmer: Adjust the brightness of backlight (Hi / Low).
- Snooze / Power button.
- Volume control.
- Battery option (four AA batteries not included) with AC adapter included.
- Alarm clock radio: dual alarm, AM/FM radio, sleep-timer functions.
- LCD Contrast: Allows you to adjust the LCD screen contrast for comfortable viewing (1-3).
OPERATING INSTRUCTIONS
This system provides soothing sounds to relax you and to mask unwanted noise. The Conair Sound Therapy & Relaxation Clock Radio System allows you to create a soothing environment at home, at the office or anywhere you would like to relax. Used as directed, the Conair Sound Therapy & Relaxation Clock Radio System will provide you with dependable service. The Conair Sound Therapy & Relaxation Clock Radio System can be used with a cord by inserting the pin end of the adapter into the DC jack on the side of the unit. Plug the adapter into a 120V AC household outlet. The Conair Sound Therapy & Relaxation Clock Radio System will also operate without the cord, using four 1.5 volt AA batteries (not included).
TO INSERT BATTERIES
- Unlatch and lift off the battery compartment door (located on the bottom of the sound system).
- Insert four AA 1.5 volt alkaline batteries, as shown inside the battery compartment.
- Replace the battery compartment door and return the sound system to its upright position.
Please note: If you will be running the Conair Sound Therapy & Relaxation Clock Radio System for a long period of time, it is recommended that you use the adapter. This will preserve the life of the batteries. Battery power is not consumed when the adapter is used. To prevent the sound system from turning on accidentally while you are travelling, remove the batteries before packing. The sound system will run solely on the adapter if the batteries are not used. Batteries are a good backup in case of power failure. Dispose of batteries in a proper manner appropriate to your provincial, state and local regulations. Be sure to remove batteries when storing your Conair Sound Therapy & Relaxation Clock Radio System. The batteries will drain if they are left connected when the sound system is unplugged. Old batteries may leak chemicals that can badly damage the sound system.
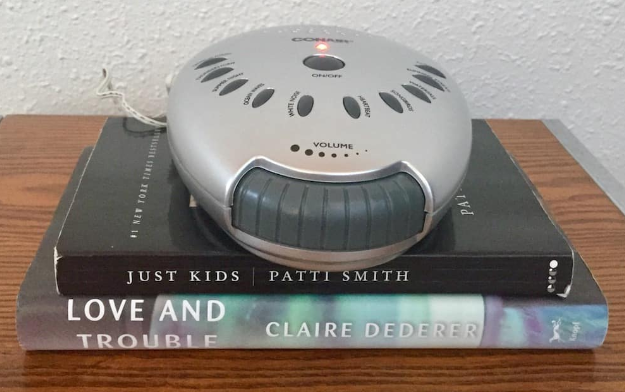
Conair SU7 Sound Therapy & Relaxation Clock Radio Description
The Conair Sound Relaxation Clock Radio SU7 is a compact and sleek device that can fit easily on any nightstand or desk. It has a user-friendly interface with easy-to-use buttons and a clear LED display. The dual alarm feature allows you to set different wake-up times for weekdays and weekends, and the nap setting lets you take a quick power nap during the day. The FM radio has 20 preset stations, so you can easily switch between your favorite channels. The sound machine feature offers 6 nature sounds that can help you relax, focus, or sleep. You can choose from ocean, rain, thunder, brook, summer night, or white noise sounds. The gradual wake and sleep feature allows you to wake up and fall asleep gently, by gradually increasing or decreasing the volume of the sound or radio. The USB charging port is a convenient feature that lets you charge your smartphone, tablet, or other devices while you sleep.
HOW TO OPERATE
OPERATING THE SOUND THERAPY SYSTEM
- Plug the pin end of the adapter into the DC jack on the side of the Conair Sound Therapy & Relaxation Clock Radio System. Insert the plug end of the adapter into any 120V AC household outlet OR insert four AA batteries (not included) as shown inside the battery compartment, on the bottom of the sound system.
- Press the POWER button once to turn on the sound system. The Power LED will light up to indicate the power is on. The sound system will generate the default natural sound (the default setting is Running stream).
- Choose one of ten natural sounds by pressing the corresponding button once.
- To adjust the speaker volume, turn the volume control located at the left of the sound system.
- To turn off the Conair Sound Therapy Relaxation System, press and release the POWER button again.
- You can shut off the sound system automatically by using the SLEEP function. For more details, please refer to the section using the sleep mode.
OPERATING THE RADIO
- Plug the pin end of the adapter into the DC jack on the side of the Conair Sound Therapy & Relaxation Clock Radio System. Insert the plug end of the adapter into any 120V AC household outlet OR insert four AA batteries (not included) as shown inside the battery compartment, on the bottom of the sound system.
- Press the POWER button once to turn on the sound system. The Power LED will light up to indicate the Power is on. The sound system will generate the default sound Running stream.
- Press the RADIO button to switch to the radio mode.
- Slide the AM/FM switch to set the wave band (AM/FM); turn the TUNER control also located at the right of the sound system to adjust the radio frequency.
- Turn the volume control located at the left of the sound system to adjust the speaker volume.
- Press the SOUND THERAPY button to turn back to sound therapy mode. To turn off the radio, just press and release the POWER button again.
- You can shut off the radio automatically by using the SLEEP function. For more details, please refer to the section using the sleep mode.
SETTING THE TIME
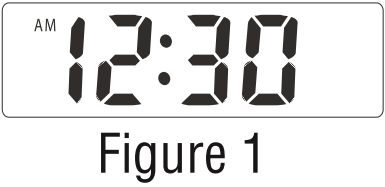
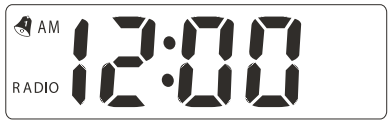
When power is initially supplied, the SU7 will automatically enter the time setting mode. The LCD will show “AM 12:00”. If no time is set in 8 seconds it will quit the mode and “:” will start blinking steadily. You can also press the SET button to enter the time setup mode during idle mode.
- Press the HOUR button to adjust the hour; the hour will increase by one hour every time the HOUR button is pressed; press and hold HOUR for over one second, and the hour will increase continuously.
- Press the MINUTE button to adjust the minutes by the same method.
- After the time setting is completed, press the SET button to save the data and quit the setup mode.
SETTING THE TIME OF ALARM CLOCK
- Press SET to enter the time setting during idle mode.
- Press ALARM1 to enter the ALARM1 clock setting mode. The last data that was entered will appear on the clock display. If you enter Alarm1 clock setting mode from Alarm2 setting mode, the last data of Alarm2 will be recognized also.
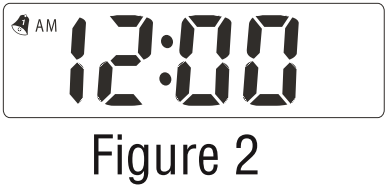
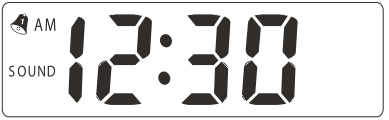
The Alarm 1 default time is “AM 12:00” as figure 2 shows with the Alarm1 icon flashing. The LCD display will show the current time of ALARM 1, reset time.
- Follow steps 3 and 4 of setting the time to adjust the hour and minute.
- Press SET to quit setting mode or the ALARM2 button to enter Alarm2 clock setting mode. The last data of Alarm1 will be saved and recognized. To set ALARM2 proceed with the same method.
NOTE: In ALARM Clock setup mode, if there is not any operation for 8 seconds, the unit exits from the setup mode and saves the last entered data.
SELECTING THE ALARM CLOCK SOUND
There are three sounds that can be selected for the Alarm: SOUND, RADIO & BUZZER. When the time reaches the ALARM1 time, the selected sound will be triggered automatically.
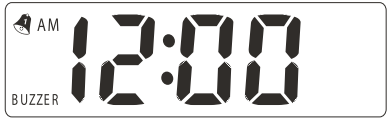
Press ALARM1 button. The system will enter BUZZER mode, and the LCD will show the set time with the Alarm1 icon, and “BUZZER” will flash on the LCD display 8 times. The current time will then show on the display.
Press ALARM1 again. The mode will change to RADIO, and the LCD will show the set time with the Alarm1 icon, and “RADIO” will flash 8 times on the LCD display. The current time will then show on the display.
Press ALARM1 once more. The mode will change to SOUND, and the LCD will show the set time with the Alarm1 icon, and “SOUND” will flash 8 times. The current time will then show on the display.
- Press ALARM1 again. The mode will change to NO RING, and quit the ALARM function with CANCELLING setting. The current time will then show on the display. To select the sound of Alarm2, use the same method.
NOTE: Bell icons appear when Alarm1 and Alarm2 are set to turn on at a selected time.
STOPPING THE ALARM SOUND/USING THE SNOOZE MODE
The duration of the alarm is sixty minutes. The sound will stop when sixty minutes are up. You can also turn off the alarm with the following steps:
- When buzzer is triggered, press ALARM1 or ALARM2 to enter idle mode, or press SOUND THERAPY or RADIO to switch to SOUND or RADIO mode.
- When radio is triggered, press ALARM1 or ALARM2 to enter the idle mode, or press SOUND THERAPY to switch to SOUND mode.
- When SOUND THERAPY is triggered, press ALARM1 or ALARM2 to enter the idle mode, or press RADIO to switch to radio mode.
- During the sound of ALARM1 or ALARM2, press SNOOZE to switch to SNOOZE mode. The sound of ALARM1 or ALARM2 will stop temporarily for ten minutes. You can trigger SNOOZE only three times.
NOTE
- If the second alarm is triggered during the operation of first alarm, the previous action will be stopped and changed to the second sound mode, and then stop when the alarm time is over.
- If the current sound is the same as the selected ALARM sound, when the ALARM is triggered, the current sound will play continually and then stop when the alarm time is over.
- During the operation of the alarm clock, you can trigger SNOOZE only three times.
- When the alarm is triggered during the SNOOZE mode, the period of SNOOZE time will stop automatically.
- If there is no power supplied when the time reaches the setting of ALARM1 or ALARM2 or the power is broken during the alarm, the alarm operation will not work.
USING THE SLEEP MODE
There are five different SLEEP times available (15, 30, 45, 60, 90 minutes). The maximum time is 90 minutes.
- Press SLEEP button when the SU7 is in idle mode. The SOUND THERAPY will turn on; also you can set SLEEP during the SOUND THERAPY / RADIO playing mode.
- The set sleep time will show on the LCD and the SLEEP icon will flash 8 times. The current time will then show on the LCD display. The entered time of SLEEP will start countdown.
- During SLEEP countdown, if you press SLEEP, the LCD will show the remaining time and will flash 8 times. You can press SLEEP again to add time while the remaining time flashes, then the system will go back to show the current time.
- If you press SLEEP again while the remaining time flashes, the time will go back to the original sleep time. For example, if the remaining time is less than 15 minutes, it will go back to 15, if less than 30 minutes but more than 15 minutes, back to 30.
- If you press SLEEP again while the remaining sleep time flashes, the sleep time increases 15 minutes, and the LCD display will show 5 different times if you press SLEEP continuously.
- When SLEEP time ends, the SOUND THERAPY or Radio will stop and the power will be off.
NOTE
- If the time reaches the set time of ALARM 1 or ALARM 2 during the SLEEP time countdown, the unit will quit Sleep operation and stop the countdown.
- You can also adjust the SLEEP time just by pressing MINUTE during SLEEP time setting mode, it will increase by one minute every time or increase upward continuously by pressing and holding the button.
- When the SLEEP time is 90 already, press MINUTE, the time will become 0 and the LCD will show OFF.
- The SLEEP icon will turn on permanently during countdown mode until the SLEEP time countdown ends.
AT A GLANCE
Care of your Conair SU7 Sound Therapy & Relaxation Clock Radio
- Before cleaning, unplug the Sound Therapy & Relaxation Clock Radio System from the outlet (if using the adapter) or remove the batteries.
- Clean the Sound Therapy & Relaxation Clock Radio System only with a soft, slightly damp cloth. Never allow water or any other liquid to come into contact with the sound system.
- DO NOT IMMERSE IN ANY LIQUID TO CLEAN. Never use abrasive cleaners.
- Do not attempt to repair the Sound Therapy Relaxation System.
Setup Guide
To operate the Conair Sound, follow these steps:
- Plug the power cord into a wall outlet and the clock radio.
- Press the power button to turn on the clock radio.
- Use the tuning buttons to set your desired radio station.
- Press and hold the set button to set the time and alarm.
- Use the alarm buttons to set the alarm time and mode (radio, sound, or off).
- Use the volume buttons to adjust the volume.
- Use the snooze and sleep buttons to snooze or sleep the alarm.
- Use the dimmer button to adjust the LED display brightness.
- Use the USB charging port to charge your devices.
IMPORTANT SAFETY INSTRUCTIONS
When using an electrical appliance, basic precautions should always be taken, including the following: Read all instructions before using this appliance.
DANGER – To reduce the risk of electric shock:
- Always unplug this appliance from the electrical outlet immediately after using and before cleaning.
- Do not reach for an appliance that has fallen into water. Unplug immediately.
- Do not use while bathing or in a shower.
- Do not place or store appliance where it can fall or be pulled into a tub or sink. Do not place or drop into water or other liquid.
WARNING – To reduce the risk of burns, fire, electric shock, or injury to persons:
- An appliance should never be left unattended when plugged in. Unplug from outlet when not in use.
- This appliance is not for use by children or individuals with certain disabilities.
- Do not operate under blanket or pillow. Excessive heating can occur and cause fire, electric shock, or injury to persons.
- Use this appliance only for its intended use as described in this manual.
- Never operate this appliance if it has a damaged cord or plug, if it is not working properly, or if it has been dropped or damaged, or dropped into water. Return the appliance to a service center for examination and repair.
- Do not carry this appliance by supply cord or use cord as a handle.
- Keep the cord away from heated surfaces.
- Never operate the appliance with the air openings blocked. Keep the air opening free of lint, hair, and other debris.
- Never operate on a soft surface, such as a bed or a couch, where air openings may be blocked.
- Never drop or insert any object into any of the openings.
- To disconnect, turn all controls to the OFF position, then remove plug from outlet.
SAVE THESE INSTRUCTIONS
Note: Unit supplied with a UL Listed 6V DC 300mA center positive adapter. For more information, please contact a Conair service center.
Troubleshooting
If you encounter any issues with the Conair Sound Relaxation Clock Radio SU7, try the following solutions:
- If the clock radio does not turn on, check the power cord and outlet.
- If the radio does not receive any stations, check the antenna and location.
- If the alarm does not sound, check the alarm mode and time.
- If the USB charging port does not work, check the cable and device.
LIMITED ONE-YEAR WARRANTY
Conair will repair or replace (at our option) your unit free of charge for 12 months from the date of purchase if the appliance is defective in workmanship or materials. In the absence of a purchase receipt, the warranty period will be 12 months from the date of manufacture.
ANY IMPLIED WARRANTIES, OBLIGATIONS OR LIABILITIES, INCLUDING BUT NOT LIMITED TO THE IMPLIED WARRANTY OF MERCHANTABILITY AND FITNESS FOR A PARTICULAR PURPOSE, SHALL BE LIMITED IN DURATION TO THE 12-MONTH DURATION OF THIS WARRANTY.
Pros & Cons about Conair SU7 Sound Therapy & Relaxation Clock Radio
Pros
- Versatile and feature-packed
- Compact and sleek design
- User-friendly interface
- Affordable price
- Gradual wake and sleep feature
- USB charging port
Cons
- No Bluetooth connectivity
- No battery backup
- No AM radio
- No color display
Faqs
How do I set the time on the Conair SU7 Sound Therapy & Relaxation Clock Radio?
What sound therapy options are available on the Conair SU7 Sound Therapy & Relaxation Clock Radio?
How do I set an alarm on the Conair SU7 Sound Therapy & Relaxation Clock Radio?
How do I adjust the volume on the Conair SU7 Sound Therapy & Relaxation Clock Radio?
Does the Conair SU7 Sound Therapy & Relaxation Clock Radio have a gradual wake feature?
How do I switch between AM and FM radio on the Conair SU7 Sound Therapy & Relaxation Clock Radio?
What should I do if the Conair SU7 Sound Therapy & Relaxation Clock Radio options are not playing correctly?
How do I set the sleep timer on the Conair SU7 Sound Therapy & Relaxation Clock Radio?
What is the warranty of the Conair SU7 Sound Therapy & Relaxation Clock Radio?
Can I use the Conair SU7 Sound Therapy & Relaxation Clock Radio as an alarm without the sound or radio?
Leave a Comment