
Setup: Dymo LabelManager Plug N Play LabelMaker30 User Manual
Content
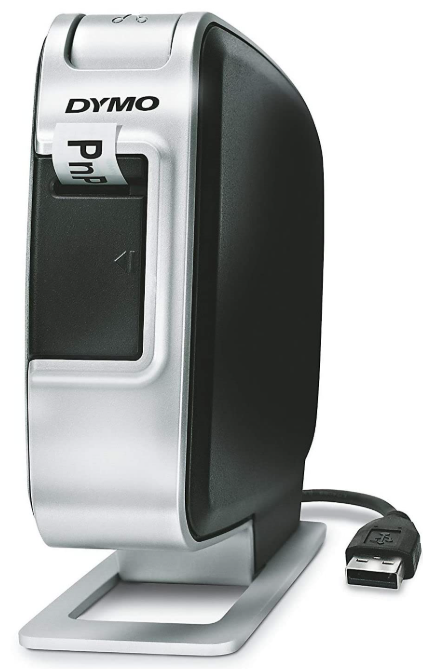
DYMO LabelManager Plug N Play LabelMaker 30
Introduction
- The Dymo LabelManager 300 enables you to create a wide variety of high-quality self-adhesive labels of up to 90 characters.
- The LabelManager uses 6mm (1/4"), 9mm (3/8"), 12mm (1/2"), 19mm (3/4"), or 24mm (1") wide tape cassettes in several label colours. Labels are back slit for easy removal from the backing tape. Text can be printed horizontally or vertically in a variety of sizes and styles, and can be left-justified, right-justified, or centred on the label.
- Visit www.dymo.com for information on obtaining tapes and accessories for your LM300.
Detailed Specifications (Key Features)
The DYMO LabelManager Plug N Play LabelMaker 30 comes with several key features that enhance its functionality:
- Plug-and-play connectivity via USB, eliminating the need for batteries or charging.
- High-resolution text and graphics with up to 280 characters per label.
- Supports multiple label sizes and types, including address labels, file folder labels, and more.
- Built-in keyboard with navigation keys for easy label creation.
- Compact and lightweight design for portability.
- Compatible with Windows and macOS operating systems.
Power Supply
BATTERIES
- With the LabelManager positioned as shown in Figure A1 on page 2, open the machine by lowering the keyboard. Apply pressure to point A2 of the battery/tape compartment cover to release the catch, then hinge down the cover.
- Insert six size AA alkaline or rechargeable Nickel-cadmium batteries, observing the polarity markings A3, and close the cover.
- Remove batteries if the LabelManager is to be unused for some time.
AC ADAPTOR (optional)
- Connect the AC adaptor to socket B. Inserting the adaptor plug disconnects the supply from the batteries.
- Unplug the AC adaptor from the LabelManager before disconnecting the mains power to the adaptor; otherwise, all label memory settings may be lost (see also ON/OFF).
Changing the cassette
- Apply pressure to point A2 of the battery/tape compartment cover to release the catch, then hinge down the cover.
- Hold as shown, then lift cassette C1 straight up and out.
- Ensure tape and ribbon C2 are taut across the mouth of the cassette , and the tape passes between the guideposts before installing as shown. If necessary, turn spool C3 clockwise to tighten the ribbon.
- Check that cassette switch D1 is set for the cassette type-see page 2. A notch in the cassette will fit over the switch when it is set correctly.
- Insert cassette with tape and ribbon positioned as shown between print head D2 and pinch roller D3.
- Push firmly D❹ until the cassette clicks into place. Ensure tape and ribbon are positioned correctly.
- Close the compartment cover.
Creating your first label
You will no doubt be anxious to see what your new LabelManager 300 can do. Before we go on to explore the many advanced features of the LM300, follow these simple steps to create your first label:
- Fit the batteries, or connect the AC adaptor, plug in, and switch on at the wall socket - see ‘Power Supply’.
- Open the battery/cassette compartment cover and install a tape cassette – see page 2 and ‘Changing the Cassette’. Check that the cassette is fitted correctly.
Close the cover, then press
 to switch the power on. The welcome message ‘DYMO’ will appear, and then the display should look like this: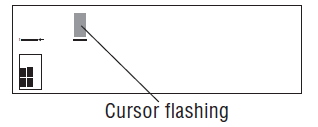
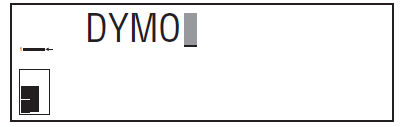
Use the keyboard to type in your full name. Each character you enter will appear on the display, for example:
- For an upper-case character, press and hold down
 followed by the character required.
 - Press CAPS for all subsequent characters in UPPER CASE.
- Press the space bar once for the space between each name.
- If you make a mistake, press DEL to delete the error, then type in the correction.
- For an upper-case character, press and hold down
- When you have finished, press PRINT . A label will be printed and will emerge from the slot in the top right-hand side of the machine. Wait until the mechanism has stopped, then press the cutter lever E to cut off the label and remove it from the machine.
You should now have a high-quality printed name label —don’t waste it! If this is your personal machine, why not fix the label to the underside to identify its owner? You have just found the first of many uses for your DYMO labels.
DYMO
Cleaning
- Clean the cutter blade regularly: Press and hold down the cutter lever E to expose the cutter blade F, then use a cotton bud and alcohol to clean both sides of the blade. Release the cutter lever E.
- Check and clean the print head face F regularly using a cotton bud and alcohol ONLY.
Troubleshooting
No display
- Check that the machine is on
- Replaced discharged batteries
- Check the AC adaptor.
No printing or poor text
- Replace discharged batteries
- Check that the tape cassette is installed correctly
- clean the print head
- Replace the tape cassette.
Poor print quality with white ink
- When using a White on Black or a White on Clear cassette, it may be necessary to use the darkest contrast setting in order to obtain good print quality. To change the contrast setting via the keyboard, read and follow the instructions as described in the paragraph “Print Contrast”.
Tape jammed
- lift out the tape cassette carefully
- remove/release jammed tape
- DO NOT cut the ink ribbon – turn spool C3 to tighten
- Cut off excess label tape
- Refit/replace the tape cassette. Poor cutter performance
- Clean the cutter blade regularly
No response to print key
- !!!!!!!!!!!!!!! The display indicates a printer jam. Press any key to return to normal display. Open the cassette compartment and free the jam.
 Flashing in the display indicates discharged batteries. Press any key to return to normal display. Replace the batteries.
No success?
- Call the DYMO customer service hotline telephone number in your country – see the warranty booklet.
Warranty Registration
Please complete the warranty registration card and return it to the relevant address, within seven days– see the warranty booklet for details.
Pros & Cons
Pros:
- Ease of use with plug-and-play connectivity.
- Compact and lightweight design.
- Supports multiple label sizes and types.
- High-resolution text and graphics.
- Affordable price point.
Cons:
- Limited to USB connection; no wireless option.
- No built-in memory for storing label designs.
- Dependent on software for advanced features.
Customer Reviews
Customers have generally praised the DYMO LabelManager Plug N Play LabelMaker 30 for its ease of use and reliability. Here are some common sentiments:
"This label maker is so easy to set up and use. The plug-and-play feature is a game-changer." - John D.
"I've been using this for labeling cables and files, and it's been a lifesaver. The labels are clear and durable." - Sarah K.
Some common complaints include the lack of wireless connectivity and the need to use software for more advanced label designs.
Faqs
How do I connect the DYMO LabelManager Plug N Play LabelMaker 30 to my computer?
What types of labels are compatible with the DYMO LabelManager Plug N Play LabelMaker 30?
Do I need to install software to use the DYMO LabelManager Plug N Play LabelMaker 30?
Is the DYMO LabelManager Plug N Play LabelMaker 30 compatible with both Windows and macOS?
How do I resolve a label jam in the DYMO LabelManager Plug N Play LabelMaker 30?
Can I use the DYMO LabelManager Plug N Play LabelMaker 30 without a computer?
What is the estimated price of the DYMO LabelManager Plug N Play LabelMaker 30?
Is the DYMO LabelManager Plug N Play LabelMaker 30 portable?
How do I know if my computer recognizes the DYMO LabelManager Plug N Play LabelMaker 30?
Can I store label designs on the DYMO LabelManager Plug N Play LabelMaker 30 itself?
Tags
More dymo manuals
Leave a Comment