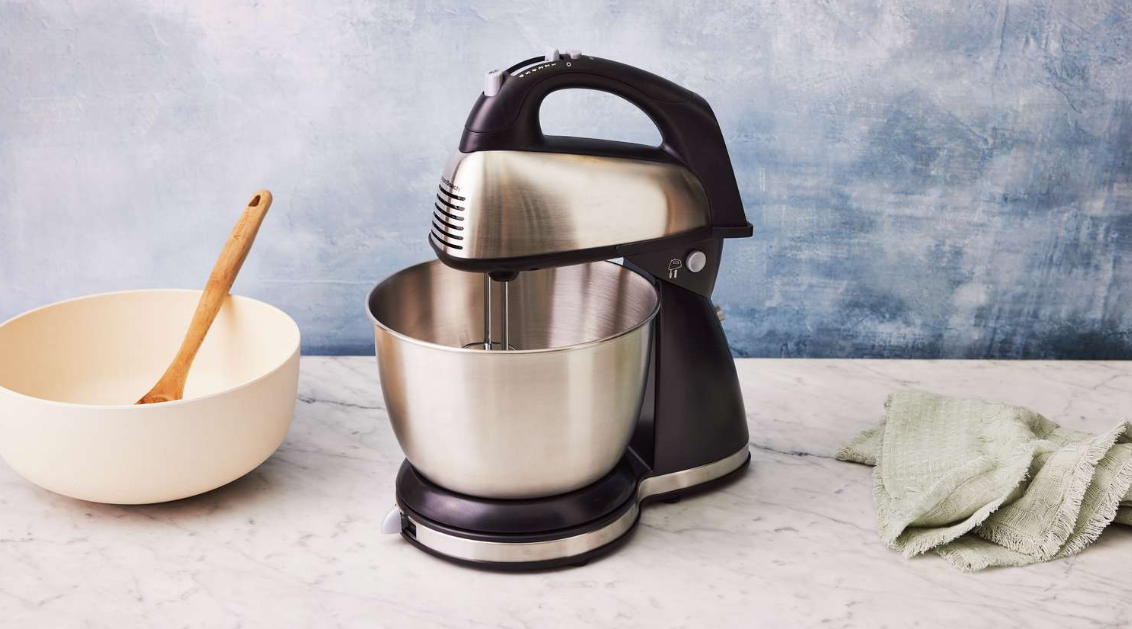
Hamilton Beach Stand Mixer 64655 Instruction Manual
Content
Introduction
Hamilton Beach is a versatile kitchen appliance designed to streamline baking tasks. With a powerful 290-watt motor and six speed settings, it effortlessly handles everything from whipping cream to kneading dough. This mixer features a unique Shift & Stir lever that moves the bowl side-to-side for thorough mixing, ensuring even ingredient distribution. It comes with five attachments, including traditional beaters and dough hooks, all dishwasher safe for easy cleanup. Priced at approximately $49.99, it offers excellent value for both novice and experienced bakers.
Parts and Features
Specifications
The Hamilton Mixer 64655 boasts several key features that make it a standout in its category:
- 300-watt motor for powerful mixing and kneading
- 7-speed control for precise mixing
- 3.5-quart stainless steel bowl with a non-slip base
- Planetary mixing action for thorough ingredient incorporation
- Interchangeable attachments including a flat beater, dough hook, and wire whip
- Ergonomic handle for easy lifting and pouring
- Compact design with a tilt-back head for easy access to the bowl
Description
The mixer is built with durability and functionality in mind. The 3.5-quart stainless steel bowl is large enough to handle big batches but small enough to fit comfortably on most kitchen countertops. The planetary mixing action ensures that ingredients are evenly distributed throughout the bowl, reducing the need for manual scraping.
The mixer's 7-speed control allows for a range of mixing tasks, from gentle folding to heavy-duty kneading. The included attachments – flat beater, dough hook, and wire whip – are designed to handle various baking tasks with ease.
Features about Hamilton Beach
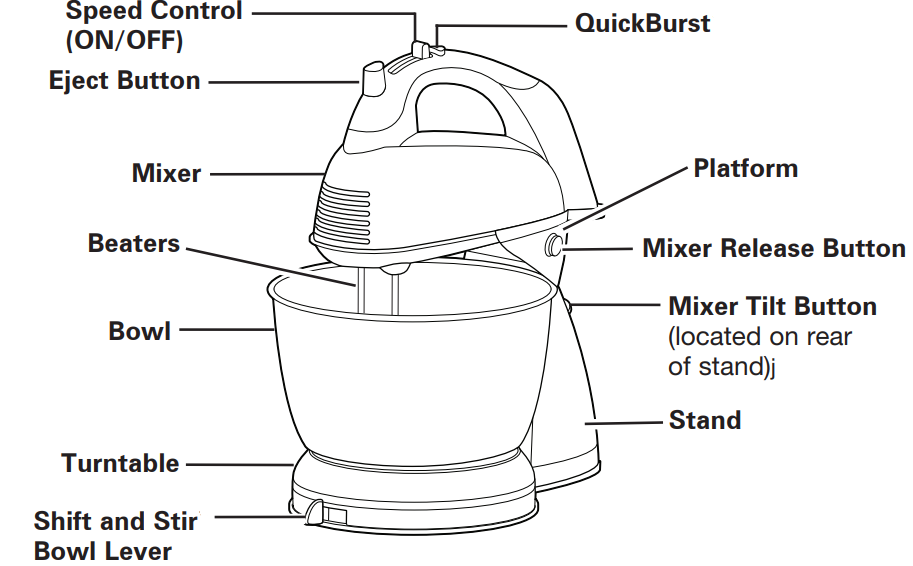
Mixer Release Button
Use this feature to release the mixer from the “locked” position on the stand.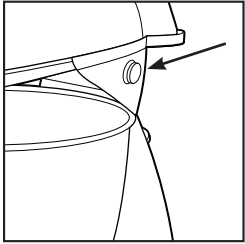
Bowl Rest
This feature can be used on most large mixing bowls. Use the Bowl Rest while adding ingredients or checking a recipe. To use, TURN MIXER OFF ( ) and then set the mixer on the edge of the bowl.
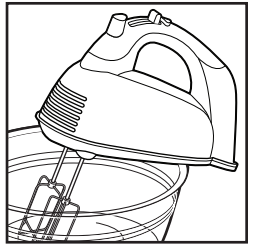
CAUTION
Pinch Hazard. Never use Bowl Rest when mixer is on.
NOTE: Do not use Bowl Rest on small (11⁄2 quart [1.4 L]) mixing bowls or plastic mixing bowls.QuickBurst
Press and hold down the button for additional power at any speed.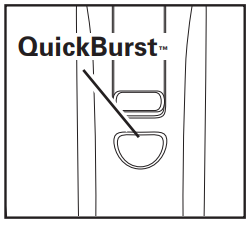
NOTE: Never use QuickBurst for more than two minutes at a time or motor may overheat.
Shift and Stir Bowl Lever
Use the lever to move the turntable. This allows you to position the beaters near the edge of the bowl or in the center for better mixing performance.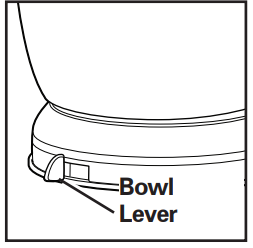
How to Assemble Stand
The stand mixer is very convenient for most recipes. However, small amounts—like one cup (237 ml) of cream—may not contact the beaters in the stand mixer mode. In these cases we recommend using as a hand mixer.
NOTE: Attach mixer to stand before attaching beaters or dough hooks.
- Set stand on the counter. With platform level and while holding mixer as shown, place the two small holes on the bottom of the mixer into the two hooks on platform.
- As the mixer is lowered, gently press the back of the mixer onto the platform until it locks in position. The mixer can now be used as a stand mixer.
Push the Tilt Button to tilt the mixer.
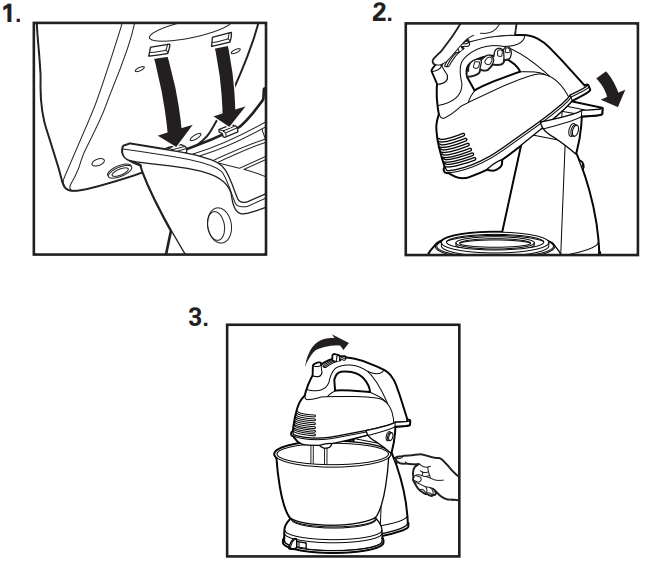
Optional Attachments (available on selected models)
Before first use: wash beaters or attachments in warm, sudsy water; rinse and dry. Always unplug mixer from electrical outlet before inserting or removing attachments. This mixer comes with 1 or more of the following attachments:
| ATTACHMENT | DESCRIPTION |
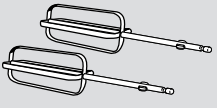 | The flat beaters are designed for general mixing purposes. |
 | The straight wire beaters, which have no center post for ease in cleaning, are designed for mixing thick batters and cookie dough. |
 | The single whisk is perfect for whipping cream. The whisk may be inserted into either opening. |
 | The twisted wire beaters, which have no center post for ease in cleaning, are designed for mixing thick batters and cookie dough. |
 | The dough hooks can perfectly knead a one loaf bread recipe. Always use dough hooks on speed 4, 5, or 6 in the hand mixer mode. Do not use dough hooks in the stand mixer mode. |
To Insert Attachments
Flat Beaters, Straight Wire Beaters, and Whisk
- Always make sure mixer is unplugged and speed control is set to OFF (
 ).
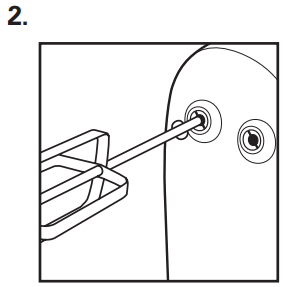
). Insert a beater or attachment into an opening on the bottom of the mixer. Push until it clicks into place. Repeat with other beater or attachment.
Twisted Wire Beaters and Dough Hooks
- Always make sure mixer is unplugged and speed control is set to OFF (
 ).
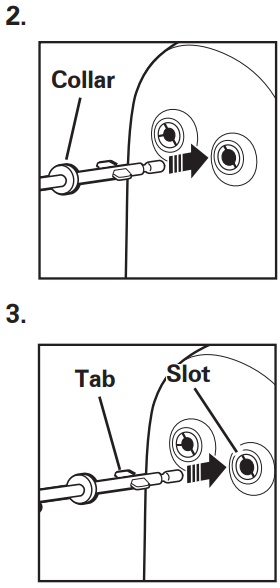
). - Insert the wire beater or the dough hook with the collar into the larger opening.
Align tabs on the beater or dough hook with the slots in theopening. Push until it clicks into place. Repeat with other beater or dough hook.
Using Your Mixer
- Always make sure mixer is unplugged and OFF (
 ) before inserting beaters, using as a hand mixer or assembling on the stand.
 - Plug mixer into electrical outlet.
- Move the speed control to desired speed, starting at 1 and increasing to a higher speed as necessary.
- If using as a stand mixer do not leave mixer unattended. Always monitor the progress of the mixing.
- When finished mixing, move the speed control to OFF (
 ) and unplug mixer.
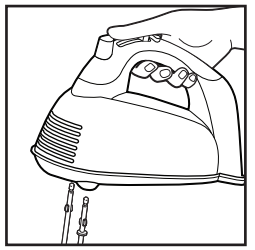
 To eject beaters, push straight down on the eject button.
- To remove mixer from stand, hold mixer and press mixer release button. Pull mixer to release from stand.
Mixing Guide
The following mixing guide is a suggestion for selecting mixing speeds. Begin on speed 1 and increase to desired speed depending on the recipe consistency.
6 SPEED | FUNCTION |
| OFF ( | |
1 | LOW speed for folding or mixing in dry ingredients, muffins, or quick breads |
2 | To cream butter and sugar; most cookie dough |
3 | MEDIUM speed for most packaged cake mixes |
4 | Frosting and mashed potatoes; kneading dough |
5 | Beating egg whites; kneading dough |
6 | HIGH speed for whipping cream; kneading dough |
Mixing Tips
Cookie dough is one of the thickest doughs to mix. Make it easier by following these tips:
- Use a large mixing bowl so that ingredients spread out for easier mixing.
- Have butter or margarine at room temperature.
- Add ingredients one at a time and thoroughly mix after each addition.
- Add flour one cup at a time.
- To add chips or nuts to a very thick dough or batter, we recommend stirring them in by hand at the very end of the recipe.
Setup Guide
To set up and operate the Hamilton Beach Stand Mixer 64655, follow these steps:
- Unbox the mixer and all included attachments.
- Place the mixer on a stable, flat surface.
- Attach the desired accessory (flat beater, dough hook, or wire whip) to the mixer head.
- Tilt back the mixer head to access the bowl.
- Add ingredients to the bowl and lower the mixer head.
- Select the appropriate speed setting using the control dial.
- Start the mixer and monitor the mixing process.
IMPORTANT SAFEGUARDS
When using electrical appliances, basic safety precautions should always be followed to reduce the risk of fire, electric shock, and/or injury to persons, including the following:
- Read all instructions.
- This appliance is not intended for use by persons with reduced physical, sensory, or mental capabilities, or lack of experience and knowledge, unless they are closely supervised and instructed concerning use of the appliance by a person responsible for their safety.
- This appliance shall not be used by children. Keep the appliance and its cord out of reach of children.
- Close supervision is necessary when any appliance is used near children. Children should be supervised to ensure that they do not play with the appliance.
- To protect against risk of electrical shock, do not put cord, plug, or mixer body in water or other liquid.
- Turn the appliance OFF(
 ), then unplug from outlet when not in use, before putting on or taking off parts, and before cleaning. To unplug, grasp the plug and pull from the outlet. Never pull from the power cord.
 - Avoid contacting moving parts. Keep hands, hair, and clothing, as well as spatulas and other utensils, away from beaters during operation to reduce risk of injury to persons and/or damage to mixer.
- Remove beaters from mixer before washing.
- Do not let cord hang over edge of table or counter or touch hot surfaces, including stove.
- Do not operate any appliance with a damaged supply cord or plug, or after the appliance malfunctions or has been dropped or damaged in any manner. Supply cord replacement and repairs must be conducted by the manufacturer, its service agent, or similarly qualified persons in order to avoid a hazard. Call the provided customer service number for information on examination, repair, or adjustment.
- The use of attachments not recommended or sold by the appliance manufacturer for use with this model may cause fire, electric shock, or injury.
- Do not use outdoors.
- Do not place on or near a hot gas or electric burner, or in a heated oven.
- Check that the appliance is OFF (
 ) before plugging cord into wall outlet. To disconnect, turn the control to OFF (
 ); then remove plug from wall outlet. To unplug, grasp the plug and pull from the outlet. Never pull from the power cord.
 - Do not use appliance for other than intended purpose.
- CAUTION! In order to avoid a hazard due to inadvertent resetting of the thermal cut-out, this appliance must not be supplied through an external switching device, such as a timer, or connected to a circuit that is regularly switched on and off by the utility.
SAVE THESE INSTRUCTIONS
Other Consumer Safety Information
This appliance is intended for household use only.
WARNING Electrical Shock Hazard:
This appliance is provided with a polarized plug (one wide blade) to reduce the risk of electric shock. The plug fits only one way into a polarized outlet. Do not defeat the safety purpose of the plug by modifying the plug in any way or using an adapter. If the plug does not fit fully into the outlet, reverse the plug. If it still does not fit, have an electrician replace the outlet.
The length of the cord used on this appliance was selected to reduce the hazards of becoming tangled in or tripping over a longer cord. If a longer cord is necessary, an approved extension cord may be used. The electrical rating of the extension cord must be equal to or greater than the rating of the appliance. Care must be taken to arrange the extension cord so that it will not drape over the countertop or tabletop where it can be pulled on by children or accidentally tripped over.
BEFORE FIRST USE: Wash bowl and beaters in hot, soapy water. Rinse and dry.
NOTICE: Never place mixing bowl in oven, microwave oven, or on a hot cooking surface. Mixing bowl is not intended to be used at high temperatures and should never be used as cookware, ovenware, or bakeware.
WATTAGE/PEAK POWER INFORMATION
The marked rating of the hand mixer is determined by Underwriters Laboratories as the maximum stabilized power consumption of the hand mixer at high speed under a loaded condition. Peak power is an average of the maximum wattage a hand mixer may consume during initial operation at high speed.
Cleaning Your Mixer
WARNING
Electrical Shock Hazard: Do not immerse base, cord or plug in water or any other liquid.
- Always unplug mixer from electrical outlet and eject the attachments before cleaning.
- Wash attachments in hot, soapy water; rinse and dry.
- Wipe the mixer body and cord with a clean, damp cloth.
NOTE: Do not use abrasive cleaners or scouring pads.
Troubleshooting
If you encounter any issues with your Hamilton Beach Stand, here are some common problems and solutions:
- Mixer not turning on: Check if the mixer is properly plugged in and if the power cord is intact.
- Overheating: Ensure that the mixer is not overloaded with ingredients and allow it to cool down periodically.
- Noisy operation: Check for any blockages or misaligned parts. Make sure all attachments are securely fitted.
Always refer to the user manual for detailed troubleshooting instructions and safety precautions.
Stand Mixer 64655 Pros & Cons
Pros
- Powerful 300-watt motor for efficient mixing
- 7-speed control for precise mixing tasks
- Durable stainless steel bowl and interchangeable attachments
- Compact design with a tilt-back head for easy access
- Affordable pricing compared to other stand mixers on the market
Cons
- Some users report that the mixer can be noisy at higher speeds
- The non-slip base may not be as effective on certain countertop surfaces
- Limited warranty period compared to some other brands
Customer Reviews
Customers generally praise the Hamilton Beach Stand Mixer 64655 for its performance, ease of use, and value for money. Many reviewers appreciate its powerful motor and the variety of attachments included. However, some users have noted that it can be noisy and that the non-slip base could be improved.
Common complaints
Include issues with the mixer's noise level at higher speeds and occasional difficulties with the non-slip base staying in place on certain surfaces.
WARRANTY
This product is warranted to be free from defects in material and workmanship for a period of five (5) years from the date of original purchase in Canada and one (1) year from the date of original purchase in the U.S.
Faqs
What is the power of the Hamilton Beach Stand Mixer?
How many speed settings does the mixer have?
What attachments are included with the Hamilton Beach Stand Mixer 64655?
Is the bowl of the mixer dishwasher safe?
How do I prevent overheating of the Stand Mixer?
Can I use this mixer for heavy-duty kneading?
What is the warranty period for this mixer?
Is the mixer compact enough for small kitchens?
How do I assemble and configure the mixer?
What are some common issues with this mixer and how can they be resolved?
Leave a Comment
