Idprt Shipping Label Printer SP420 User Manual | Installation Instructions
Content
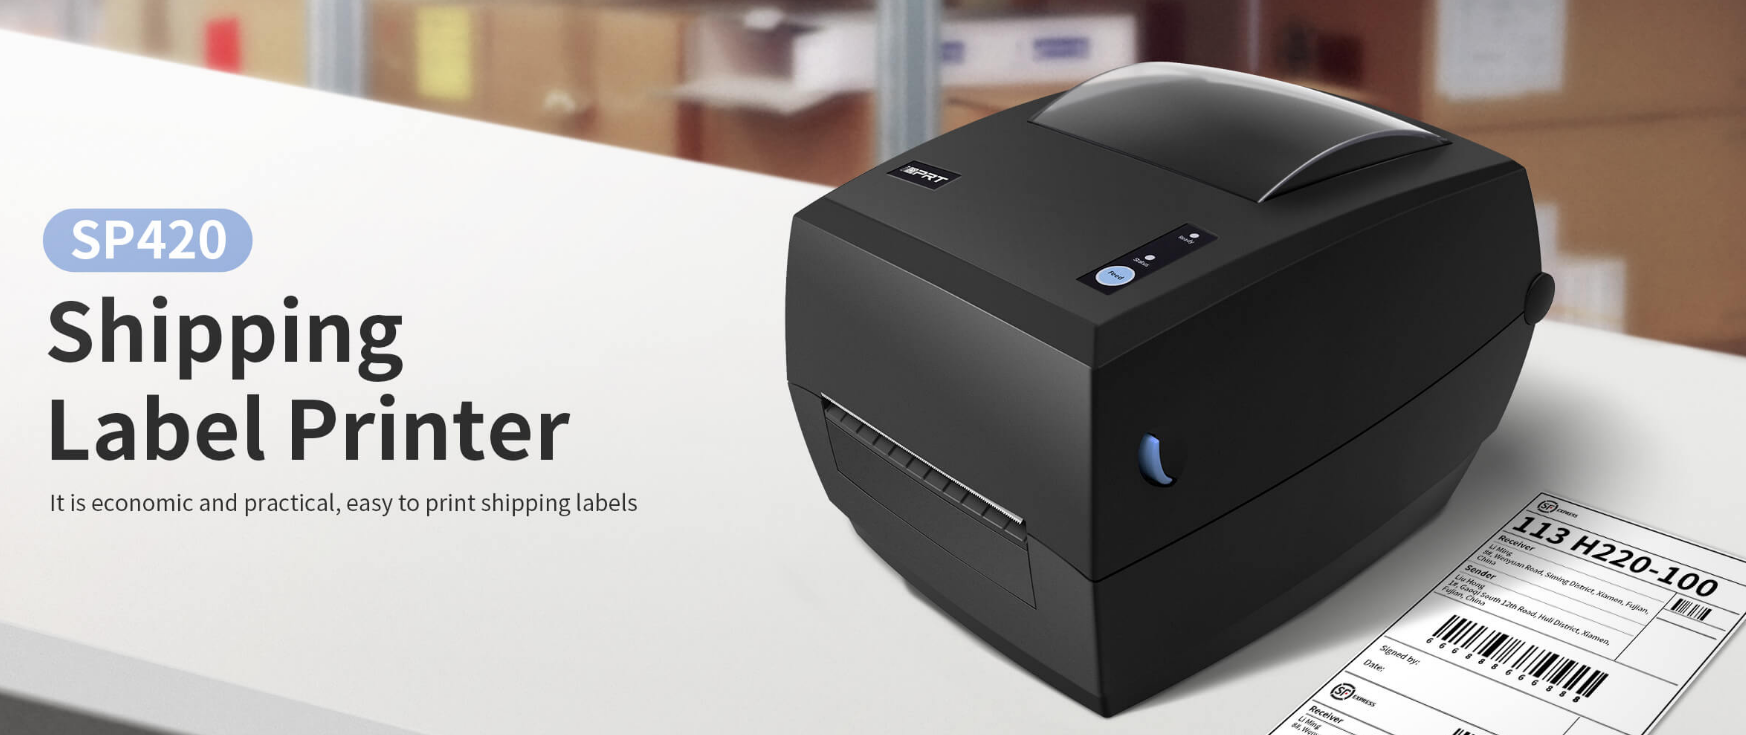
idprt Shipping Label Printer SP420
The idprt Shipping Label Printer SP420 is a high-quality, reliable printer designed to make the process of printing shipping labels quick and easy. With an estimated price of $250 and a launch date set for early 2023, this printer is perfect for small businesses, online sellers, and individuals who ship packages frequently.
Packing List
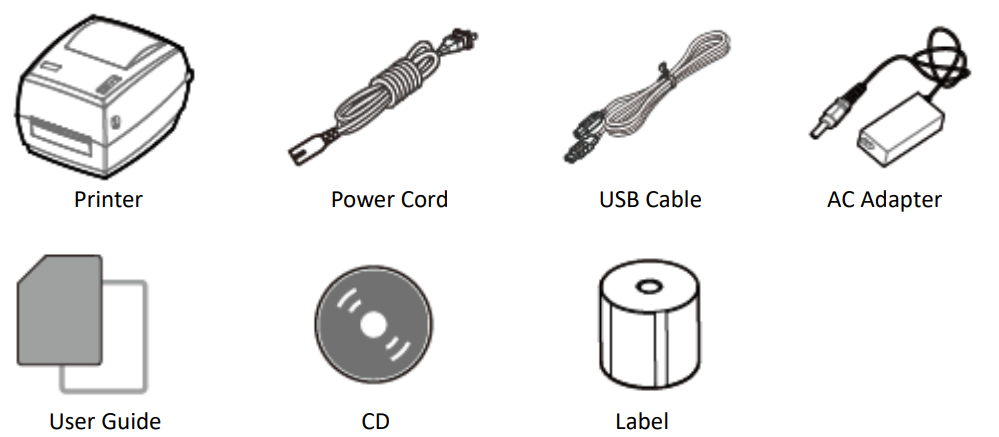
Note:
- Unpack the printer and keep the packing materials in case you need to ship the printer in the future.
- If any damages exist, please contact the local dealer.
The packing items are based on the order.
Appearance and Components
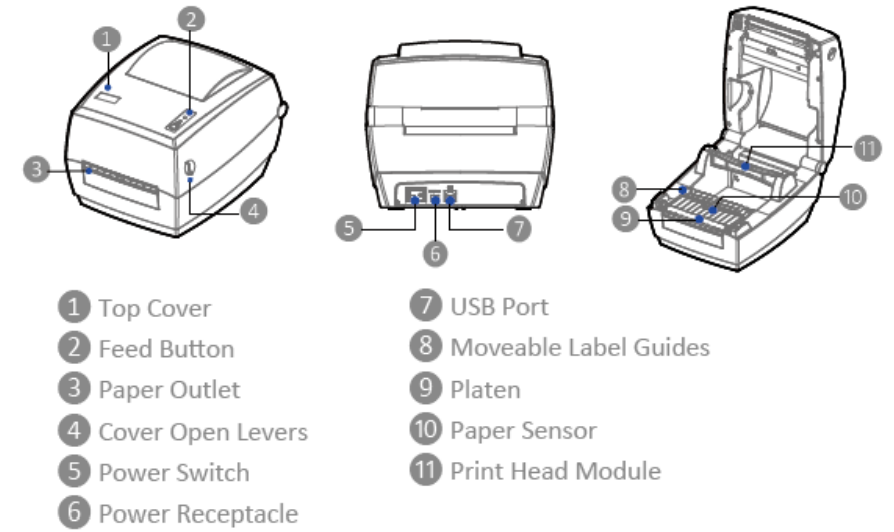
Note: The views above are for your reference. Ports vary by your choice.
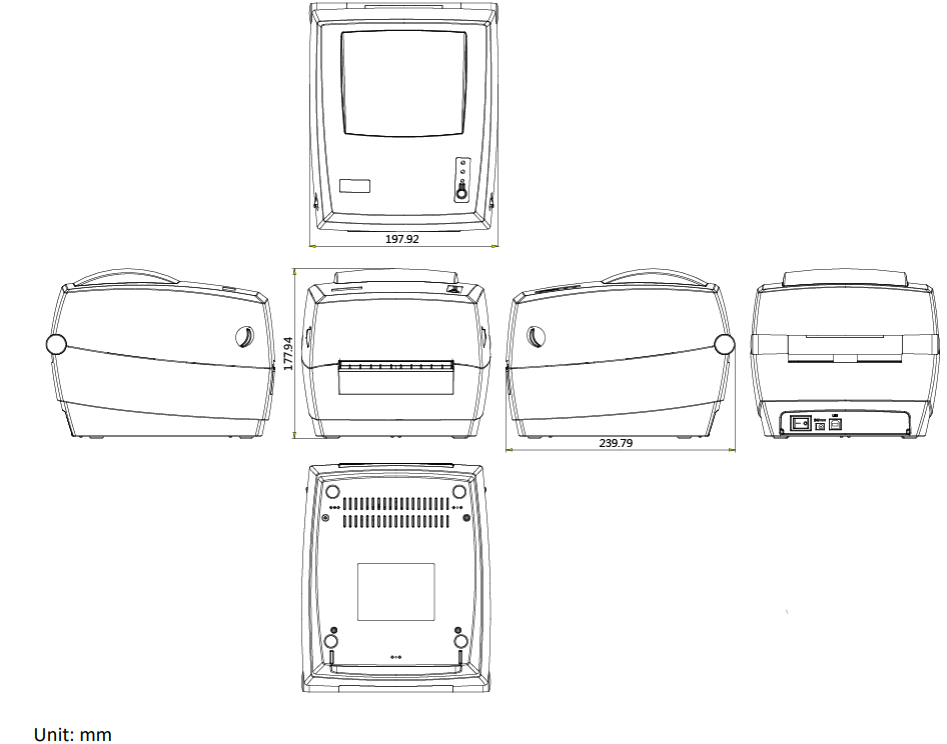
Dimension
Specifications
Items Parameter
- Printing
- Printing Method: Direct thermal
- Resolution: 203 dpi (8 dots/mm)
- Printing Speed: 50/75/100/125/150 mm/s
- Printing Width: 50-108 mm
- Printing Length: 25 mm - 300 mm
- Processor
- 32-bit RISC CPU
- Memory
- RAM: 2 MB
- Flash: 2 MB
- Detection Sensors
- Paper out detection, seam label detection, black mark detection, open detection
- Media
- Types: Roll-fed or fan-fed, label paper, black mark paper
- Width: 2’’ (50 mm) – 4.65’’ (118 mm)
- Thickness: 0.003’’ (80 um) – 0.007’’ (180 um)
- Ext. Label Roll Diameter: 5’’ (127 mm)
- Ext. Fan-fold Paper: W: 100 mm x L: 100 mm - 300 mm
- Programming Language
- TSPL, EPL
- Software
- Label Design Software: BarTender
- Driver: Windows, Mac OS, Linux
- Resident Fonts
- GBK: 16x16, 24x24 dots
- ASCII: 8×16, 12×24 dots
- Barcode
- 1D: Code 39, Code 93, EAN 8/13 (add on 2 & 5), UPC A/E (add on 2 & 5), I 2 of 5, Codabar, Code 128 (subset A, B, C)
- 2D: QR Code
- Communication Interfaces
- USB
- Man-Machine Interface
- Indicator: Red, Green
- Power
- I/P: AC100-240V, 50/60Hz
- O/P: DC 24V/2.5A
- Environment
- Operation: 41℉ (5℃) - 104℉ (40℃), 20%-85%, non-condensing
- Storage: -4℉ (-20℃) - 122℉ (50℃), 10%-90%, non-condensing
- Physical Characteristics
- Dimension: 240178198 mm (LWH)
- Weight: 2.26 kg, excluding consumables
- Options & Accessories
- External label roll holder, Folding carton
- Agency Approvals
- CCC
Installation & Usage
Media Loading
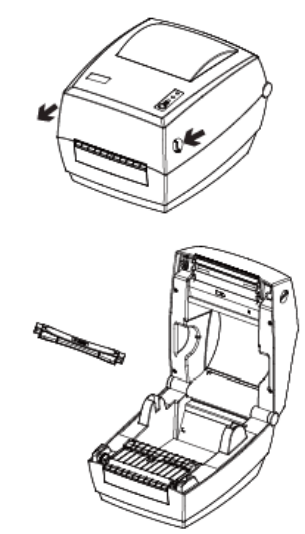
Paper Roll Loading
- Press the left and right cover open levers with hands simultaneously and lift the printer cover.
Hold the paper roll shaft and take it out of the printer.
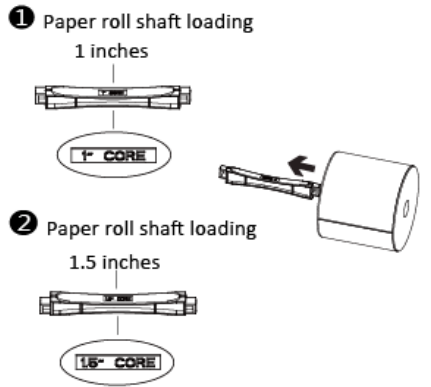
Load paper into the paper roll shaft coordinating the inside diameter.
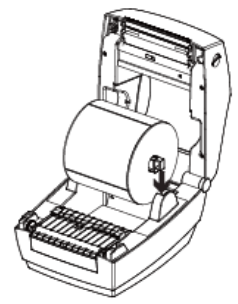
Then load the paper module from the top down into the printer.
Pull some paper and pass it through paper guides, adjusting paper guides according to the paper width.
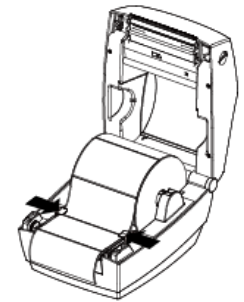
Press down the top cover until it closes.
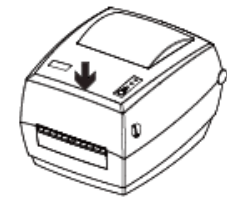
Note: If your printer is under Thermal Line Printing Method, press down the printer cover until it snaps closed.
External Paper Roll Loading
If the paper roll is extremely large, users can load the paper roll outside. Pass the paper through the external feed slot and then through the paper guides.
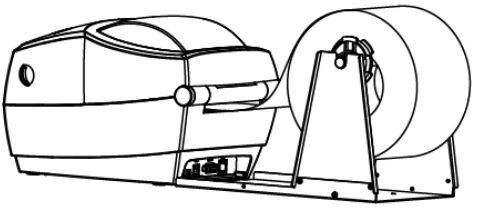
Note: The paper roll holder can be fixed on the clamping pin on both sides.
Power Connection
- Make sure the printer’s power switch is in the off position.
- Connect the AC adapter to the printer.
- Connect the power cord to the AC adapter.
- Connect the other end of the power cord to the outlet.
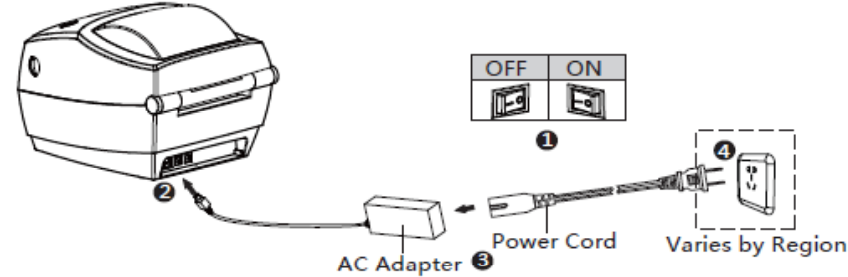
Note: Use the original power adapter only to avoid damage caused by improper charging. Please unplug the printer power cord if it is not in use for a long time.
Peripherals Connection
Interface Cable Connection
The standard for the printer’s interface cable is shown in the following.
USB B-Type Cable
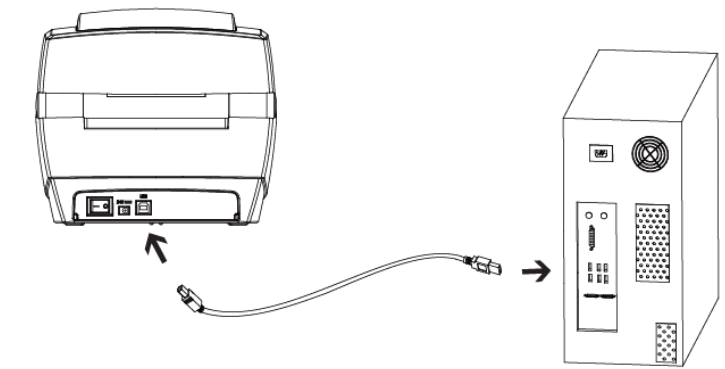
- Turn off the power switch.
- Connect the communication cable to the printer communication port to be used.
- Connect the USB B-Type cable to the USB port.
Operation Panel
Button Operation
- Power On: When the power is off, turn on the power switch at the back of the printer, then the indicator will light on.
- Power Off: When the power is on, turn off the power switch at the back of the printer, then the indicator will light off.
- FEED button: Press the FEED button, and the printer will feed paper to the specified position according to the paper type. Long-press the FEED button once to feed the fixed distance paper when using continuous paper. Long-press the FEED button once to feed a whole label paper when using a label printer.
Description of Indicator Status
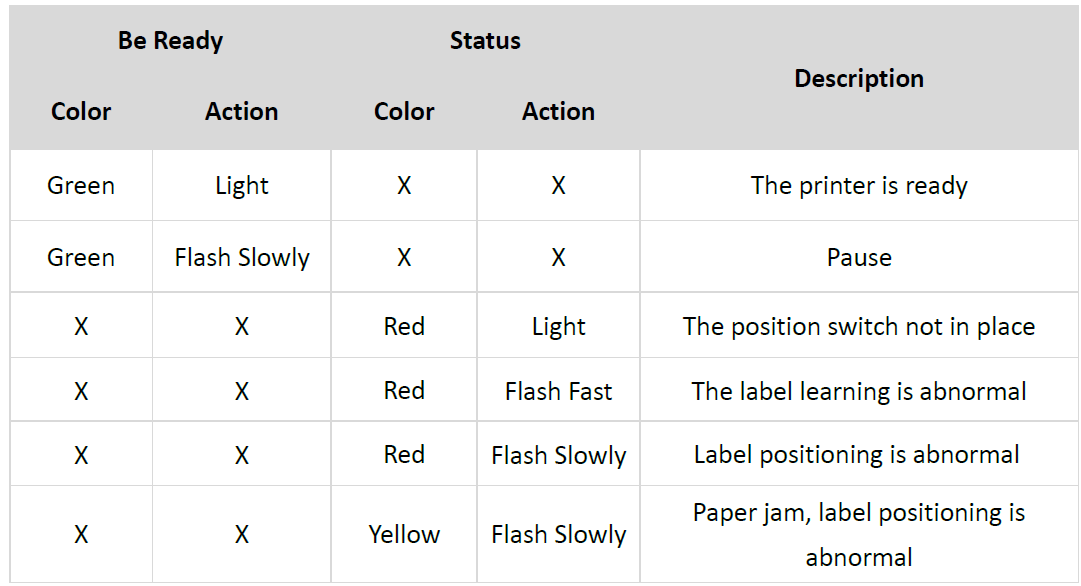
Basic Operation
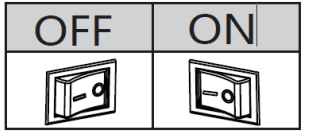
Power On/Power Off
- Power Off: Press “O” to power off the printer.
- Power On: Press “I” to power on the printer.
Feed Button
Press the FEED button, and the printer will feed paper to the specified position according to the paper type. Long-press the FEED button once to feed the fixed distance paper when using continuous paper. Long-press the FEED button once to feed a whole label paper when using a label printer.
Quick Calibration
Note: Users must carry out the calibration under the conditions below:
- The first time to use the printer after installation;
- The first time to use the printer since sensor cleaning;
- Reuse the printer when it has not been used for a long time;
- Change a new type of media;
- Printer cannot recognize the mark;
- Huge change of the operating environment;
Calibration method:
- Carry out the calibration manually.
- When the printer is ready, press the FEED button until the status indicator (green) flashes twice. Then release the button, and the printer will start to do the calibration. Loosen the FEED button of the printer until the status indicator (green) flashes twice, then it starts the black label mode learning. When the printer starts the calibration under the continuous media mode, the calibration is invalid.
- Carry out the calibration by printer utility tool.
- Please refer to detailed information in “Chapter 6 Label Printer Utility Instructions”.
Note: After the calibration, users could open the printer cover to pull back the learned paper to avoid paper wasting.
Printing Self-Test Page
The self-test checks the printer’s current settings, status, and whether the printer has any problems or not.
- Printing Manually
- Make sure the roll is loaded properly.
- Make sure the top cover and mechanism of the printer are closed properly. Then turn on the printer.
- When the printer is ready, press the feed button continuously. As soon as the indicator flashes (blue) once, loosen the button. Then the printer starts to print the self-test page.
- Printing by Windows Driver Program
- Install the Windows Driver program.
- Please set the “Interface” as the type you use.
- Use the Windows Driver Program to print out the “Self-test page”.
- Please refer to “Chapter 7 Windows Driver Instructions” for more detailed information.
Description
The idprt Shipping Label Printer SP420 is a compact, lightweight printer that is easy to set up and use. It supports direct thermal printing technology, which means that there is no need for ink or toner cartridges, making it a cost-effective solution for printing shipping labels. With a printing speed of up to 5 inches per second and a printing resolution of 203 dpi, this printer can handle high-volume printing tasks with ease. The printer is compatible with a wide range of label sizes, from 1 to 4 inches, making it a versatile solution for different shipping needs. It also offers multiple connectivity options, including USB 2.0, Wi-Fi, and Bluetooth, providing flexibility and convenience for users.
Windows Driver Instructions
Introduction
This chapter provides information on installation according to the PC operating system (OS). This driver supports the following operating systems:
- Microsoft Windows 10 (32 bit/64 bit)
- Microsoft Windows 8 (32 bit/64 bit)
- Microsoft Windows 7 SP1 (32 bit/64 bit)
- Microsoft Windows Vista SP2 (32 bit/64 bit)
- Microsoft Windows XP SP2
- Microsoft Windows 2000
- Microsoft Windows Server 2012 (64 bit)
- Microsoft Windows Server 2008 R2
- Microsoft Windows Server 2008 SP2 (32 bit/64 bit)
- Microsoft Windows Server 2003 R2 SP2 (32 bit/64 bit)
Installation Preparation
Download the Windows Driver application program. For the latest version, please visit our website: http://www.idprt.com
Installation
Warning: There are some differences under different operating systems. Please operate it according to the tips. It is recommended to close security software before installation in case it prevents installation.
- Select one interface to connect your printer to the computer.
- Turn on the printer and check if it is connected to the computer successfully.
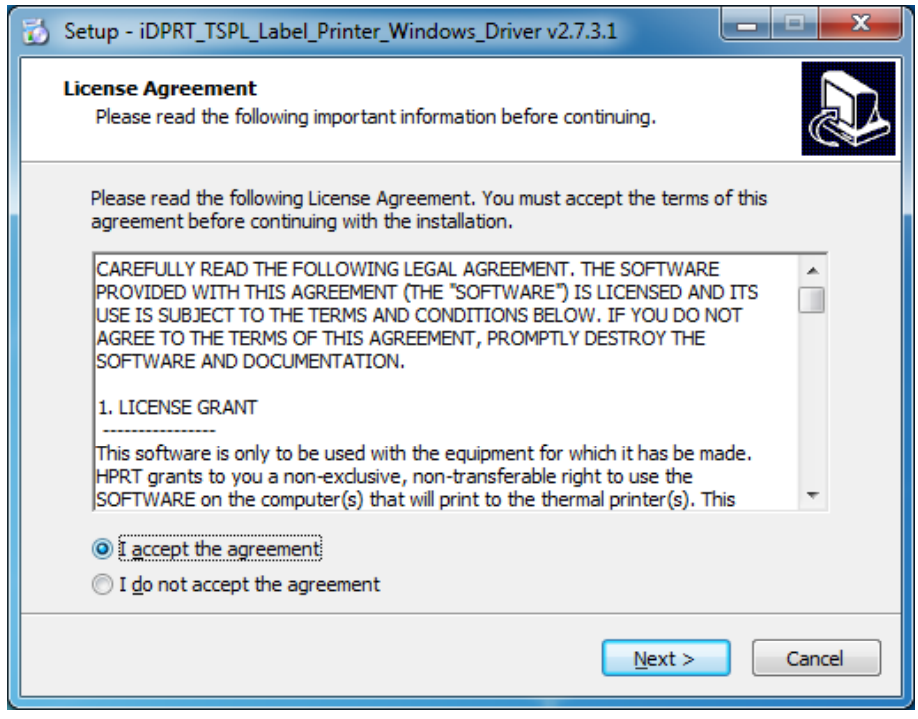
Double-click the Windows Driver.
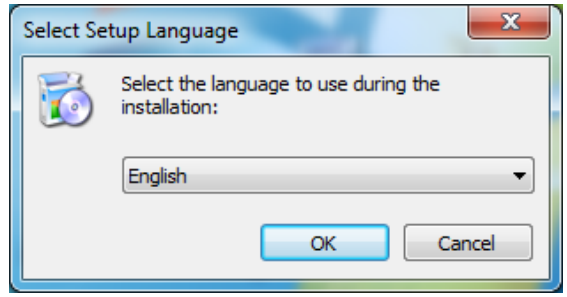
After agreeing to the EULA, click “Next”.
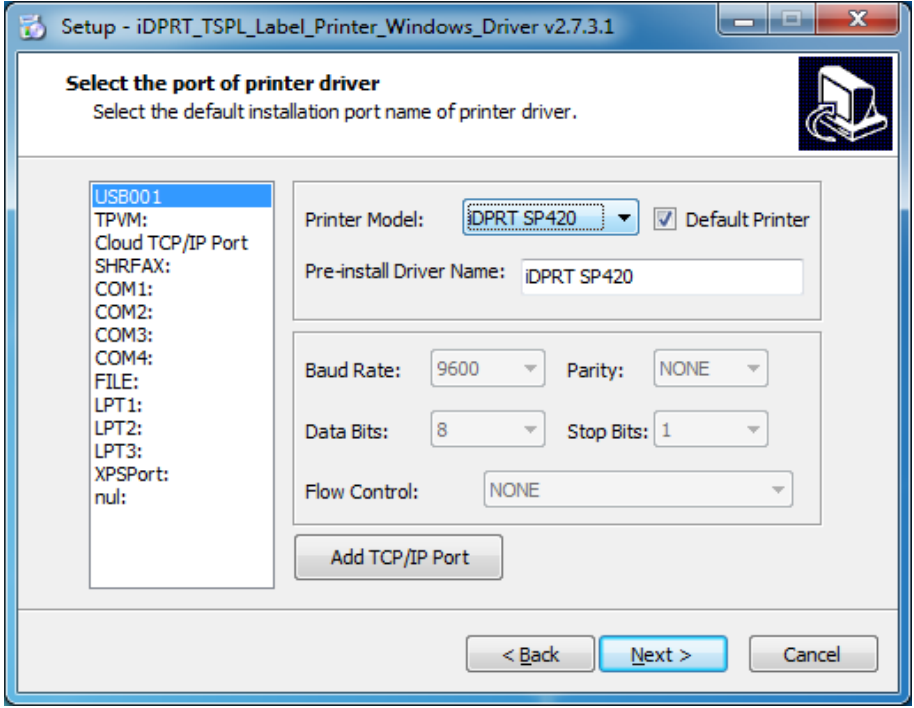
Select the default installation port name of the printer driver, then click “Next”.
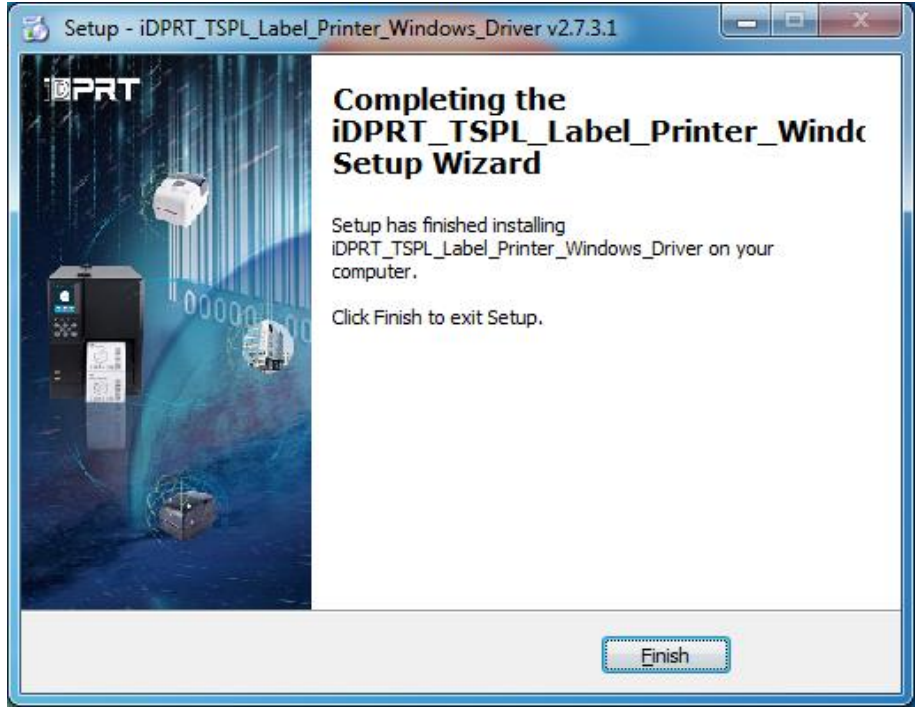
Click "Finish".
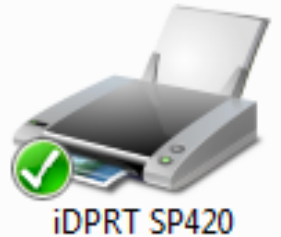
After installation, the icon will be found in “Start” → “Printers and Faxes”.
Note:
- If you already installed the driver (No matter what kind of port), when you connect the printer to the computer, it will create a USB port automatically.
- For any problems, please use our utility on the CD.
Usage
Printing Preferences
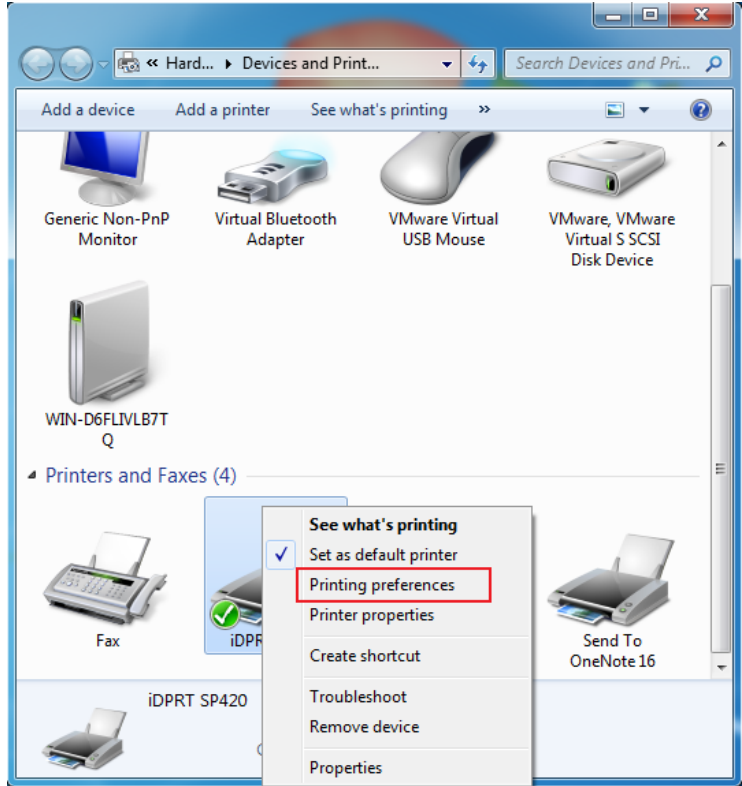
Click “Start” → “Devices and Printers”. Right-click the icon and choose “Printing preferences”.
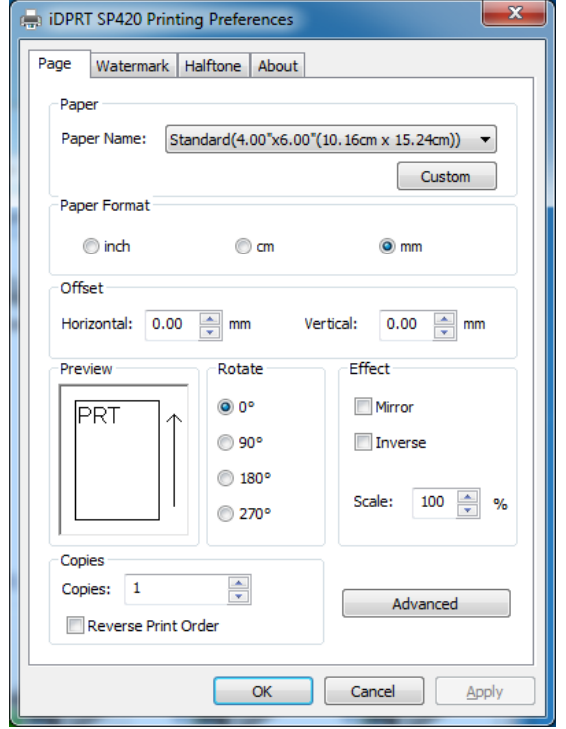
According to different needs, set the page.
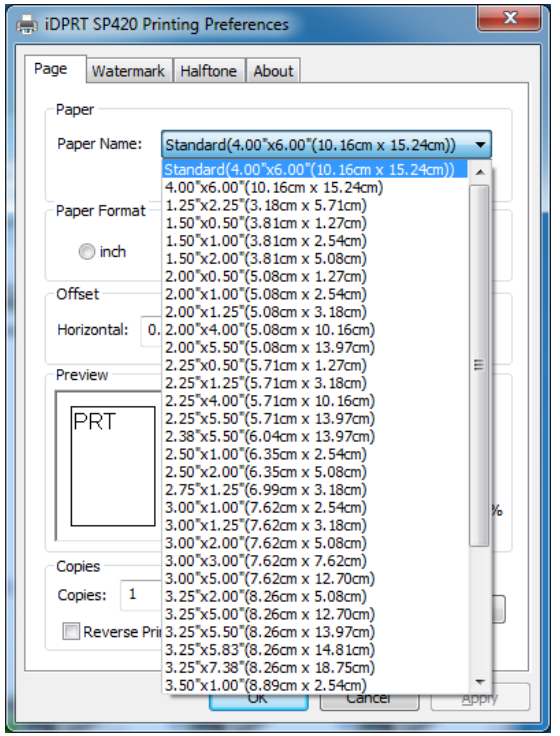
Click “Paper Name”, then choose the paper type.
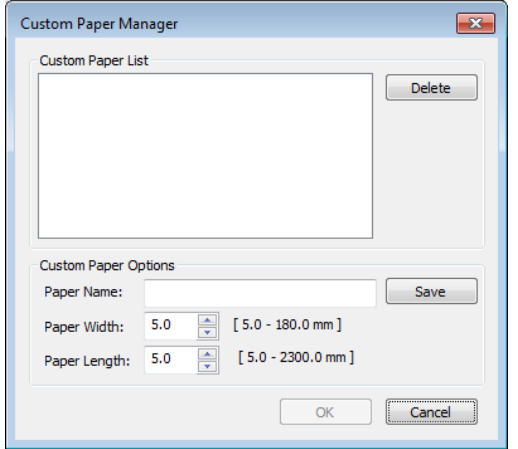
Click “Manager” to add a new stock.
Choose “Rotate” or “Effect”, it will be shown in the “Preview”.
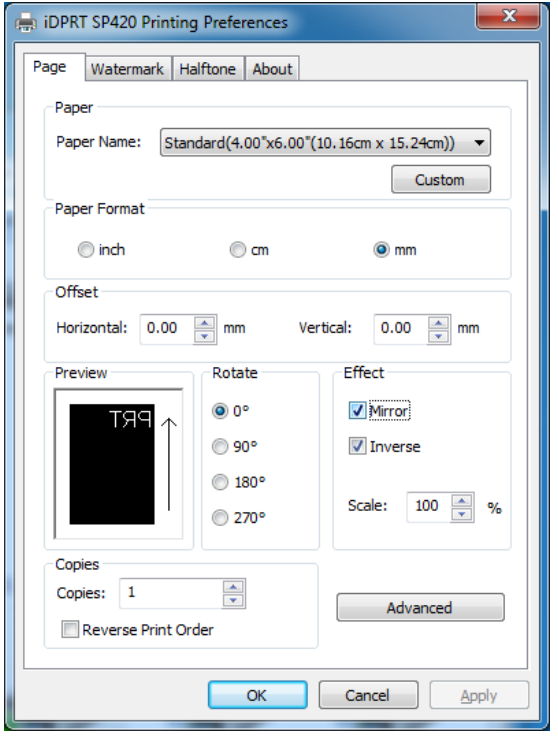
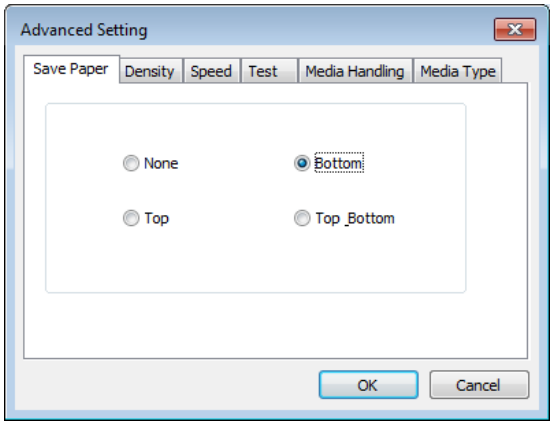
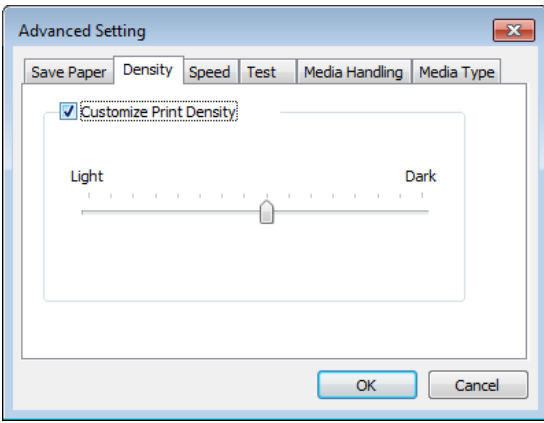
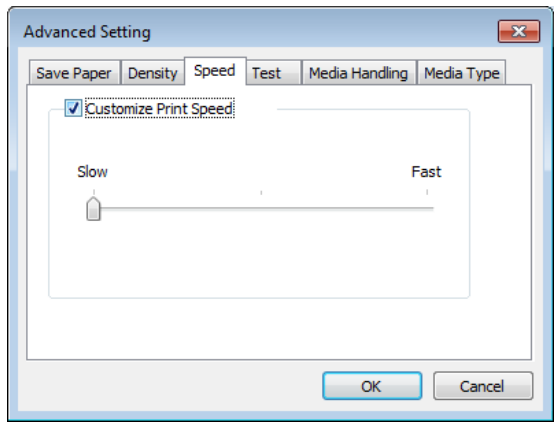
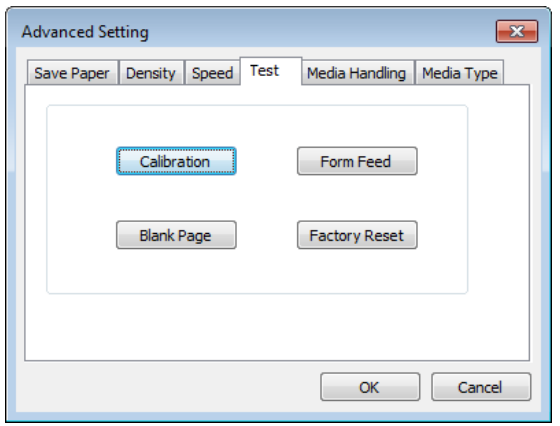
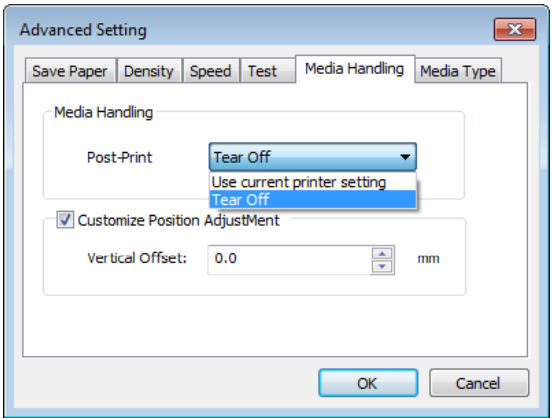
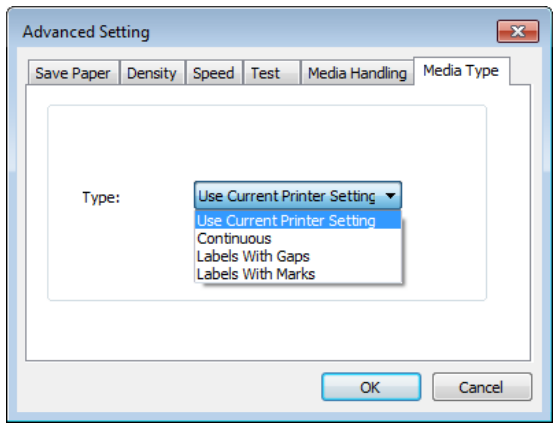
- Click “Advanced” to set “Save Paper”, “Density”, “Speed”, “Test”, “Media Handling”, “Media Type”.
Save Paper
Density
Speed
Test
Media Handling
Media type
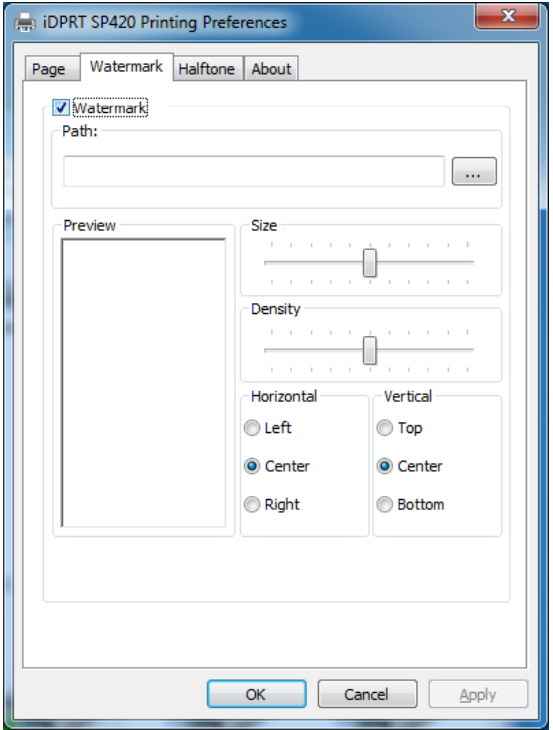
Click “Watermark”, it is recommended to use BMP format.
Click “Halftone”.


Printer Properties
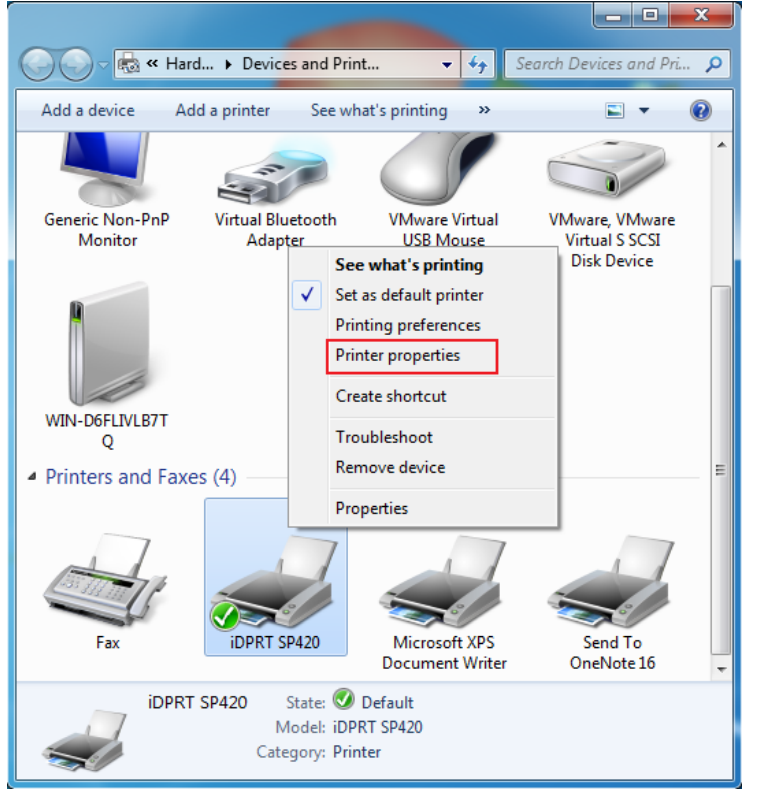
Click “Start” → “Devices and Printers”. Right-click the icon and choose “Printer properties”.
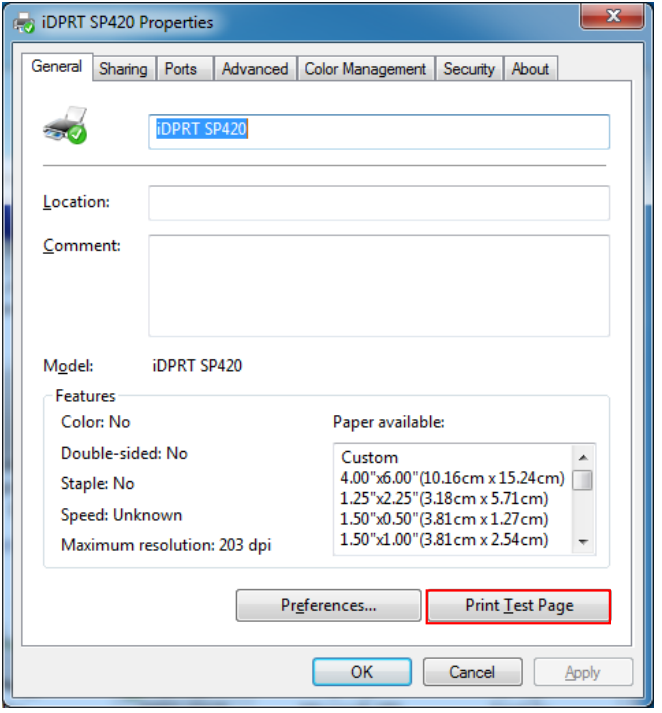
Click “General” → “Print Test Page”, and the printer will print the current settings.
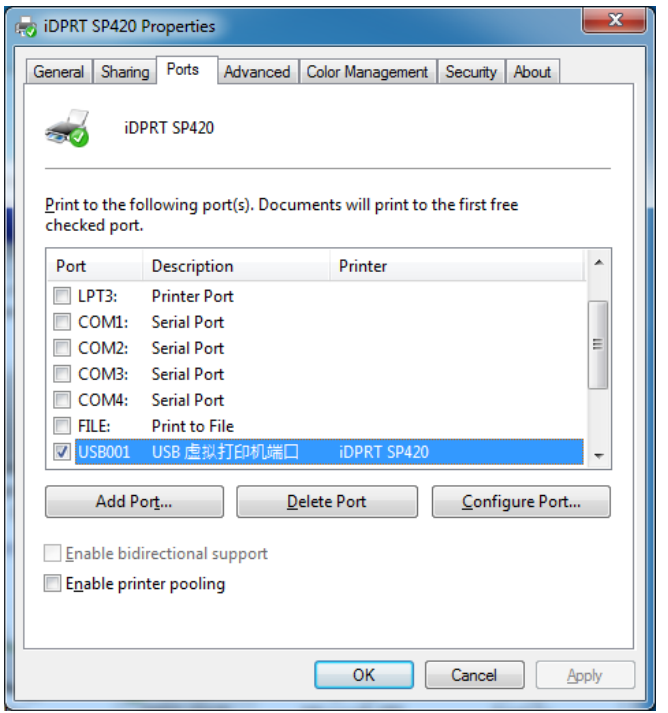
Click “Ports”, then choose the port needed.
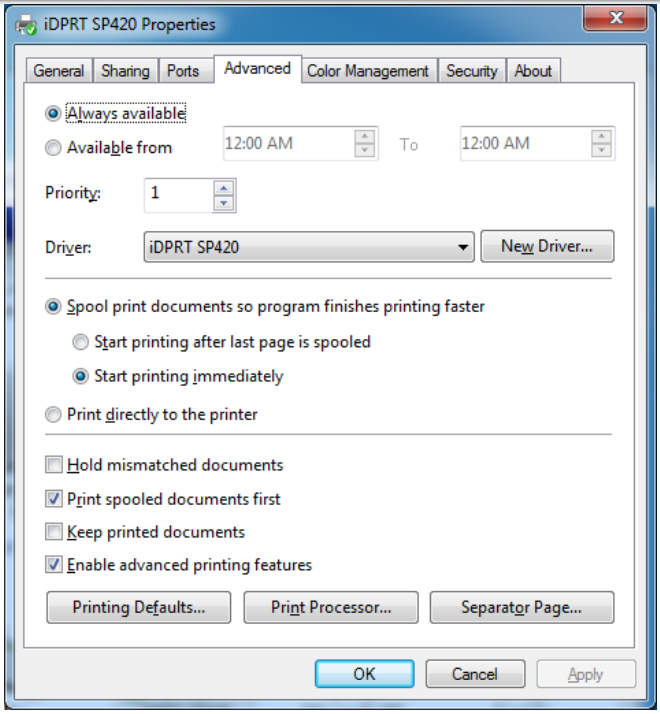
- Click “Advanced” to set the available time for the printer.
Setup Guide
Setting up the idprt Shipping Label Printer SP420 is a straightforward process:
- Unbox the printer and remove all packaging materials.
- Connect the power supply and turn on the printer.
- Install the printer driver and software on your computer.
- Load the shipping labels into the printer.
- Connect the printer to your computer using the USB 2.0, Wi-Fi, or Bluetooth connection.
- Start printing shipping labels.
Removing
Note: Please turn off the printer or unplug the USB cable before removing the driver.
Double-click Windows Driver.

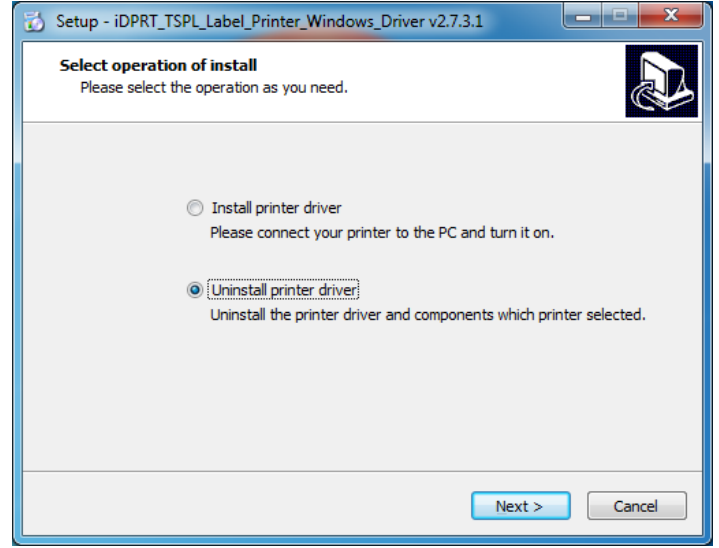
Choose “Uninstall printer driver”, then click “Next”.
Choose the printer driver name needed to uninstall, then click “Next”.
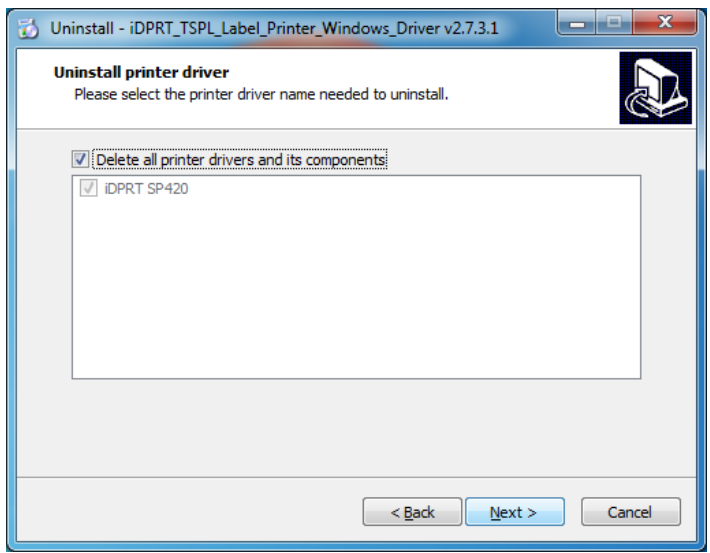
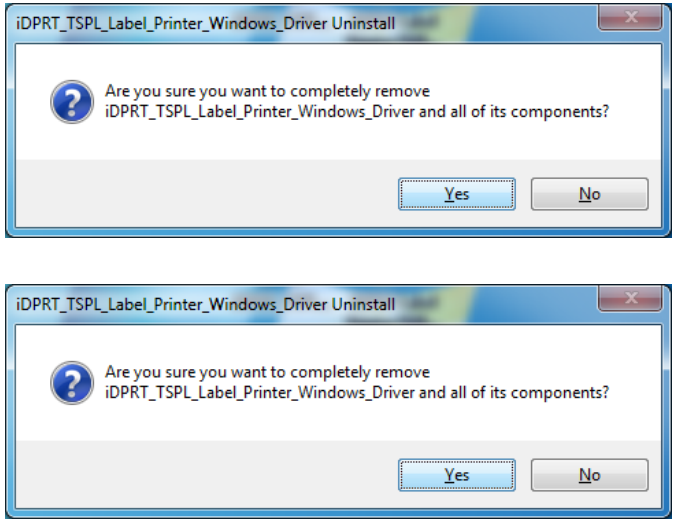
Click "Yes".
Important Safety Instructions
Before using the printer, please read carefully the following safety considerations to prevent bodily injury or equipment damage.
Safety Warning
The print head will become very hot during printing; please do not touch the printhead and peripheral parts during and immediately after printing. Do not touch the printhead and connectors to avoid static damage to the printer head.
Instructions
Warnings
Violating the following instructions may cause serious injury or death.
- Do not plug several products into one porous power outlet.
- This may cause overheating and a fire.
- If the plug is wet or dirty, dry or wipe it before use.
- If the plug does not fit perfectly into the outlet, do not plug it in.
- Be sure to use only standardized porous power outlets.
- You must use the supplied adapter.
- It is dangerous to use other adapters.
- Do not pull the cable by pulling.
- This may damage the cable or cause a fire.
- Do not plug in or unplug with your wet hands.
- You may be electrocuted.
- Do not bend the cable by force or leave it under any heavy object.
- A damaged cable may cause a fire.
Notes
Violating the following instructions may cause slight damage to the appliance.
- If you observe strange smoke, odor, or noise from the printer, unplug it before taking the following measures.
- Switch off the printer and unplug the set from the mains.
- After the disappearance of the smoke, call your dealer to repair it.
- Install the printer on a stable surface.
- If the printer falls, it may be broken and you may be hurt.
- Use the approved accessories only and do not try to disassemble, repair, or remodel it by yourself.
- Call your dealer when you need these services.
- Do not touch the blade of the auto cutter.
- Do not let water or other foreign objects drop into the printer.
- If this happens, switch off and unplug the printer before calling your dealer.
- Do not use the printer when it is out of order. This can cause a fire or electrocution.
- Switch off and unplug the printer before calling your dealer.
- Other considerations:
- Place the printer on a solid and even base so that it cannot fall.
- Leave enough space around the printer for operation and maintenance.
- Keep all liquids away from the printer.
- Do not expose the printer to high temperatures, direct sunlight, or dust.
- Ensure the printer is connected to a socket with the correct mains voltage.
- Switch off the printer POWER supply when it’s not in use for a long time.
- To ensure printing quality and reliability, use the same quality or recommended paper supplier.
- Switch off the POWER supply when connecting/disconnecting all ports to avoid damage to the printer control circuit.
- Never carry out maintenance or repair work yourself. Always contact a qualified service technician.
- Keep this User Manual in a place that is always easily accessible.
Troubleshooting
Here are some common problems and solutions for the idprt Shipping Label Printer SP420:
- The printer is not responding: Check the power supply and connection cables, and try restarting the printer.
- Labels are not printing correctly: Check the label size and type, and make sure that the printer settings are correct.
- The printer is making strange noises: Check for any obstructions in the printer mechanism, and make sure that the printer is not overheating.
- The printer is not connecting to Wi-Fi or Bluetooth: Check the network settings and passwords, and make sure that the printer is within range of the network.
idprt Shipping Label Printer SP420 Pros & Cons
Pros
- Cost-effective: No need for ink or toner cartridges.
- High-volume printing: Up to 5 inches per second.
- Versatile: Compatible with a wide range of label sizes.
- Multiple connectivity options: USB 2.0, Wi-Fi, Bluetooth.
Cons
- Limited printing resolution: 203 dpi may not be suitable for some applications.
- No Ethernet connectivity: Limited to USB 2.0, Wi-Fi, Bluetooth.
Customer Reviews
The idprt Shipping Label Printer SP420 has received positive reviews from customers, with many praising its ease of use, high-volume printing capabilities, and cost-effectiveness. However, some customers have noted issues with connectivity and printing quality.
Faqs
Can the iDPRT print any kind of label?
What is the idprt Shipping Label Printer SP420print resolution?
How do I set up the iDPRT printer driver?
Are the main shipping platforms compatible with the iDPRT?
Is it possible for the SP420 to print labels from well-known online stores?
What kind of upkeep is necessary for the iDPRT?
If my computer is not recognizing the iDPRT, what should I do?
Leave a Comment