How to Use: Lifelong Oven Griller LLOT23 User Guide
Content

Introducing the Lifelong Oven Griller LLOT23
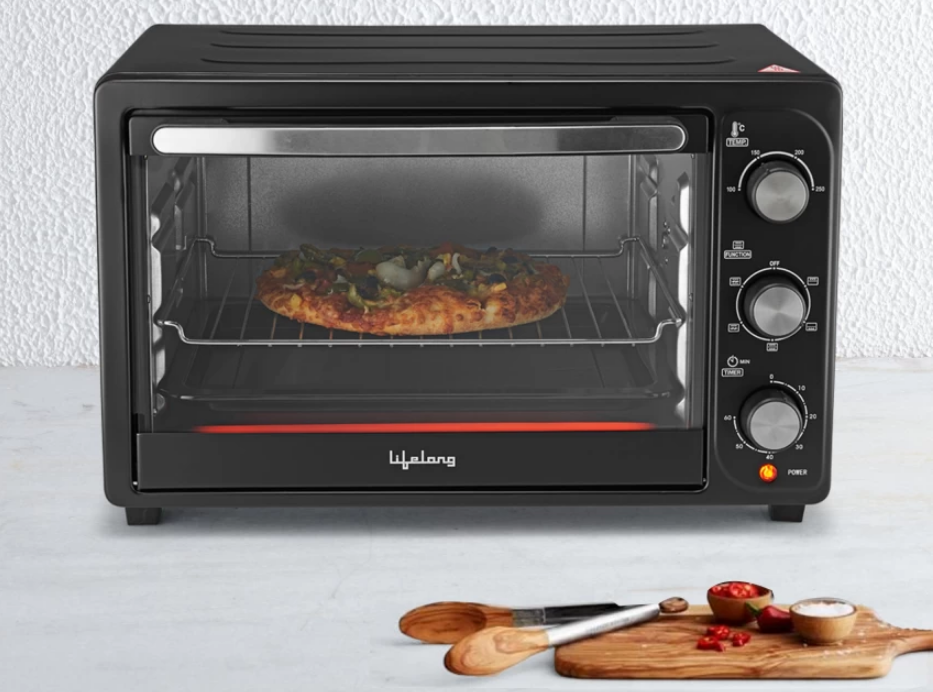
The Lifelong Oven Griller LLOT23 is a versatile kitchen appliance designed for baking, grilling, and toasting. With a 23-liter capacity and a powerful 1380-watt heating element, it offers efficient cooking with adjustable temperature settings. Its user-friendly design and included accessories make it ideal for various culinary tasks. Priced at $46.44, it combines functionality and affordability for home cooks.
Detailed Specifications
| Brand | Lifelong |
| Color | Black |
| Product Dimensions | 45D x 28.5W x 34.5H Centimeters |
| Special Feature | Cool Touch Exterior, Indicator Light, Temperature Control, Timer, Adjustable Thermostat |
| Control Type | Knob Control |
|
| ||||
|
|
GENERAL DESCRIPTION
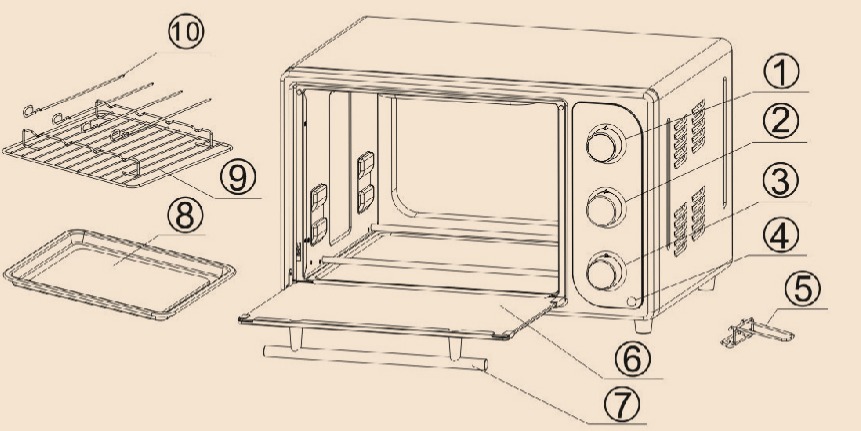
- Thermostat Knob
- Function Knob
- Timer Knob
- Power Indicator
- Food Tray Handle
- Glass Door
- Door Handle
- Food Tray
- Grill Rack
- Skewer
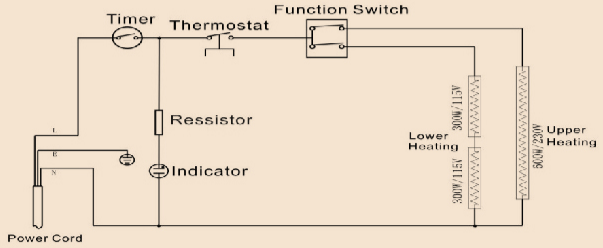
CIRCUIT
OPERATING INSTRUCTIONS
BEFORE USING THE UNIT FOR THE FIRST TIME:
Heat the empty oven.
- Insert the tray and baking net.
- Set the heater operating switch to "UPPER &LOWER" , set the temperature control dial to “250°C” and heat the empty oven for about 10 minutes.
Note: There may be some smoke and a burning smell at first use, but this is not a malfunction.
TEMPERATURE CONTROL DIAL
- Set the Temperature Control Dial for the dishes that you are going to cook.
HEAT OPERATING SWITCH
Select operation mode Upper Heating![]() , Lower Heating
, Lower Heating![]() , Upper Heating & Lower Heating
, Upper Heating & Lower Heating ![]() according to the dishes you are going to prepare. You can observe whether the heater is working or not by observing the front indicator light.
according to the dishes you are going to prepare. You can observe whether the heater is working or not by observing the front indicator light.
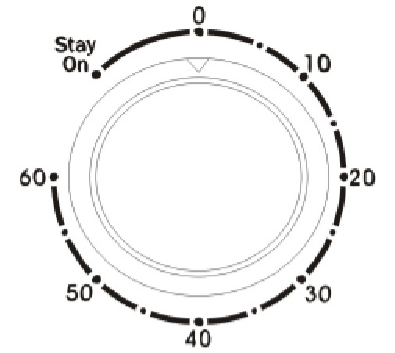
- Set the arrow on the timer knob to the number which indicates the cooking time (minutes) according to the dishes you are going to cook.
- Set the timer by turning it clockwise. They will turn off automatically at the end of the selected time and the bell will ring. When setting the time to less than 5 minutes, turn it to more than 6 min, and then back to the selected time. Turn control to the left (counter-clockwise) at the position of "Stay On" and the oven will STAY ON until manually shut off.
- The oven can be turned off manually during cooking by turning the timer counterclockwise to the "0" position.
NOTE: If the inside of the oven is dirty cooking may take a slightly longer time.
HOW TO BAKE
- Place the removable rack into the desired position.
- Place the bake pan on the wire stack. Shut off the oven door.
- Turn the timer dial to the desired cooking time.
- Turn the thermostat for the desired temperature.
- When finished baking, turn the timer dial till position "Off", to switch of the oven.
| Type of food | Temperature | Site (Shelf) | Time |
|---|---|---|---|
| Bread | 180°C | 3 | 9-13 min |
| Cake | 180°C | 2 | 25-35 min |
| Fish | 250°C | 2 | 10-15 min |
| Chicken / Duck | 220-250°C | 2 | 30-45 min |
| Pancake | 160°C | 1 | 7-10 min |
| Beef | 250°C | 2 | 8-15 min |
| Egg/Peanut | 125-150°C | 2 | 6-10 min |
| Hot Dog | 200°C | 2 | 6-10 min |
| Hamburger | 240°C | 2 | 10-14 min |
HOW TO BROIL
- Insert the removable wire rack with food and an all -purpose pan.
- Keep the door half open.
- Turn the thermostat dial to the desired broiling time.
- When finished broiling, turn the timer dial till position "Off", to switch of the oven.
HOW TO TOAST
- Set the temperature control to 250 degree Celsius.
- Place the food to be toasted on the bake rack.
- Turn the time control to desired darkness. Bell will ring to signal the end of the toast cycle.
- When finished, turn the timer dial till position "Off", to switch of the oven.
HOW TO USE THE ROTISSERIE
- Insert the Rotisserie rod through the food.
- Ensure food is held between the two forks
- Insert the pointed end of the rotisserie rod into the motor receptor on the right hand side. Now place the bush end of the rotisserie rod on the 'U' shaped notch on the left hand side of the chamber
- Ensure that that the rod is secured properly.
- Switch on the Rotisserie switch and keep the temperature selector Knob and heater select knob as per the recipe.
Setup Guide
Setting up the Lifelong Oven Griller LLOT23 is easy.
- First, make sure to place the oven griller on a flat and stable surface.
- Next, plug in the power cord and turn on the oven griller using the power button. Use the temperature controls to set the desired cooking temperature, and use the 60-minute timer to set the cooking time.
- When you're ready to cook, place your food inside the oven griller and close the see-through glass door.
CARE AND CLEANING INSTRUCTIONS
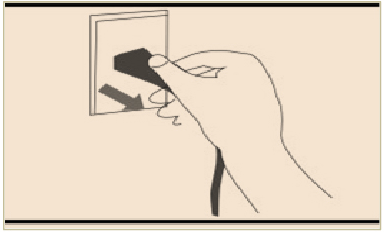
Disconnect the power supply and cool the OTG, prior to any cleaning.
Clean the glass door of the OTG with a moistened cloth. Wipe again with a dry cloth subsequently.
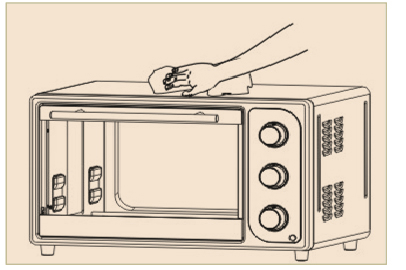
- If any food particles or liquid has spilled in the OTG, clean it with a damp cloth and let the interior dry thoroughly before use.
Do not scrub the surface of the drip cum crumb tray with any hard or abrasive material while cleaning. Use a sponge or Nylon scrubber to clean the surface of the tray. To clean stubborn food particles on the tray, make a thick paste of normal washing powder and little water and apply on the surface. Keep for 10-15 minutes and scrub with sponge/nylon scrubber and wash.
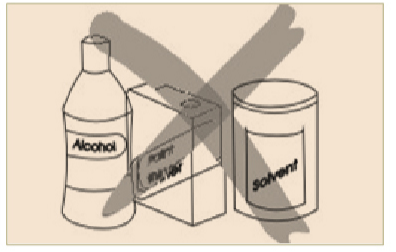
SPECIAL WARNING
- Recycling symbol, don't dispose of the product with household refuse.
- Caution: The temperature of the accessible surface may be high when the appliance is operating.
IMPORTANT INSTRUCTIONS
Leave a space of at least 10 cm between the back cover of the OTG and wall. Do not operate your appliance under a wall cupboard, shelves or close to flammable materials such as blinds, curtains etc.
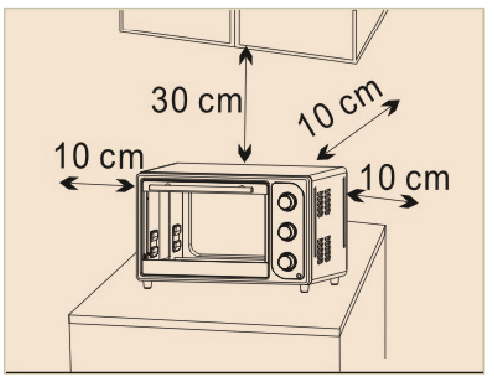
- Ensure that the outlet is placed on a firm level surface and close to an electrical outlet.
- Do not immerse the OTG, power cord or power plug in water or other liquid.
Do not put anything on the oven while using it, the heat could cause deformation, cracking etc.
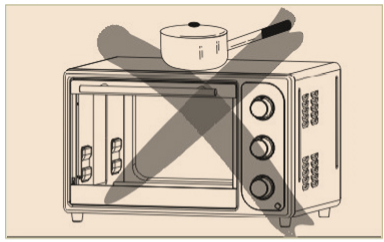
- Never allow a child to operate the OTG.
- Do not let the power cord hang over the edge of the table or counter, or touch hot surface.
AC power must be taken from a fixed plug point. Insert the plug completely into the socket/plug point. If it is not fixed properly plug could become abnormally hot. Never connect multiple plugs to the same point

- Do not operate the appliance with damaged cord or plug or after the appliance malfunctions, or has been damaged in any manner.
Do not wet the power cord nor touch the unit with wet hands. Always unplug the cord after use or whenever the unit is to be left unattended. A malfunction while the plug is inserted into the outlet could cause a fire.
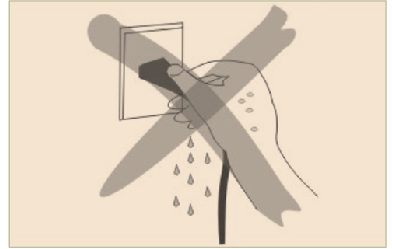
- Do not place any of the following materials in the oven: cardboard, plastic, paper.
Do not put the appliance near a source of heat
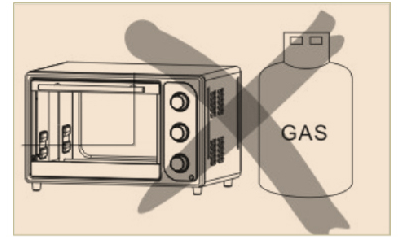
Do not touch the heating element, outer metal surface and front glass door of the OTG when in use and hot.

- Always wear protective, insulated oven gloves when inserting or removing items from hot oven.
- Never cover the OTG when in use.
- Do not use outdoors.
When cooking oil-splashing dishes such as roast chicken, it is recommended to put 2 sheets of aluminum foils on a tray in order to diminish oil splashing. By putting one on a tray, oil will drop to the gap between the foils.

- The use of accessory/attachments not recommended may cause fire or hazard.
When unplugging the cord, always take hold of the plug itself. Never pull on the cord. Doing so could break the wires inside the cord

- Carefully unpack the OTG, accessories and printed material.
- Do not apply water on the front glass while in operation or when hot as the glass could crack.
- Before using it wipe the glass door and inner cavity of the OTG with a moist cloth. Wipe again with a dry cloth
Do not use the appliance other than the intended domestic use.
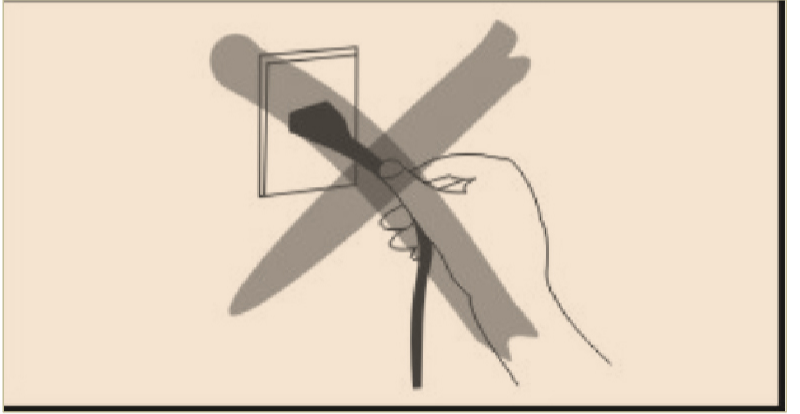
- To avoid hazards please contact the nearest authorized Lifelong service centre for service.
USE INDICATION
NOTE: Parts and accessories are different for different models
Food Tray and Wire Rack
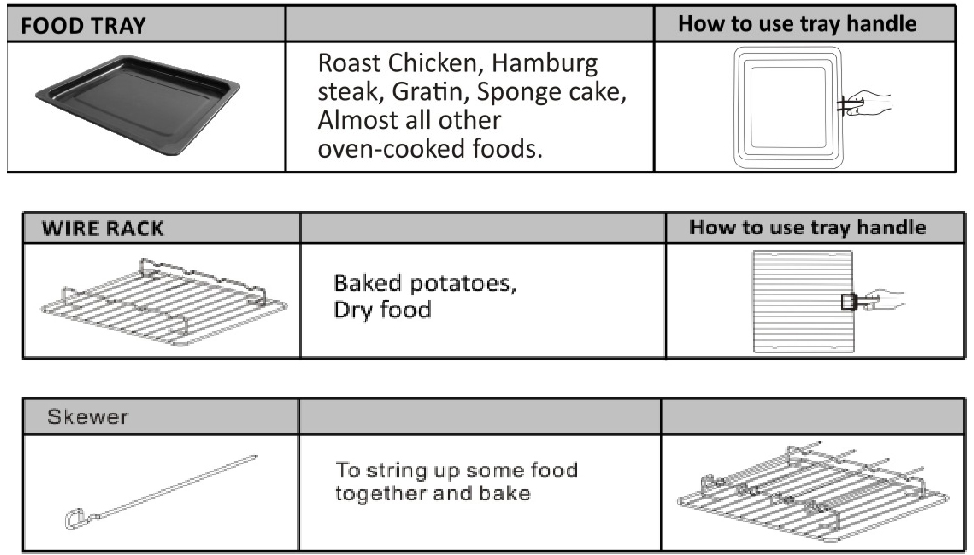
The trays are not perfectly square.
Note: Be careful when removing puddings and other hot liquids
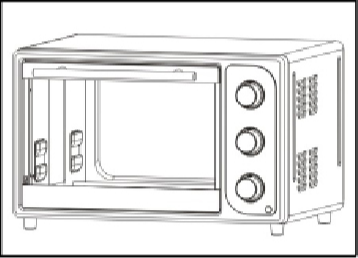
RACK SUPPORT
You can adjust the Tray at 2 different positions according to the dishes you want to cook. For instance, when making macaroni gratin and you want to have the top part cooked the most, use the second or the second rack support. For roasting a chicken, use the bottom rack support.
Troubleshooting
If you're having trouble with your Lifelong Oven Griller LLOT23, here are some common problems and solutions:
- The oven griller won't turn on: Make sure that the power cord is plugged in securely and that the power button is turned on.
- The temperature isn't adjusting: Make sure that the temperature controls are set to the desired setting. If the temperature still isn't adjusting, unplug the oven griller and let it cool down before trying again.
- The 60-minute timer isn't working: Make sure that the timer is set to the desired time. If the timer still isn't working, unplug the oven griller and let it cool down before trying again.
Lifelong Oven Griller LLOT23 Warranty
Warranty coverage: 1 year
Please log onto to https://www.lifelongindiaonline.com and complete the online warranty form with your personal and product details within 14 days.
Claims damaged and/or missing parts (accessories) after 7 days from the original date of goods received.
Pros & Cons
Pros
- Spacious 23-liter capacity
- Adjustable temperature controls
- 60-minute timer and see-through glass door
- Durable stainless steel construction
Cons
- May be too large for some kitchens
- Can be difficult to clean
Customer Reviews
Customers who have purchased the Lifelong Oven Griller LLOT23 have praised its spacious interior and adjustable temperature controls. They also appreciate the 60-minute timer and see-through glass door, which make it easy to monitor their food as it cooks. However, some customers have noted that the oven griller can be difficult to clean, and that it may be too large for some kitchens.
Faqs
What is the capacity of the Lifelong?
What temperature range does the oven griller have?
Is the oven Lifelong Oven Griller LLOT23 easy to clean?
How long does it take for the oven griller to heat up?
Does the oven griller come with a warranty?
What is the weight of the oven griller?
What is the power consumption of the oven griller?
Leave a Comment
