Malone SeaWing Kayak Carrier MPG107 | Installation & Loading Instructions
Content
Introduction Of Malone SeaWing Kayak Carrier MPG107
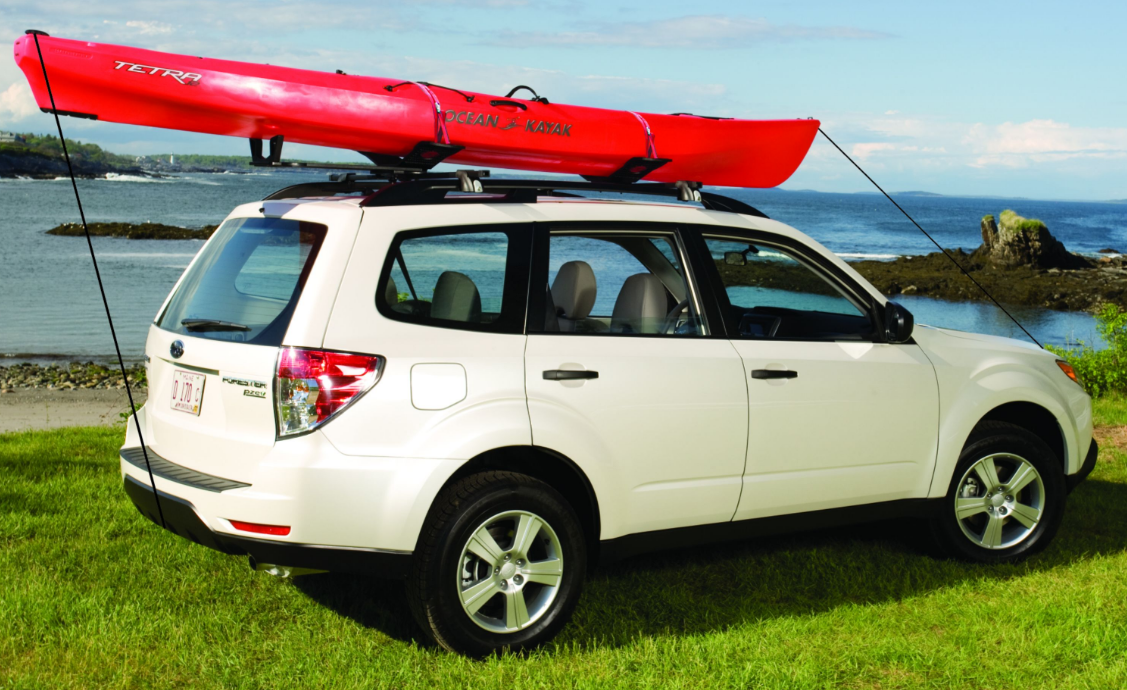
The SeaWing Kayak Carrier is a game-changer for kayak enthusiasts who need a reliable and easy-to-use carrier for their boats. This carrier is designed to fit most factory and aftermarket cross rails, making it a versatile option for many kayakers. The estimated price of the Malone SeaWing Kayak Carrier MPG107 is around $200 to $250, and it was launched in the market in 2021.
Detailed Specifications
The Malone SeaWing Kayak Carrier has the following key features:
- J-style carrier that can carry one kayak up to 75 lbs.
- Folds down for low profile when not in use.
- Corrosion-resistant aluminum and stainless steel construction.
- Padded saddles protect the hull of the kayak.
- Includes Bow and Stern safety tie-downs.
- Fits most factory and aftermarket cross rails.
- Easy to install and remove.
- Eight contact points for increased stability.
Description of Malone MPG107
The Malone SeaWing Kayak Carrier is a high-quality J-style carrier that can carry one kayak up to 75 lbs. It is made of corrosion-resistant aluminum and stainless steel, making it a durable option for kayakers who use their boats in saltwater. The padded saddles protect the hull of the kayak, while the eight contact points provide increased stability during transportation. The bow and stern safety tie-downs ensure that the kayak is secure during transportation. The SeaWing carrier folds down for low profile when not in use, making it easy to store when not in use.
Components
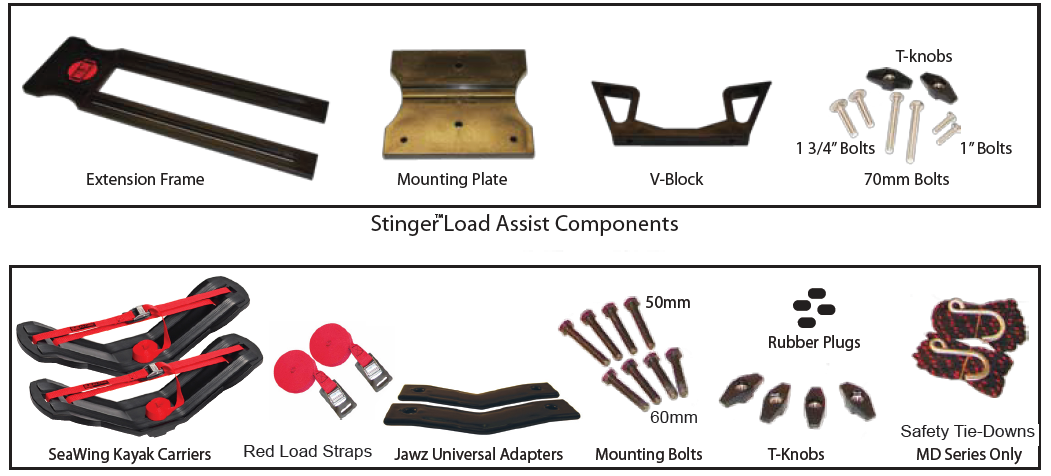
Setup Guide of Malone SeaWing Kayak Carrier
To set up the SeaWing Kayak Carrier MPG107, follow these steps
- Mount the SeaWing carrier to your cross rails using the included hardware.
- Place the padded saddles on the SeaWing carrier.
- Place your kayak on the padded saddles, making sure that the hull is centered on the carrier.
- Attach the bow and stern safety tie-downs to your kayak and cross rails.
- Tighten the tie-downs until the kayak is secure.
Installation & Loading Instructions
IMPORTANT WARNING: All vehicular transports are potentially hazardous. Any person(s) using Malone products are personally responsible for following the given directions for use and/or installation and accepts full responsibility for any and all damages or injury of any kind including death, which may result from their use and/or installation. It is critical that all Malone racks and accessories be properly and securely attached to your vehicle. Improper attachment could result in a serious accident, and could cause serious bodily injury or death to you or to others. You are responsible for securing the racks and accessories to your car, checking the attachment's prior to use, and periodically inspecting the products for adjustment, wear, and damage.You must read and understand all of the instructions and cautions supplied with your Malone products(s) prior to installation or use. If you do not understand all of the instructions and cautions, or, if you have no mechanical experience and are not thoroughly familiar with the installation procedures. vou should have the product installed by a professional installer.
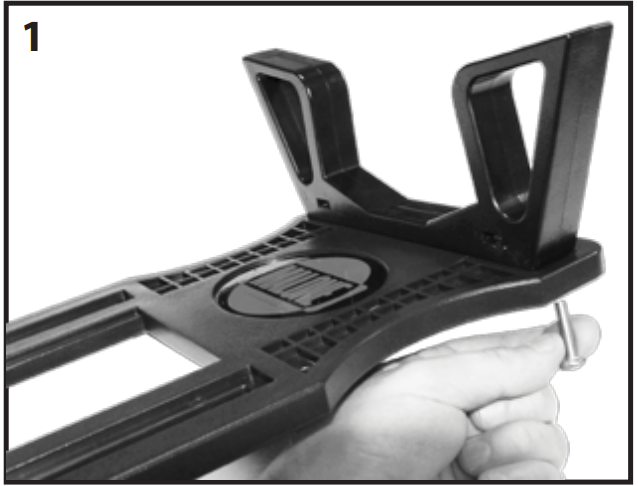
Stinger Pre-Assembly
Place the V-Block into the channel located directly behind the Malone logo on the Extension Frame. See image 1.
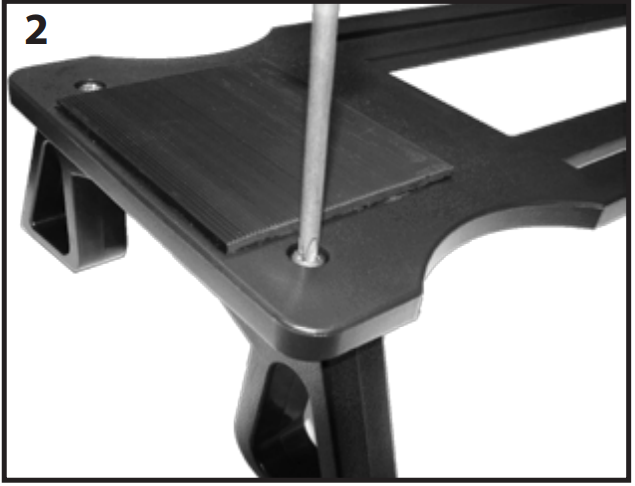
Insert the two 1" bolts into the two holes located on the bottom side of the Extension Frame. Tighten with a phillips screwdriver. See image 2.
Place the Extension Frame on top of the Mounting late with the raised block side facing up. The two holes located on the end of the Plate should align with the two channels in the Frame. See image 3.

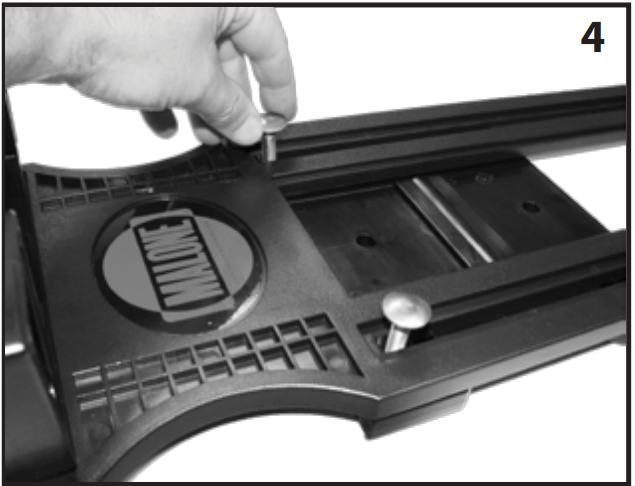
Insert the 1 3/4" Carriage Bolts down and through the Extension Frame channels and into the holes in the Mounting Plate. See image 4.
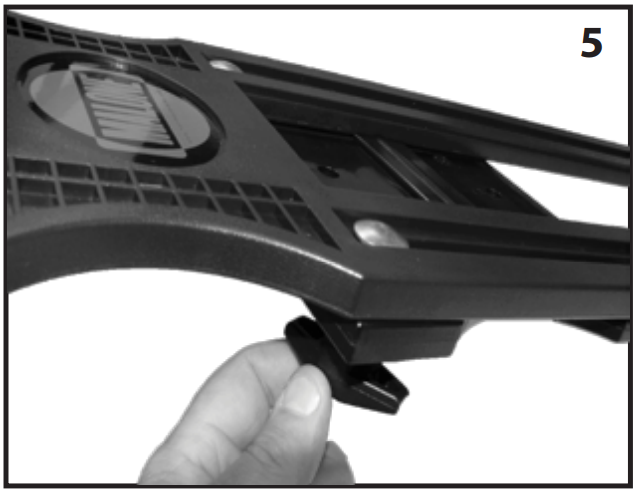
Loosely thread the two T-knobs onto the Bolts. Slide the Frame forward towards the Mounting Plate until travel is stopped. Tighten both of the T-knobs. See image 5.
Installing Carriers to Cross Bars
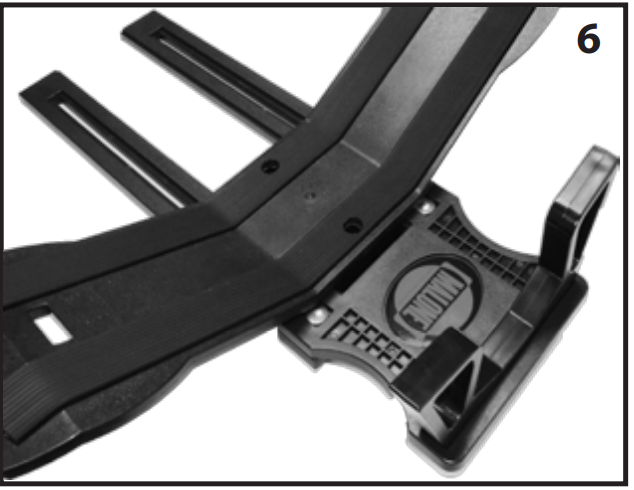
Place the SeaWing onto the Stinger so that the mounting holes in both units are aligned. See image 6.
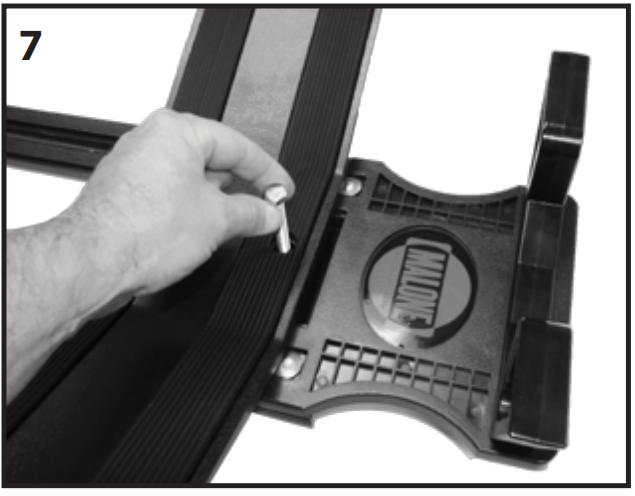
Insert a single 70mm Mounting Bolt down through the SeaWing and Mounting Plate. See image 7.
Insert Mounting Bolt through one hole of a Jawz adapter and loosely apply a T-knob. See image 8.
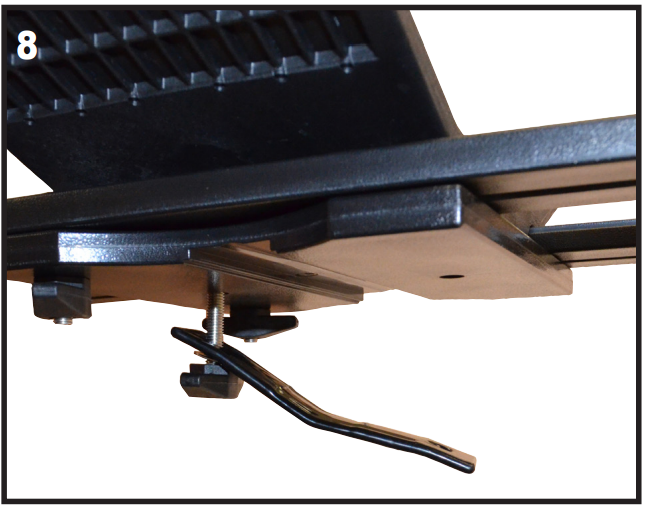
- Note: Additional bolt lengths are available.
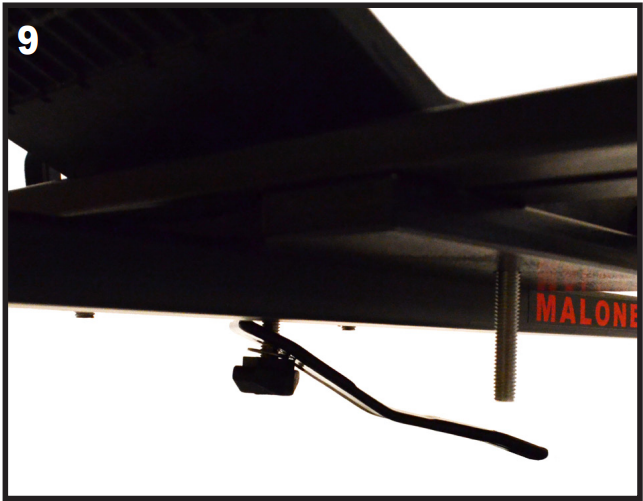
Place the Stinger with SeaWing assembly onto the rear cross bar of the vehicle with the V-Block closest to the rear of the vehicle. Swing the Jawz under the crossbar and insert the second 70mm Bolt. See image 9.
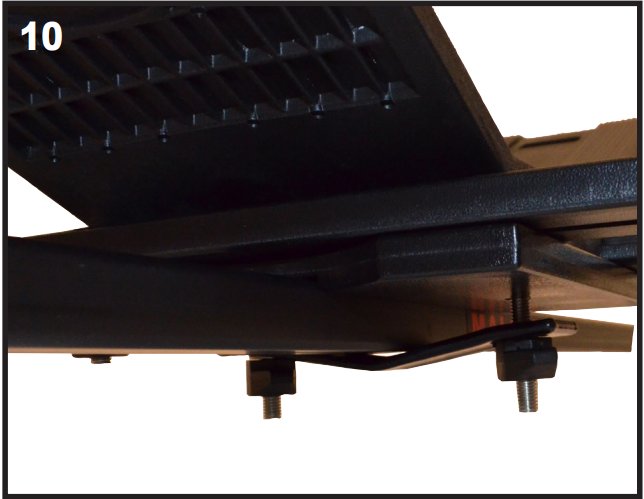
Loosely apply the T-knob. Position the assembly to the final location and firmly tighten until the carrier is secure. See image 10.
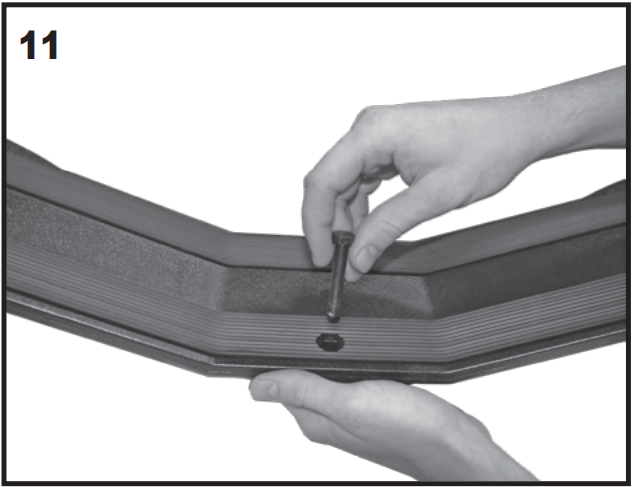
Using the second SeaWing carrier, insert a Mounting Bolt into one of the top side hex holes. See image 11.
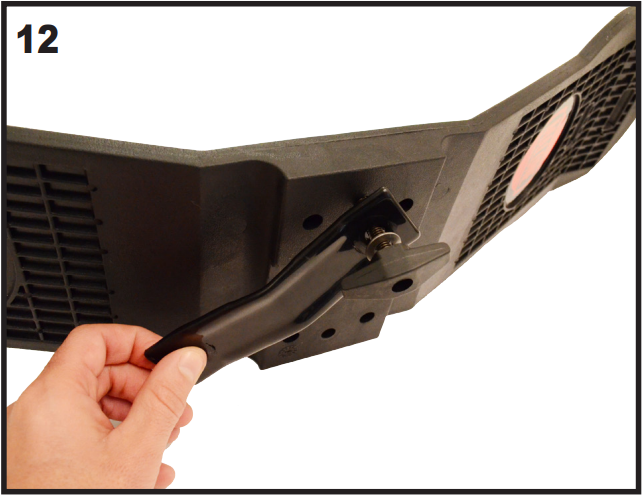
Insert Mounting Bolt through one hole of a Jawz adapter and loosely apply a T-knob. See image 12.
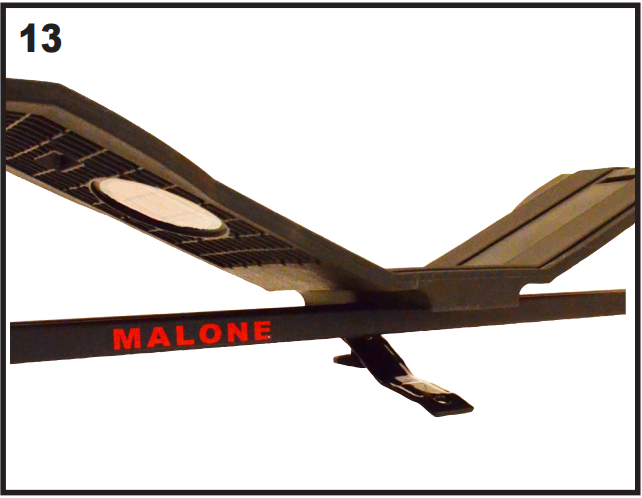
Place the carrier onto the front cross bar. Swing the Jawz under the cross bar as shown. See image 13.
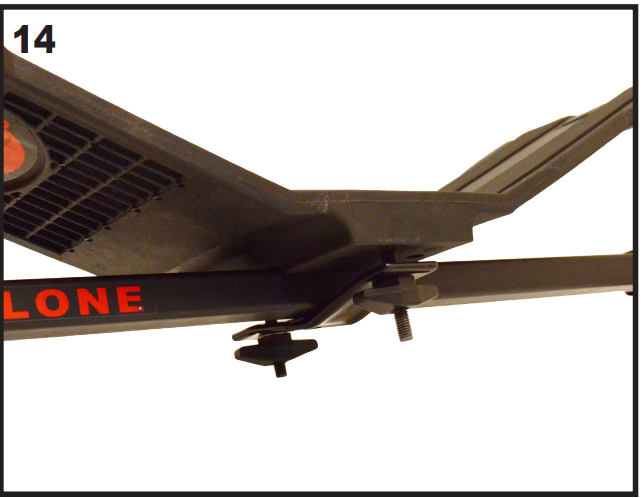
Insert a second mounting bolt through the unused hex hole and Jawz adapter. Loosely apply the second T-knob. Tighten until the carrier is secure. See image 14.
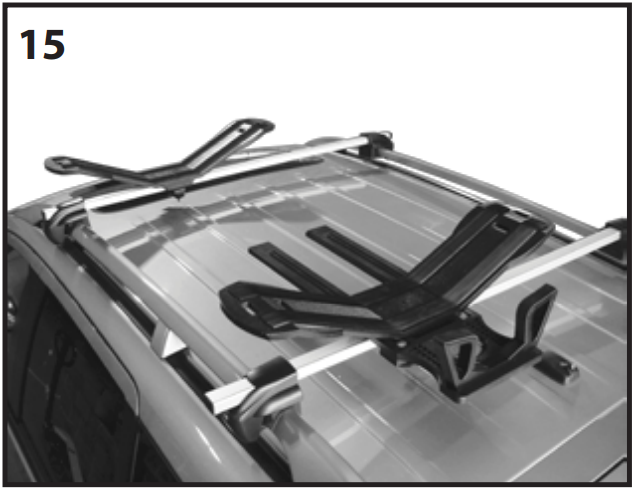
Confirm the carriers are in alignment. Firmly tighten the T-knobs until both carriers are securely fixed to the cross bars. See image 15.
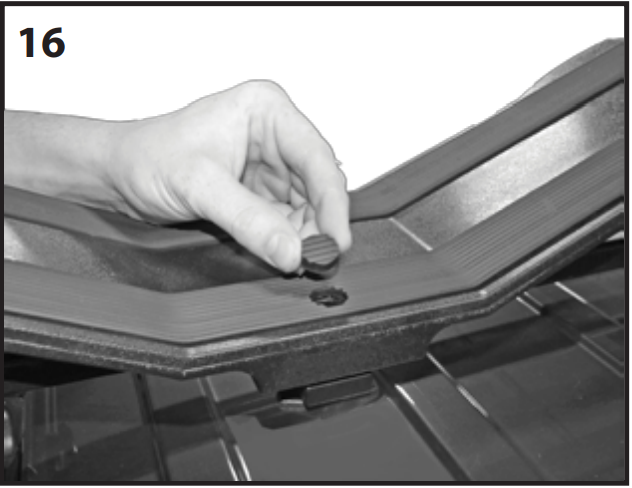
Insert the four Rubber Plugs into the four top side hex holes in the two carriers. See image 16.
Loading the Kayak
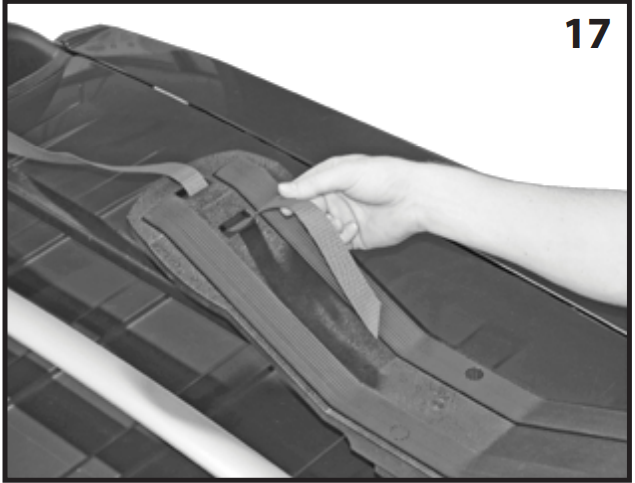
Route the free end of a 12' Load Strap down through the top of the outer most strap slot and back up through the inside slot of the carrier. Pull the free end until there is an even loop. Repeat for the second carrier. See image 17.
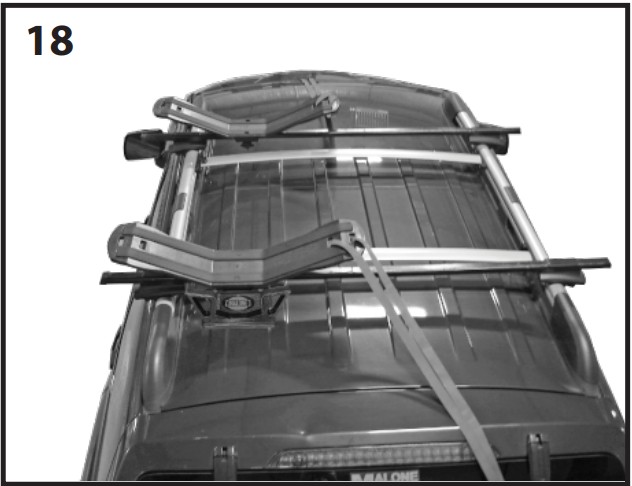
Place the straps parallel to the carriers with the front strap loop on the windshield and the rear strap loop on the back of the vehicle. See image 18.
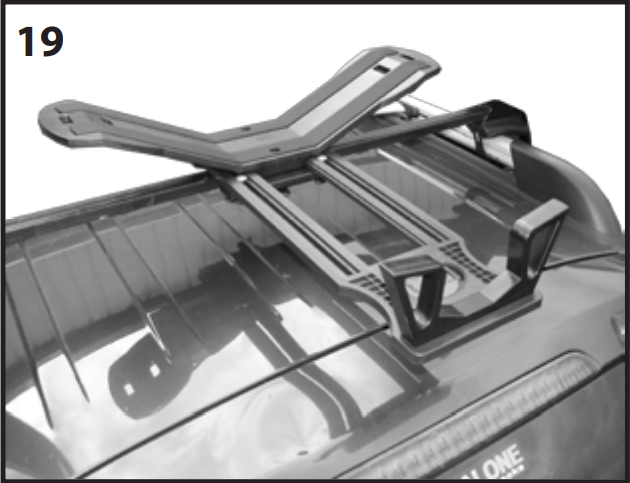
Loosen the two T-knobs holding the Extension Frame. Pull the Frame out to the rear edge of the vehicle and slightly re-tighten the T-knobs. See image 19.
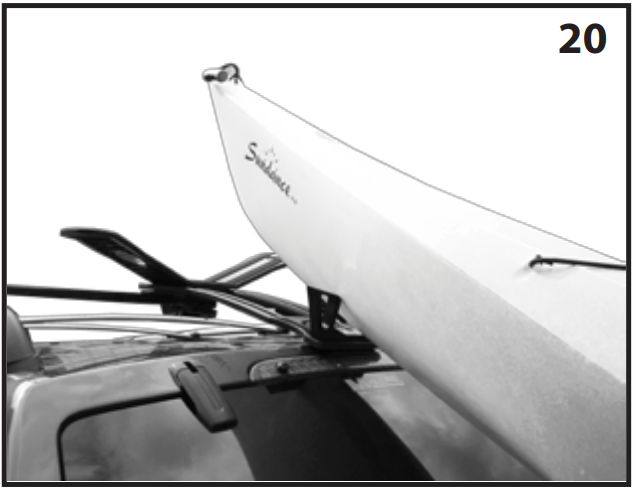
Note: The Extension Frame will bend down under the weight of the kayak. The Frame should be placed so that the rubber pad makes contact with the vehicle's rear edge. This will provide support and protection while the kayak is loaded.Lift and place the front of the kayak into the V-Block on the Extension Frame. Walk to the rear of the kayak while continuing to hold the kayak in place. See image 20.
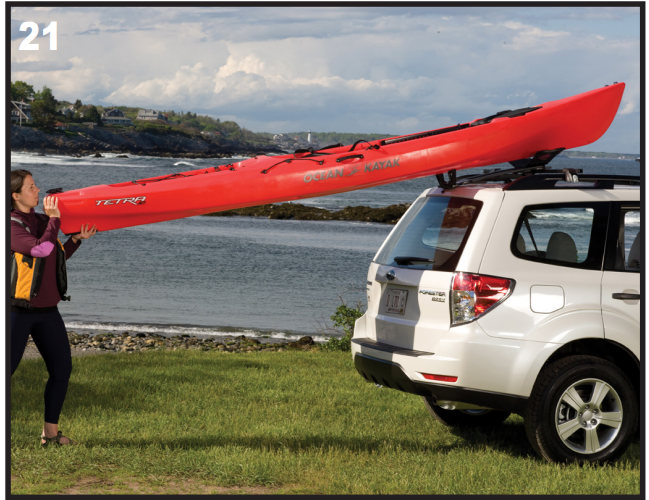
Lift the rear of the kayak and slowly push forward until the kayak is centered between the carriers. See image 21.
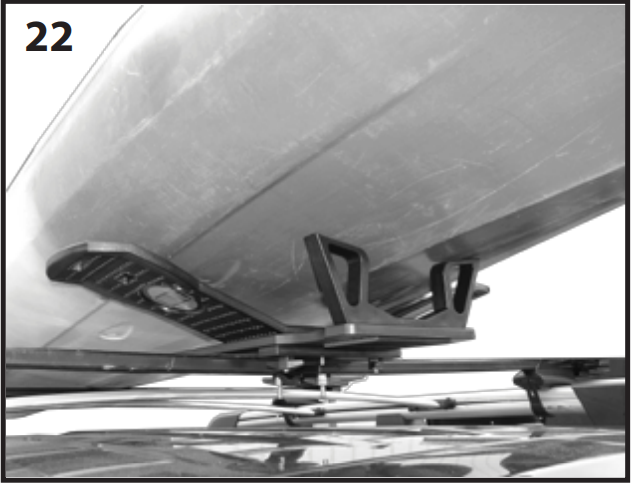
After the kayak has been loaded onto the carriers, loosen the two Extension Frame T-knobs and push the Extension Frame back until the V-Block makes contact with the kayak. Tighten the T-knobs for transport. See image 22.
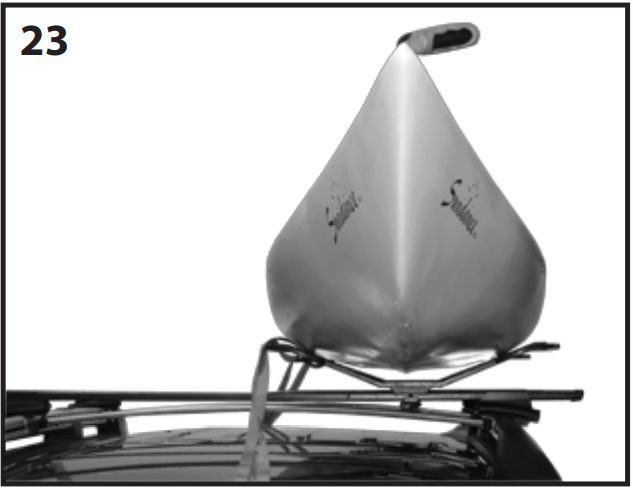
Position kayak so that the cockpit is evenly centered between the front and rear carriers. The bottom of the kayak should be slightly elevated above each of the carriers and held by the sides of the carriers. See image 23.
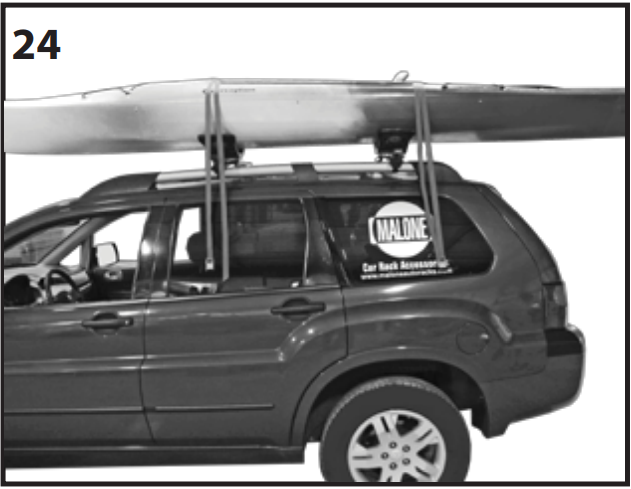
Place the strap loops over the kayak so that each loop is positioned directly over a carrier. See image 24.
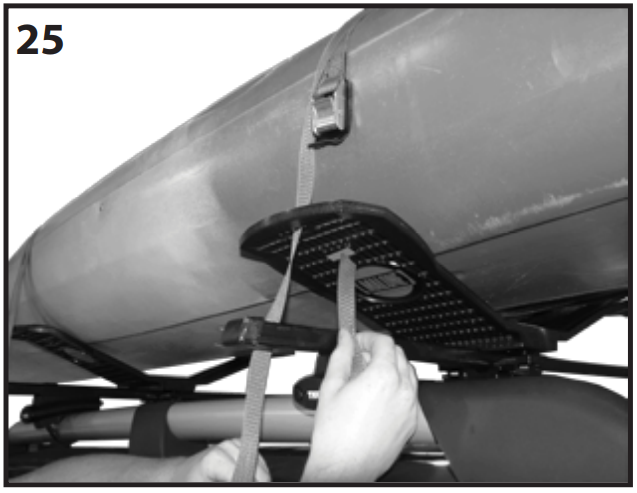
Pull the free end of each strap loop down until the buckles are positioned half way up the side of the kayak. Thread each free end down and through the top of the outside slot and back up through the bottom of the inside slot. See image 25.
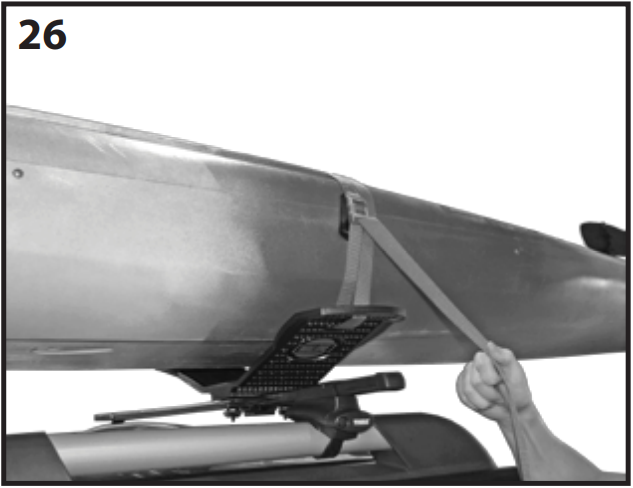
Thread the free strap ends up and through the buckles. Pull down to tighten. Dress any extra strap down and around the cross bars. See image 26.
IMPORTANT NOTES
- Bow and Stern Safety tie-downs are required for all transport. Failure to use these safety lines voids all warranty.
- If your kit did not include safety tie-downs, we strongly recommend the use of the
- Malone MPG316 Sentry Ratchet Tie-Down System or Malone MPG309 SpeedLine Mini Ratchet Tie-Down
- For added stability for larger kayaks, dress the straps down under the cross bars before bringing them back up through the slots in steps 17 and 25.
- Always check mounting hardware, load straps and safety tie-down lines for proper and secure attachment before transport. Use of this product for any other application other than kayak transport voids warranty.
- Warning: All vehicular rooftop transports are potentially hazardous. Any person using MALONE automotive transport systems is personally responsible for following the given directions for use and installation and accepts full and complete responsibility for any and all damages or injury of any kind including death, which may result from their use.
MPG306 BOW & STERN LINE KIT
NOTE: NOT REQUIRED ON TRAILER PACKAGES
Attach hook to rope (steps A-D)
- Thread free end of cord through hook.
- Create a “left over right” knot & tighten.
- Create a “right over left” knot & tighten.
Pull to test for knot strength.

Attach and dress rope to vehicle and boat (steps E-O)- Attach S-hook to vehicle tow ring or other sturdy body part.
- Keeping the rope tight and S-hook in place, thread the free end up and through a strong point on the kayak
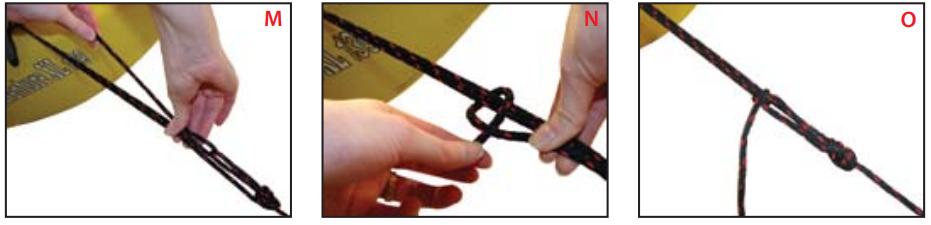
- Make a loop in the rope 12” to 14” away from the kayak or canoe.
Bend the loop over leaving a large opening as shown.

- Pass the loop through the opening.
- Pull to create a tight knot.
- Thread the free end of the rope through the loop.
Pull the free end up until the rope is sufficiently tight.

- Hold the rope secure with one hand.
- Form a knot with the free end and tighten. Form a second knot for safety purposes.
- The line should be tight and secure. Repeat for the second tie-down.
Warranty Of Malone MPG107
The Malone Auto Racks (Malone) Limited Lifetime Warranty covers certain Malone-brand products that have been specifically identified for inclusion in the program and is effective for as long as the original retail purchaser owns the product. This warranty is terminated when the original retail purchaser sells or otherwise transfers the product to any other person or entity.
Troubleshooting
If you encounter any issues with the Malone SeaWing Kayak Carrier MPG107, try the following solutions:
- Make sure that the SeaWing carrier is properly mounted to your cross rails.
- Check the tightness of the bow and stern safety tie-downs.
- Make sure that the kayak is centered on the padded saddles.
- Inspect the carrier for any signs of damage or wear and tear.
- Do not exceed the weight limit of the carrier.
Pros & Cons of Malone SeaWing Kayak Carrier MPG107
Pros
- High-quality construction
- Easy to install and remove
- Padded saddles protect the hull of the kayak
- Bow and stern safety tie-downs included
- Folds down for low profile when not in use
Cons
- May not fit all cross-rails
- The weight limit may be too low for some kayaks
- Some users may find it difficult to load and unload their kayak
Customer Reviews about SeaWing Kayak Carrier
Customers have given the Malone SeaWing Kayak Carrier positive reviews, praising its high-quality construction and ease of use. However, some users have noted that it may not fit all cross rails, and that the weight limit may be too low for some kayaks. Overall, the SeaWing carrier is a reliable and easy-to-use option for kayakers who need a carrier for their boats.
Most Common Complaints
The most common complaint about the SeaWing Kayak Carrier is that it may not fit all cross rails. Some users have also noted that the weight limit may be too low for some kayaks. However, these complaints are relatively rare, and most users have reported that the SeaWing carrier is a reliable and easy-to-use option for kayak transportation.
Faqs
Is the Malone SeaWing Kayak Carrier MPG107 suitable for carrying two kayaks, and what is the ideal configuration for this purpose?
Are there any special equipment needed to install the Malone SeaWing Kayak Carrier MPG107 on my car correctly?
How is my kayak protected while being transported with the Malone SeaWing MPG107?
If my Malone SeaWing carrier appears loose, what should I do?
What should I do if a component of my Malone MPG107 is broken or missing?
Can I use a car without roof rails and still utilise the Malone SeaWing MPG107?
How should my Malone SeaWing Kayak Carrier MPG107 be maintained and cared for?
Can large kayaks be utilised with the Malone SeaWing MPG107?
How should a kayak be loaded onto the Malone SeaWing MPG107?
Is there a warranty for the Malone SeaWing Kayak Carrier MPG107?
Leave a Comment