Ninja Mini Oven SP101UK User Manual | Usage Instructions
Content
Introduction of Ninja Mini Oven SP101UK
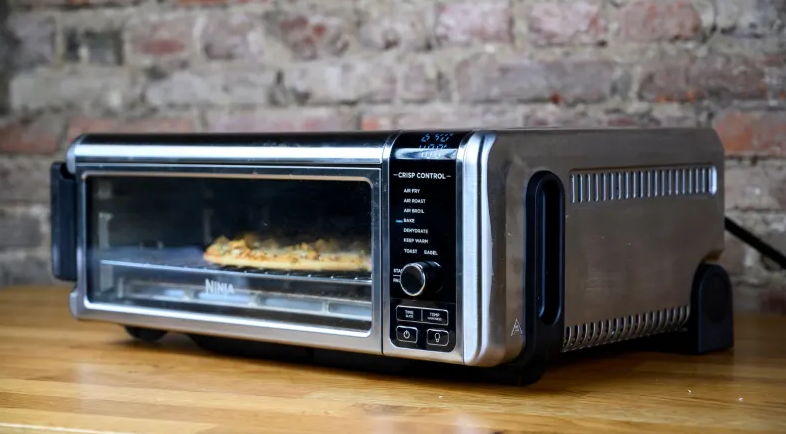
Introducing the Ninja Mini Oven SP101UK, a compact and versatile appliance that will revolutionize your cooking experience. This mini oven is perfect for those with limited kitchen space, or for anyone looking for a convenient and efficient way to cook their favorite meals. With a sleek and modern design, the Ninja Mini Oven SP101UK is not only functional but also stylish. It is estimated to be priced around £149.99, making it an affordable option for those looking to upgrade their cooking appliances. The launching date is yet to be announced, but you can already pre-order it on Ninja's official website.
Detailed Specifications
The Ninja Mini Oven SP101UK boasts several key features that make it stand out from other mini ovens. It has an 1800W capacity, which allows for faster cooking times and even heating. It also has a digital control panel, making it easy to adjust the temperature and cooking time. The oven has a maximum temperature of 230°C and can fit a 12" pizza or 4 slices of bread. It also comes with a variety of cooking functions, including bake, broil, toast, and keep warm.
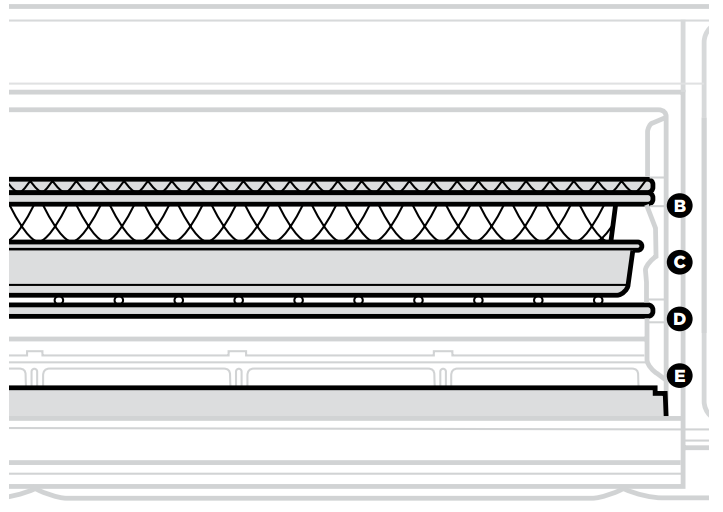
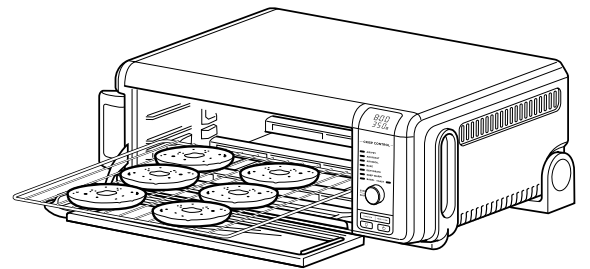
PARTS
- A Main Unit: (attached power cord not shown)
B Air Fry Basket: (use in the top rail position)
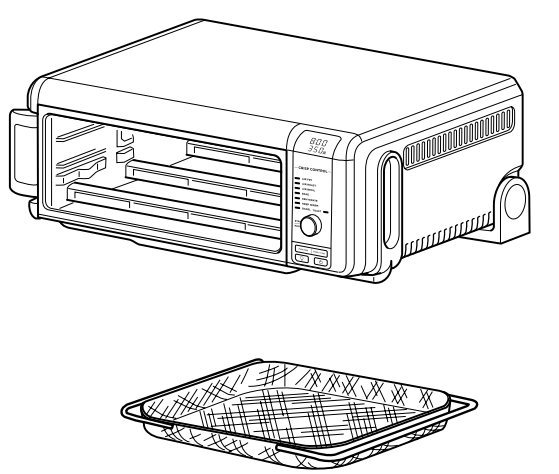
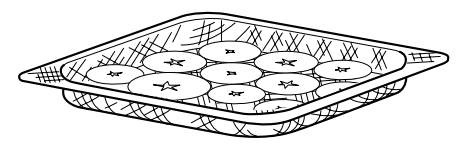
- C Oven Tray: (always layer on top of the wire rack)
- D Wire Rack: (keep in the bottom rail position)
- E Removable Crumb Tray: (always place below the bottom heating element)
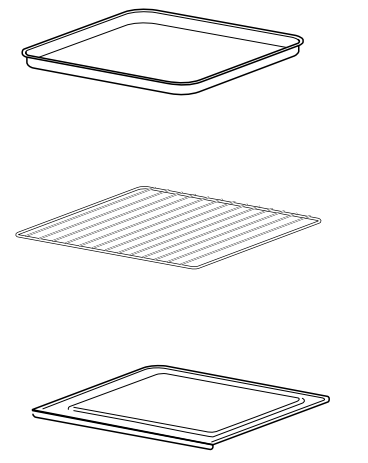
ACCESSORY PLACEMENT
BEFORE FIRST USE
- Remove and discard any packaging material, promotional labels and tape from the unit.
- Remove all accessories from the package and read this manual carefully. Please pay particular attention to operational instructions, warnings and important safeguards to avoid any injury or property damage.
- Wash the air fry basket, oven tray, wire rack and removable crumb tray in warm, soapy water, then rinse and dry thoroughly. NEVER clean the main unit in the dishwasher.
- We recommend placing all accessories inside the oven and running it on Air Fry at 200°C for 20 minutes without adding food. Make sure the area is well ventilated. This removes any packaging residue and odor traces that may be present. This is completely safe and not detrimental to the performance of the oven.
NOTE: For longevity, we recommend hand-washing the accessories.
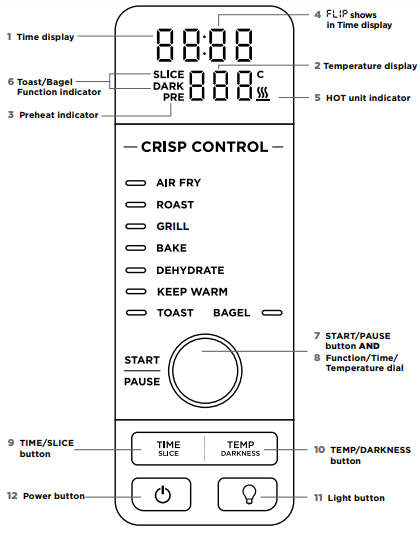
USING THE CONTROL PANEL
FUNCTIONS
- AIR FRY: Make foods that would traditionally be fried—such as chicken wings, French fries and chicken nuggets—with little to no added oil.
- ROAST: Achieve a crispy outside and perfectly cooked inside for full-sized oven tray meals, chunkier proteins and roasted vegetables.
- GRILL: Grills meat and fish and evenly browns the tops of casseroles.
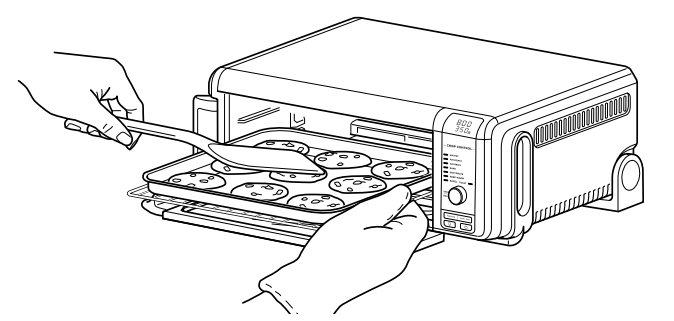
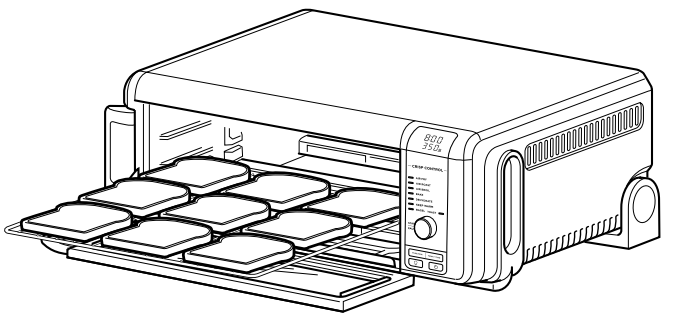
- BAKE: Evenly bakes everything from your favorite cookies to homemade pizzas.
- TOAST: Evenly toasts up to 6 slices of bread to your perfect level of darkness.
- BAGEL: Perfectly toast up to 6 bagel halves when they’re placed cut-side up on the wire rack.
- DEHYDRATE: Dehydrates meats, fruits and vegetables for healthy snacks.
- KEEP WARM: Keeps food warm up to 2 hours.
CONTROL PANEL DISPLAY & OPERATING BUTTONS
- Time display: Shows the cook time. The time will count down when cooking is in progress.
- Temperature display: Shows the cook temperature.
NOTE: Time and temperature will always return to the cook time and temperature that was set the last time the oven was in use. - PRE flashes when the unit is preheating.
- FLIP will appear on the time display when the unit is cool enough to flip up for storage or cleaning.
- Heat sign illuminates when the unit is hot and will turn off when the oven is cool enough to be flipped up for storage or cleaning.
- SLICE and DARK will illuminate when using the Toast or Bagel function.
- START/PAUSE button: Press to start
- Function/Time/Temperature dial: Turn to select a cooking function or adjust time and temperature (or number of slices and darkness level when using the Toast and Bagel functions).
NOTE: Press and hold the START/PAUSE button for 3 seconds to return to the function selection. - TIME/SLICE button: To select a cook time, press the TIME button, then use the dial to adjust the time. When using the Toast or Bagel function, this button will adjust the number of slices instead of the time.
- TEMP/DARKNESS button: To adjust temperature, press the TEMP button and use the dial to adjust the temperature. When using the Toast or Bagel function, this button will adjust the darkness level instead of the temperature.
NOTE: The cook time and temperature may be adjusted at any time during the cooking cycle. - Light button: Press to turn the oven’s interior light on and off.
NOTE: The light will automatically turn on when there are 30 seconds of cook time remaining. - Power button: Press to turn the unit on and off.
USING YOUR FOODI® MINI OVEN
USING THE COOKING FUNCTIONS
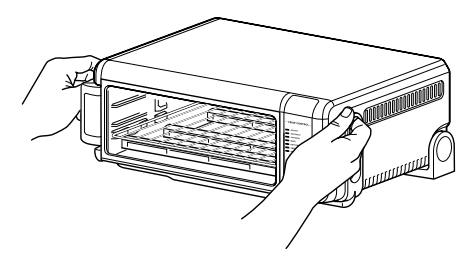
To turn on the unit, plug the power cord into the wall, flip oven down into cooking position, and press the Power button.
NOTE: The unit preheats quickly, so we recommend prepping all ingredients before turning on the oven.
Air Fry
- To select the function, turn the dial until AIR FRY illuminates. The default time and temperature settings will display.
- Press the TIME/SLICE button and use the dial to select your time up to 1 hour. To set the time, press the TIME/SLICE button again.
- Then press the TEMP/DARKNESS button and use the dial to select a temperature between 120°C–205°C. To set the temperature, press the TEMP/DARKNESS button again.
- Press START/PAUSE to begin preheating.
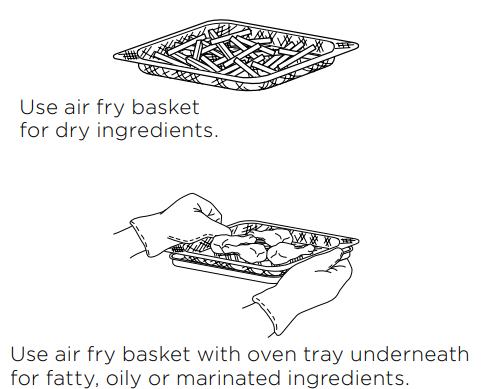
Place ingredients in the air fry basket. If ingredients are fatty, oily or marinated, place the basket on the oven tray.
- Slide the basket into the upper rails of the oven. If also using the oven tray, slide both into the oven at the same time, with the basket in the upper rails and the pan on the wire rack beneath the basket. Close oven door.
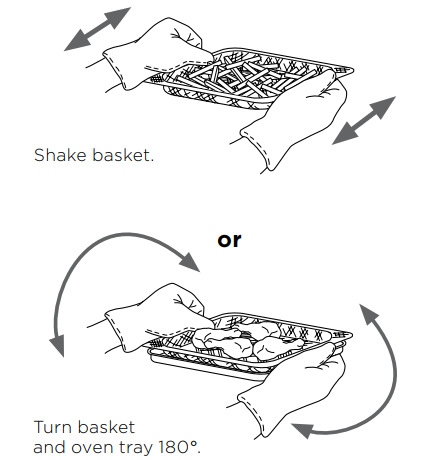
NOTE: The timer will start counting down as soon as the unit has preheated. If ingredients are not ready to go into the oven, simply turn the dial to add more time. For more even browning and crispiness, toss ingredients or turn the basket 180° halfway through cooking cycle.
- When cook time is complete, the unit will beep.
Roast
- To select the function, turn the dial until ROAST illuminates. The default time and temperature settings will display.
- Press the TIME/SLICE button and use the dial to select your time up to 2 hours. To set the time, press TIME/SLICE button again.
NOTE: If cooking for less than 1 hour the clock will count down by minutes and seconds. If cooking for more than 1 hour, the clock will count down by hours and minutes. - Press the TEMP/DARKNESS button and use the dial to select a temperature between 120°C–230°C. To set the temperature, press the TEMP/DARKNESS button again.
and use the dial to select a temperature between 120°C–230°C. To set the temperature, press the TEMP/DARKNESS button again. - Press START/PAUSE to begin preheating.
NOTE: Food cooks faster when using the ROAST function than when using the BAKE function, so for traditional oven recipes, lower the cook time 30% and lower the temperature 10°C. - Place ingredients on the oven tray. When the unit beeps to signify it has preheated, immediately place the oven tray on the wire rack. Close oven door.
NOTE: The timer will start counting down as soon as the unit has preheated. If ingredients are not ready to go into the oven, simply turn the dial to add more time. During cooking, you can open the oven door to check on or flip ingredients.

- When cook time is complete, the unit will beep.
Grill
- To select the function, turn the dial until GRILL illuminates. The default time and temperature settings will display.
- Press the TIME/SLICE button and use the dial to select your time up to 30 minutes. To set the time, press the TIME/SLICE button again.
- Press the TEMP/DARKNESS button and use the dial to select either HI or LO. To set the temperature, press the TEMP/DARKNESS button again.
Place ingredients on the oven tray. Place the sheet pan on the wire rack and close the oven door, press START/PAUSE to start cooking.
During cooking, you can open the oven door to check on or flip ingredients.
- When cook time is complete, the unit will beep
Bake
- To select the function, turn the dial until BAKE illuminates. The default time and temperature settings will display.
- Press the TIME/SLICE button and use the dial to select your time up to 2 hours. To set the time, press the TIME/SLICE button again.
NOTE: If cooking for less than 1 hour the clock will count down by minutes and seconds. If cooking for more than 1 hour, the clock will count down by hours and minutes. - Press the TEMP/DARKNESS button and use the dial to select a temperature between 120°C–230°C. To set the temperature, press the TEMP/DARKNESS button again.
- Press START/PAUSE to begin preheating.
Place ingredients on the oven tray. When the unit beeps to signify it has preheated, immediately place the oven tray on the wire rack. Close oven door.
NOTE: The timer will start counting down as soon as the unit has preheated. If ingredients are not ready to go into the oven, simply turn the dial to add more time.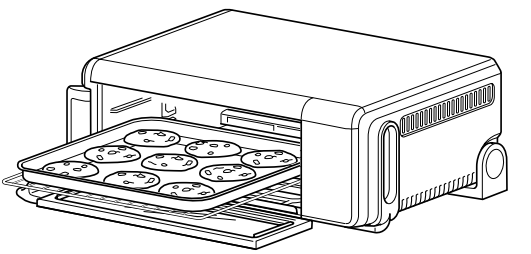
During cooking, you can open the oven door to check on or flip ingredients.
- When cook time is complete, the unit will beep.
NOTE: For best results with baked goods such as cookies, line the oven tray with baking parchment paper.
Toast
- To select the function, turn the dial until TOAST illuminates. The default amount of slices and darkness will be displayed.
- Press the TIME/SLICE button and use the dial to select the number of bread slices. You may toast up to 9 slices at once. To set the number of slices, press the TIME/SLICE button again.
- Press the TEMP/DARKNESS button and use the dial to select a darkness level. To set the darkness level, press the TEMP/DARKNESS button again.
NOTE: There is no temperature adjustment available for the TOAST function, and the unit does not preheat in Toast mode. It is very important to select the exact number of slices to avoid over- or under-toasting. Place bread slices on the wire rack. Close oven door and press START/PAUSE to begin cooking.
- You do not need to flip the slices during cooking. When cook time is complete, the unit will beep.
Bagel
- To select the function, turn the dial until BAGEL illuminates. The default number of slices and darkness level will display.
- Press the TIME/SLICE button and use the dial to select the number of slices. You may toast up to 6 bagel slices at once. To set the number of slices, press the TIME/SLICE button again.
- Press the TEMP/DARKNESS button and use the dial to select a darkness level. To set the darkness level, press the TEMP/DARKNESS button again.
NOTE: There is no temperature adjustment available for the BAGEL function, and the unit does not preheat in BAGEL mode. It is very important to select the exact number of slices to avoid over- or under-toasting. Place bagel slices, cut-side up, on the wire rack. Close oven door and press START/PAUSE to begin cooking.
- You do not need to flip the slices during cooking. When cook time is complete, the unit will beep.
Dehydrate
- To select the function, turn the dial until DEHYDRATE illuminates. The default time and temperature settings will display.
- Press the TIME/SLICE button and use the dial to select a time up to 12 hours. To set the time, press the TIME/SLICE button again.
- Press the TEMP/DARKNESS button and use the dial to select a temperature between 40°C–90°C. To set the temperature, press the TEMP/DARKNESS button again.
Place ingredients in the air fry basket and place basket in oven. Close oven door and press START/PAUSE to begin cooking.
- During cooking, you can open the oven door to check on or flip ingredients.
- When cook time is complete, the unit will beep.
Keep Warm
NOTE: The KEEP WARM function is not included on all models.
- To select the function, turn the dial until KEEP WARM illuminates. The default time setting will display.
- Press the TIME/SLICE button and use the dial to select a time up to 2 hours. To set the time, press the TIME/SLICE button again.
NOTE: There is no temperature selection available for the KEEP WARM function. - Place food on the oven tray or in an oven-safe container and place the pan or container on the wire rack. Close oven door and press START/PAUSE to begin warming.
NOTE: The unit does not preheat in Keep Warm mode. - When warming time is complete, the unit will beep.
CLEANING, MAINTENANCE & STORAGE
EVERYDAY CLEANING
The unit should be cleaned thoroughly after every use.
- Unplug the unit from the socket and allow it to cool down before cleaning.
Empty crumb tray by sliding it out of the oven when the oven is in the flipped-down position.
NOTE: Empty crumb tray frequently. Hand-wash when necessary.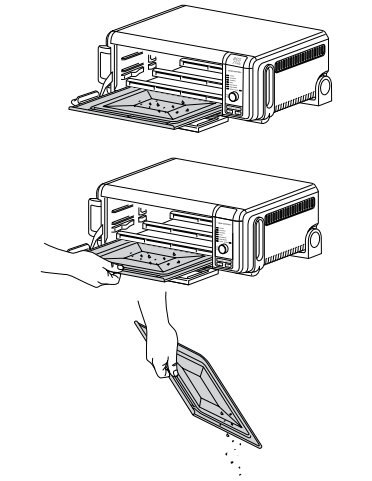
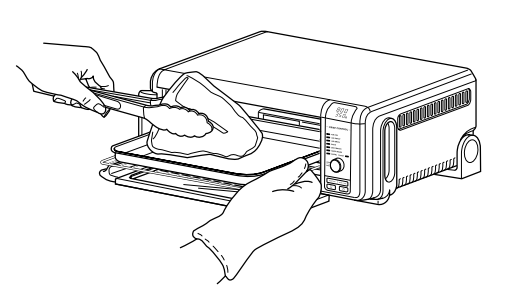
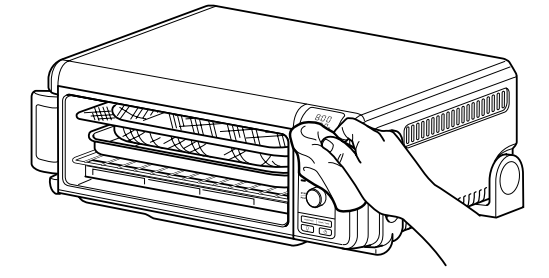
- To clean any food splatter on the interior walls of the unit, wipe them with a soft, damp sponge.
- To clean the exterior of the main unit and the control panel, wipe them clean with a damp cloth. A non-abrasive liquid cleanser or mild spray solution may be used. Apply the cleanser to the sponge, not the oven surface, before cleaning.
DEEP CLEANING
- Unplug the unit from the socket and allow it to cool down before cleaning.
- Remove all accessories from the unit, including the crumb tray and wash separately. Use a non-abrasive cleaning brush to more thoroughly wash the air fry basket.
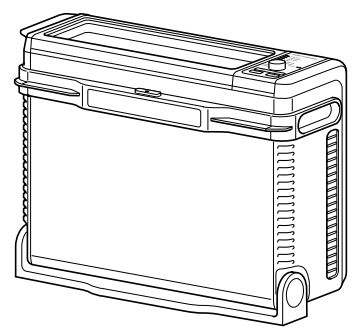
Flip up the oven into the storage position.
Press the push button to release the back door to access the oven’s interior.

Use warm, soapy water and a soft cloth to wash the oven’s interior. DO NOT use abrasive cleaners, scrubbing brushes or chemical cleaners, as they will damage the oven.
CAUTION: NEVER put the main unit in the dishwasher or immerse it in water or any other liquid.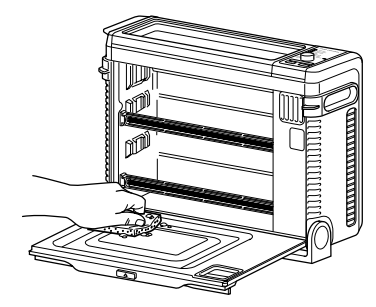
- To prolong use of accessories, hand-wash with warm, soapy water.
- Thoroughly dry all parts before placing them back in the oven.
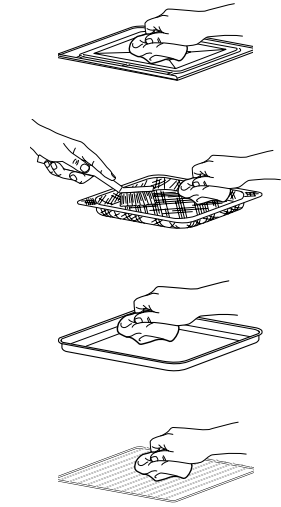
TIP: For stuck on food residue, leave accessories to soak in soapy water overnight.
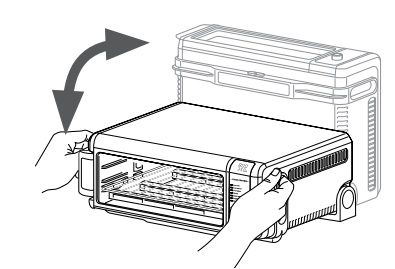
FLIP-UP-AND-AWAY STORAGE
DO NOT flip oven up when is illuminated. Wait for oven to cool down before handling. Hold handles on each side of the unit.
Lift and flip unit upward.
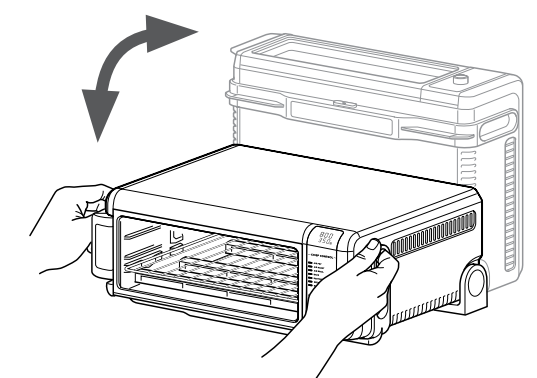
- Leave the unit in the upright position when storing or for deep cleaning.
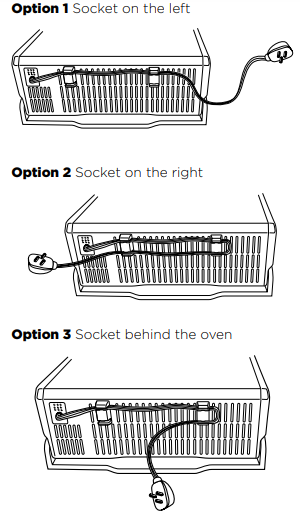
POWER CORD MANAGEMENT
Our cord-management system is designed so it will not interfere with the oven’s flip-away functionality.
ACCESSORIES FOR PURCHASE
We offer a range of accessories custom made for your Ninja® Foodi® Mini Oven.

Description
The Ninja Mini Oven SP101UK is a compact and versatile appliance that is perfect for any kitchen. Its small size makes it easy to store, yet it still has the capacity to cook a wide variety of meals. The digital control panel makes it easy to use, and the variety of cooking functions allows for endless possibilities. Whether you're baking a cake, broiling a steak, or toasting bread, the Ninja Mini Oven SP101UK can handle it all. The oven's even heating and fast cooking times make it a reliable and efficient option for any meal.
TROUBLESHOOTING
ERROR MESSAGES “CALL CUSt SrVC” followed by “Er1” – “Er7”
Power off the unit and call Customer Service at 0800 862 0453. So we may better assist you, please register your product online and have the product on hand when you call.
Pros & Cons
Pros
- Compact and versatile
- Digital control panel
- Variety of cooking functions
- Even heating
- Fast cooking times
Cons
- Small size may not be suitable for larger meals
- Higher price point compared to some other mini ovens
Customer Reviews
Customers love the Ninja Mini Oven SP101UK for its compact size and versatility. They appreciate the digital control panel and the variety of cooking functions. The even heating and fast cooking times have also received positive reviews. However, some customers have noted that the small size may not be suitable for larger meals.
Most Common Complaints
The most common complaint about the Ninja Mini Oven SP101UK is that the exterior gets hot during use. Some customers have also noted that the oven can be difficult to clean.
Faqs
Is the Ninja Mini Oven SP101UK compatible with other Ninja accessories?
What are the key features of the Ninja Mini Oven SP101UK?
How is the Ninja Mini Oven SP101UK installed?
What is the price of Ninja Mini Oven SP101UK?
Are there any special care or maintenance tips for the Ninja Mini Oven SP101UK?
How do I control the temperature and time settings on the Ninja Mini Oven SP101UK?
What should I do if the Ninja Mini Oven SP101UK exterior gets hot during use?
Can I use my own pans and dishes in the Ninja Mini Oven SP101UK?
Does the Ninja Mini Oven SP101UK come with a warranty?
Is the Ninja Mini Oven SP101UK suitable for small kitchens?
Leave a Comment