Polder Digital Cooking Timer thermometer THM-362-86 User Manual
Content
Introduction
The Polder Digital Cooking Timer THM-362-86 is a must-have kitchen gadget for every home cook. This versatile and durable timer is designed to help you keep track of multiple cooking tasks at once, ensuring perfect results every time. With its estimated price range of $15 to $20 and a launching date of January 2021, this cooking timer is an affordable and practical addition to your kitchen arsenal.
Detailed Specifications
The Polder Digital Cooking Timer THM-362-86 boasts several key features that make it a standout product. These include a large and easy-to-read LCD display, a loud and clear alarm, a magnetic back for easy mounting, and a countdown and count-up timer function. The timer has a measuring range of 99 hours, 59 minutes, and 59 seconds, making it suitable for even the longest cooking tasks. Its durable construction ensures that it can withstand the rigors of daily use, while its compact size allows for easy storage.
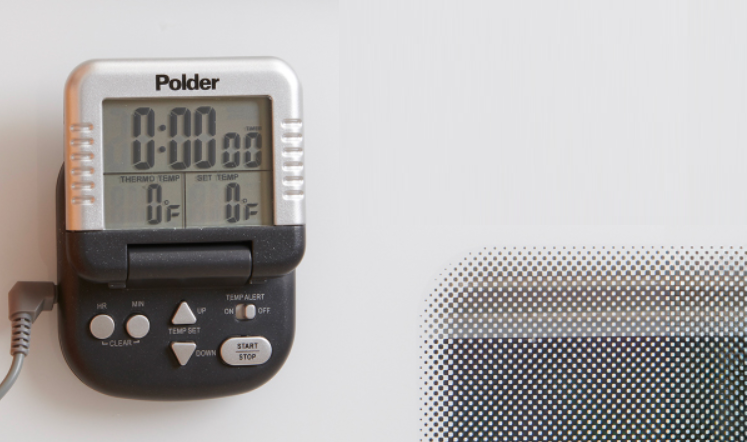
Polder Digital Cooking Timer THM-362-86 Description
The Polder is a versatile and practical kitchen tool that is perfect for busy home cooks. Its dual timer function allows you to keep track of multiple cooking tasks at once, while its loud and clear alarm ensures that you'll never overcook your food again. The timer's magnetic back makes it easy to mount on any metal surface, while its compact size means that it won't take up too much space on your countertop. Whether you're baking, roasting, or grilling, the Polder Cooking Timer THM-362-86 is the perfect tool to help you achieve perfect results every time.
IMPORTANT INFORMATION
If this is your first time using the DIGITAL COOKING TIMER/THERMOMETER Thermometer please be sure to remove the protective insulation tape from the battery compartment and protective sheet from the LCD screen before use.
TO INSTALL
Warning: batteries may pose a choking hazard. Do not let children handle batteries.
This item uses one AAA battery. Battery should be removed from the thermometer if consumed or if the product is to be left unused for a duration of time. It is recommended to clean all battery contacts prior to installation. Do not mix old and new batteries. Do not mix alkaline, standard (Carbon-Zinc), or rechargeable (Nickel Cadmium) batteries. Always purchase the correct size and grade of battery most suitable for the intended use. Replace all batteries of a set at the same time. Ensure all batteries are installed correctly with regard to polarity (+ and -). Remove used batteries promptly.
- Press the tab up on the battery cover, and snap open the battery compartment.
- Align the positive and negative sides of the battery with the (+) positive and (-) negative symbols in the battery compartment.
- Snap the battery compartment cover back into place.
DISPOSAL OF USED BATTERIES
Batteries may contain hazardous substances which could endanger the environment and human health. This symbol marked on the battery and/or packaging indicates that used battery shall not be treated as municipal waste. Instead it shall be left at the appropriate collection point for recycling. By ensuring the used batteries are disposed of correctly, you will help prevent potential negative consequences for the environment and human health. The recycling of materials will help conserve natural resources. For more information about collection and recycling of used batteries, please contact your local municipality, your waste disposal service or the point of sale where you purchased this product.
SETTING THE TEMPERATURE
(Temperature Range: 32˚F/0˚C to 392˚F/200˚C)
- Switch the TEMP ALERT switch to the OFF position.
- Press the UP or DOWN arrow until the desired temperature is displayed in the SET TEMP box on the display unit. (Hold the arrows down to quickly scroll.)
- Switch the ON/OFF ALERT switch to the ON position. The temperature alarm will automatically sound when the THERMO TEMP reaches the SET TEMP. The alarm will sound for 5 minutes with a 5 second pause every minute.
- Press the START/STOP button and the alarm will stop temporarily. The alarm will continue to sound every 1 minute for 5 seconds until the alarm is turned off by switching the TEMP ALERT switch into the OFF position.
- When the desired temperature is attained, remove the metal thermometer probe with a heat resistant glove.
DIRECTIONS FOR COOKING
- Preheat the oven to the desired cooking temperature.
- Sterilize the metal thermometer probe before every use. Wash the metal probe with hot soapy water and dry thoroughly with a dry cloth before every use. Do not immerse the probe or thermometer in water while cleaning.
- Be sure desired thermometer reading is switched to either ˚F or ˚C.
- Set desired temperature.
- Insert the point of the thermometer probe into the center of the meat. Do not place the probe near the bone, the gristle or the cooking surface. This will not give an accurate temperature reading.
- Place the meat in the oven with the thermometer probe in place. The electronic display unit must be placed outside of the oven. The probe wire will be held in place by the oven door.
- Make sure the probe plug is securely plugged into the display unit.
- The temperature will be displayed in the THERMO TEMP box on the display unit. When cooking in a barbecue or smoker, do not use as a continuous read thermometer, use only as a instant read thermometer.
TO SET TIMER
- Press the HOUR button on the front of the display unit until the desired hours are reached in the timer box on the display.
- Press the MIN button on the front of the display unit until the desired minutes are reached in the timer box on the display.
- Press the START/STOP button to begin the timer function. Countdown will begin counting in seconds on the display. Countdown can be paused and restarted by pressing the START/STOP button.
- When countdown is complete, the alarm will sound for one minute. Press the START/STOP button to turn the alarm off.
- To reset the timer to 00:00, press the HOUR and the MIN buttons simultaneously. This will clear the time set in the TIMER box on the display. If the timer is not reset to "00:00", it will default back to the last programmed time when the countdown is completed.
Polder Digital Cooking Timer THM-362-86 PRECAUTIONS
- Do not leave thermometer inside oven. This is not an in-oven thermometer.
- Always cover probe with sheath when not in use.
- Sterilize tip between uses.
- Wash probe after each use.
- Do not wash probe with scouring pad or other abrasive substance as damage may occur.
- Do not get water on the housing.
- Keep metal probe away from children.
- Do not clean the unit with abrasive or corrosive compound. It may scratch the finish and corrode the electronic circuit.
- Do not subject the unit to excessive force, shock, dust, temperature, direct sunlight, heavy exposure to water or humidity, which may result in malfunction, shorter electronic lifespan, battery damage or distorted parts.
- Do not tamper with the unit's internal components. It will invalidate the warranty.
Troubleshooting
While the Polder Digital Cooking Timer THM-362-86 is a reliable and easy-to-use product, there are a few common issues that you may encounter. If the timer is not working, make sure that it is properly connected to a power source and that the batteries are fresh. If the alarm is not sounding, check to make sure that the volume is turned up and that the timer is set correctly. If the LCD display is difficult to read, try adjusting the angle or position of the timer. Always follow the manufacturer's instructions and warnings to ensure safe and proper use of the product.
ONE YEAR WARRANTY
Polder will repair or at its option replace this product without charge, other than shipping charges, if it is returned to the address below with shipping charges prepaid, as being defective, within one year of the date of purchase and provided that inspection by the company indicates it is defective because of faulty workmanship or material.
Please save your original receipt for this limited one-year warranty to be valid. This limited warranty does not cover damage to this product through accident or misuse, nor does it cover any incidental expense to the user resulting from the non-function or malfunction of this product.
Pros & Cons
Pros
- Dual timer function
- Loud and clear alarm
- Magnetic back for easy mounting
- Compact size
- Durable construction
Cons
- No backlight on LCD display
- Limited range of motion for the timer dial
- No remote control option
Customer Reviews about Polder Digital Cooking Timer THM-362-86
Customers love the Polder Digital Cooking Timer THM-362-86 for its versatility and ease of use. Many note that the timer is a lifesaver when it comes to keeping track of multiple cooking tasks, while others appreciate the loud and clear alarm. The timer's magnetic back is also a popular feature, with many customers praising its convenience. However, some customers have noted that the LCD display can be difficult to read in low light, and that the timer dial has a limited range of motion. Overall, the Polder Cooking Timer THM-362-86 is a highly-rated product that is sure to be a hit with home cooks of all skill levels.
Faqs
How do I set the time on the Polder Digital Cooking Timer THM-362-86?
What should I do if the display Polder Digital Cooking Timer THM-362-86 is not working?
How do I set the clock on the timer?
What should I do if the display is flickering?
How loud is the alarm on a scale of 1 to 10?
What should I do if the Polder Digital Cooking Timer THM-362-86 buttons become sticky?
How do I switch the Polder Digital Cooking Timer THM-362-86 from minutes and seconds to hours and minutes?
What should I do if the Polder Digital Cooking Timer THM-362-86 are not responding?
What is the best way to store the Polder Digital Cooking Timer THM-362-86 when not in use?
Is there a warranty for the Polder Digital Cooking Timer THM-362-86?
Leave a Comment